menu
MobalyticsUse your favourite features in-game with our Desktop App
Gamebase Guide

Elden Ring Mage Build - Stats, Weapons, Skills & More

Updated on Aug 24, 2026
Aug 24, 2026

Overview

Mage builds are among the most versatile ranged builds in Elden Ring, using Intelligence and Sorceries to deal powerful Magic damage while controlling fights from a safe distance.

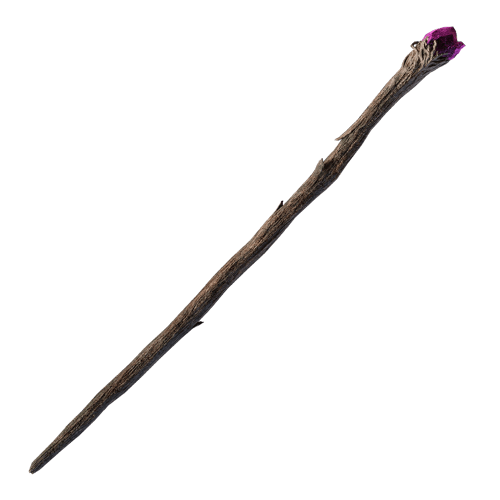
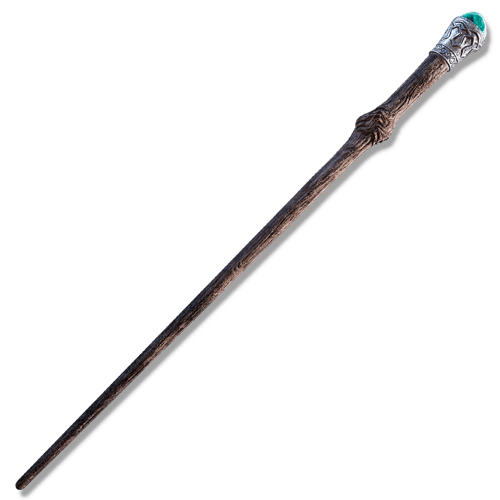
Unlike weapon-specific Intelligence builds such as Moonveil, this build focuses primarily on spellcasting. Your Glintstone Staff is your main weapon, while melee options are used as secondary tools when enemies close the distance or when conserving FP.

The biggest strength of a Mage is the enormous variety of Sorceries available. You can use fast and efficient projectiles during exploration, powerful charged spells against bosses, melee Sorceries at close range, Gravity Magic for stance damage, and specialized spells against enemies that frequently dodge normal projectiles.

Our primary offensive attribute is Intelligence, which increases the Sorcery Scaling of Intelligence-based Glintstone Staves and provides access to progressively stronger spells.

Early in the game, the Meteorite Staff provides an excellent starting point because it requires no upgrades and strongly supports Gravity Sorceries. As Intelligence increases, other Staves become more effective, eventually leading into the Carian Regal Scepter as our primary general-purpose endgame Staff.

The Carian Regal Scepter requires 60 Intelligence and becomes particularly strong at high Intelligence while having no additional FP penalty. It also increases the damage of Carian Moon Sorceries, making it an excellent all-around choice for an 80 Intelligence Mage.

For players who want maximum burst damage, Lusat's Glintstone Staff provides greater Sorcery Scaling at the cost of significantly increased FP consumption. This makes it better suited to short damage windows rather than general exploration.

Mage builds also benefit heavily from using specialized Staves in the off-hand. For example, the Staff of Loss increases the damage of Night Sorceries while simply being held, allowing you to cast with your stronger main Staff while still receiving its passive bonus.

This gives Mage builds an enormous amount of flexibility. Instead of forcing one spell into every encounter, you can adjust your spell selection based on the enemy you're fighting.

How Sorcery Scaling Works

Sorceries don't directly scale from Intelligence by themselves.

Instead, their damage is determined by the Sorcery Scaling of the Glintstone Staff used to cast them. Increasing Intelligence improves the Sorcery Scaling of Intelligence-based Staves, which then increases the damage of your Sorceries.

This makes both your Intelligence level and your chosen Staff important.

Different Staves also have different scaling curves. A Staff that performs extremely well at 30 Intelligence may eventually be surpassed by another Staff once you reach much higher Intelligence.

For our endgame build, the primary target is 80 Intelligence.

At 80 Intelligence, the Carian Regal Scepter reaches 373 Sorcery Scaling, making it an excellent high-level option without increasing the FP cost of your spells.

Specialized Staff Bonuses

Several Glintstone Staves provide passive bonuses to specific schools of Sorcery.

These bonuses can apply simply by holding the Staff, meaning the Staff providing the passive doesn't necessarily need to cast the spell.

For example, you can cast Night Comet using your stronger main-hand Staff while holding the Staff of Loss in the opposite hand to increase its damage. The Staff of Loss provides a substantial bonus to Night Sorceries, which is one reason Night Comet remains such a strong specialized option.

This creates an important distinction between:

  • Casting Staff → chosen primarily for high Sorcery Scaling

and

  • Off-hand Staff → chosen for its passive Sorcery bonus

You don't need to optimize around this during normal progression, but it becomes extremely useful for specialized endgame setups.

Why Night Sorceries Are Useful

Some enemies react to conventional ranged Sorceries by dodging when you cast them.

Night Comet avoids this problem because PvE enemies don't react to its projectile, making it particularly reliable against highly evasive targets.

This doesn't automatically make Night Comet the best spell for every encounter. Against enemies that don't dodge, other Sorceries can provide better FP efficiency.

Instead, Night Sorceries give Mage builds another specialized tool for enemies that would otherwise make ranged casting frustrating.

Don't Rely Exclusively on Magic Damage

Most traditional Glintstone Sorceries deal Magic damage, but Intelligence builds aren't completely restricted to it.

Gravity Sorceries provide access to Physical damage, giving the build an important alternative against enemies with high Magic resistance.

This is another reason a Mage should maintain several different Sorceries rather than building their entire spell selection around a single projectile.
Pros and Cons

Pros

  • Excellent ranged damage.
  • Huge selection of Sorceries for different situations.
  • Can deal extremely high burst damage during large boss openings.
  • Strong general-purpose damage through Magic.
  • Access to excellent melee-range Sorceries such as Carian Slicer.
  • Night Sorceries are extremely effective against enemies that dodge normal projectiles.
  • Gravity Sorceries provide access to strong stance damage and Physical damage.
  • Can exploit specialized Staff bonuses without changing the entire build.
  • Excellent progression from early-game Sorceries into powerful endgame spells.
  • Pure Intelligence progression keeps the build relatively straightforward.
  • Shadow of the Erdtree adds additional Sorcery options without making the base-game toolkit obsolete.

Cons

  • Heavy spellcasting requires significant FP management.
  • Many enemies aggressively close distance, making positioning important.
  • Some of the strongest Sorceries have long casting animations.
  • Enemies with high Magic resistance can significantly reduce your primary damage.
  • Maximum-damage setups can require specialized equipment and buffs.
  • Lusat's Glintstone Staff substantially increases FP consumption.
  • Poor spell selection can make the build unnecessarily inefficient.
  • A caster with low Vigor can be extremely vulnerable during late-game and DLC encounters.
  • Some powerful Sorceries are much better against large or stationary enemies than fast targets.
  • Maintaining distance isn't always possible against aggressive bosses.

All Elden Ring Guides

Check Out Our Other Elden Ring Builds and Guides

Starting Class, Attribute Leveling and Distribution

A pure Mage build scales primarily through Intelligence, making the overall progression straightforward. Intelligence increases the Sorcery Scaling of our Glintstone Staves, while Mind provides the FP needed to consistently use Sorceries as our primary form of combat.

Unlike the Spellblade build, we don't need to invest heavily into Strength or Dexterity for melee weapons. This allows us to concentrate almost entirely on Intelligence, Vigor, and Mind.

Recommended Starting Class: Astrologer

Attribute

Starting Stats

LV25

LV50

LV100

LV150

Vigor

9

16

25

40

60

Endurance

9

9

10

14

18

Strength

8

8

8

8

8

Dexterity

12

12

12

12

12

Mind

15

18

22

28

35

Intelligence

16

25

35

60

80

Faith

7

7

7

7

7

Arcane

9

9

9

9

9

The Astrologer is the natural starting class for a dedicated Mage. It begins with 16 Intelligence and 15 Mind, alongside the Astrologer's Staff and two useful starting Sorceries, allowing the build to focus on spellcasting immediately.

During the early game, prioritize Intelligence while gradually increasing Vigor and Mind. Around level 25, approximately 25 Intelligence gives your Sorceries a strong early foundation, while 16 Vigor and 18 Mind provide enough survivability and FP for normal exploration.

By level 50, aim for approximately 25 Vigor, 22 Mind, and 35 Intelligence. At this point, Sorceries should comfortably function as your primary damage source, while your increasing FP pool allows you to rely less heavily on conserving every cast.

At level 100, aim for approximately 40 Vigor, 28 Mind, and 60 Intelligence. Reaching 60 Intelligence is particularly important because it meets the requirement for the Carian Regal Scepter, allowing the build to transition toward its endgame casting setup.

At level 150, 60 Vigor, 35 Mind, and 80 Intelligence create a powerful pure Mage with excellent Sorcery Scaling, a large FP pool, and enough survivability for endgame and Shadow of the Erdtree encounters.

Why 80 Intelligence?

Intelligence is by far our most important offensive attribute.

Sorcery damage is determined by the Sorcery Scaling of the Staff used to cast it, and increasing Intelligence improves this scaling on our Intelligence-based Glintstone Staves.

Our eventual 80 Intelligence target works particularly well with the Carian Regal Scepter. At maximum upgrade level, it reaches 373 Sorcery Scaling at 80 Intelligence, while remaining free of the increased FP costs associated with options such as Lusat's Glintstone Staff.

There is little reason for the standard level 150 Mage to push Intelligence substantially beyond 80. Those additional levels are generally better spent improving supporting attributes.

Vigor and Mind

Despite fighting primarily at range, a Mage still needs substantial Vigor.

Late-game and DLC enemies can close distance extremely quickly, and many stronger Sorceries require longer casting animations. Reaching 60 Vigor prevents the build from becoming unnecessarily fragile when an enemy gets through your ranged pressure.

Mind is our second major supporting attribute.

Around 35 Mind provides 200 FP, giving the build a comfortable resource pool for sustained spellcasting without taking excessive levels away from Intelligence and Vigor.

This is especially valuable once you begin incorporating more expensive Sorceries instead of relying entirely on efficient early-game projectiles.

Endurance

Endurance is considerably less important for a pure Mage than for most melee builds.

We aren't carrying multiple heavy weapons, and most Mage armor setups can comfortably remain at Medium Equip Load with relatively little investment.

Around 15–20 Endurance is enough for most setups while also providing additional Stamina for casting, sprinting, and dodging.

Strength and Dexterity

Leave Strength and Dexterity at their starting values for the standard build.

Dexterity does improve spellcasting speed, but investing heavily into Dexterity purely for this purpose is unnecessary when equipment can provide alternative ways to improve casting speed.

More importantly, investing heavily into melee requirements would begin pushing the build toward Spellblade territory, which isn't the goal of this setup.

Faith and Arcane

Faith and Arcane provide no meaningful benefit to our standard pure Intelligence progression.

Keep both at their starting values and invest those levels into Intelligence, Vigor, Mind, and a small amount of Endurance instead.

Attribute Priority

The general progression is:

  • Intelligence → Vigor → Mind → Endurance

Early on, Intelligence provides the damage and spell requirements needed to establish the build.

As you approach the mid-game, continue raising Vigor and Mind alongside Intelligence rather than rushing maximum damage.

Your major Intelligence milestones are:

  • 35 INT → strong early/mid-game Sorcery scaling
  • 60 INT → Carian Regal Scepter requirement
  • 80 INT → endgame Intelligence target

A strong level 150 distribution is:

  • 60 Vigor / 35 Mind / 18 Endurance / 80 Intelligence

This gives the build everything it needs to function as a dedicated spellcaster without spending unnecessary levels on melee attributes.

Best Glintstone Staffs for Mage Builds

Your Glintstone Staff determines the Sorcery Scaling used by your spells, making it one of the most important pieces of equipment for a pure Mage. Different Staffs perform best at different Intelligence levels, so you should upgrade your casting tool as the build progresses rather than using the same Staff throughout the entire game.

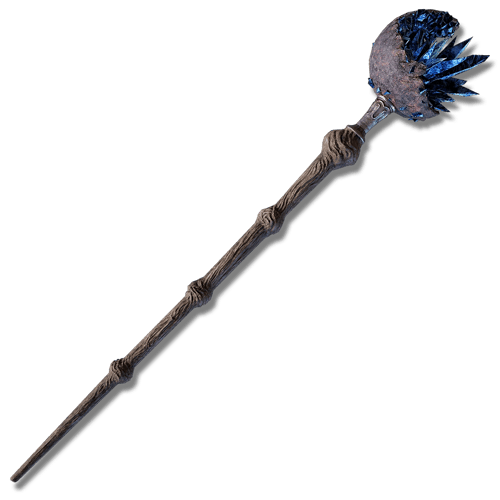
Meteorite Staff — Best Early-Game Staff

Meteorite Staff — Best Early-Game Staff

Requirements: Strength - 6 / Intelligence - 18

The Meteorite Staff is one of the strongest early-game options available to a Mage.

It starts with S Intelligence scaling, requires no Smithing Stones, and provides extremely strong Sorcery Scaling at lower Intelligence levels. This makes it significantly stronger than many early-game Staffs before they receive several upgrades.

The Meteorite Staff also increases the damage of Gravity Sorceries by 30%, making it particularly effective when paired with Rock Sling.

Its major disadvantage is that it cannot be upgraded. This makes it exceptional early on but causes upgraded alternatives to eventually surpass it as your Intelligence and weapon upgrade level increase.

Use it as your primary Staff during the early game, then transition into an upgraded Staff once its scaling begins falling behind.

Location: Found in the Street of Sages Ruins in Caelid.

Academy Glintstone Staff — Best Mid-Game Staff

Academy Glintstone Staff — Best Mid-Game Staff

Requirements: Strength - 6 / Intelligence - 28

The Academy Glintstone Staff is an excellent transition between the Meteorite Staff and our endgame setup.

Unlike the Meteorite Staff, it can be upgraded normally and provides excellent pure Intelligence Sorcery Scaling without increasing FP costs or specializing in one particular school of Sorcery.

It performs particularly well at approximately 41–68 Intelligence, making it a natural choice during the portion of our progression where we're moving toward the 60 Intelligence requirement of the Carian Regal Scepter.

This makes the general progression extremely simple:

Meteorite Staff → Academy Glintstone Staff → Carian Regal Scepter

Location: Obtained from Thops after giving him the Academy Glintstone Key, or dropped by him if he is killed.

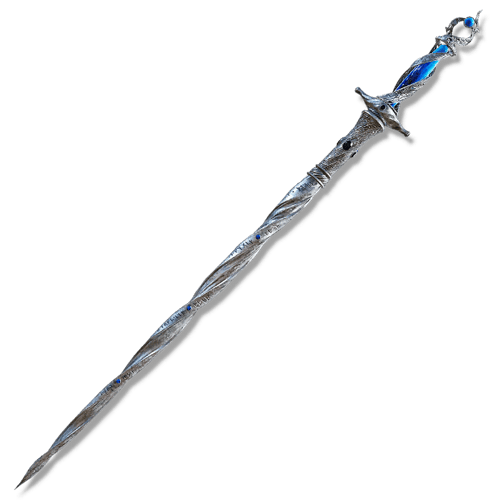
Carian Regal Scepter — Best Overall Endgame Staff

Carian Regal Scepter — Best Overall Endgame Staff

Requirements: Strength - 8 / Dexterity - 10 / Intelligence - 60

The Carian Regal Scepter is our primary endgame recommendation for a pure Mage.

At high Intelligence, it provides excellent Sorcery Scaling without increasing the FP cost of your spells. At 80 Intelligence and +10, it reaches 373 Sorcery Scaling, making it one of the strongest general-purpose Staffs available without a significant drawback.

It also increases the damage of Full Moon Sorceries by 10%, directly benefiting spells such as Ranni's Dark Moon and Rennala's Full Moon.

Unlike more specialized Staffs, you don't need to build your entire spell selection around its passive bonus. Its high Sorcery Scaling makes it excellent for almost everything.

Location: Obtained by exchanging the Remembrance of the Full Moon Queen with Finger Reader Enia after defeating Rennala.

Lusat's Glintstone Staff — Best Maximum Damage Option

Lusat's Glintstone Staff — Best Maximum Damage Option

Requirements: Strength - 10 / Intelligence - 52

Lusat's Glintstone Staff provides higher Sorcery Scaling than the Carian Regal Scepter at high Intelligence, making it one of the strongest options when your only goal is maximizing spell damage.

The trade-off is significant: all Sorceries consume 50% more FP while using it.

This makes Lusat's Staff much less efficient during normal exploration and longer encounters. You'll deal more damage per cast, but you'll also burn through your FP and Cerulean Flasks considerably faster.

Use Lusat's when you want maximum burst damage during a boss fight rather than treating it as the default Staff for every situation.

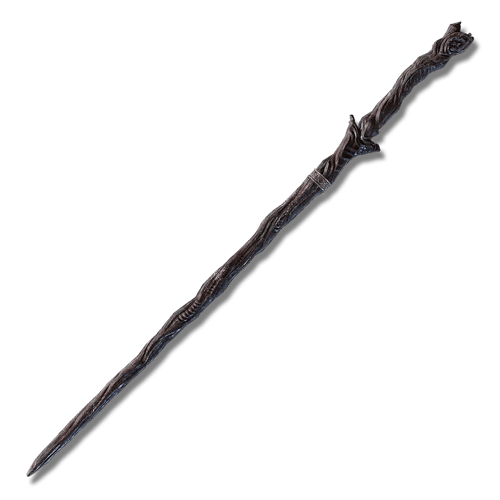
Staff of Loss — Best Night Sorcery Off-Hand

Staff of Loss — Best Night Sorcery Off-Hand

Requirements: Strength - 6 / Dexterity - 12 / Intelligence - 14

The Staff of Loss increases the damage of Night Sorceries by 30%, making it extremely powerful when using spells such as Night Comet.

Its most important feature is that you don't actually need to cast with it to receive the bonus.

You can hold the Staff of Loss in your off-hand while casting Night Comet with a stronger Staff such as the Carian Regal Scepter, receiving both the higher Sorcery Scaling and the Staff of Loss passive bonus.

This makes it an excellent specialized off-hand option without replacing your primary casting Staff.

Location: Found in Sellia, Town of Sorcery in Caelid.

Staff Progression

For a standard pure Mage:

Meteorite Staff → Academy Glintstone Staff → Carian Regal Scepter

This provides excellent scaling throughout progression without introducing additional FP penalties.

At endgame, you can then adjust your setup depending on what you need:

  • Carian Regal Scepter → best general-purpose option
  • Lusat's Glintstone Staff → maximum burst damage
  • Staff of Loss in the off-hand → Night Sorcery setup

You don't need to constantly switch between several Staffs. For most players, Carian Regal Scepter can remain your primary Staff once you reach 60 Intelligence, with specialized options only being used when their bonuses provide a meaningful advantage.

Best Sorceries for Mage Builds

Sorceries are the core of this build, and a pure Mage should carry several spells that cover different ranges, enemy types, and opening sizes. Rather than filling every Memory Slot with high-cost spells, combine efficient general-purpose Sorceries with a few specialized options for bosses and difficult encounters.

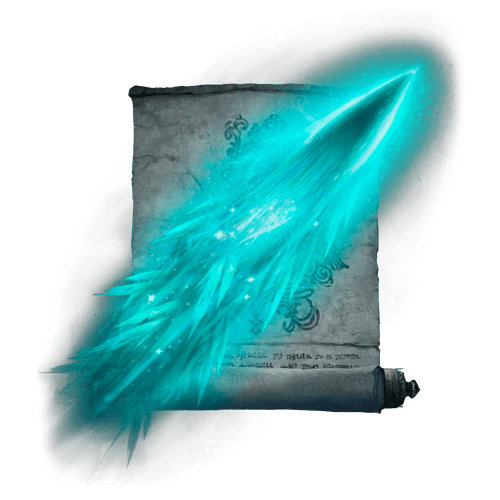
Night Comet — Best Overall Projectile

Night Comet — Best Overall Projectile

Requirements: Intelligence - 38

Night Comet is one of the strongest general-purpose Sorceries available to a pure Mage.

It deals excellent Magic damage, can be charged for additional damage, and has one particularly important advantage: PvE enemies don't react to the projectile by input-dodging it.

This makes Night Comet extremely reliable against enemies that frequently avoid conventional Glintstone projectiles.

Its damage becomes even stronger when holding the Staff of Loss in your off-hand, which increases the damage of Night Sorceries while allowing you to cast with a stronger primary Staff.

Night Comet is relatively expensive compared with basic projectiles, so weaker enemies don't always justify using it.

Location: Found in a chest in Sellia, Town of Sorcery after breaking the appropriate magical seal.

Glintstone Pebble — Best Early-Game Sorcery

Glintstone Pebble — Best Early-Game Sorcery

Requirements: Intelligence - 10

Glintstone Pebble isn't flashy, but its excellent FP efficiency makes it one of the most useful spells during early progression.

It provides fast, reliable ranged Magic damage at a very low FP cost, allowing you to clear normal enemies without constantly consuming Cerulean Flasks.

Eventually, stronger Sorceries will replace it during difficult encounters, but efficient spells remain useful even after unlocking much more powerful alternatives.

Location: Starting Sorcery for the Astrologer, and also sold by several Sorcery teachers.

Carian Slicer — Best Close-Range Sorcery

Carian Slicer — Best Close-Range Sorcery

Requirements: Intelligence - 14

Carian Slicer creates a magical sword and performs an extremely fast close-range slash.

Despite being a Sorcery, it functions almost like a melee weapon and provides excellent damage for its extremely low FP cost.

This gives a pure Mage an effective answer when enemies get too close for comfortable projectile casting without requiring us to invest in an actual melee weapon.

Carian Slicer also casts extremely quickly and can be chained repeatedly during larger openings.

Location: Purchased after giving the Royal House Scroll to Sorceress Sellen or another compatible Sorcery teacher.

Rock Sling — Best Physical Damage Sorcery

Rock Sling — Best Physical Damage Sorcery

Requirements: Intelligence - 18

Rock Sling launches three rocks toward the target, dealing Physical rather than Magic damage.

This makes it extremely valuable against enemies with high Magic resistance, giving our pure Intelligence build an alternative damage type without changing attributes or equipment.

Rock Sling also deals excellent stance damage, making it useful for creating stance breaks against bosses.

During the early game, it pairs exceptionally well with the Meteorite Staff, which increases the damage of Gravity Sorceries.

Its relatively slow projectiles can also interact strangely with enemy dodging, sometimes causing enemies to evade too early before the rocks actually arrive.

Location: Found in the Street of Sages Ruins in Caelid, close to the Meteorite Staff.

Ranni's Dark Moon — Best Boss Opener

Ranni's Dark Moon — Best Boss Opener

Requirements: Intelligence - 68

Ranni's Dark Moon launches a large magical moon that deals Magic damage while applying Frostbite buildup and reducing the target's Magic Damage Negation.

This makes it an excellent opening spell against bosses.

Rather than repeatedly casting it throughout the entire encounter, use Ranni's Dark Moon early to apply its debuff before transitioning into your primary damage Sorceries.

The Carian Regal Scepter also increases the damage of Full Moon Sorceries, creating natural synergy with our endgame Staff.

Its long casting animation makes it poorly suited to short openings, so create distance before attempting to use it.

Location: Found in Chelona's Rise on the Moonlight Altar after progressing Ranni's questline.

Shard Spiral — Best Large-Enemy Sorcery

Shard Spiral — Best Large-Enemy Sorcery

Requirements: Intelligence - 27

Shard Spiral fires a slowly travelling spiral projectile that repeatedly damages enemies as it passes through them.

Against small targets, this is simply a useful projectile.

Against large or elongated bosses, however, the spell can hit multiple times while travelling through their body, dramatically increasing its total damage.

This makes Shard Spiral particularly effective against Dragons and other enormous enemies where the projectile can remain inside the hitbox for longer.

Its relatively low FP cost also makes repeated casts surprisingly efficient.

Location: Purchased from Sorceress Sellen after siding with her during the final stage of her questline.

Comet — Best High-Damage General Projectile

Comet — Best High-Damage General Projectile

Requirements: Intelligence - 52

Comet provides a more powerful conventional projectile when you want substantially more damage than your basic Glintstone Sorceries.

It can be charged for additional damage, making it particularly effective during medium and large boss openings.

Unlike Night Comet, enemies can react to the projectile, so it isn't always the best option against highly evasive targets.

Against enemies that don't constantly dodge, however, Comet provides excellent straightforward ranged damage and works well with Godfrey Icon when using charged casts.

Location: Found behind an illusory wall inside Raya Lucaria Academy.

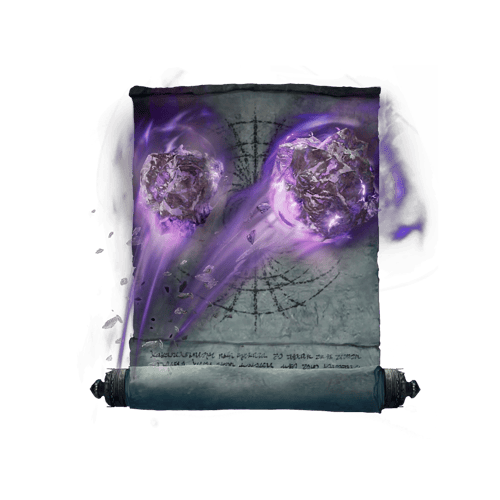
Comet Azur — Best Burst Damage Sorcery

Comet Azur

Requirements: Intelligence - 60

Comet Azur fires a massive continuous beam of Magic damage.

Against enemies that remain stationary long enough, the spell can deal enormous amounts of damage over its full duration.

Its biggest weakness is also obvious: the beam doesn't track mobile targets effectively.

Comet Azur is therefore strongest against large or stationary enemies and during situations where the boss gives you an unusually long opening.

It also consumes FP extremely quickly, making it poorly suited to general exploration.

Treat Comet Azur as a specialized boss burst tool, not your primary attack.

Location: Obtained from Primeval Sorcerer Azur in Mt. Gelmir.

Choosing Your Sorceries

A balanced spell selection could include:

  • Glintstone Pebble → cheap exploration damage
  • Night Comet → reliable general-purpose projectile
  • Carian Slicer → close-range combat
  • Rock Sling → Physical damage and stance pressure
  • Ranni's Dark Moon → boss opener and Magic debuff
  • Shard Spiral → large enemies
  • Comet → high-damage conventional projectile
  • Comet Azur → specialized burst damage

You don't need all eight equipped permanently. Adjust your Memory Slots depending on the area or boss you're fighting.

Against enemies that constantly dodge projectiles, prioritize Night Comet.

Against high Magic resistance, use Rock Sling.

Against enormous enemies, Shard Spiral can dramatically outperform conventional projectiles.

Against a boss where you have time to prepare, open with Ranni's Dark Moon before transitioning into your primary damage Sorceries.

The strength of a pure Mage isn't simply having one spell with enormous damage. It's having the correct Sorcery for almost every type of encounter.

Best Armor for Mage Builds

Pure Mage builds don't require a specific armor set to function, so armor should primarily support Sorcery damage, FP efficiency, and survivability while maintaining Medium Equip Load.

Because we aren't carrying heavy melee weapons, it's relatively easy to stay lightweight while still using armor pieces with useful passive effects.

Queen's Crescent Crown — Best General Intelligence Headpiece

Queen's Crescent Crown

The Queen's Crescent Crown increases Intelligence by 3 without reducing another attribute, making it a straightforward option during progression.

The additional Intelligence can help reach Staff and Sorcery requirements earlier while slightly increasing Sorcery damage.

Its value naturally decreases once you reach the 80 Intelligence target, at which point other headpieces or more defensive armor become more attractive.

Location: Purchased from Finger Reader Enia after defeating Rennala, Queen of the Full Moon.

Twinsage Glintstone Crown — Best Early Intelligence Boost

Twinsage Glintstone Crown

The Twinsage Glintstone Crown increases Intelligence by 6, providing one of the largest straightforward Intelligence bonuses available from armor.

This can be extremely useful during progression for reaching important requirements earlier, such as 60 Intelligence for the Carian Regal Scepter.

However, the Crown also reduces HP and Stamina, making it much less attractive once your natural Intelligence is high enough.

Use it primarily as a progression tool rather than a permanent endgame choice.

Location: Found in Raya Lucaria Academy after defeating a Crystallized Crab.

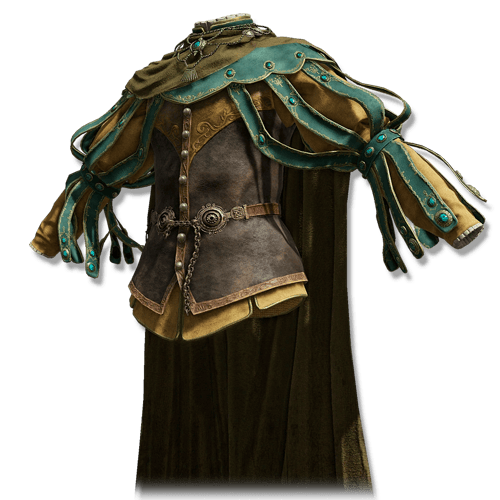
Spellblade Set — Best Magic Skill Alternative

Spellblade Set

Despite the name, the Spellblade Set does not increase Sorcery damage.

Instead, its passive bonus increases the damage of Magic and Cold weapon Skills. Because our build focuses almost entirely on casting Sorceries, this provides very little value to the standard Mage setup.

It can be useful for Intelligence builds incorporating weapons and Magic-based Skills, but those setups fit our Spellblade build much better.

Location: Obtained from Sorcerer Rogier after progressing his storyline.

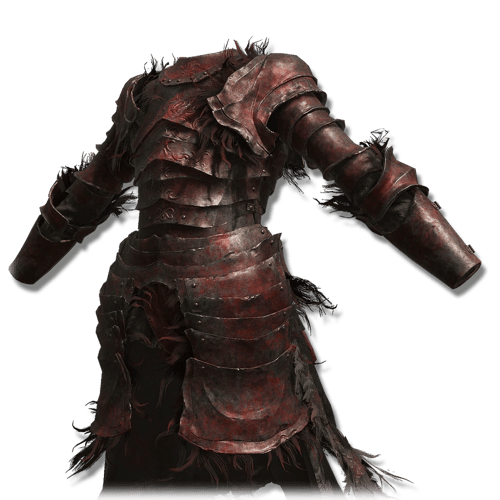
Rakshasa Set — Best General Offensive DLC Option

Rakshasa

The Rakshasa Set provides a general damage increase with each equipped piece.

Unlike the Spellblade Set, its bonus isn't restricted to weapon Skills, making it more useful to a caster-focused setup when maximizing damage.

The trade-off is reduced effective defense compared with similarly weighted armor, so wearing the full set isn't always worthwhile.

Individual pieces can be incorporated when you want additional offense without completely sacrificing survivability.

Location: Dropped by Rakshasa in the Eastern Nameless Mausoleum in Shadow of the Erdtree.

Mixed Medium Armor — Best Overall Setup

For most pure Mage builds, simply using your best available defensive armor while maintaining Medium Equip Load is the most practical choice.

There is no armor set that you need in order for Sorceries to deal strong damage.

Once you've naturally reached 80 Intelligence, stat-boosting crowns become less important, allowing you to prioritize Damage Negation and survivability instead.

This is particularly valuable in Shadow of the Erdtree, where many enemies can close the distance extremely quickly and punish long casting animations.

Choosing Your Armor

During early and mid-game progression:

  • Queen's Crescent Crown or Twinsage Glintstone Crown + defensive armor

At 80 Intelligence:

  • Best available defensive armor while maintaining Medium Equip Load

For additional offense:

  • Rakshasa pieces

Avoid wearing armor purely because it looks like Mage equipment. Spellblade Set, for example, doesn't improve our normal Sorceries, so its passive provides little benefit to this particular build.

Best Talismans for Mage Builds

Talismans provide some of the strongest direct improvements available to a pure Mage. Since this build focuses almost entirely on Sorcery damage, we want bonuses that increase Sorceries directly, improve Magic damage, or strengthen the charged spells in our toolkit.

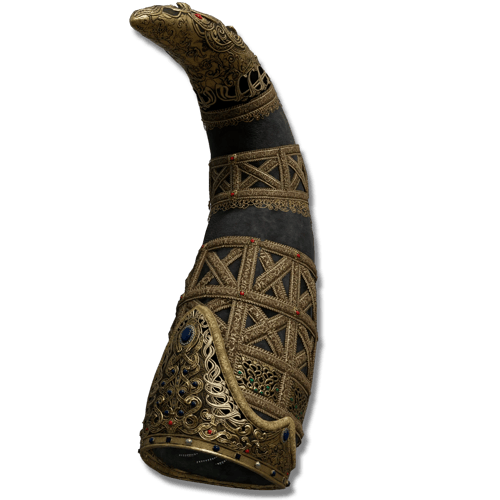
Graven-Mass Talisman — Best Overall Sorcery Talisman

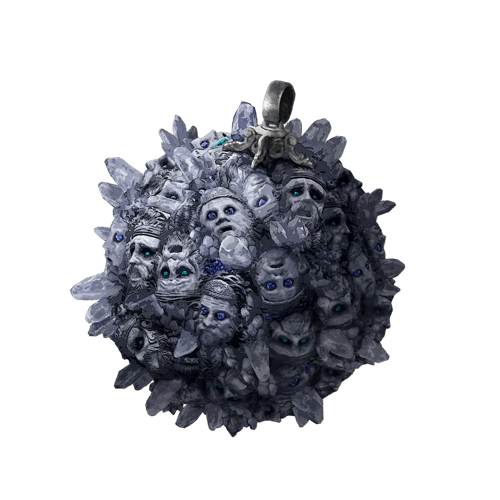
Graven Mass

The Graven-Mass Talisman increases the potency of Sorceries by 8%, making it one of the most consistent offensive Talismans for a pure Mage.

The bonus applies to essentially our entire offensive toolkit without requiring a specific activation condition or playstyle.

Whether you're using Night Comet, Rock Sling, Shard Spiral, or another damaging Sorcery, Graven-Mass provides reliable additional damage.

Location: Found in Albinauric Rise in the Consecrated Snowfield.

Magic Scorpion Charm — Best Magic Damage Talisman

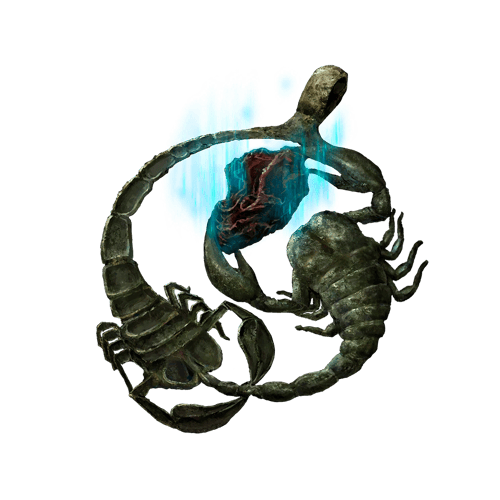
Magic Scoprion Charm

The Magic Scorpion Charm increases Magic damage by 12% in PvE.

Most of our primary Sorceries deal Magic damage, making this one of the strongest general offensive options available.

The downside is reduced Physical Damage Negation, so the additional damage comes with a meaningful defensive trade-off. Against aggressive bosses that frequently reach melee range, replacing it with a defensive Talisman can be worthwhile.

Also remember that the bonus only improves Magic damage. Rock Sling deals Physical damage and therefore doesn't benefit from it.

Location: Obtained from Preceptor Seluvis during his questline. Make sure to obtain it before progressing his quest too far, as it can become permanently missable.

Godfrey Icon — Best Charged Sorcery Talisman

Godfrey Icon

The Godfrey Icon increases the damage of charged spells and Skills by 15%.

Several of our strongest Sorceries can be charged, including Night Comet and Comet, making this an excellent option during boss fights where larger openings allow you to fully charge attacks.

It doesn't benefit every Sorcery, and it provides no bonus when a chargeable spell is released without charging.

Don't force charged casts purely to activate the Talisman. Against aggressive enemies, faster uncharged Sorceries are often the safer option.

Location: Dropped by Godefroy the Grafted in the Golden Lineage Evergaol.

Graven-School Talisman — Best Additional Sorcery Damage

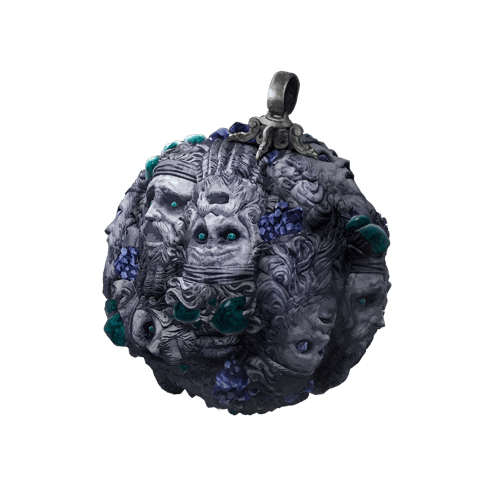
Graven-School Talisman

The Graven-School Talisman increases Sorcery damage by 4%.

Its bonus is smaller than Graven-Mass, but the two Talismans can be equipped together, allowing a dedicated caster to stack additional Sorcery damage.

This makes it a straightforward fourth offensive option when survivability, casting speed, or FP efficiency aren't currently a concern.

Location: Found behind an illusory wall in Raya Lucaria Academy.

Radagon Icon — Best Casting Speed Option

Radagon Icon

The Radagon Icon provides 30 virtual Dexterity toward spellcasting speed, reducing the casting time of Sorceries.

This can be extremely useful against aggressive enemies where the difference between finishing a spell and being interrupted is more important than another raw damage multiplier.

It works particularly well on a pure Intelligence build because we intentionally leave Dexterity at its starting value.

The Talisman doesn't directly increase damage, so consider it a consistency and comfort option rather than a mandatory offensive slot.

Location: Found in Raya Lucaria Academy, accessible from the Debate Parlor Site of Grace.

Dragoncrest Greatshield Talisman — Best Defensive Option

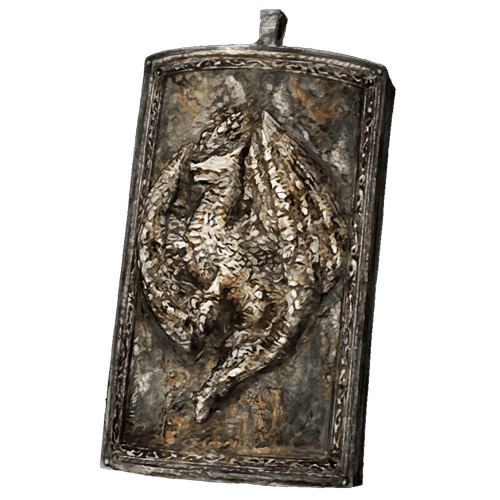
Dragoncrest Greatshield Talisman

The Dragoncrest Greatshield Talisman significantly increases Physical Damage Negation in PvE.

Although Mages ideally fight at range, late-game and DLC bosses frequently close distance extremely quickly. Additional Physical defense can therefore provide significantly more practical value than another small damage increase.

It's also a strong replacement for Magic Scorpion Charm when that Talisman's defensive penalty becomes too dangerous.

Location: Found in Elphael, Brace of the Haligtree.

Choosing Your Talismans

For maximum general Sorcery damage:

  • Graven-Mass Talisman + Magic Scorpion Charm + Godfrey Icon + Graven-School Talisman

For a more balanced setup:

  • Graven-Mass Talisman + Magic Scorpion Charm + Godfrey Icon + Dragoncrest Greatshield Talisman

Against aggressive enemies where casting speed becomes more important:

  • Radagon Icon can replace Godfrey Icon or Graven-School Talisman.

If you're primarily using Sorceries that cannot be charged, Godfrey Icon loses much of its value and should also be replaced.

Similarly, Magic Scorpion Charm is extremely powerful for our normal Magic Sorceries but provides no benefit to Physical-damage Sorceries such as Rock Sling.

The only Talisman I would consider nearly universal for this build is Graven-Mass Talisman. The remaining slots should change depending on whether you need maximum Magic damage, charged spell damage, faster casting, or additional survivability.


Mage Build Playstyle Tips

A pure Mage is strongest when you take advantage of the enormous variety of Sorceries available rather than relying on a single high-damage spell. Different enemies reward different ranges, damage types, and casting speeds, so adapting your spell selection is one of the most important parts of playing the build effectively.

Use Efficient Sorceries During Exploration

Not every enemy needs to be hit with Night Comet or another expensive Sorcery.

During normal exploration, use efficient spells such as Glintstone Pebble or Carian Slicer to conserve FP. Your stronger Sorceries are much more valuable when saved for dangerous enemies and bosses.

This also allows you to dedicate more Flask charges to Crimson Tears rather than constantly replenishing FP.

Use Night Comet Against Enemies That Dodge

Many PvE enemies react to conventional projectile Sorceries by dodging when they're cast.

Night Comet is particularly effective against these enemies because they don't react to its projectile in the same way.

If an enemy repeatedly avoids Comet or your normal Glintstone projectiles, switch to Night Comet rather than trying to repeatedly catch them during animations.

Holding the Staff of Loss in your opposite hand further increases Night Comet's damage while still allowing you to cast with your primary Staff.

Open Boss Fights With Ranni's Dark Moon

Ranni's Dark Moon is an excellent way to begin difficult encounters.

It deals Magic damage, builds Frostbite, and temporarily reduces the enemy's Magic Damage Negation, increasing the effectiveness of the Magic damage you deal afterward.

Because of its slow cast and projectile speed, it's generally better as an opener or large-window spell than something you repeatedly cast throughout the fight.

After applying its debuff, transition into faster Sorceries such as Night Comet or Comet.

Use Rock Sling Against Magic Resistance

Most of your Sorceries deal Magic damage, which can become problematic against enemies with particularly high Magic resistance.

Rock Sling deals Physical damage, giving the build a natural solution without requiring a different attribute distribution.

It also deals strong stance damage, making it useful even when Magic resistance isn't a major concern.

During the early game, combine it with the Meteorite Staff for its Gravity Sorcery bonus.

Use Shard Spiral Against Large Bosses

Shard Spiral becomes increasingly effective as enemy size increases.

The projectile continuously deals damage while passing through a target, allowing it to hit large enemies multiple times from a single cast.

Against Dragons and other enormous bosses, position yourself so the projectile travels through as much of their body as possible.

Against small enemies, conventional projectiles are usually more reliable.

Don't Force Comet Azur

Comet Azur can deal enormous damage, but only when the target remains inside the beam.

Against highly mobile bosses, repeatedly attempting to set up Comet Azur often wastes more FP and time than simply using your normal Sorceries.

Save it for:

  • Stationary bosses
  • Large recovery animations
  • Stance breaks
  • Slow or enormous enemies
  • Encounters where you can safely create a long opening

Comet Azur is a specialized burst tool, not the default solution to every boss.

Charge Sorceries When the Opening Allows It

Spells such as Night Comet and Comet can be charged for additional damage.

With Godfrey Icon equipped, charged casts become even stronger.

However, don't automatically charge every spell. Against aggressive bosses, several fast uncharged casts may be much safer and ultimately deal more damage than attempting one fully charged attack and being interrupted.

Think of charging as something you use to capitalize on larger openings, not as your default casting method.

Use Carian Slicer at Close Range

Being a pure caster doesn't mean you need to panic whenever an enemy reaches melee range.

Carian Slicer provides fast, extremely FP-efficient close-range damage and can effectively function as the build's melee weapon.

Against enemies that constantly pressure you, weaving Carian Slicer attacks between dodges can be considerably easier than repeatedly trying to create enough distance for projectile Sorceries.

This is also why the build doesn't require heavy investment into an actual melee weapon.

Learn to Cast After Dodging

Aggressive enemies often won't give you enough time to create large amounts of distance before casting.

Instead of constantly running away, learn which attacks can be dodged and immediately punished with a fast Sorcery.

Carian Slicer, Glintstone Pebble, and uncharged Night Comet are much easier to fit into short openings than your slower high-damage spells.

Your spell selection should change based on how much time the enemy gives you.

Don't Empty Your FP Bar

Always leave enough FP to respond to unexpected situations.

Using your final FP on an expensive Sorcery can leave you unable to cast when a much better opening appears several seconds later.

Against bosses, replenish FP during safe moments rather than waiting until your bar is completely empty.

The goal isn't to maximize damage per cast. It's to maximize the amount of useful damage you can produce from your entire FP pool.

Use Specialized Staff Bonuses

Some Staffs are worth carrying specifically for their passive bonuses.

The Staff of Loss, for example, can be held in one hand while your stronger Staff casts Night Comet.

You don't need to constantly optimize around multiple Staffs, but specialized setups can provide substantial damage increases when you're building heavily around a particular Sorcery.

For general play, the Carian Regal Scepter remains the simpler option.

Keep Your Distance, but Don't Depend on It

Range is one of the Mage's biggest advantages, but many late-game and DLC enemies are specifically designed to close distance quickly.

Instead of building your entire strategy around endlessly retreating, maintain enough space to cast while remaining prepared to dodge and fight at close range.

This is why 60 Vigor and Carian Slicer remain valuable even for a dedicated ranged caster.

Adjust Your Flask Distribution

Because Sorceries are your primary damage source, a Mage generally needs more Flasks of Cerulean Tears than a melee build.

However, don't go too far in the opposite direction and leave yourself with insufficient healing.

Adjust your Crimson/Cerulean distribution based on the encounter. Short bosses may allow you to carry more Cerulean Flasks, while difficult exploration areas often benefit from additional healing.

Match Your Sorcery to the Enemy

A simple way to approach your spell selection is:

  • Weak enemies → Glintstone Pebble
  • Close-range enemies → Carian Slicer
  • Enemies that dodge → Night Comet
  • High Magic resistance → Rock Sling
  • Large enemies → Shard Spiral
  • Boss opener → Ranni's Dark Moon
  • Large safe opening → Charged Comet or Night Comet
  • Stationary target / massive opening → Comet Azur

You don't need to use every Sorcery in every fight. A Mage becomes much stronger once you stop asking "What is my strongest spell?" and instead ask which spell is strongest for the situation you're currently facing.

A pure Mage wins through versatility. Control distance with efficient Sorceries, exploit enemy weaknesses with specialized spells, and save your strongest casts for openings where their additional damage is actually worth the FP and casting time.

Table of Contents

See More Elden Ring

Elden Ring Black Flame Build - Stats, Weapons, Skills & More
Updated on Aug 24, 2026
Elden Ring Mage Build - Stats, Weapons, Skills & More
Updated on Aug 24, 2026
Elden Ring Rivers of Blood Build - Stats, Weapons, Skills & More
Updated on Aug 24, 2026
Elden Ring Lightning Build - Stats, Weapons, Skills & More
Updated on Aug 24, 2026
Elden Ring Madness Build - Stats, Weapons, Skills & More
Updated on Aug 24, 2026

Like our guides?

Add Mobalytics as a preferred source on Google!