menu
MobalyticsUse your favourite features in-game with our Desktop App
Gamebase Guide

Elden Ring Dragon Build - Stats, Weapons, Skills & More

Updated on Aug 22, 2026
Aug 22, 2026

Overview

Dragon builds focus on the powerful Dragon Communion Incantations, allowing you to transform parts of your body into those of dragons and unleash devastating breath attacks, bites, claws, and roars.

The biggest strength of Dragon Communion is its wide variety of damage types and status effects. Depending on the Incantation you use, you can deal Physical, Fire, Magic, or Lightning damage while also gaining access to effects such as Frostbite and Scarlet Rot. This allows the build to adapt to the weaknesses of different enemies and bosses.

Our primary casting tool will be the Dragon Communion Seal, which boosts Dragon Communion Incantations by 15% and scales with both Faith and Arcane. Because many Dragon Communion Incantations require both attributes, the Seal fits naturally into the build.

Dragon Incantations can deal enormous damage, but their long cast animations and high FP costs require careful positioning. Instead of repeatedly casting whenever you have FP available, wait for large openings and choose the Dragon Incantation that best fits the encounter.

Shadow of the Erdtree also significantly expanded this playstyle with new Dragon Communion Incantations such as Ghostflame Breath, Bayle's Tyranny, and Bayle's Flame Lightning, giving Dragon builds even more options in the late game.

Pros and Cons

Pros

  • Extremely high burst damage when Dragon Incantations fully connect.
  • Access to multiple damage types, making it easy to target enemy weaknesses.
  • Can apply powerful status effects including Scarlet Rot and Frostbite.
  • Excellent AoE through Dragon Breath Incantations.
  • Dragon Communion Seal provides strong scaling for an Arcane/Faith hybrid.
  • Shadow of the Erdtree adds several powerful new Dragon Communion options.
  • One of the most visually distinctive playstyles in Elden Ring.

Cons

  • Long cast animations can leave you extremely vulnerable.
  • Dragon Incantations generally have high FP and Stamina costs.
  • Many of the strongest Incantations require defeating specific dragons or bosses.
  • Requires investment in both Faith and Arcane, alongside Vigor and Mind.
  • Breath attacks can be inefficient against smaller enemies.
  • Poor positioning can cause expensive Incantations to miss or be interrupted.

All Elden Ring Guides

Check Out Our Other Elden Ring Builds and Guides

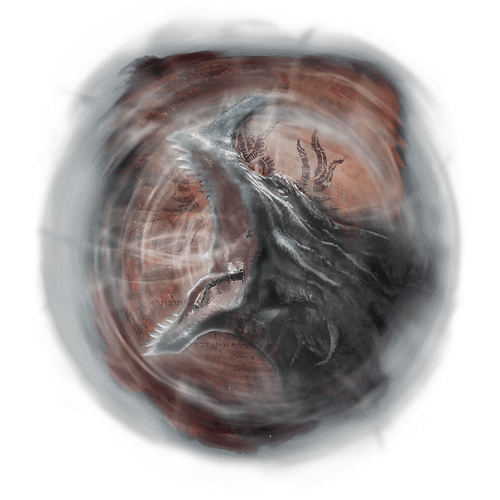
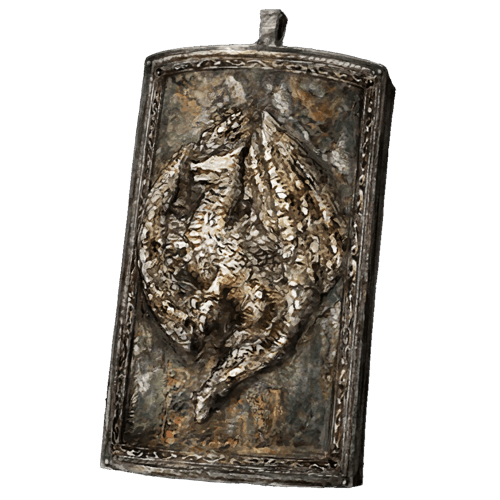
Dragon Communion Seal

The Dragon Communion Seal is the core Sacred Seal for this build and one of the most important pieces of equipment to obtain early.

It provides a 15% damage bonus to Dragon Communion Incantations while held, directly improving the main spells used throughout the build. The Seal scales with both Faith and Arcane, making it perfectly suited to the hybrid attribute distribution required by Dragon Communion Incantations.

Unlike most Sacred Seals, the Dragon Communion Seal benefits heavily from Arcane. However, investing exclusively in Arcane isn't necessarily the best approach for a dedicated caster. The Seal performs extremely well when Faith and Arcane are developed together, with 45 Faith / 45 Arcane providing 336 Incantation Scaling at +10.

This also gives the build enough Faith to meet the requirements of almost every Dragon Communion Incantation while maintaining strong Arcane scaling.

The Seal has no weight, which is particularly useful for Dragon builds that want to keep their Equip Load low or take advantage of equipment such as the Blue Dancer Charm.

Requirements: Faith - 10 / Arcane - 10

Location: Dropped by a spectral Banished Knight inside Fringefolk Hero's Grave in Limgrave.

Starting Class, Attribute Leveling and Distribution

Dragon Communion builds require investment into both Faith and Arcane, while also needing enough Mind to support their unusually expensive Incantations. The Dragon Communion Seal scales with both attributes and performs particularly well with a relatively balanced Faith/Arcane distribution.

Because many Dragon Communion Incantations have substantial FP and Stamina costs, this build also benefits more from Mind and Endurance than a typical melee-focused Arcane build.

Dragon Communion Build

Recommended Starting Class: Prophet

Attribute

Starting Stats

LV25

LV50

LV100

LV150

Vigor

10

15

22

40

50

Endurance

8

10

12

15

18

Strength

11

11

11

11

11

Dexterity

10

10

10

10

10

Mind

14

18

22

28

32

Intelligence

7

7

7

7

7

Faith

16

18

23

35

45

Arcane

10

15

20

35

45

Early in the game, prioritize Vigor, Mind, and the requirements for your Dragon Communion Incantations. Dragonfire only requires 15 Faith and 12 Arcane, making it an easy first Dragon Communion spell to incorporate into the build.

The Dragon Communion Seal itself only requires 10 Faith and 10 Arcane, so the Prophet can use it immediately once obtained. Its 15% boost to Dragon Communion Incantations makes it the natural casting tool throughout the entire build.

By around level 50, 23 Faith and 20 Arcane give you access to a large selection of Dragon Communion Incantations, while 22 Mind provides a much healthier FP pool for repeated casting.

From there, begin developing Faith and Arcane together while raising Vigor toward 40. Dragon Communion spells can leave you vulnerable during their long animations, so survivability becomes increasingly important as enemies become more aggressive.

At level 150, 45 Faith / 45 Arcane is an excellent target for a dedicated Dragon Communion caster. A +10 Dragon Communion Seal performs particularly well with this balanced investment, while 32 Mind gives you enough FP to actually make regular use of your expensive Dragon Incantations.

50 Vigor is slightly lower than the 60 we often recommend for melee builds, but the additional points in Mind, Faith, and Arcane are valuable for this stat-hungry caster. If you prefer additional survivability, pushing toward 60 Vigor at higher levels should be one of your priorities.

Bayle Incantation Alternative

Shadow of the Erdtree introduces Bayle's Tyranny and Bayle's Flame Lightning, which differ significantly from normal Dragon Communion Incantations.

Rather than requiring both Faith and Arcane, they require 49 Arcane and 53 Arcane, respectively, with no Faith requirement at all.

If you want to build specifically around Bayle's Incantations, prioritize:

Vigor → Mind → 49/53 Arcane → Faith → Endurance

You don't need to abandon Faith entirely, especially if you still want access to the broader Dragon Communion spell list. Instead, simply shift some of the points from Faith into Arcane until you meet the requirement of your chosen Bayle Incantation.

Because both spells are obtained very late in Shadow of the Erdtree, this is best treated as an endgame adjustment or respec rather than the progression for a fresh character.

One important limitation is that Bayle's Tyranny and Bayle's Flame Lightning are mutually exclusive in a single playthrough, as both are exchanged for the same Heart of Bayle.

Why Faith and Arcane?

The Dragon Communion Seal is specifically designed around a hybrid Faith/Arcane build. At +10, a balanced 45 Faith / 45 Arcane distribution reaches 336 Incant Scaling, while heavily favoring Arcane with 10 Faith / 80 Arcane reaches only 310.

Faith also determines which Dragon Communion Incantations you can cast, while Arcane is required by most of the spell family and contributes strongly to the Dragon Communion Seal.

This makes 45/45 an excellent general-purpose target, rather than maximizing one casting stat and neglecting the other.

Best Dragon Communion Incantations

Dragon Communion builds have access to a huge variety of damage types and status effects. Rather than using the same Incantation against every enemy, one of the biggest strengths of the build is being able to switch spells depending on the target's weaknesses and the size of the opening available.

Breath Incantations are excellent for sustained damage and AoE, while Dragonmaw and the Bayle Incantations provide much more concentrated burst damage at close range.

Rotten Breath — Best Early Dragon Incantation

Rotten Breath — Best Accessible Rot Incantation

Requirements: Faith - 15 / Arcane - 12

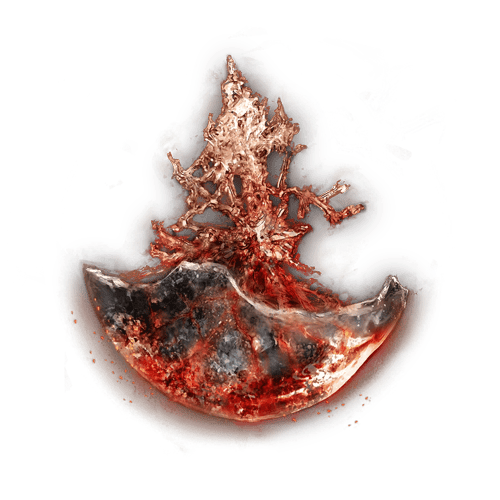
Rotten Breath is one of the best Dragon Communion Incantations to obtain early. It breathes a large cloud in front of the caster that deals Physical damage while rapidly building Scarlet Rot.

Scarlet Rot makes Rotten Breath particularly effective against bosses with large health pools. Once the status activates, you can stop casting and allow the damage-over-time effect to continue while you reposition or use other Incantations.

Its relatively low requirements also make it available almost immediately to a Dragon Communion build.

Location: Purchased for 1 Dragon Heart at the Cathedral of Dragon Communion in Caelid.

Dragonmaw — Best Physical Burst Damage

Dragonmaw — Best Physical Burst Damage

Dragonmaw transforms the caster's head into that of a dragon before delivering an enormous bite.

Unlike the breath attacks, Dragonmaw is built around heavy single-target Physical damage. It is particularly effective when you have a large opening and want immediate damage rather than committing to a prolonged breath animation.

Its Physical damage also gives the build an important alternative when an enemy has strong elemental resistances.

Location: Purchased for 1 Dragon Heart at the Church of Dragon Communion in Limgrave or the Cathedral of Dragon Communion in Caelid. 

Dragonice — Best Early Frostbite Option

Dragonice — Best Early Frostbite Option

Dragonice breathes an icy mist that deals Magic damage while building Frostbite.

Frostbite deals a burst of damage when triggered and temporarily increases the damage the affected enemy receives, making it useful both offensively and as a setup for your other Dragon Incantations.

It is also available much earlier than Borealis's Mist, making it the more practical Frostbite option throughout most of a playthrough.

Location: Purchased for 1 Dragon Heart at the Cathedral of Dragon Communion in Caelid. 

Ekzykes's Decay — Best Advanced Scarlet Rot Breath

Ekzykes's Decay — Stronger Dragon Communion Option

Requirements: Faith - 23 / Arcane - 15

Ekzykes's Decay provides a stronger late-game alternative to Rotten Breath.

The caster rises into the air before releasing a large cloud of rotting breath, giving it excellent coverage and allowing Scarlet Rot to be applied from relative safety when you have a sufficient opening. It does, however, cost considerably more FP than Rotten Breath.

Use Rotten Breath when efficiency matters and Ekzykes's Decay when you can take advantage of the stronger cast and larger opening.

Location: Purchased at the Cathedral of Dragon Communion after defeating Decaying Ekzykes.

Greyoll's Roar — Best Dragon Utility Incantation

Greyoll's Roar — Best Dragon Utility Incantation

Requirements: Faith - 28 / Arcane - 17

Greyoll's Roar deals Physical damage in a large area around the caster while applying a powerful debuff to enemies hit.

Affected enemies deal 15% less damage and have their Damage Negation reduced by 10% for 60 seconds, making the spell useful even when its direct damage isn't your main priority.

This makes Greyoll's Roar an excellent opener against difficult bosses: apply the debuff, then follow with whichever Dragon Incantation best matches the encounter.

Location: Purchased from the Cathedral of Dragon Communion after defeating Elder Dragon Greyoll.

Ghostflame Breath — Best DLC Frostbite Breath

Ghostflame Breath — Best DLC Frostbite Breath

Requirements: Faith - 23 / Arcane - 15

Ghostflame Breath is one of the most useful Dragon Communion additions from Shadow of the Erdtree.

It breathes ghostflame across a wide area, dealing Magic damage while building Frostbite. This gives Dragon builds another powerful way to combine elemental damage with status pressure.

Its biggest limitation is simply availability, as you need to reach the DLC before it becomes accessible.

Location: Purchased for 3 Dragon Hearts at the Grand Altar of Dragon Communion.

Bayle's Tyranny — Best DLC AoE Burst

Bayle's Tyranny — Best DLC AoE Burst

Requirements: Arcane - 49

Bayle's Tyranny transforms the caster into the likeness of Bayle and unleashes an enormous fiery roar around them.

Rather than functioning like a traditional breath attack, it is designed around massive close-range AoE damage, making it especially effective against large enemies or groups when you have enough time to complete the animation.

Its extremely high Arcane requirement makes it much more specialized than normal Dragon Communion Incantations.

Location: Obtained by exchanging the Heart of Bayle after defeating Bayle the Dread.

Bayle's Flame Lightning — Best DLC Single-Target Option

Bayle's Flame Lightning — Best DLC Single-Target Option

Requirements: Arcane - 53

Bayle's Flame Lightning channels Bayle's power into a devastating flame-lightning-infused talon attack.

It provides the Dragon build with another powerful close-range burst option rather than another traditional breath spell. Its 53 Arcane requirement is the highest of the Dragon Communion Incantations, so using it requires adjusting the normal Faith/Arcane distribution.

Like Bayle's Tyranny, it is primarily an endgame option for characters willing to specialize heavily into Arcane.

Location: Obtained by exchanging the Heart of Bayle after defeating Bayle the Dread.

You can only obtain one of Bayle's two Incantations per playthrough, since both require the same Heart of Bayle.

Other Useful Dragon Incantations

A few other Dragon Communion Incantations are worth keeping available depending on the encounter:

  • Dragonfire / Agheel's Flame — reliable Fire damage and excellent AoE.
  • Glintstone Breath / Smarag's Glintstone Breath — useful when an enemy is vulnerable to Magic damage.
  • Borealis's Mist — another powerful Frostbite option with higher requirements than Dragonice.
  • Magma Breath / Theodorix's Magma — Fire-based alternatives that leave damaging magma behind.
  • Dragonclaw — fast close-range Physical damage with a follow-up cast.
  • Placidusax's Ruin — spectacular and powerful, although it isn't boosted by the Dragon Communion Seal despite its dragon theme.

The important thing is not to equip every Dragon Incantation at once. Choose several that cover different purposes and damage types.

A strong general loadout could include:

  • Rotten Breath or Ekzykes's Decay → Scarlet Rot
  • Dragonmaw → Physical burst
  • Dragonice or Ghostflame Breath → Frostbite/Magic
  • Greyoll's Roar → Debuff
  • Dragonfire/Agheel's Flame → Fire/AoE

Then use the remaining Memory Slots for encounter-specific options.

Best Early-Game Weapons

Dragon Communion builds are primarily casters, so your melee weapon should complement your Incantations rather than compete with them for attributes. Since the build already invests heavily into Arcane and Faith, weapons that benefit from those stats are the most natural choices.

Your melee weapon is especially useful against weaker enemies where spending a large amount of FP on a Dragon Incantation would be unnecessary, or when an enemy gives you too little time to safely cast.

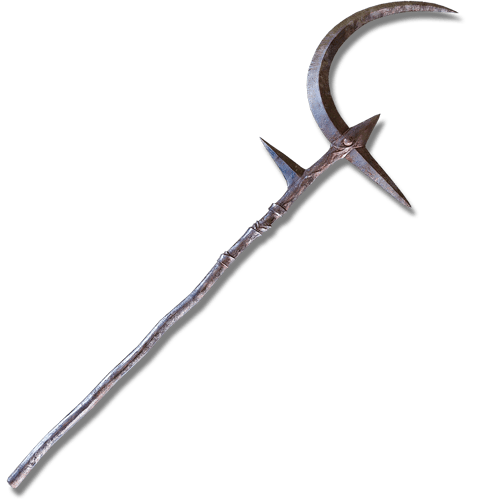
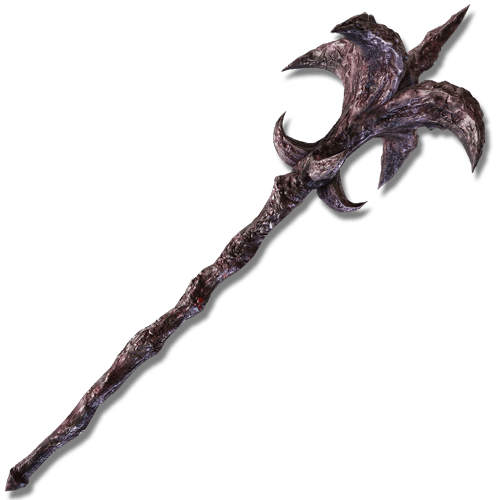
Ripple Crescent Halberd — Best Arcane Sidearm

Ripple Crescent Halberd — Best Arcane Sidearm

Requirements: Strength - 12 / Dexterity - 12 / Arcane - 20

The Ripple Crescent Halberd is an excellent melee option for a Dragon Communion build because its damage scales almost entirely from Arcane, allowing it to benefit directly from one of our primary casting attributes.

Its long reach gives the build a safe melee option without requiring additional investment into Strength or Dexterity beyond its relatively low requirements.

It can also be buffed with certain weapon buffs and consumables, giving it additional flexibility despite being unable to change its Ash of War.

Location: Dropped by Albinaurics wielding the weapon around Academy Gate Town in Liurnia of the Lakes.

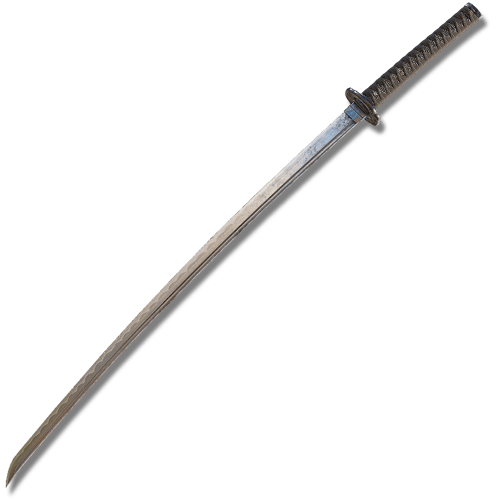
Occult Uchigatana — Best Customizable Option

Occult Uchigatana — Best Customizable Option

Requirements: Strength - 11 / Dexterity - 15

The Uchigatana is an excellent option once given the Occult affinity. Its innate Blood Loss remains useful, while Occult allows its Physical damage and Bleed buildup to benefit from your high Arcane.

Unlike unique weapons, it can also use a wide variety of Ashes of War, allowing you to choose a Skill that covers something your Dragon Incantations don't already provide.

The Dexterity requirement requires a few additional points from our standard Prophet progression, but the investment is relatively small.

Location: Found inside the Deathtouched Catacombs in Limgrave. Samurai characters also begin with one.

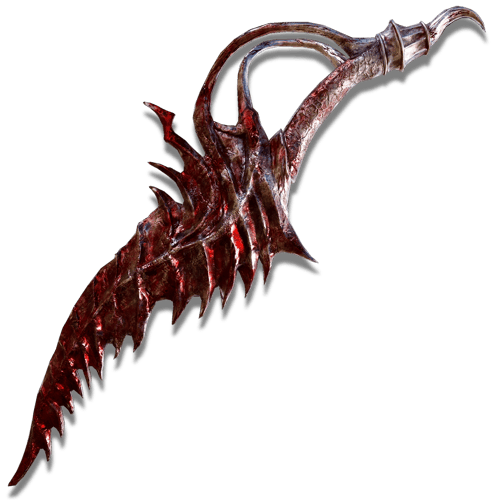
Reduvia — Best Lightweight Bleed Option

Reduvia — Best Lightweight Bleed Option

Requirements: Strength - 5 / Dexterity - 13 / Arcane - 13

Reduvia is one of the easiest Arcane weapons to incorporate into the build.

It has extremely low requirements, innate Blood Loss, and strong Arcane scaling. Reduvia Blood Blade also provides a quick ranged attack when committing to a Dragon Breath would be unnecessarily slow or expensive.

Its main weakness is its very short melee range, but as a lightweight backup weapon for an Arcane caster, it performs extremely well.

Location: Dropped by Bloody Finger Nerijus near Murkwater Cave in Limgrave.

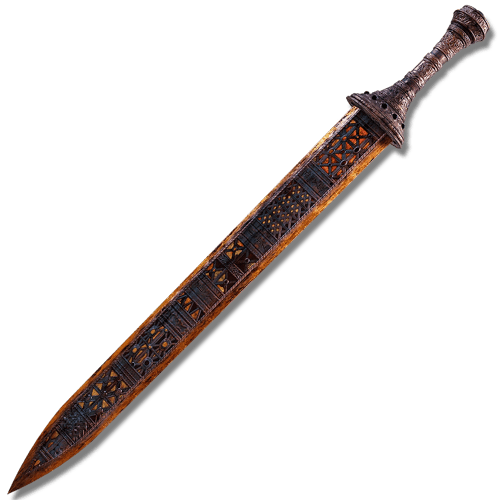
Regalia of Eochaid — Best Early Arcane Unique Weapon

Regalia of Eochaid — Best Early Arcane Unique Weapon

Requirements: Strength - 12 / Dexterity - 18 / Arcane - 15

The Regalia of Eochaid deals Physical and Magic damage and scales with Arcane, giving Dragon Communion characters another weapon that naturally benefits from their existing attributes.

Its Unique Skill, Eochaid's Dancing Blade, launches the sword forward in a rapidly spinning attack that can hit an enemy multiple times.

The Dexterity requirement does require some additional investment, so it isn't as immediately convenient as Reduvia or the Ripple Crescent Halberd.

Location: Found in the graveyard above Gaol Cave in Caelid.

Flowerstone Gavel — Best DLC Dragon-Themed Weapon

Flowerstone Gavel — Best DLC Dragon-Themed Weapon

Requirements: Strength - 14 / Dexterity - 8 / Arcane - 15

The Flowerstone Gavel is one of the most natural DLC additions to a Dragon Communion build.

It scales strongly with Arcane, and its Unique Skill, Flower Dragonbolt, calls down red lightning on an enemy. More importantly, the Skill temporarily reduces the target's Lightning Damage Negation, creating excellent synergy with Lightning-based attacks.

Its relatively modest requirements also make it easy to incorporate into an Arcane-heavy Dragon build without significantly changing your attributes.

Location: Obtained from Dragon Communion Priestess Florissax at the Grand Altar of Dragon Communion after progressing her questline.

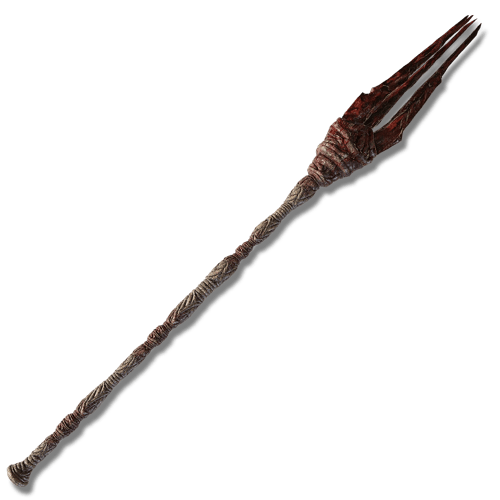
Bloodfiend's Fork — Best DLC Infusible Arcane Option

Bloodfiend's Fork — Best DLC Infusible Arcane Option

Requirements: Strength - 14 / Dexterity - 8 / Arcane - 13

The Bloodfiend's Fork provides another useful DLC option for Dragon Communion characters. It has innate Blood Loss and can change its Ash of War and affinity.

Using Occult affinity allows a high-Arcane character to improve its Physical damage while also taking advantage of its innate Blood Loss buildup.

Its Spear moveset also provides good reach and relatively safe melee attacks, which complements the long and vulnerable casting animations of Dragon Communion Incantations.

Location: Dropped by Bloodfiends wielding the weapon in Shadow of the Erdtree.

Honorable Mentions

Bloody Helice is a strong Arcane Heavy Thrusting Sword with excellent reach and an evasive Unique Skill, but its 19 Dexterity requirement requires more investment than our caster naturally wants.

Eleonora's Poleblade provides excellent multi-hit damage and Bleed buildup, but its 21 Dexterity requirement makes it better suited to a dedicated DEX/ARC hybrid than a Dragon Communion caster.

Morgott's Cursed Sword is another powerful Arcane weapon, but its 35 Dexterity requirement is far too expensive for the standard Dragon build unless you're deliberately creating a melee hybrid.

Occult-infused weapons with innate Bleed are generally excellent alternatives. Rather than searching for one specific sidearm, you can choose a weapon whose moveset you enjoy, meet its minimum Strength/Dexterity requirements, and use Occult affinity to take advantage of your Arcane investment.

Choosing Your Weapon

For the standard Dragon Communion build, don't invest heavily into Strength or Dexterity simply to use a stronger melee weapon. Your Dragon Incantations are the centerpiece of the build, and every additional melee requirement competes with Vigor, Mind, Faith, and Arcane.

Reduvia is one of the easiest early options; Occult weapons provide the most customization, and the Flowerstone Gavel is an excellent thematic DLC choice.

Your weapon should primarily handle situations where a Dragon Incantation would be too slow, too expensive, or simply unnecessary.

Best Armor for Dragon Builds

Dragon Communion builds are vulnerable during their long casting animations, so armor should either improve the damage of your Dragon Incantations or provide enough defense and Poise to survive attacks that catch you during a cast.

Because there is no single base-game armor set specifically required for Dragon Communion, mixing individual pieces is often better than wearing a complete set.

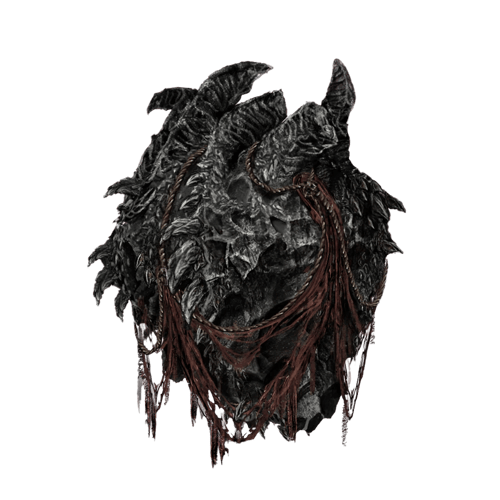
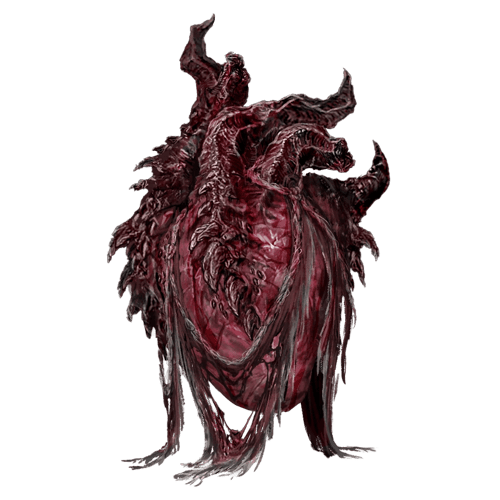
Rock Heart — Best Dragon Communion Damage Option

Rock Heart — Best Dragon Communion Damage Option

The Rock Heart is one of the strongest additions to Dragon Communion builds in Shadow of the Erdtree.

Using it while wearing no armor transforms your character into a Dragon form. While transformed, using the Rock Heart again provides a temporary 20% damage boost to Dragon Communion Incantations, making it the most directly synergistic offensive option for the build.

The obvious drawback is that Dragon form prevents you from wearing normal armor, leaving you with significantly less conventional protection. This makes it a high-risk, high-damage option for players comfortable with avoiding attacks during their casts.

Location: Obtained after solving the painting puzzle associated with the Domain of Dragons Painting in Shadow of the Erdtree.

Priestess Heart — Alternative Dragon Form

Priestess Heart — Alternative Dragon Form

The Priestess Heart provides another Dragon transformation and is particularly fitting for Dragon Communion characters.

Like the Rock Heart, it requires you to remove your armor before transforming. Using the Heart again while transformed temporarily boosts Dragon Cult Incantations, rather than Dragon Communion Incantations.

Because our build primarily uses Dragon Communion spells, Rock Heart is generally the better offensive choice. Priestess Heart is more useful if you're creating a hybrid that also uses Lightning-based Dragon Cult Incantations.

Location: Obtained through the Dragon Communion Priestess questline in Shadow of the Erdtree.

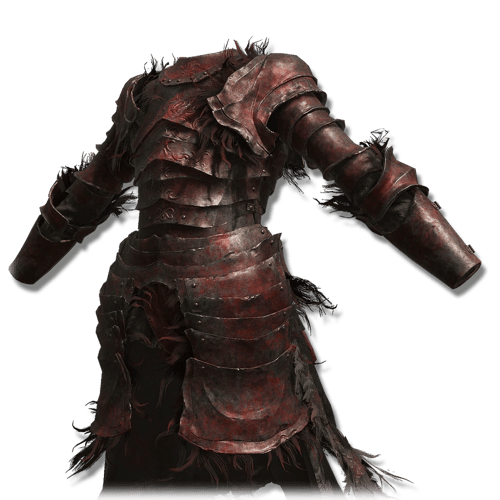
Rakshasa Set — Best General Offensive Armor

Rakshasa Set

The Rakshasa Set increases the damage you deal, with each equipped piece providing an offensive bonus.

Unlike Dragon form, it allows you to retain the defenses, Poise, and other benefits of conventional armor while still increasing your overall damage.

This makes Rakshasa pieces a good choice for players who want additional offense without committing to the much more fragile Rock Heart setup.

Location: Dropped by Rakshasa in the Eastern Nameless Mausoleum in Shadow of the Erdtree.

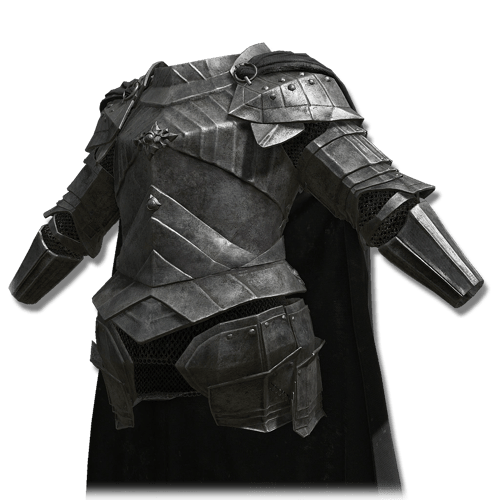
Solitude Set — Best Defensive Option

Solitude Set

The Solitude Set provides excellent Damage Negation and very high Poise.

This is particularly useful for Dragon Communion because many of your strongest Incantations require you to remain stationary through lengthy animations. While armor won't make careless casting safe, additional Poise and defenses can make the build considerably more forgiving.

The complete set is extremely heavy, so use individual pieces as necessary to remain at Medium Equip Load.

Location: Dropped by the Blackgaol Knight in the Western Nameless Mausoleum in Gravesite Plain.

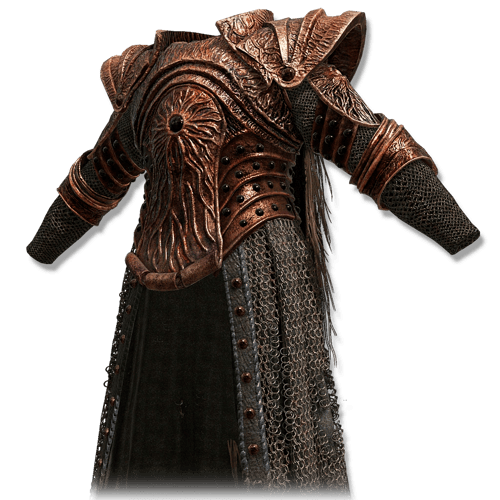
Crucible Tree Set — Strong Base-Game Defensive Option

Crucible Tree Set — Strong Base-Game Defensive Option

The Crucible Tree Set provides strong defenses and Poise without requiring access to Shadow of the Erdtree.

It is a useful option for a Dragon Communion caster that wants heavier protection, particularly during the later parts of the base game.

The set doesn't directly improve Dragon Communion Incantations, so its value comes primarily from survivability while casting.

Location: Found in a chest behind Crucible Knight Siluria in Deeproot Depths.

Choosing Your Armor

For Dragon Communion builds, there are essentially two approaches:

  • Maximum Dragon Communion Damage: Rock Heart Dragon Form
  • Balanced Setup: Medium armor with good defenses and Poise
  • Maximum Conventional Offense: Rakshasa pieces
  • Maximum Defense: Solitude or other high-defense armor

The Rock Heart is the standout DLC addition because it directly supports the Incantations we're building around. However, its lack of conventional armor makes it much less forgiving.

For general progression, prioritize Medium Equip Load and survivability. Dragon Communion already deals enormous damage; being able to safely finish your cast is often more valuable than squeezing another small damage bonus out of your equipment.

Best Talismans for Dragon Builds

Dragon Communion Incantations deal enormous damage, but their high FP costs and long casting animations make Talisman selection especially important. The best options either increase Incantation damage, strengthen specific Dragon attacks, or make the build more comfortable to play.

Roar Medallion — Best Dragon Breath Talisman

Roar Medallion — Best Dragon Breath Talisman

The Roar Medallion is one of the strongest Talismans for a Dragon Communion build because it increases the damage of breath and roar attacks by 10%.

This bonus applies to many of the Dragon Communion Incantations used throughout the build, making it particularly effective when relying heavily on breath attacks such as Rotten Breath, Dragonice, and their stronger variants.

Because it is available extremely early, this should be one of the first Talismans you obtain for the build.

Location: Dropped by the Stonedigger Troll in Limgrave Tunnels.

Flock's Canvas Talisman — Best General Incantation Talisman

Flock's Canvas Talisman

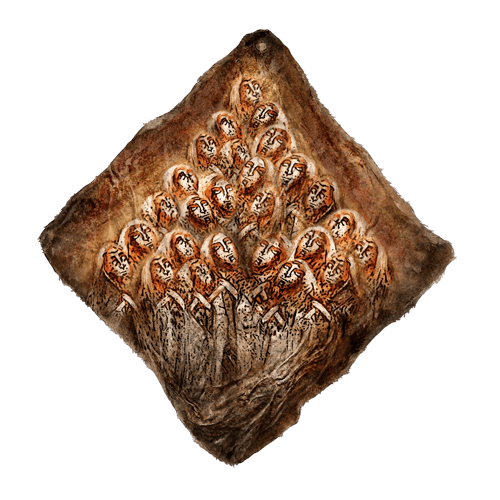
The Flock's Canvas Talisman increases the potency of Incantations by 8%.

Unlike the Roar Medallion, this bonus isn't restricted to a specific type of Dragon Incantation. It improves your entire spell selection, including breath attacks, Dragonmaw, Dragonclaw, and other offensive Incantations.

This makes it one of the safest all-around damage Talismans for any Dragon Communion setup.

Location: Obtained from Gowry near the end of Millicent's questline.

Faithful's Canvas Talisman — Early Incantation Damage Option

Faithful's Canvas Talisman

The Faithful's Canvas Talisman increases Incantation damage by 4%.

Its bonus is smaller than Flock's Canvas Talisman, but it can be obtained much earlier and provides an easy source of additional damage while progressing through the game.

The two Canvas Talismans can also be equipped together if you want to maximize Incantation damage.

Location: Found in Sellia Crystal Tunnel in Caelid.

Godfrey Icon — Best for Charged Dragon Incantations

Godfrey Icon

The Godfrey Icon increases the damage of charged spells and Skills by 15%.

Several Dragon Communion breath attacks can be extended by holding the cast button, allowing the Godfrey Icon to significantly improve their damage when you have a large enough opening for a full cast.

It is less useful for Dragon Incantations that cannot benefit from charging, so whether you equip it depends on your chosen spell loadout.

Location: Dropped by Godefroy the Grafted in the Golden Lineage Evergaol.

Blue Dancer Charm — High-Risk Damage Option

Blue Dancer Charm — High-Risk Damage Option

The Blue Dancer Charm increases Physical damage when your Equip Load is extremely low.

This has particularly strong synergy with Dragonmaw and Dragonclaw, which deal Physical damage, and becomes much easier to take advantage of when using the Rock Heart Dragon Form because you aren't wearing conventional armor.

However, the bonus decreases rapidly as your Equip Load increases. It should therefore only be used on a deliberately lightweight setup rather than a normal armored Dragon caster.

Location: Dropped by the Guardian Golem in Highroad Cave.

Primal Glintstone Blade — Best FP Efficiency Option

Primal Glintstone Blade — Best FP Efficiency Option

The Primal Glintstone Blade reduces the FP cost of spells by 25%, but also reduces maximum HP.

Dragon Communion Incantations are among the most FP-intensive spells in the game, making the FP reduction extremely noticeable during longer encounters.

The HP penalty is significant, however, especially because long Dragon casting animations already leave you vulnerable. This makes it a strong but risky option rather than a mandatory Talisman.

Location: Found in the Mountaintops of the Giants, inside a chest in Stargazer's Ruins.

Dragoncrest Greatshield Talisman — Best Defensive Option

Dragoncrest Greatshield Talisman — Best Defensive Option

The Dragoncrest Greatshield Talisman significantly reduces incoming Physical damage in PvE.

Dragon Communion casters are often vulnerable while performing long breath or transformation animations. Additional Physical Damage Negation can therefore be extremely valuable when fighting aggressive bosses.

It doesn't improve your damage directly, but surviving an attack that would otherwise interrupt or kill you can be more valuable than another offensive bonus.

Location: Found in Elphael, Brace of the Haligtree.

Choosing Your Talismans

For a general Dragon Communion setup, a strong combination is:

Roar Medallion + Flock's Canvas Talisman + Godfrey Icon + flexible fourth slot

Use the fourth slot depending on what you need:

  • Faithful's Canvas Talisman for additional general Incantation damage.
  • Primal Glintstone Blade for better FP efficiency.
  • Dragoncrest Greatshield Talisman for survivability.
  • Blue Dancer Charm for specialized lightweight Physical Dragon setups.

Your ideal combination also depends on the Incantations you actually use. A breath-heavy build benefits much more from Roar Medallion, while a Dragonmaw-focused setup should prioritize bonuses that actually affect its Physical damage.

Best Flask of Wondrous Physick for Dragon Builds

Dragon Communion builds benefit heavily from the Flask of Wondrous Physick, especially when preparing for a large burst-damage window. Since Dragon Incantations can deal several different damage types, your ideal Crystal Tears can change depending on which Incantations you plan to use.

Cerulean Hidden Tear — Best for Expensive Dragon Incantations

Cerulean Hidden Tear — Best for Expensive Dragon Incantations

The Cerulean Hidden Tear temporarily eliminates FP consumption, making it extremely useful for Dragon Communion Incantations with high FP costs.

This allows you to commit to an extended breath attack without immediately draining your FP bar, making it particularly valuable at the beginning of boss encounters or during long openings.

Location: Dropped by the Ulcerated Tree Spirit at the Minor Erdtree on Mt. Gelmir.

Opaline Hardtear — Best Defensive Option

Opaline Hardtear — Best Defensive Option

The Opaline Hardtear temporarily increases all Damage Negation.

Dragon Communion Incantations frequently lock you into long animations, so additional protection can help reduce the punishment when you mistime a cast or cannot avoid an incoming attack.

It is one of the safest general-purpose Crystal Tears for the build and works regardless of which Dragon Incantations you have equipped.

Location: Dropped by the Putrid Avatar at the Minor Erdtree in Dragonbarrow.

Flame-Shrouding Cracked Tear — Best for Fire Dragon Incantations

Flame-Shrouding Cracked Tear — Best for Fire Dragon Incantations

The Flame-Shrouding Cracked Tear temporarily increases Fire damage, making it ideal when using Dragon Communion Incantations that deal Fire damage.

It is particularly useful when you know an upcoming boss is vulnerable to Fire and plan to build your spell selection around exploiting that weakness.

Location: Dropped by the Erdtree Avatar at the Minor Erdtree in Caelid.

Magic-Shrouding Cracked Tear — Best for Magic Dragon Incantations

Magic-Shrouding Cracked Tear — Best for Magic Dragon Incantations

The Magic-Shrouding Cracked Tear increases Magic damage and is useful when your loadout focuses on Incantations such as Dragonice, Borealis's Mist, or Ghostflame Breath.

This is especially useful against enemies where Magic or Frostbite provides a better matchup than your Fire-based alternatives.

Location: Dropped by the Erdtree Avatar at the Minor Erdtree in northeastern Liurnia.

Bloodsucking Cracked Tear — Best DLC High-Risk Damage Option

Bloodsucking Cracked Tear — Best DLC High-Risk Damage Option

The Bloodsucking Cracked Tear provides a substantial increase to your damage but continuously drains HP while active.

Dragon Communion already excels at producing enormous burst damage, so the Tear can push an aggressive setup even further. However, the HP drain combined with the vulnerability of long Dragon casts makes this a high-risk option.

It works best when you are confident that you can create a large damage window and finish the encounter quickly.

Location: Obtained after defeating the Furnace Golem at the Ruins of Unte in Shadow of the Erdtree.

Recommended Combinations

For general exploration and difficult encounters:

  • Cerulean Hidden Tear + Opaline Hardtear

For maximum Fire damage:

  • Cerulean Hidden Tear + Flame-Shrouding Cracked Tear

For Magic/Frostbite-focused encounters:

  • Cerulean Hidden Tear + Magic-Shrouding Cracked Tear

For maximum DLC burst damage:

  • Bloodsucking Cracked Tear + the appropriate elemental damage Tear

The main advantage of the Flask is its flexibility. Change your Crystal Tears to match the Dragon Incantations and damage type you plan to use, rather than relying on the same combination for every encounter.

Dragon Build Playstyle Tips

Dragon Communion builds are capable of dealing extremely high burst damage, but their long casting animations make positioning and timing more important than simply maximizing damage. The strongest Dragon builds know when to commit to a full breath attack and when a faster Incantation or melee attack is the safer choice.

Choose the Right Dragon Incantation for the Enemy

One of the biggest advantages of Dragon Communion is access to multiple damage types and status effects.

Don't use the same Dragon Breath against every boss. Adjust your spell selection based on the encounter:

  • Fire — Dragonfire, Agheel's Flame
  • Magic/Frostbite — Dragonice, Borealis's Mist, Ghostflame Breath
  • Scarlet Rot — Rotten Breath, Ekzykes's Decay
  • Physical — Dragonmaw, Dragonclaw
  • Utility/Debuff — Greyoll's Roar

Taking advantage of an enemy's weakness can provide a much larger benefit than simply using whichever Incantation has the highest theoretical damage.

Don't Force Long Casts

Dragon Breath Incantations can deal enormous damage when fully extended, but they also leave you vulnerable for a long period.

Against aggressive bosses, a shorter cast that safely connects is better than attempting a full breath and getting interrupted.

Save extended breath attacks for large openings, stance breaks, phase transitions, or situations where another player or Spirit Ash is holding the enemy's attention.

Use Greyoll's Roar Before Your Main Damage

Greyoll's Roar is an excellent way to begin difficult encounters because it reduces enemy damage while also lowering their Damage Negation.

Once the debuff is active, follow it with the Dragon Incantation that best matches the enemy's weakness.

This gives Dragon Communion builds a simple damage cycle:

Apply Greyoll's Roar → identify/create an opening → cast your main Dragon Incantation → reposition → repeat when necessary.

Apply Scarlet Rot Early

Against bosses vulnerable to Scarlet Rot, Rotten Breath or Ekzykes's Decay can provide enormous value when used early in the fight.

Once Scarlet Rot activates, stop trying to repeatedly apply it and switch to your other damage options while the status continues ticking in the background.

This is particularly effective against high-HP bosses where the damage-over-time effect has enough time to generate significant value.

Use Frostbite as a Damage Setup

Dragonice, Borealis's Mist, and Ghostflame Breath can apply Frostbite, dealing immediate damage when the status triggers and temporarily reducing the enemy's Damage Negation.

This creates an excellent opportunity to follow with your strongest Dragon attacks while the target is affected.

You don't need to build the entire character around Frostbite for it to provide significant value.

Use Dragonmaw for Shorter Damage Windows

Not every opening is long enough for a breath attack.

Dragonmaw provides powerful concentrated Physical damage and is particularly useful when you have enough time for one major attack but not enough time to commit to an extended breath safely.

It also gives the build a strong alternative against enemies with high elemental resistances.

Manage Your FP Carefully

Dragon Communion Incantations can consume FP extremely quickly, particularly when extending breath attacks.

Avoid wasting large amounts of FP on weak enemies that could easily be killed with your melee weapon. Your sidearm exists specifically for situations where using a Dragon Incantation would be unnecessarily expensive.

During boss fights, use Cerulean Flasks and the Cerulean Hidden Tear strategically rather than waiting until your FP bar is empty.

Don't Ignore Stamina

Dragon Incantations consume Stamina as well as FP, and long breath attacks can leave you with very little Stamina remaining once the animation ends.

Avoid completely exhausting your Stamina unless you're confident the enemy cannot immediately retaliate.

Leaving enough Stamina to dodge after your cast can be the difference between safely repositioning and taking an entire boss combo.

Position Before You Cast

Because many Dragon Communion Incantations have long startup animations, good positioning should happen before you press the cast button.

Use distance, terrain, boss recovery animations, stance breaks, or another target drawing aggression to create your opening first.

Don't begin a long cast and hope the enemy gives you enough time to finish it.

Take Advantage of Your Range and AoE

Dragon Breath Incantations aren't limited to single targets. Their large area of effect makes them particularly effective against groups of enemies and large bosses.

Against groups, position yourself so the breath travels through multiple targets rather than focusing on one enemy.

Against very large bosses, staying at the correct distance can allow more of the breath to connect consistently.

Use Your Melee Weapon When Appropriate

Dragon Communion builds are still perfectly capable of fighting in melee.

Against normal enemies, using Reduvia, an Occult weapon, or another Arcane-scaling sidearm is often faster and considerably more FP-efficient than casting a Dragon Breath.

Save your strongest Incantations for enemies where their damage, range, status effects, or AoE actually provide an advantage.

Adapt Your Physick to the Encounter

Your Flask of Wondrous Physick doesn't need to remain identical throughout the entire game.

If you're primarily using Fire breaths, equip the Flame-Shrouding Cracked Tear. For Magic and Frostbite options, use the Magic-Shrouding Cracked Tear. If survivability is the problem, use the Opaline Hardtear instead.

Dragon Communion's versatility is one of its greatest strengths, and your Physick should reinforce that flexibility.

Rock Heart Is Powerful, but Risky

The Rock Heart provides an excellent damage bonus to Dragon Communion Incantations, but Dragon Form means giving up conventional armor.

This creates a much more fragile version of the build. The additional damage is excellent when you're comfortable with an encounter, but traditional armor can be considerably more forgiving while learning difficult bosses.

Maximum damage isn't always the best setup if you cannot safely complete your casts.

Don't Try to Equip Every Dragon Incantation

Dragon Communion offers many different spells, but filling every Memory Slot with slightly different breath attacks isn't necessary.

Instead, build a compact loadout that covers several situations:

One status option → one elemental option → one Physical burst option → Greyoll's Roar → encounter-specific spells

Switch your Incantations when necessary rather than trying to prepare for every possible situation simultaneously.

Dragon Communion builds reward preparation and timing. Exploit enemy weaknesses, create a safe opening before committing to long casts, and use the enormous variety of Dragon Incantations to adapt your damage to each encounter.

Table of Contents

1. Overview2. Pros and Cons3. Dragon Communion Seal4. Starting Class, Attribute Leveling and Distribution Dragon Communion Build Bayle Incantation Alternative5. Best Dragon Communion Incantations Rotten Breath — Best Early Dragon Incantation Dragonmaw — Best Physical Burst Damage Dragonice — Best Early Frostbite Option Ekzykes's Decay — Best Advanced Scarlet Rot Breath Greyoll's Roar — Best Dragon Utility Incantation Ghostflame Breath — Best DLC Frostbite Breath Bayle's Tyranny — Best DLC AoE Burst Bayle's Flame Lightning — Best DLC Single-Target Option6. Best Early-Game Weapons Ripple Crescent Halberd — Best Arcane Sidearm Occult Uchigatana — Best Customizable Option Reduvia — Best Lightweight Bleed Option Regalia of Eochaid — Best Early Arcane Unique Weapon Flowerstone Gavel — Best DLC Dragon-Themed Weapon Bloodfiend's Fork — Best DLC Infusible Arcane Option Honorable Mentions7. Best Armor for Dragon Builds Rock Heart — Best Dragon Communion Damage Option Priestess Heart — Alternative Dragon Form Rakshasa Set — Best General Offensive Armor Solitude Set — Best Defensive Option Crucible Tree Set — Strong Base-Game Defensive Option Choosing Your Armor8. Best Talismans for Dragon Builds Roar Medallion — Best Dragon Breath Talisman Flock's Canvas Talisman — Best General Incantation Talisman Faithful's Canvas Talisman — Early Incantation Damage Option Godfrey Icon — Best for Charged Dragon Incantations Blue Dancer Charm — High-Risk Damage Option Primal Glintstone Blade — Best FP Efficiency Option Dragoncrest Greatshield Talisman — Best Defensive Option Choosing Your Talismans9. Best Flask of Wondrous Physick for Dragon Builds Cerulean Hidden Tear — Best for Expensive Dragon Incantations Opaline Hardtear — Best Defensive Option Flame-Shrouding Cracked Tear — Best for Fire Dragon Incantations Magic-Shrouding Cracked Tear — Best for Magic Dragon Incantations Bloodsucking Cracked Tear — Best DLC High-Risk Damage Option Recommended Combinations10. Dragon Build Playstyle Tips

See More

Elden Ring Dragon Build - Stats, Weapons, Skills & More
Updated on Aug 22, 2026
Elden Ring Scarlet Rot Build - Stats, Weapons, Skills & More
Updated on Aug 22, 2026
Elden Ring Faith Build - Stats, Weapons, Skills & More
Updated on Aug 22, 2026
Elden Ring - Best Armor Sets
Updated on Aug 22, 2026
Elden Ring Bleed Build - Stats, Weapons, Skills & More
Updated on Aug 22, 2026

Like our guides?

Add Mobalytics as a preferred source on Google!