menu
MobalyticsUse your favourite features in-game with our Desktop App
Gamebase Guide

Elden Ring Strength Build - Stats, Weapons, Skills & More

Updated on Aug 22, 2026
Aug 22, 2026

Overview

Strength builds specialize in high physical damage, strong stance damage, and powerful weapons that can stagger even the toughest enemies. While Strength is commonly associated with massive Greatswords and Colossal Weapons, it also works extremely well with faster weapons such as Fists, Hammers, Great Hammers, and several Polearms.

One of the biggest advantages of Strength is two-handing. Two-handing most weapons effectively increases your Strength by 50% for both weapon requirements and damage scaling. This allows Strength builds to get excellent damage without always needing to invest as heavily into their main damage stat.

Strength builds are particularly good at using Charged Heavy Attacks, Jump Attacks, Guard Counters, and powerful weapon Skills to break an enemy's stance. This can create frequent opportunities for Critical Hits and makes Strength especially effective against bosses and heavily armored enemies.

The archetype is strong throughout the entire game and has excellent weapon choices in both the base game and Shadow of the Erdtree.

Pros and Cons

Pros

  • Excellent raw Physical damage and high damage per hit.
  • Some of the best stance-breaking weapons in the game.
  • Two-handing effectively provides 1.5x Strength for requirements and most weapon scaling.
  • Large variety of weapon types, ranging from fast Fist weapons to Colossal Weapons.
  • Excellent synergy with Charged Heavy Attacks, Jump Attacks, and Guard Counters.
  • Strong options available throughout the entire game.

Cons

  • Many Strength weapons have slower attack and recovery animations, making missed attacks easier for bosses to punish.
  • Heavy weapons and armor can require significant Endurance to maintain Medium Equip Load.
  • Large weapons generally consume more Stamina per attack, making stamina management important.
  • Slow weapons have fewer opportunities to attack against very aggressive bosses, requiring you to learn which openings are safe.
  • Some powerful Strength weapons have high Strength requirements, particularly when you want to use them one-handed.

All Elden Ring Guides

Check Out Our Other Elden Ring Builds and Guides

Starting Class, Attribute Leveling and Distribution

Attribute

Starting Stats

LV25

LV50

LV100

LV150

Vigor

14

20

30

40

60

Endurance

12

15

20

25

30

Strength

16

27

40

60

80

Dexterity

9

9

12

12

12

Mind

9

9

9

12

15

Intelligence

7

7

7

7

7

Faith

8

8

8

8

8

Arcane

11

11

11

11

11

This leveling path is designed for a primarily Strength-focused build. Weapons that require significant Dexterity, Intelligence, Faith, or Arcane investment will require a different stat distribution.

Early in the game, prioritize Strength alongside Vigor rather than investing everything into damage. Two-handing most weapons effectively increases your Strength by 50%, allowing you to meet higher Strength requirements and deal more damage without immediately investing a large number of levels into Strength.

By around level 50, aim for roughly 30 Vigor and 40 Strength while investing enough Endurance to comfortably use your weapon and armor. Dexterity should generally only be increased when it is required by a weapon you intend to use.

Around level 100, 40 Vigor and 60 Strength provide an excellent balance between survivability and damage. From here, continue increasing Vigor and Strength while adding Endurance as needed to maintain Medium Equip Load with heavier equipment.

At level 150, 60 Vigor and 80 Strength are strong endgame targets for a dedicated Strength build. Any remaining levels can be invested into Endurance, Mind, or secondary attributes depending on your weapon and how frequently you use weapon Skills.

Two-Handing

Two-handing most weapons multiplies your effective Strength by 1.5 for weapon requirements and damage scaling. For example, a weapon requiring 40 Strength can be two-handed with 27 Strength. This bonus does not apply in exactly the same way to every paired weapon or weapon Skill. 

Best Early-Game Weapons for Strength Builds

Greatsword — Best Early Heavy Weapon

Greatsword

The Greatsword is one of the best weapons for starting and eventually completing a Strength build. Despite its name, it is actually a Colossal Sword and offers excellent range, high Physical damage, and strong stance damage.

When given the Heavy affinity, the Greatsword scales exceptionally well with Strength and remains one of the strongest pure Physical options even at high levels. Its customizable Ash of War also allows you to adapt it throughout your playthrough with options such as Lion's Claw, Giant Hunt, or Royal Knight's Resolve.

Its high weight and relatively slow attacks require some stamina and Equip Load management, but few weapons offer such a complete package for a dedicated Strength character.

Location: Found inside a carriage in Caelid, northwest of the Caelem Ruins Site of Grace.

Requirements: Strength - 31 / Dexterity - 12

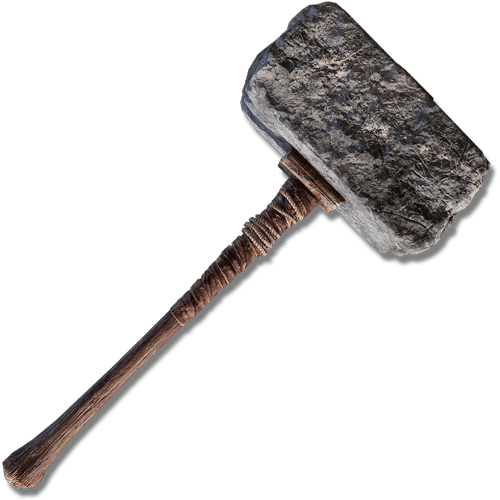
Brick Hammer — Pure Strength

Brick Hammer

The Brick Hammer is an excellent early choice for players who want to focus almost entirely on Strength. It has very strong Strength scaling when given the Heavy affinity and deals excellent stance damage with its Heavy Attacks.

As a Great Hammer, it is considerably smaller than a Colossal Weapon while still being highly effective at staggering enemies. Its Strike damage is also particularly useful against heavily armored and stone enemies.

The main drawback is its relatively short reach, but its combination of raw damage and stance damage makes it a great introduction to the Strength playstyle.

Location: Found inside Stormveil Castle, accessible through the side path after entering the castle.

Requirements: Strength - 31

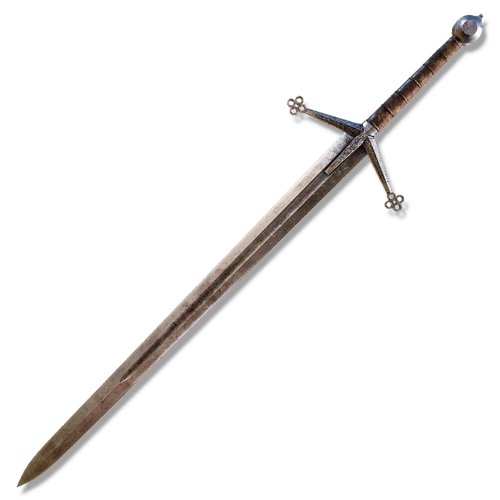
Claymore — Best Versatile Option

Claymore

The Claymore is an excellent choice for players who want a Strength weapon without committing to the slower moveset of Colossal Swords and Great Hammers.

It has a versatile Greatsword moveset with sweeping Light Attacks and an excellent thrusting Heavy Attack. That thrust gives the Claymore access to Pierce damage and counter-hit damage while retaining the stagger potential and range of a Greatsword.

It can also change its affinity and Ash of War, making the Heavy Claymore a flexible weapon that can comfortably remain useful for the entire game.

Location: Found in a chest inside Castle Morne in the Weeping Peninsula.

Requirements: Strength - 16 / Dexterity - 13

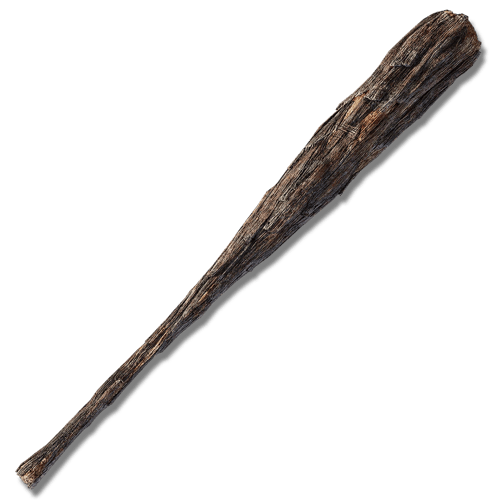
Large Club — Easy Early Bonk

Large Club

The Large Club is one of the easiest heavy Strength weapons to obtain during the opening hours of Elden Ring. It deals Strike damage and has strong Heavy Attacks capable of dealing significant stance damage.

Its relatively simple moveset makes it a good beginner weapon for learning the fundamentals of a Strength build: wait for an opening, land a powerful Heavy or Jumping Attack, and pressure the enemy's stance.

It can also change its Ash of War and affinity, allowing Heavy affinity to improve its Strength scaling as your build develops.

Location: Found on the ground near the cliffs south of the Forlorn Hound Evergaol in Limgrave.

Requirements: Strength - 22

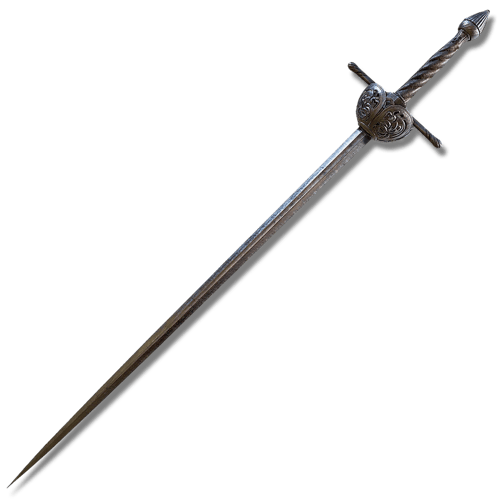
Great Épée — Fast Strength Alternative

Great Épée

The Great Épée is a Heavy Thrusting Sword obtainable almost immediately in Limgrave. While Heavy Thrusting Swords aren't traditionally associated with Strength, giving it the Heavy affinity turns it into a strong alternative for players who prefer faster and safer attacks.

Its thrusting attacks deal Pierce damage and have excellent reach, allowing it to take advantage of counter-hit damage. It can also attack while guarding with a shield, giving Strength builds access to a very different playstyle from the usual two-handed heavy weapon setup.

Location: Found in a chest at an enemy camp northeast of the Agheel Lake South Site of Grace. 

Requirements: Strength - 15 / Dexterity - 16

Best Strength Weapons to Build Around

Star Fist — Charged Heavy / Stance Break
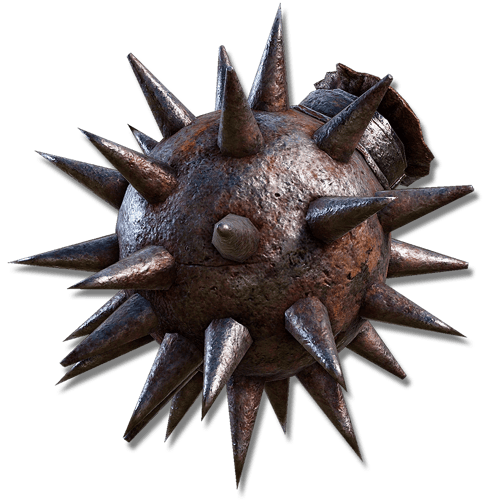
Star Fist

The Star Fist is one of the strongest PvE weapons for a dedicated Strength build despite its small size. When given the Heavy affinity, it gains excellent Strength scaling while retaining its innate Blood Loss buildup.

Its biggest strength is its extremely fast charged Heavy Attack. Compared with most heavy Strength weapons, the Star Fist can repeatedly land charged attacks during openings that would normally only allow a single hit. These attacks deal excellent stance damage and can rapidly stagger bosses.

Its fast paired moveset, low weight, Bleed buildup, and exceptional charged attacks make it one of the highest-performing Strength weapons in PvE.

Location: Found on a corpse near the Colosseum in Leyndell, Royal Capital.

Requirements: Strength - 12 / Dexterity - 8

Greatsword — Colossal Strength
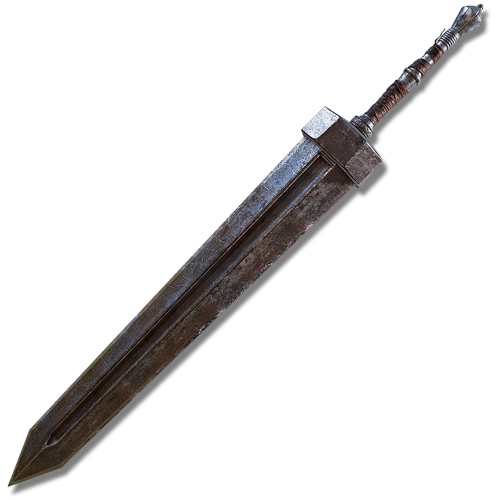
Greatsword

The Greatsword deserves to appear here again because, unlike many early-game weapons, it doesn't eventually need replacing.

A Heavy Greatsword combines excellent Strength scaling with huge range, high stance damage, and access to some of the strongest Ashes of War available to heavy weapons.

Lion's Claw, Savage Lion's Claw, Giant Hunt, Cragblade, and Royal Knight's Resolve can all drastically change how the weapon plays, allowing it to support several different Strength setups.

Its combination of customization and raw performance makes it one of the safest weapons around which to build an entire Strength character.

Requirements: Strength - 31 / Dexterity - 12

Great Stars — Strength / Bleed / Sustain
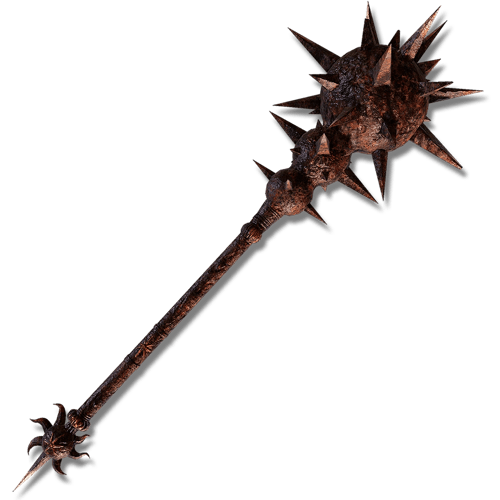
Great Stars

Great Stars is one of the most versatile Great Hammers in the game. It deals Strike damage, has innate Blood Loss buildup, and restores 1% of maximum HP whenever it hits an enemy.

The healing effect also activates from individual hits caused by compatible weapon Skills, creating strong synergy with multi-hit Ashes of War. Combined with the Great Hammer's excellent stance damage, this gives Great Stars offense, Bleed, survivability, and stance breaking in a single weapon.

It can also change its affinity and Ash of War, making Heavy an excellent choice for dedicated Strength builds.

Location: One copy is obtained from a carriage in Altus Plateau, with a second available through Magnus the Beast Claw's invasion.

Requirements: Strength - 22 / Dexterity - 12

Giant-Crusher — Maximum Bonk
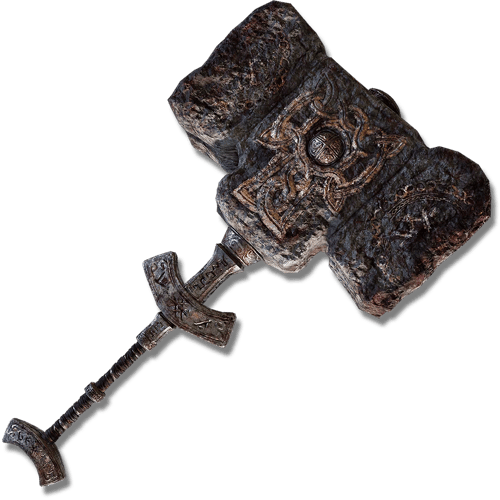
Giant-Crusher

The Giant-Crusher is the quintessential pure Strength weapon. It has a massive Strength requirement, enormous Physical damage potential, and some of the strongest charged attacks available to a melee build.

Its unique Heavy Attack performs a forward somersaulting slam, dealing tremendous damage and stance damage when an opening is available.

The Giant-Crusher is particularly effective with effects that amplify individual attacks, such as Royal Knight's Resolve, Charged Attack bonuses, and the Axe Talisman.

The obvious trade-offs are its enormous weight, stamina consumption, and slow moveset. It rewards players who understand boss openings rather than trying to attack continuously.

Location: Found in a carriage south of the Outer Wall Phantom Tree in Altus Plateau.

Requirements: Strength - 60

Nightrider Glaive — Strength Polearm
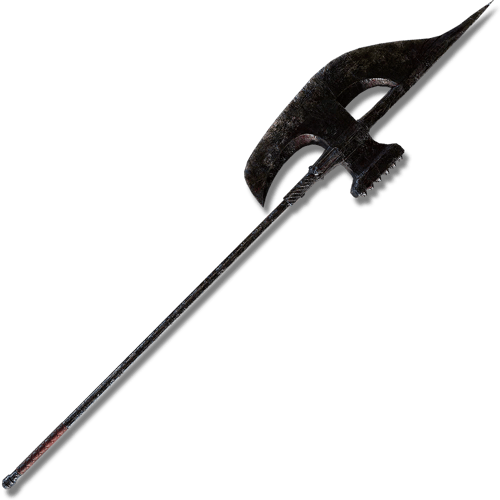
Nightrider Glaive

The Nightrider Glaive is an excellent choice for players who want the range of a Halberd without sacrificing pure Strength scaling. With Heavy affinity, it receives exceptional Strength scaling and deals strong Physical damage.

Its reach allows you to punish enemies from much farther away than weapons such as Star Fist, while its customizable Ash of War gives it access to options such as Giant Hunt and Sword Dance.

This makes it one of the best choices for a traditional pure Strength build that wants more speed and reach than a Colossal Weapon.

Location: Dropped by the Night's Cavalry between East Raya Lucaria Gate and Bellum Church at night.

Requirements: Strength - 26 / Dexterity - 10

Sword Lance — Strength / Pierce
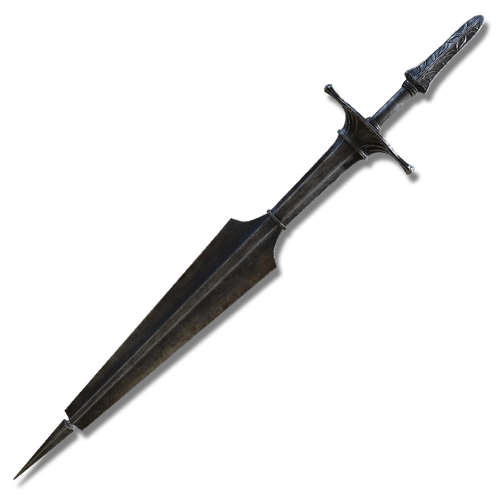
Sword Lance

The Sword Lance is one of the strongest weapons introduced in Shadow of the Erdtree for Strength builds. With Heavy affinity, it gains excellent Strength scaling while retaining the powerful Heavy Thrusting Sword moveset.

Its combination of high Physical damage, relatively fast thrusts, excellent reach, and Pierce counter damage makes it exceptionally effective against bosses. It is also fully infusible, allowing its Skill and affinity to be customized.

Location: Obtained by trading the Remembrance of the Wild Boar Rider after defeating Commander Gaius.

Requirements: Strength - 21 / Dexterity - 11

Greatsword of Solitude — Pure DLC Strength
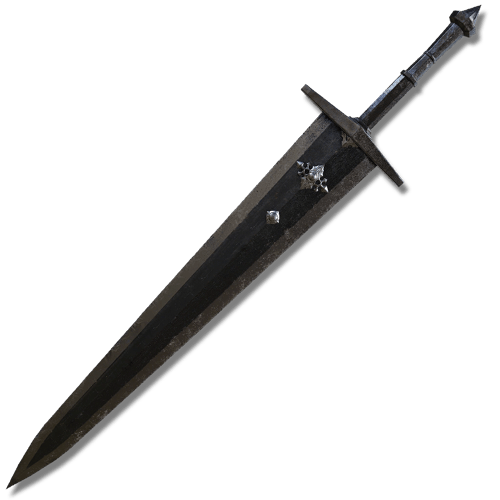
Greatsword of Solitude

The Greatsword of Solitude is an excellent dedicated Strength weapon with high Strength scaling, strong Physical damage, and unusually good guarding capabilities for a Greatsword.

Its Unique Skill, Solitary Moon Slash, launches a ranged arc before allowing a follow-up gap-closing slash. This gives a normally close-range Strength build both ranged pressure and mobility.

It is also available extremely early after entering Shadow of the Erdtree.

Location: Dropped by the Blackgaol Knight in the Western Nameless Mausoleum.

Requirements: Strength - 27 / Dexterity - 13

Ancient Meteoric Ore Greatsword — STR/ARC Colossal
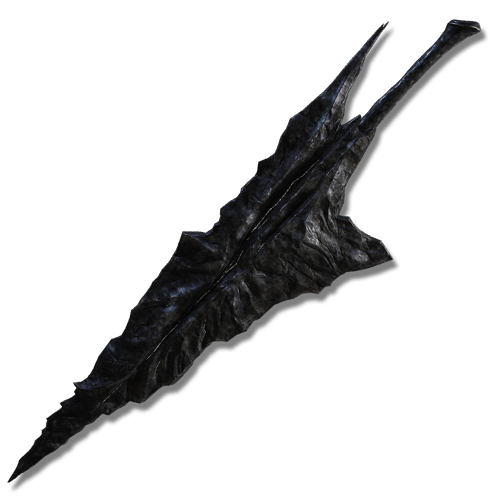
Ancient Meteoric Ore Greatsword

The Ancient Meteoric Ore Greatsword is a Colossal Sword that combines tremendous range and damage with significantly more mobility than most weapons in its class.

Its Unique Skill, White Light Charge, rapidly launches you toward an enemy with a thrust and can be followed by an explosive second attack. This gives a heavy weapon an excellent gap-closing option.

It requires Arcane alongside Strength and ultimately benefits from investing in both stats, so it isn't a completely pure Strength weapon. However, its high Strength requirement and excellent STR scaling still make it one of the DLC's standout heavy weapon options.

Location: Obtained from the altar at the end of Ruined Forge of Starfall Past.

Requirements: Strength - 35 / Dexterity - 10 / Arcane - 19 

Executioner's Greataxe — Critical / Stance Build
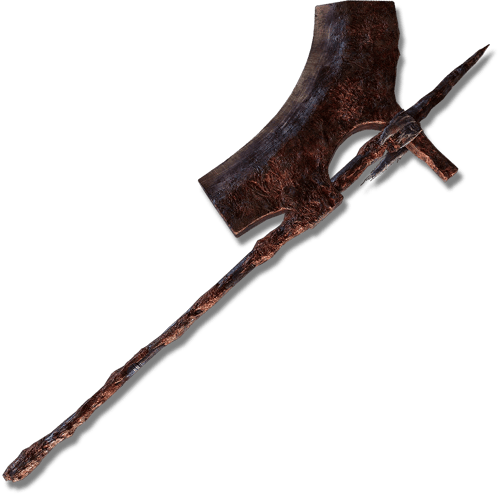
Executioner's Greataxe

The Executioner's Greataxe is an excellent Strength weapon for builds focused on stance breaking and Critical Hits. It combines high Physical damage with a 115 Critical modifier, allowing it to capitalize particularly well on the frequent stance breaks caused by heavy Strength attacks.

It can use Heavy affinity and customizable Ashes of War, allowing Skills such as Cragblade to further improve its stance-breaking capabilities.

Its main downside is availability, as obtaining it requires farming rather than simply picking it up from a guaranteed location.

Location: Dropped by Skeletons wielding the Executioner's Greataxe, including those found near the Church of the Plague in Caelid.

Requirements: Strength - 34 / Dexterity - 8

Honorable Mentions

These weapons didn't quite make our main recommendations, but are still excellent options for Strength builds and can easily become the centerpiece of a build depending on your preferred playstyle.

  • Rusted Anchor — A Great Axe that deals Pierce damage, allowing it to benefit from counter-hit bonuses and the Spear Talisman. Its high Strength scaling with Heavy affinity and customizable Ash of War make it an excellent pure Strength option.
  • Ruins Greatsword — A powerful Colossal Sword for STR/INT builds with extremely high Strength scaling. Its Unique Skill, Wave of Destruction, provides Strength builds with a powerful long-range attack, but its Intelligence requirement keeps it outside our main pure-STR recommendations.
  • Prelate's Inferno Crozier — An enormous Colossal Weapon with high damage, excellent stance-breaking potential, and customizable Ashes of War. It's extremely heavy, but a great alternative to the Giant-Crusher.
  • Black Steel Greathammer — One of the DLC's standout Guard Counter weapons. It has a unique follow-up effect when performing Guard Counters and is especially strong for STR/FAI builds using a Greatshield.
  • Serpent-Hunter — Despite being designed for the Rykard fight, Serpent-Hunter remains a surprisingly strong Strength weapon outside of it thanks to its high Physical damage and excellent Strength scaling. Its main limitation is being locked to its unique Skill.
  • Brick Hammer — One of our recommended early-game weapons that remains viable much later. Its excellent Strength scaling, Strike damage, and strong stance damage make it a perfectly good endgame weapon despite its short range.

Ashes of War

Strength builds benefit heavily from Ashes of War that increase stance damage, provide hyper armor, amplify individual heavy attacks, or compensate for the slower movesets of larger weapons.

For a pure Strength build, Heavy affinity will generally provide the best Physical damage, although the optimal affinity can vary depending on your weapon and attributes.

Lion's Claw

Lion's Claw is one of the best all-around Ashes of War for Strength builds. It launches the player forward into a powerful somersault attack that deals high damage and excellent stance damage.

More importantly, the Skill provides substantial hyper armor, making it difficult for most enemy attacks to interrupt you once the animation begins. This makes it especially effective on large weapons such as the Greatsword and other Great or Colossal weapons.

Its combination of damage, stance pressure, hyper armor, and relatively simple execution makes it an excellent choice throughout the game.

Affinity: Heavy

Location: Dropped by the Lion Guardian in Fort Gael, Caelid.

Savage Lion's Claw

Savage Lion's Claw is the Shadow of the Erdtree alternative to Lion's Claw. The initial attack performs a forward somersault, but an additional input allows you to follow it with another acrobatic strike.

The extended combo gives it excellent damage and stance-breaking potential when you have a large enough opening. However, regular Lion's Claw can still be preferable when you want a faster, simpler punish rather than committing to the longer sequence.

This makes the two versions alternatives rather than Savage Lion's Claw simply making the original obsolete.

Affinity: Heavy

Location: Obtained from a Teardrop Scarab in Gravesite Plain.

Cragblade

Cragblade coats your weapon in rock, temporarily increasing its Physical damage and stance damage.

This is particularly powerful on Strength builds because weapons such as Great Hammers and Colossal Weapons already deal large amounts of stance damage. Cragblade further improves their ability to stagger bosses, creating more opportunities for Critical Hits.

Unlike an attack Skill, its benefit remains active while you continue using your normal moveset, making it especially good for builds centered around Charged Heavy Attacks and Jump Attacks.

Affinity: Heavy

Location: Dropped by a Teardrop Scarab west of the Impassable Greatbridge in Caelid.

Royal Knight's Resolve

Royal Knight's Resolve massively increases the damage of your next attack for a short period, making it one of the best Ashes of War for builds centered around landing extremely powerful individual hits.

It synergizes particularly well with Charged Heavy Attacks from weapons such as the Giant-Crusher. Combining it with Charged Attack bonuses allows Strength builds to deal enormous damage when a boss provides enough time to prepare the attack.

Unlike Cragblade, this is about maximizing one attack rather than improving sustained stance pressure.

Affinity: Quality by default, but can be used with Heavy affinity with the appropriate Whetblade.

Location: Found in Volcano Manor.

Giant Hunt

Giant Hunt performs a powerful upward thrust that deals high damage and excellent stance damage while launching many smaller humanoid enemies into the air.

It is especially strong on larger Strength weapons because it gives them a relatively fast forward-moving thrust, helping compensate for their otherwise slower movesets.

On weapons capable of using it, Giant Hunt is one of the best choices for aggressive Strength builds that want both damage and crowd-control potential.

Affinity: Heavy

Location: Dropped by the Night's Cavalry near Bellum Church in Liurnia 

Prayerful Strike

Prayerful Strike is one of the best defensive Ashes of War for Strength builds. It performs a slow but powerful downward attack and restores a significant amount of HP when it successfully hits an enemy.

Because heavy Strength builds often have enough Poise or hyper armor to trade attacks, the healing can compensate for damage taken during those trades.

It works particularly well on Great Hammers such as Great Stars, where you can combine the weapon's innate healing with Prayerful Strike for an extremely durable melee setup.

Affinity: Sacred by default; Heavy can be selected with the appropriate Whetblade.

Location: Dropped by an invisible Teardrop Scarab near the Outer Wall Phantom Tree in Altus Plateau.

War Cry

War Cry temporarily increases your Physical damage and changes your charged Heavy Attacks into unique, more powerful attacks on compatible weapons.

This makes it particularly interesting for Strength builds centered around Heavy Attacks rather than weapon Skill spam. The altered Heavy Attacks can also benefit from effects specifically designed around roar-based attacks.

When building around War Cry, the Roar Medallion and Highland Axe can further improve the damage of its enhanced attacks.

Affinity: Heavy

Location: Purchased from Knight Bernahl.

Earthshaker

Earthshaker gives Strength builds a strong area-of-effect option. The Skill slams the weapon into the ground to create a shockwave around the player and can be followed with an additional Heavy Attack.

This is particularly useful when fighting groups of enemies, where many traditional Strength weapons can struggle due to their slow individual attacks.

For bosses, options such as Lion's Claw, Cragblade, or Royal Knight's Resolve will generally be more specialized, but Earthshaker gives the build excellent crowd control.

Affinity: Heavy

Location: Obtained from an invisible Teardrop Scarab in Altus Plateau.

Best Armor for Strength Builds

Strength builds often use heavier weapons and benefit from high Poise, making armor particularly important. However, wearing the heaviest armor available isn't always the best choice. You should generally aim to maintain Medium Equip Load while balancing Damage Negation, Poise, and any offensive bonuses your build can use.

Solitude Set — Best Overall Heavy Armor

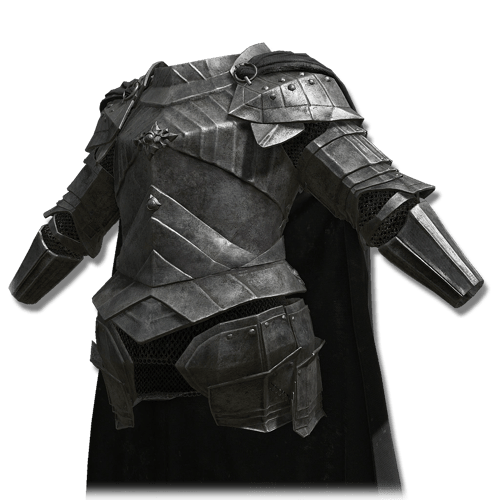
Solitude Set

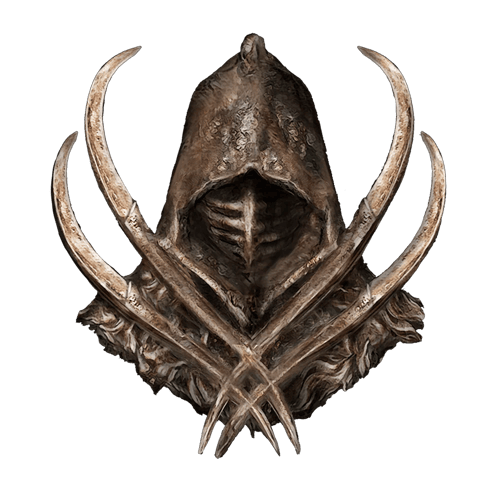
The Solitude Set is one of the best all-around armor sets for a Strength build. It provides extremely high Physical Damage Negation and 96 Poise, while being slightly lighter than extreme heavy sets such as Bull-Goat and Verdigris.

This makes it an excellent choice for aggressive Strength builds that want to avoid being staggered while using slower weapons without sacrificing quite as much Equip Load.

It is also available very early in Shadow of the Erdtree, making it an excellent armor upgrade when entering the DLC.

Location: Dropped by the Blackgaol Knight in the Western Nameless Mausoleum in Gravesite Plain.

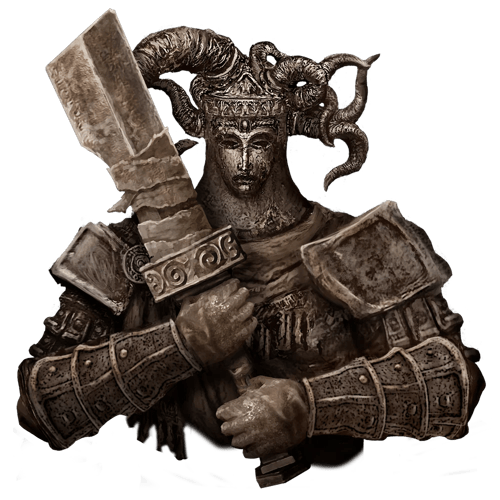
Bull-Goat Set — Maximum Physical Defense and Poise

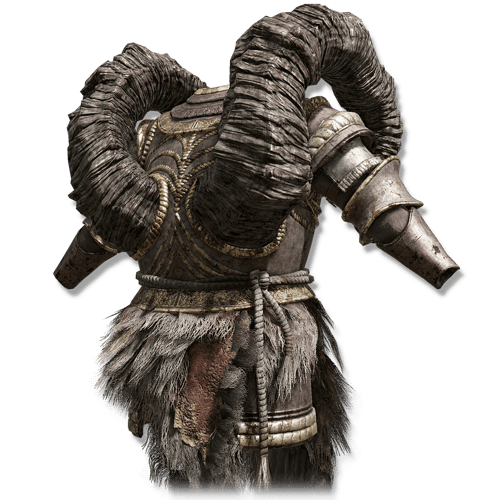
Bull-Goat Set

The Bull-Goat Set is one of the heaviest and most defensive armor sets in Elden Ring. It provides exceptional Physical Damage Negation and 100 Poise, making it ideal for builds that want to trade attacks or resist being interrupted.

This can work particularly well with slow Strength weapons, where being staggered during an attack can completely waste a large opening.

The downside is its enormous 63 Weight. You'll need considerable Endurance, Great-Jar's Arsenal, or other Equip Load bonuses if you want to combine it with a Colossal Weapon while maintaining Medium Load.

Location: Obtained by defeating Great Horned Tragoth during Patches' Volcano Manor assassination request.

Verdigris Set — Heavy Defensive Alternative

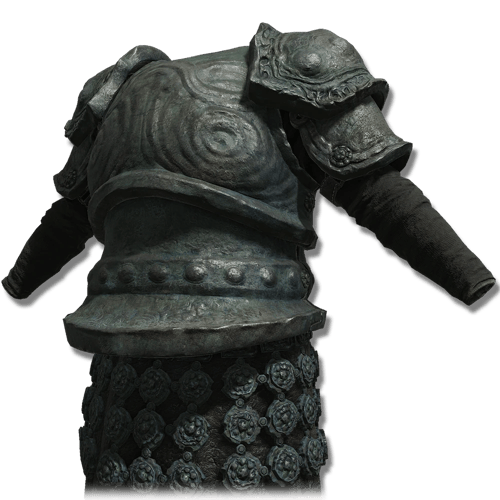
Verdigris Set

The Verdigris Set is another ultra-heavy option with 100 Poise and excellent Damage Negation and Resistances.

Compared with Bull-Goat, the differences in individual defenses make either set preferable depending on the damage you're facing. Verdigris is also slightly lighter, although both require substantial Equip Load investment.

For a general Strength build, you don't necessarily need this much armor. However, it is an excellent option for builds deliberately centered around maximum survivability and Poise.

Location: Obtained through Moore's questline in Shadow of the Erdtree. How and when you obtain it depends on your choices during his quest.

Rakshasa Set — Best Offensive Option

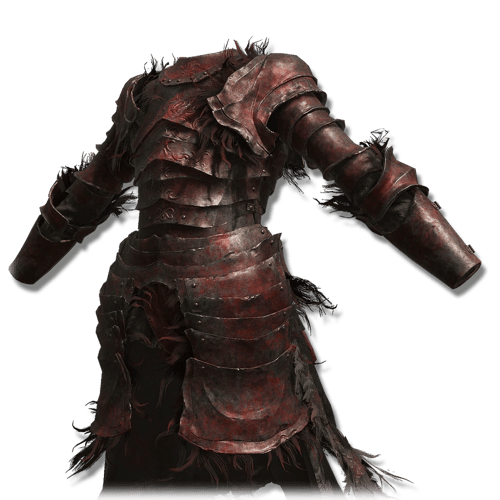
Rakshasa Set

The Rakshasa Set takes the opposite approach. Instead of maximizing defense, each piece increases the damage you deal by 2%, giving the complete set an 8% universal damage bonus.

This makes it excellent for Strength builds focused on maximizing damage, since the bonus isn't restricted to a particular weapon type or attack. It can benefit everything from Star Fist charged attacks to Greatsword swings.

The trade-off is lower effective protection than you would expect from armor of its weight. You also don't need the complete set: individual pieces can be mixed with heavier armor while retaining their respective damage bonuses.

Location: Dropped by Rakshasa in the Eastern Nameless Mausoleum in Shadow of the Erdtree.

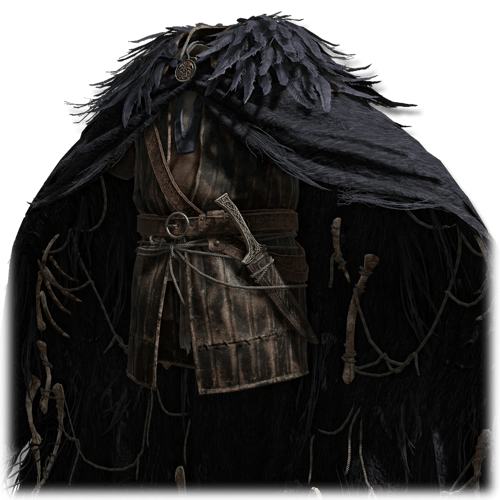
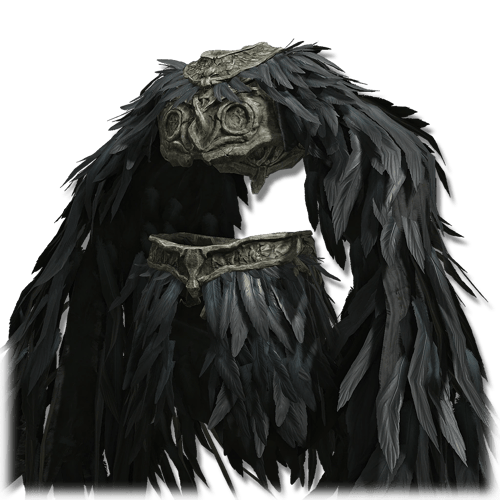
Raptor's Black Feathers / Gravebird's Blackquill Armor — Best for Jump Attacks

Raptor's Black FeathersGravebird's Blackquill Armor

For Strength builds centered around Jump Attacks, the chest slot can be used offensively instead.

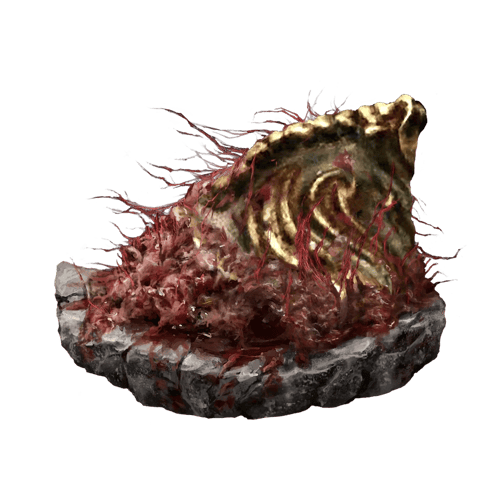
Raptor's Black Feathers increases melee Jump Attack damage by 10%. This can be combined with the Claw Talisman, making it particularly powerful with Great Hammers, Colossal Weapons, and powerstanced heavy weapons.

Gravebird's Blackquill Armor from Shadow of the Erdtree provides the same 10% Jump Attack bonus and serves as a DLC alternative.

Because the bonus only requires the chest piece, the other three armor slots can be filled with heavier equipment to recover some Poise and defenses.

Locations: Raptor's Black Feathers is found in Sage's Cave in Altus Plateau. Gravebird's Blackquill Armor is found near the Temple Town Ruins in Rauh Base.

Mixed High-Poise Armor - Best General Approach

You don't need to wear a complete matching armor set. Elden Ring generally doesn't provide bonuses simply for wearing every piece of a set, so mixing armor is often optimal.

For a Strength build, choose pieces that provide good Damage Negation and Poise while keeping your total Equip Load at Medium Load. Heavy chest and leg armor can provide most of your protection, while lighter helmets and gauntlets can help keep your weight under control.

Your ideal combination depends on your weapon weight and Endurance, so don't sacrifice Medium Load simply to equip a complete heavy set.

A Small Note About Poise

Poise helps prevent enemy attacks from interrupting your actions. However, many heavy weapons and Skills also gain hyper armor during their attack animations. High Poise is useful for aggressive Strength builds, but it doesn't mean you can safely ignore incoming damage.

Best Talismans for Strength Builds

Strength builds can benefit from several Talismans depending on whether you focus on two-handed attacks, Charged Heavy Attacks, Jump Attacks, weapon Skills, or defensive play. There is no single best setup, so choose Talismans that complement your weapon and primary attacks.

Two-Handed Sword Talisman — Best Overall

Two-Handed Sword Talisman

The Two-Handed Sword Talisman is one of the best general damage Talismans for Strength builds, increasing the damage of most regular attacks performed while two-handing a weapon by 15%.

Despite its name, the effect isn't restricted to Swords and can benefit many different weapon classes. This makes it an excellent match for weapons such as the Greatsword, Giant-Crusher, Nightrider Glaive, Greatsword of Solitude, and Ancient Meteoric Ore Greatsword.

It does not increase weapon Skill damage, so Skill-focused builds should combine or replace it with the Shard of Alexander.

Location: Found in a chest at the Temple Town Ruins in Shadow of the Erdtree.

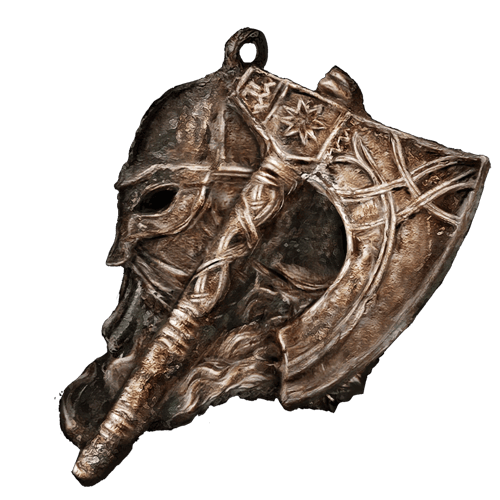
Axe Talisman — Best for Charged Heavy Attacks

Axe Talisman

The Axe Talisman increases the damage of fully charged Heavy Attacks by 12%, making it one of the best Talismans for Strength builds focused on stance breaking.

Weapons such as the Star Fist, Giant-Crusher, Great Hammers, and Colossal Weapons can deal enormous damage and stance damage with charged attacks. It also synergizes with the Spiked Cracked Tear, which provides another 15% Charged Attack damage increase.

Star Fist in particular is one of the best users because its charged Heavy Attack comes out extremely quickly.

Location: Found in a cellar in the Mistwood Ruins in Limgrave.

Shard of Alexander — Best for Weapon Skills

Shard of Alexander

The Shard of Alexander increases weapon Skill damage by 15%.

This is particularly strong when your build relies heavily on Skills such as Lion's Claw, Savage Lion's Claw, Giant Hunt, Solitary Moon Slash, White Light Charge, or other high-damage attacks.

Unlike many specialized Talismans, Shard of Alexander doesn't care about your weapon class or damage type, making it one of the safest offensive choices for Skill-heavy Strength builds.

Location: Obtained at the end of Iron Fist Alexander's questline in Crumbling Farum Azula. Its 15% Skill boost is also documented for individual weapon Skills.

Claw Talisman — Best for Jump Attacks

Claw Talisman

The Claw Talisman increases Jump Attack damage by 12%.

Jumping Heavy Attacks are particularly useful for Strength builds because heavy weapons can deal excellent damage and stance damage while also allowing you to close some distance during the attack.

It becomes even stronger when combined with Raptor's Black Feathers or Gravebird's Blackquill Armor, making it an excellent choice for builds centered around repeated Jump Attacks.

Location: Found on a tower in Stormveil Castle.

Two-Headed Turtle Talisman — Best for Stamina

Two-Headed Turtle Talisman

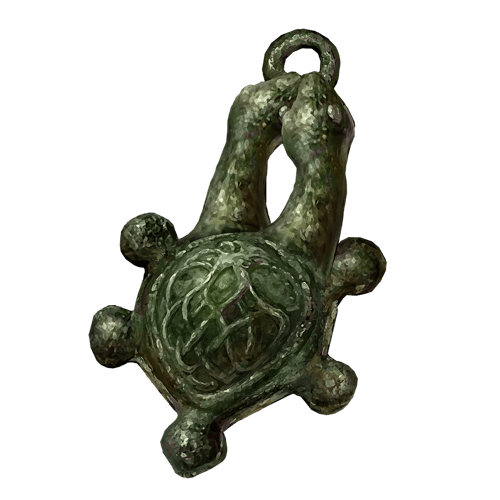
The Two-Headed Turtle Talisman greatly increases Stamina recovery speed and is an excellent utility option for Strength builds. It is the DLC upgrade to the base game's Green Turtle Talisman.

Heavy weapons generally consume significant amounts of Stamina, and you still need enough remaining after attacking to dodge, block, or reposition. Faster Stamina regeneration therefore indirectly allows you to maintain pressure more safely.

For players without Shadow of the Erdtree, the Green Turtle Talisman serves the same purpose with a weaker effect.

Location: Found in a cave behind a waterfall near the Ellac River in Shadow of the Erdtree.

Great-Jar's Arsenal — Best for Heavy Equipment

Great-Jar's Arsenal

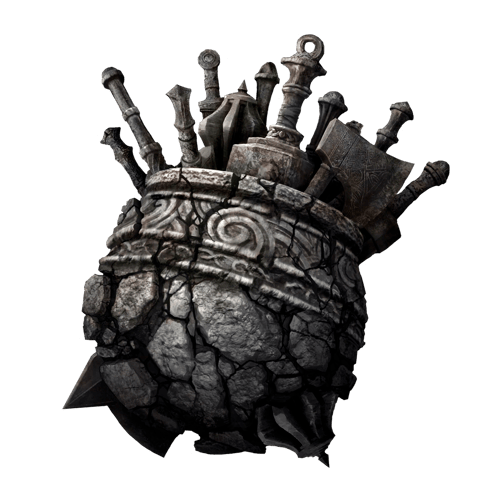
The Great-Jar's Arsenal significantly increases your maximum Equip Load, making it particularly valuable for Strength builds using heavy weapons and armor.

A Colossal Weapon combined with high-Poise armor can consume an enormous amount of Equip Load. Great-Jar's Arsenal makes it much easier to maintain Medium Load without investing excessive levels into Endurance.

It doesn't directly increase damage, so builds that can already comfortably maintain Medium Load should use an offensive or defensive Talisman instead.

Location: Rewarded after defeating the three Great-Jar's Knights in Dragonbarrow.

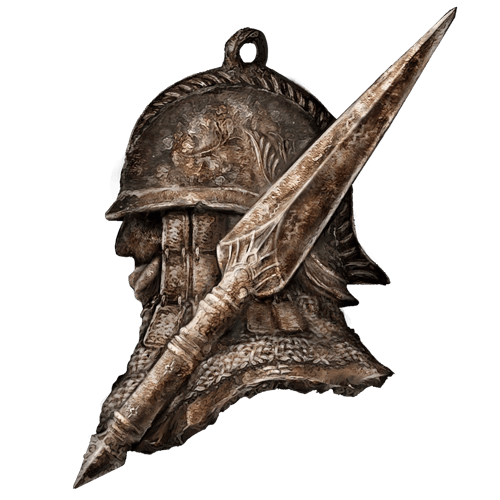
Spear Talisman — Best for Pierce Strength Weapons

Spear Talisman

The Spear Talisman increases Pierce counterattack damage by 15% in PvE. Importantly, this effect isn't limited to Spears; what matters is whether the attack itself deals Pierce damage.

That makes it particularly relevant for Strength weapons such as the Rusted Anchor, Sword Lance, and thrusting attacks from compatible weapons.

This is more specialized than something like the Two-Handed Sword Talisman, but extremely powerful when the weapon and playstyle can consistently take advantage of counterattacks.

Location: Found inside Lakeside Crystal Cave in Liurnia of the Lakes.

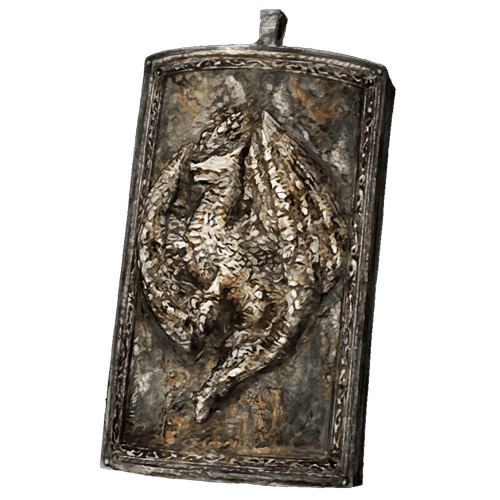
Dragoncrest Greatshield Talisman — Best Defensive Option

Dragoncrest Greatshield Talisman

The Dragoncrest Greatshield Talisman is one of the best defensive options for any melee build, significantly reducing incoming Physical damage in PvE.

Strength builds often fight at close range and may intentionally trade through attacks using Poise or hyper armor. Additional Physical protection is therefore especially useful when playing aggressively.

It won't increase your damage directly, but it can be considerably more valuable than another offensive Talisman against bosses that deal mostly Physical damage.

Location: Found in Elphael, Brace of the Haligtree.

Honorable Mentions

Other useful options include:

  • Curved Sword Talisman for Guard Counter builds
  • Roar Medallion for War Cry and other compatible roar-based setups
  • Dagger Talisman for builds that frequently capitalize on stance breaks with Critical Hits
  • Bull-Goat's Talisman when additional Poise is needed

Strength Playstyle Tips

Strength builds excel at dealing massive damage with individual attacks, breaking enemy stance, and turning short openings into opportunities for Critical Hits. While many Strength weapons are slower than Dexterity-focused alternatives, good timing and smart use of two-handing, charged attacks, and stance damage can make them extremely powerful.

Two-Hand Your Weapon

Two-handing is one of the most important mechanics for a Strength build. When two-handing most weapons, your effective Strength is multiplied by 1.5 for weapon requirements and Strength scaling.

This allows you to use weapons earlier than their listed Strength requirement would normally allow. For example, a weapon requiring 40 Strength can be two-handed with just 27 Strength.

The additional scaling also means two-handing can increase your damage even after you already meet the weapon's requirements.

Focus on Stance Damage

One of the biggest advantages of Strength weapons is their ability to deal large amounts of stance damage. Breaking an enemy's stance leaves them vulnerable to a Critical Hit and can interrupt otherwise dangerous bosses.

Charged Heavy Attacks, Jumping Heavy Attacks, Guard Counters, and Skills such as Lion's Claw are all excellent ways to pressure an enemy's stance.

Try to remain aggressive enough to prevent an enemy's hidden stance meter from recovering, but don't force attacks when there isn't a safe opening.

Use Charged Heavy Attacks

Don't rely entirely on Light Attacks. Strength weapons can get tremendous value from fully charged Heavy Attacks, which deal increased damage and significantly more stance damage than regular attacks.

Against bosses, look for long recovery animations where you have enough time to charge an attack. Weapons such as Star Fist and Giant-Crusher are particularly effective when built around Charged Heavy Attacks.

The Axe Talisman and Spiked Cracked Tear can further increase their damage.

Jump Attacks Are Great Gap Closers

Jump Attacks allow slower Strength builds to simultaneously close distance and deliver a powerful attack. Jumping Heavy Attacks also deal excellent stance damage, making them particularly effective with larger weapons.

However, don't fall into the trap of using them for every opening. Regular Heavy Attacks, weapon Skills, and your normal moveset can outperform Jump Attacks depending on the situation.

For dedicated Jump Attack builds, the Claw Talisman and Raptor's Black Feathers or Gravebird's Blackquill Armor provide additional damage.

Learn When You Can Trade

Heavy weapons and certain weapon Skills have access to hyper armor, making them more difficult to interrupt during parts of their attack animations.

Skills such as Lion's Claw can therefore allow you to continue attacking through hits that would interrupt lighter attacks. High-Poise armor can further improve your ability to fight aggressively.

That doesn't mean every trade is worthwhile. Trading a powerful attack into a weak enemy hit can be advantageous; trading into a boss's strongest combo usually isn't.

Don't Ignore Guard Counters

Strength builds are excellent candidates for shield-based playstyles because they naturally have the Strength required for many Greatshields.

After successfully blocking an attack, a Guard Counter can deal significant stance damage and create frequent Critical Hit opportunities. This offers a completely different Strength playstyle from two-handing a Colossal Weapon.

Weapons such as the Black Steel Greathammer are particularly effective for builds centered around Guard Counters.

Manage Your Stamina

Large weapons generally consume considerably more Stamina per attack than lighter weapons. Emptying your Stamina bar with a long sequence of attacks can leave you unable to dodge or block the enemy's response.

Try to keep enough Stamina available for at least one defensive action after attacking. Additional Endurance and Stamina recovery effects such as the Two-Headed Turtle Talisman become especially valuable when using extremely heavy weapons.

Use Your Weapon's Full Moveset

A Strength build doesn't have to be Jump Attack → Jump Attack → Lion's Claw → repeat.

Many heavy weapons have useful rolling attacks, crouching attacks, thrusting Heavy Attacks, running attacks, or other unique moves that can compensate for their otherwise slow speed.

The Claymore's thrusting Heavy Attack, for example, serves a very different purpose from its sweeping Light Attacks. Learning these differences makes slow weapons considerably more flexible.

Take Advantage of Pierce Counter Damage

Not every Strength weapon deals standard Physical or Strike damage. Weapons such as the Rusted Anchor and Sword Lance can deal Pierce damage, which receives additional counter damage when hitting an enemy during certain attack animations.

This can make aggressive play particularly rewarding and can be enhanced further with the Spear Talisman.

Don't Sacrifice Your Roll for Heavy Equipment

Strength builds often combine extremely heavy weapons with heavy armor, making it easy to accidentally reach Heavy Load.

For most builds, maintaining Medium Load is more valuable than equipping slightly heavier armor. Increase Endurance, use an Equip Load Talisman, or mix lighter armor pieces if necessary.

A Giant-Crusher and the heaviest armor in your inventory aren't particularly useful if you can barely avoid the boss.

Adapt Your Attack to the Opening

A large opening might give you enough time for a fully Charged Heavy Attack, while a shorter opening may only allow a quick Light Attack, rolling attack, or fast weapon Skill.

Strength builds become much more effective once you stop trying to force your strongest attack into every opening and instead use the strongest attack that is safe for the time available.

Strength builds reward patience and timing. Use your high damage and stance pressure to make each opening count rather than trying to attack as often as possible.

Table of Contents

1. Overview2. Pros and Cons3. Starting Class, Attribute Leveling and Distribution4. Best Early-Game Weapons for Strength Builds Greatsword — Best Early Heavy Weapon Brick Hammer — Pure Strength Claymore — Best Versatile Option Large Club — Easy Early Bonk Great Épée — Fast Strength Alternative5. Best Strength Weapons to Build Around Star Fist — Charged Heavy / Stance Break Greatsword — Colossal Strength Great Stars — Strength / Bleed / Sustain Giant-Crusher — Maximum Bonk Nightrider Glaive — Strength Polearm Sword Lance — Strength / Pierce Greatsword of Solitude — Pure DLC Strength Ancient Meteoric Ore Greatsword — STR/ARC Colossal Executioner's Greataxe — Critical / Stance Build Honorable Mentions6. Ashes of War Lion's Claw Savage Lion's Claw Cragblade Royal Knight's Resolve Giant Hunt Prayerful Strike War Cry Earthshaker7. Best Armor for Strength Builds Solitude Set — Best Overall Heavy Armor Bull-Goat Set — Maximum Physical Defense and Poise Verdigris Set — Heavy Defensive Alternative Rakshasa Set — Best Offensive Option Raptor's Black Feathers / Gravebird's Blackquill Armor — Best for Jump Attacks Mixed High-Poise Armor - Best General Approach8. Best Talismans for Strength Builds Two-Handed Sword Talisman — Best Overall Axe Talisman — Best for Charged Heavy Attacks Shard of Alexander — Best for Weapon Skills Claw Talisman — Best for Jump Attacks Two-Headed Turtle Talisman — Best for Stamina Great-Jar's Arsenal — Best for Heavy Equipment Spear Talisman — Best for Pierce Strength Weapons Dragoncrest Greatshield Talisman — Best Defensive Option Honorable Mentions9. Strength Playstyle Tips

See More

Elden Ring Strength Build - Stats, Weapons, Skills & More
Updated on Aug 22, 2026
Elden Ring Dexterity Build - Stats, Weapons, Skills & More
Updated on Aug 22, 2026
Abyssal Chest Explained - Hero Siege Season 10: Ebontharn
Updated on Aug 21, 2026
All New Major Features In Hero Siege Season 10 Ebontharn
Updated on Aug 21, 2026
Everything Confirmed for RuneScape Dragonwilds 1.0 So Far
Updated on Aug 20, 2026

Like our guides?

Add Mobalytics as a preferred source on Google!