menu
MobalyticsUse your favourite features in-game with our Desktop App
Gamebase Guide

Elden Ring Madness Build - Stats, Weapons, Skills & More

Updated on Aug 23, 2026
Aug 23, 2026

Overview

Madness builds harness the Frenzied Flame, using powerful Incantations that deal heavy Fire damage while building Madness on both enemies and, in some cases, the caster.

The most important thing to understand is that Madness is primarily a PvP status effect. Most regular PvE enemies and bosses cannot be afflicted with Madness, with the main exceptions being Tarnished-type enemies such as NPC invaders. Against normal PvE enemies, this build instead relies on the high raw damage, range, AoE, and stance damage of Frenzied Flame Incantations.

This means Madness should not be treated like Bleed or Scarlet Rot. You are not constantly trying to fill a boss's status bar. Instead, Incantations such as The Flame of Frenzy, Frenzied Burst, and Unendurable Frenzy function as powerful Fire attacks that cover different ranges and situations.

The build becomes particularly dangerous when combining these Incantations with effects that reward Madness occurring nearby. Shadow of the Erdtree expanded this playstyle with Aged One's Exultation, Madding Hand, and Midra's Flame of Frenzy, giving dedicated Frenzied Flame characters significantly more ways to benefit from triggering Madness themselves.

How Madness Works

Madness is a status effect that, when triggered, causes HP and FP damage while briefly stunning the affected target. Unlike most other status effects, however, Madness only works against Tarnished characters. This makes it extremely powerful in PvP and against compatible NPC enemies, but largely irrelevant as a status effect during normal PvE boss fights.

Fortunately, Frenzied Flame Incantations do not need to trigger Madness to deal strong damage. The Flame of Frenzy, for example, deals Fire damage, can hit large enemies multiple times, and deals meaningful stance damage when charged. Frenzied Burst provides exceptional range, while Unendurable Frenzy offers sustained close-range damage.

Madness can also be deliberately triggered on your own character. This is important because equipment such as Aged One's Exultation, Black Dumpling, and Madding Hand activates when Madness occurs nearby, including when you inflict it on yourself. This gives Madness builds a way to benefit from the status even against bosses that are completely immune to it.

Pros and Cons

Pros

  • Excellent Fire damage even against enemies that cannot be afflicted with Madness.
  • Access to strong options at close, medium, and extremely long range.
  • The Flame of Frenzy provides excellent AoE and stance damage.
  • Frenzied Burst is one of the best long-range Incantations in the game.
  • Can intentionally trigger Madness on yourself to activate powerful damage buffs.
  • Frenzied Flame Incantations receive a 20% damage bonus from the Frenzied Flame Seal while it is held.
  • Shadow of the Erdtree adds several strong new tools for dedicated Madness builds.

Cons

  • Madness cannot affect the vast majority of PvE enemies and bosses.
  • Several Frenzied Flame Incantations also build Madness on the caster.
  • Long or channeled casts can leave you vulnerable to interruption.
  • Some of the strongest Madness-specific equipment is obtained relatively late.
  • Fire-resistant enemies can significantly reduce the effectiveness of your primary damage options.
  • The Frenzied Flame Seal is obtained very late, requiring substantial progression through Hyetta's questline and the Subterranean Shunning-Grounds.

All Elden Ring Guides

Check Out Our Other Elden Ring Builds and Guides

Starting Class, Attribute Leveling and Distribution

Madness builds are primarily Faith-based casters, with Vigor and Mind providing the survivability and FP needed to comfortably use Frenzied Flame Incantations. Unlike Dragon Communion, there is no reason to spread large amounts of points across multiple offensive attributes unless you specifically want to incorporate a particular Madness weapon.

For a dedicated Frenzied Flame caster, Faith should remain our primary damage stat.

Recommended Starting Class: Prophet

Attribute

Starting Stats

LV25

LV50

LV100

LV150

Vigor

10

18

25

40

55

Endurance

8

10

12

15

18

Strength

11

11

11

11

11

Dexterity

10

10

10

10

10

Mind

14

18

22

28

30

Intelligence

7

7

7

7

7

Faith

16

20

30

50

80

Arcane

10

10

10

10

10

Early in the game, prioritize Vigor, Mind, and Faith. The Flame of Frenzy only requires 16 Faith, meaning Prophet can use it immediately once the Incantation is obtained. This gives the build access to its core playstyle extremely early.

By around level 50, 30 Faith provides strong Incantation damage while 22 Mind gives you enough FP to cast comfortably. Continue raising Vigor alongside Faith rather than rushing your offensive stat while leaving yourself extremely fragile.

At level 100, aim for around 40 Vigor and 50 Faith. This provides a strong balance between survivability and damage while leaving enough points for additional Mind and Endurance.

For level 150, 80 Faith maximizes the damage potential of a dedicated Faith caster, while 55 Vigor and 30 Mind provide a comfortable amount of HP and FP. Faith reaches an important Incantation scaling soft cap at 80 when using high-Faith Sacred Seals such as the Erdtree Seal.

If you continue leveling beyond 150, pushing Vigor to 60 is an easy next investment.

Why 80 Faith?

Although the Frenzied Flame Seal scales with Strength, Dexterity, Intelligence, and Faith, that doesn't mean we should distribute our levels across all four attributes.

For a dedicated caster, investing heavily into Faith allows us to use a stronger Sacred Seal for Incantation Scaling while still benefiting from the Frenzied Flame Seal's unique bonus.

The Frenzied Flame Seal increases the damage of Frenzied Flame Incantations by 20% while held, and this bonus works even if another Sacred Seal is used to actually cast the spell.

This allows an endgame setup to use:

  • Main Hand: Erdtree Seal — cast your Incantations
  • Off Hand: Frenzied Flame Seal — receive the 20% Frenzied Flame bonus.

At high Faith, this gives us the stronger Incantation Scaling of the Erdtree Seal while retaining the unique damage bonus of the Frenzied Flame Seal.

Frenzied Flame Seal

Frenzied Flame Seal

Requirements: None

The Frenzied Flame Seal is the signature Sacred Seal of the build and provides a 20% boost to Frenzied Flame Incantations.

Its unusual scaling allows it to benefit from Strength, Dexterity, Intelligence, and Faith, but its raw Incantation Scaling generally isn't the main reason we use it on a dedicated Faith build.

Instead, its greatest value comes from holding it in your off-hand while casting with a stronger Sacred Seal. The Frenzied Flame damage bonus still applies, allowing both Seals to contribute to the same cast.

Earlier in the game, simply use the best Faith-scaling Sacred Seal available to you. Once you reach high Faith, the Erdtree Seal becomes the natural primary casting option.

Location: Obtained from Hyetta at the end of her questline after becoming the Lord of Frenzied Flame beneath Leyndell.

Best Frenzied Flame Incantations

Frenzied Flame has a relatively small selection of Incantations, but each one fills a distinct role. The build has access to close-range burst, AoE, extreme range, buffs, and sustained damage, so there is little reason to use the same spell in every situation.

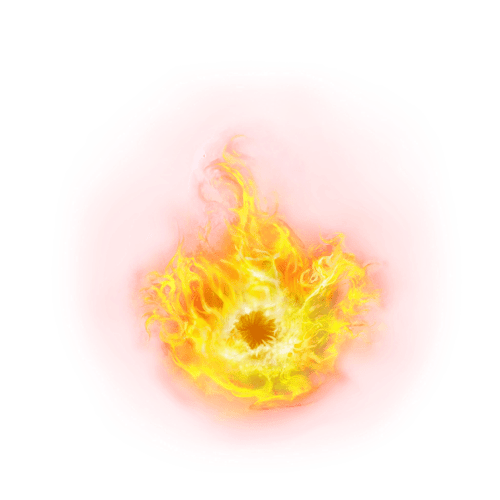
The Flame of Frenzy — Best Overall Frenzied Flame Incantation

The Flame of Frenzy — Best Overall Frenzied Flame Incantation

Requirements: Faith - 16

The Flame of Frenzy is one of the earliest Incantations available to the build and remains useful throughout the entire game.

It fires multiple streams of yellow flame in a wide area, dealing Fire damage and strong stance damage. Against large enemies, multiple projectiles can connect simultaneously, making the spell considerably stronger than its low requirements suggest.

The Incantation can also be charged, increasing its damage and the number of projectiles released. This makes it excellent against groups, large bosses, and enemies where stance breaking is valuable.

Location: Found inside the Callu Baptismal Church in the Weeping Peninsula.

Frenzied Burst — Best Long-Range Option

Frenzied Burst — Best Long-Range Option

Requirements: Faith - 22

Frenzied Burst fires a concentrated beam of Frenzied Flame from the caster's eyes.

Its exceptional range makes it one of the best tools in the build for sniping enemies before they can reach you. Charging the Incantation further increases its damage.

Unlike the widespread damage of The Flame of Frenzy, Frenzied Burst concentrates its damage onto a single target, making it much more reliable against smaller enemies.

Location: Dropped by a Teardrop Scarab near the Church of Inhibition in Liurnia of the Lakes.

Unendurable Frenzy — Best Sustained Damage

Unendurable Frenzy — Best Sustained Damage

Requirements: Faith - 31

Unendurable Frenzy continuously releases Frenzied Flame in front of the caster for as long as the spell is maintained.

Its sustained damage can be extremely high when you have a large enough opening, especially against large enemies that are repeatedly struck by the flames.

However, the Incantation also continuously builds Madness on the caster, meaning you cannot channel it indefinitely. It also leaves you vulnerable while casting, so positioning is extremely important.

Location: Found in a chest beneath Yelough Anix Ruins in the Consecrated Snowfield.

Howl of Shabriri — Best Damage Buff

Howl of Shabriri — Best Damage Buff

Requirements: Faith - 33

Howl of Shabriri causes the caster to scream, building Madness on themselves while providing a powerful temporary damage buff.

For 40 seconds, it increases all damage dealt by 25%, but also causes you to take 30% more damage.

The self-inflicted Madness buildup also has excellent synergy with equipment such as Aged One's Exultation and Black Dumpling, allowing the build to deliberately trigger Madness before a major damage window.

The defensive penalty makes it risky, so it is best used when you're confident you can avoid incoming attacks.

Location: Found inside Frenzy-Flaming Tower in Liurnia of the Lakes.

Midra's Flame of Frenzy — Best DLC Frenzy Incantation

Midra's Flame of Frenzy

Requirements: Faith - 41

Midra's Flame of Frenzy is the major Frenzied Flame Incantation added in Shadow of the Erdtree.

The caster summons the head of the Lord of Frenzied Flame, releasing Frenzied Flame across the surrounding area while continuously building Madness on themselves.

It is an expensive and high-commitment Incantation, but provides dedicated Madness builds with another powerful late-game option for dealing sustained Fire damage.

Because it continuously builds Madness on the caster, it also naturally interacts with Madness-triggered equipment such as Aged One's Exultation.

Location: Obtained by exchanging the Remembrance of the Lord of Frenzied Flame after defeating Midra, Lord of Frenzied Flame.

Inescapable Frenzy — PvP/Specialized Option

Inescapable Frenzy

Requirements: Faith - 21

Inescapable Frenzy is extremely different from the other Incantations in this build. It is a grab attack that only works against Tarnished targets, making it largely unusable against normal PvE enemies and bosses.

When it does connect, the caster grabs the target and releases Frenzied Flame directly through their eyes.

It's thematically perfect for a Madness build and can be extremely dangerous against compatible targets, but it should not occupy one of your normal PvE Memory Slots.

Location: Found beneath Mohg, the Omen's arena in the Subterranean Shunning-Grounds.

Recommended PvE Spell Loadout

For general PvE, you don't need to equip every Frenzied Flame Incantation.

A strong selection is:

  • The Flame of Frenzy → AoE and stance damage
  • Frenzied Burst → long-range single-target damage
  • Unendurable Frenzy → sustained damage during large openings
  • Howl of Shabriri → high-risk damage buff
  • Midra's Flame of Frenzy → DLC sustained/AoE option

This covers essentially every situation the build needs without wasting Memory Slots on highly specialized spells such as Inescapable Frenzy.

Best Weapons to Build Around

Madness has very few dedicated weapons, so this build remains primarily focused on Frenzied Flame Incantations. Your weapon should provide a reliable melee option when casting would be too slow or FP-intensive rather than becoming the main source of damage.

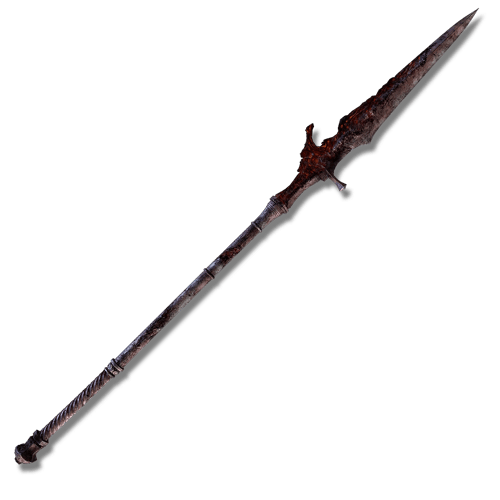
Vyke's War Spear — Best Madness Weapon

Vyke's War Spear

Requirements: Strength - 16 / Dexterity - 20 / Faith - 18

Vyke's War Spear is the signature melee weapon for a Madness build. It deals Physical and Fire damage, scales with Faith, and has innate Madness buildup.

Its Unique Skill, Frenzyflame Thrust, launches the player forward before slamming the spear into the ground and creating an explosion of Frenzied Flame.

The Madness buildup is primarily relevant against Tarnished targets, but the weapon's regular damage and Skill remain usable against normal PvE enemies. Its biggest downside for our caster setup is the 20 Dexterity requirement, which requires additional investment outside our standard leveling progression.

Location: Dropped by Festering Fingerprint Vyke at the Church of Inhibition in Liurnia of the Lakes.

Madding Hand — Best DLC Madness Weapon

Madding Hand

Requirements: Strength - 8 / Dexterity - 8 / Intelligence - 13 / Faith - 20

The Madding Hand is a Fist weapon added in Shadow of the Erdtree that naturally fits dedicated Madness setups.

Its Unique Skill, Madding Spear-Hand Strike, performs a powerful thrusting attack that inflicts a large amount of Madness buildup. More importantly for PvE, triggering Madness nearby while the Madding Hand is equipped provides a temporary damage increase, allowing it to contribute to self-Madness buff setups even against bosses that cannot be afflicted with the status.

This gives the Madding Hand considerably more utility than simply using it as a melee weapon.

Location: Dropped by the Madding Hand NPC in the Abyssal Woods in Shadow of the Erdtree.

Flame Art Weapon — Best General PvE Alternative

If you don't want to invest additional Dexterity for Vyke's War Spear, a regular weapon with the Flame Art affinity is often the most practical melee option.

Flame Art adds Faith scaling and Fire damage, allowing your weapon to benefit from the same Faith investment used for your Frenzied Flame Incantations.

Choose a weapon with low Strength and Dexterity requirements and a moveset you enjoy rather than spending valuable levels purely to meet weapon requirements.

This is especially useful against normal enemies where using an expensive Frenzied Flame Incantation would be unnecessary.

Choosing Your Weapon

For a thematic Madness setup, Vyke's War Spear remains the obvious primary weapon, while Madding Hand provides the most interesting DLC synergy.

For a pure Faith caster, however, neither is mandatory. A simple Flame Art-infused weapon can provide everything you need from a melee sidearm without forcing significant investment away from Vigor, Mind, and Faith.

Best Armor for Madness Builds

Madness builds don't require a complete armor set, but there is one headpiece with direct synergy with the build's self-Madness mechanics. Outside of that, prioritize armor that provides good defense and Poise while maintaining Medium Equip Load.

Black Dumpling — Best Madness Headpiece

Black Dumpling — Best Madness Headpiece

The Black Dumpling is the most important armor piece for a dedicated Madness build.

When Madness is triggered on the wearer, it temporarily increases all damage dealt by 10% for 60 seconds. This makes it particularly effective with Incantations such as Howl of Shabriri, Unendurable Frenzy, and Midra's Flame of Frenzy, which can build Madness on the caster.

The effect can also be combined with other Madness-triggered bonuses, allowing you to deliberately proc Madness before entering a major damage window.

Its actual defensive stats are poor, so the Black Dumpling is primarily worn for its unique damage bonus rather than protection.

Location: Rare drop from First Generation Albinaurics wearing the Black Dumpling in Volcano Manor and Leyndell.

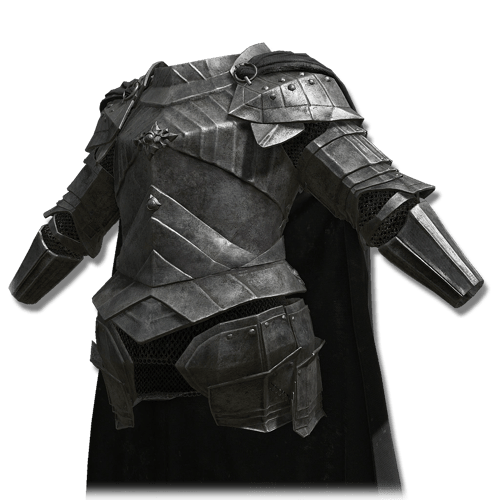
Rakshasa Set — Best General Offensive Option

Rakshasa Set

The Rakshasa Set increases the damage you deal with each equipped piece, making it a strong DLC option when maximizing offense.

It can be combined with the Black Dumpling, allowing you to retain the Madness-triggered headpiece while using Rakshasa pieces in the remaining armor slots.

This works especially well with the build's high-risk playstyle, where effects such as Howl of Shabriri already prioritize damage over survivability.

Location: Dropped by Rakshasa in the Eastern Nameless Mausoleum in Shadow of the Erdtree.

Solitude Set — Best Defensive Option

Solitude Set

The Solitude Set provides excellent Damage Negation and very high Poise.

This can be particularly valuable when using Incantations such as Unendurable Frenzy, where committing to a longer cast leaves you vulnerable to enemy attacks.

The full set is extremely heavy, so mixing individual pieces with lighter armor is generally preferable if necessary to maintain Medium Equip Load.

Location: Dropped by the Blackgaol Knight in the Western Nameless Mausoleum in Gravesite Plain.

High-Poise Mixed Armor — Best General Setup

For most Madness builds, a mixed armor setup is the most practical option.

Use the Black Dumpling when taking advantage of self-Madness buffs, then fill your remaining slots with armor that provides good Damage Negation and Poise without pushing you into Heavy Load.

If you aren't using the Black Dumpling strategy, simply choose the strongest armor available while maintaining Medium Equip Load.

Choosing Your Armor

For a dedicated self-Madness setup:

  • Black Dumpling + Rakshasa pieces

For a safer general-purpose setup:

  • Black Dumpling + defensive/high-Poise armor

For maximum survivability:

  • Solitude or other heavy armor while maintaining Medium Equip Load

The Black Dumpling is the only armor piece that is truly central to the Madness build. Everything else should primarily be selected around your preferred balance between damage, Poise, and survivability.

Best Talismans for Madness Builds

Madness builds benefit from a particularly strong combination of Fire damage, Incantation damage, and self-Madness bonuses. Shadow of the Erdtree also introduced Aged One's Exultation, giving dedicated Frenzied Flame builds a Talisman that directly rewards triggering Madness.

Aged One's Exultation — Best Madness Talisman

Aged One's Exultation — Best Madness Talisman

The Aged One's Exultation is the most important Talisman for a dedicated Madness build.

Whenever Madness occurs nearby, it increases all damage dealt by 20% for 20 seconds. Importantly, this can also be activated by triggering Madness on yourself, allowing the bonus to work against PvE bosses that are completely immune to Madness.

This synergizes perfectly with the Black Dumpling and Madding Hand, allowing multiple damage bonuses to activate from the same self-Madness proc.

Location: Obtained by defeating the Aging Untouchable in the Abyssal Woods, which drops the Talisman.

Fire Scorpion Charm — Best Fire Damage Option

Fire Scorpion Charm

The Fire Scorpion Charm increases Fire damage by 12% in PvE, directly improving most of your offensive Frenzied Flame Incantations.

The downside is that it also increases the Physical damage you receive by 10%. Combined with Howl of Shabriri's defensive penalty, this can make an aggressive Madness setup extremely fragile.

Use it when maximizing damage is worth the additional risk.

Location: Found on the wooden ramparts of Fort Laiedd on Mt. Gelmir.

Flock's Canvas Talisman — Best General Incantation Option

Flock's Canvas Talisman — Best General Incantation Option

The Flock's Canvas Talisman increases the damage of Incantations, making it an easy general-purpose choice for a Madness caster.

Unlike the Fire Scorpion Charm, it doesn't come with a defensive penalty and improves your offensive Incantations regardless of how aggressively you're using self-Madness.

This makes it one of the safest permanent slots in the build.

Location: Obtained from Gowry near the end of Millicent's questline.

Godfrey Icon — Best for Charged Frenzied Flame Incantations

Godfrey Icon

The Godfrey Icon increases the damage of charged spells and Skills by 15%.

This works particularly well with The Flame of Frenzy and Frenzied Burst, both of which can be charged for stronger attacks. Charged Frenzied Burst also gains considerably more stance damage, making the Talisman particularly attractive when you frequently use these spells.

Location: Dropped by Godefroy the Grafted in the Golden Lineage Evergaol.

Faithful's Canvas Talisman — Best Early Incantation Option

Faithful's Canvas Talisman — Best Early Incantation Option

The Faithful's Canvas Talisman increases Incantation damage by 4% and can be obtained considerably earlier than Flock's Canvas Talisman.

Its bonus is relatively small, but it is a straightforward damage increase during progression and can later be replaced by a stronger or more specialized option.

It can also stack with Flock's Canvas Talisman if you want to maximize Incantation damage.

Location: Found in Sellia Crystal Tunnel in Caelid.

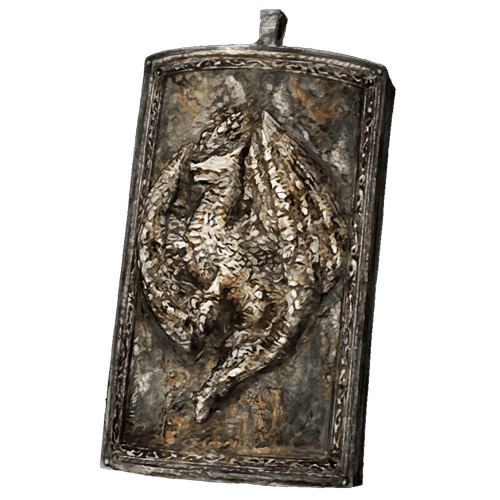
Dragoncrest Greatshield Talisman — Best Defensive Option

Dragoncrest Greatshield Talisman — Best Defensive Option

The Dragoncrest Greatshield Talisman is a strong defensive alternative for difficult PvE encounters.

Madness builds can become surprisingly fragile when combining Howl of Shabriri, Fire Scorpion Charm, and other aggressive damage bonuses. Replacing one offensive Talisman with additional Physical Damage Negation can make the build considerably more forgiving.

This is especially valuable when using Unendurable Frenzy or Midra's Flame of Frenzy, where longer casting animations leave you exposed.

Location: Found in Elphael, Brace of the Haligtree.

Choosing Your Talismans

For a dedicated Madness damage setup:

  • Aged One's Exultation + Flock's Canvas Talisman + Fire Scorpion Charm + Godfrey Icon

For a safer general PvE setup:

  • Aged One's Exultation + Flock's Canvas Talisman + Godfrey Icon + Dragoncrest Greatshield Talisman

During earlier progression, Faithful's Canvas Talisman can fill one of these slots until the stronger options become available.

The most important choice is Aged One's Exultation. Combined with Black Dumpling and optionally Madding Hand, deliberately triggering Madness on yourself becomes an actual offensive mechanic rather than simply a drawback of Frenzied Flame Incantations.

Madness Playstyle Tips

Madness builds play differently from most status builds because Madness itself cannot be inflicted on the majority of PvE enemies. Your Frenzied Flame Incantations should therefore be treated primarily as powerful Fire attacks, while self-inflicted Madness can be used to activate some of the build's strongest damage bonuses.

Use the Right Frenzied Flame Incantation

Each Frenzied Flame Incantation has a different purpose, so avoid relying on the same spell for every encounter.

  • The Flame of Frenzy is excellent against groups and large enemies.
  • Frenzied Burst provides exceptional long-range single-target damage.
  • Unendurable Frenzy excels during large openings where you can safely maintain the cast.
  • Midra's Flame of Frenzy provides another powerful sustained DLC option.

Switch between them based on the enemy and the opening available rather than simply using whichever spell has the highest potential damage.

Take Advantage of Charged Casts

Both The Flame of Frenzy and Frenzied Burst become more powerful when charged.

This is especially important when using the Godfrey Icon, which further increases the damage of applicable charged Incantations.

Don't automatically charge every cast, however. Against aggressive enemies, an uncharged spell that safely connects is better than a charged cast that gets interrupted.

Use Frenzied Burst to Control Encounters

Frenzied Burst has exceptional range and can eliminate or heavily damage enemies before they have an opportunity to reach you.

Use it to pick off dangerous targets, pull individual enemies away from groups, or begin encounters from a safe distance.

Against normal enemies, this can significantly reduce the amount of close-range fighting required.

Use Self-Madness as a Damage Setup

With the right equipment, triggering Madness on yourself becomes one of the defining mechanics of an optimized Madness build.

Aged One's Exultation, Black Dumpling, and Madding Hand can all reward Madness occurring, allowing you to deliberately trigger the status before a major damage window.

This is particularly valuable in PvE because bosses don't need to be vulnerable to Madness for your own Madness proc to activate these bonuses.

Howl of Shabriri Is Powerful but Dangerous

Howl of Shabriri provides a substantial damage increase, but it also causes you to take considerably more damage.

Combined with aggressive equipment such as the Fire Scorpion Charm, the build can become extremely fragile.

Use Howl when you know the encounter well enough to take advantage of the damage window. Against unfamiliar or highly aggressive bosses, a safer setup may produce better results overall.

Don't Force Madness Against PvE Bosses

Most bosses cannot be afflicted with Madness, so repeatedly trying to build the status against them accomplishes nothing.

Your Incantations are still powerful because of their regular Fire damage, range, AoE, and stance damage.

Think of Madness buildup as an additional benefit against compatible Tarnished enemies rather than the main reason your spells are strong.

Use The Flame of Frenzy Against Large Enemies

The Flame of Frenzy releases multiple projectiles in a spread, which makes it particularly effective against large enemies that can be hit by several flames at once.

It also deals good stance damage, allowing repeated casts to contribute toward stance breaks.

Against small targets, Frenzied Burst is often more reliable because its concentrated beam is much easier to connect.

Save Unendurable Frenzy for Large Openings

Unendurable Frenzy can produce enormous sustained damage, but locking yourself into the cast at the wrong moment can be extremely dangerous.

The best opportunities come during stance breaks, long boss recovery animations, phase transitions, or while another target is holding the enemy's attention.

Don't channel it simply because you have enough FP. Make sure you have enough time to actually benefit from the cast.

Manage Your Own Madness Meter

Several Frenzied Flame Incantations build Madness on the caster, so pay attention to your own status bar.

Sometimes you want Madness to trigger to activate Aged One's Exultation and Black Dumpling. At other times, another Madness proc can interrupt your attack at the worst possible moment.

Self-Madness should eventually become something you deliberately manage rather than an accidental side effect.

Keep a Melee Option Available

Using a powerful Incantation against every basic enemy wastes FP.

Keep Vyke's War Spear, Madding Hand, or a Flame Art weapon available for normal encounters and situations where casting would be too slow.

Your Frenzied Flame Incantations should be saved for situations where their range, AoE, stance damage, or burst actually provides an advantage.

Boost Your Fire Damage When Needed

The Flame-Shrouding Cracked Tear is an easy addition to your Flask of Wondrous Physick because most of your offensive Frenzied Flame Incantations deal Fire damage.

You don't need to build your entire Physick around Madness. Simply changing one Crystal Tear before a difficult encounter can provide a useful additional damage boost.

Be Prepared for Fire-Resistant Enemies

Frenzied Flame builds rely heavily on Fire damage, so some encounters naturally provide poor matchups.

This is where a strong melee sidearm or additional Faith Incantations become useful. Don't force Frenzied Flame against an enemy that heavily resists your primary damage type when your Faith investment gives you access to alternatives.

Maximum Damage Isn't Always the Best Setup

Combining Howl of Shabriri, Fire Scorpion Charm, Black Dumpling, Aged One's Exultation, Madding Hand, and other damage bonuses can produce extremely high damage.

It can also make the setup more complicated and significantly less forgiving.

For normal progression, prioritize a setup you can use consistently. Save the full self-Madness buff sequence for difficult bosses or situations where maximizing burst damage is actually worthwhile.

Madness builds are ultimately powerful Fire casters with a unique self-Madness mechanic. Use Frenzied Flame Incantations according to the situation, deliberately manage your own Madness meter, and take advantage of self-Madness buffs without sacrificing your ability to safely finish a cast.

Table of Contents

See More Elden Ring

Elden Ring Madness Build - Stats, Weapons, Skills & More
Updated on Aug 23, 2026
Elden Ring Tank Build - Stats, Weapons, Skills & More
Updated on Aug 23, 2026
Elden Ring Bloodhound's Fang Build - Stats, Weapons, Skills & More
Updated on Aug 23, 2026
Elden Ring Rivers of Blood Build - Stats, Weapons, Skills & More
Updated on Aug 23, 2026
Elden Ring Lightning Build - Stats, Weapons, Skills & More
Updated on Aug 23, 2026

Like our guides?

Add Mobalytics as a preferred source on Google!