menu
MobalyticsUse your favourite features in-game with our Desktop App
Gamebase Guide

Elden Ring Rivers of Blood Build - Stats, Weapons, Skills & More

Updated on Aug 23, 2026
Aug 23, 2026

Overview

The Rivers of Blood is one of Elden Ring's most iconic Bleed weapons, combining fast Katana attacks, innate Blood Loss buildup, split Physical and Fire damage, and the powerful Corpse Piler Unique Skill.

Unlike a conventional Dexterity Katana, Rivers of Blood scales with Dexterity and Arcane, with Arcane being particularly important because it improves both the weapon's damage and its Blood Loss buildup. This makes a DEX/ARC hybrid the natural way to build around the weapon.

The centerpiece of the build is Corpse Piler, a three-part Skill that unleashes repeated cursed-blood slashes in front of the character. Each additional input extends the combo, allowing you to rapidly build Blood Loss while dealing both Physical and Fire damage.

However, Rivers of Blood shouldn't be treated as a weapon where you simply complete the entire Corpse Piler combo whenever possible. The first sequence is relatively fast and easy to use, while later portions require increasingly large openings. Against aggressive bosses, knowing when to stop the combo is just as important as knowing when to start it.

The weapon also retains the excellent Katana moveset, meaning regular attacks, running attacks, jumping attacks, and powerstanced attacks remain valuable whenever committing to Corpse Piler would be unsafe.

Blood Loss is naturally the build's greatest strength. Triggering Hemorrhage deals a large burst of damage while simultaneously activating powerful equipment such as the White Mask and Lord of Blood's Exultation, increasing your Attack Power and allowing the build to become even more dangerous after the first Bleed proc.

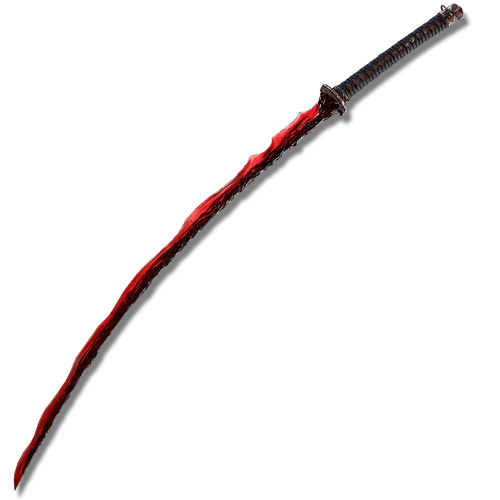
Rivers of Blood

Rivers of Blood — Best Bleed Katana Skill

Requirements: Strength - 12 / Dexterity - 18 / Arcane - 20

Rivers of Blood is a unique Katana dealing Physical and Fire damage while providing innate 50 Blood Loss buildup before Arcane scaling is taken into account.

Its Arcane scaling is particularly important. While Dexterity primarily improves the Physical portion of the weapon, Arcane contributes to both its Physical and Fire Attack Power while also increasing Blood Loss buildup. This makes Arcane an extremely efficient offensive attribute for a dedicated Rivers of Blood build.

At +10, its Blood Loss buildup reaches approximately:

  • 20 Arcane → 62 Blood Loss
  • 45 Arcane → 72 Blood Loss
  • 80 Arcane → 79 Blood Loss

This also shows why we don't necessarily need to blindly push Arcane all the way to 80. The gains to status buildup become considerably smaller after the earlier breakpoints, allowing us to invest in Dexterity, Vigor, and other supporting attributes instead.

Corpse Piler

Rivers of Blood's Unique Skill, Corpse Piler, performs a series of cursed-blood slashes with significantly greater range and Blood Loss buildup than normal Katana attacks.

The Skill consists of three sequences:

  • First input → quick opening series
  • Second input → extends the combo
  • Third input → strongest portion of the sequence, but requires the largest commitment.

You don't need to complete all three inputs every time.

Against fast bosses, using only the opening portion of Corpse Piler allows you to deal damage and build Bleed without becoming trapped in a lengthy animation. Save the complete sequence for large recovery windows, stance breaks, or other situations where the enemy cannot immediately retaliate.

Corpse Piler also benefits from effects that trigger from successive attacks, including Rotten Winged Sword Insignia and Millicent's Prosthesis, making its rapid multi-hit sequence particularly easy to enhance.

Location: Rivers of Blood is obtained from Bloody Finger Okina near the Church of Repose in the Mountaintops of the Giants.

Pros and Cons

Pros

  • Excellent Blood Loss buildup.
  • Corpse Piler can rapidly trigger Hemorrhage against vulnerable enemies.
  • Strong combination of Physical and Fire damage.
  • Arcane improves both weapon damage and Blood Loss buildup.
  • Fast Katana moveset remains useful without spending FP.
  • Corpse Piler provides considerably more range than normal Katana attacks.
  • Excellent synergy with White Mask and Lord of Blood's Exultation.
  • Multi-hit Corpse Piler attacks work extremely well with successive-attack bonuses.
  • Relatively straightforward DEX/ARC attribute requirements.
  • Remains effective throughout the endgame when properly built.

Cons

  • Rivers of Blood is obtained relatively late in the base game.
  • Blood Loss loses much of its value against Bleed-resistant or immune enemies.
  • Corpse Piler consumes FP quickly when repeatedly used.
  • Completing the entire Corpse Piler sequence can leave you vulnerable against aggressive bosses.
  • Split Physical/Fire damage means enemy Fire resistance can affect part of your damage.
  • The weapon cannot change its Ash of War or affinity.
  • Requires investment into both Dexterity and Arcane.
  • Over-relying on Corpse Piler wastes the excellent regular Katana moveset.

All Elden Ring Guides

Check Out Our Other Elden Ring Builds and Guides

Starting Class, Attribute Leveling and Distribution

Rivers of Blood scales with both Dexterity and Arcane, but Arcane should receive priority during the earlier stages of the build. Unlike Dexterity, Arcane improves both the weapon's Physical and Fire damage while also increasing its Blood Loss buildup.

Once Arcane reaches its most important Bleed breakpoint, we can begin investing more heavily into Dexterity for additional weapon damage.

Recommended Starting Class: Samurai

Attribute

Starting Stats

LV25

LV50

LV100

LV150

Vigor

12

18

25

40

60

Endurance

13

14

16

20

25

Strength

12

12

12

12

12

Dexterity

15

18

20

30

50

Mind

11

11

13

17

20

Intelligence

9

9

9

9

9

Faith

8

8

8

8

8

Arcane

8

12

20

45

45

The Samurai is the natural starting class for this build. It begins with good Dexterity, already has the 12 Strength required by Rivers of Blood, and starts with an Uchigatana that can comfortably carry the build until Rivers of Blood becomes available.

Level 25

During the earliest part of the game, prioritize Vigor before aggressively investing into damage.

Aim for approximately 18 Vigor, 18 Dexterity, and 12 Arcane. This provides better survivability while beginning the transition toward the DEX/ARC distribution Rivers of Blood eventually requires.

You don't need to rush Arcane yet. Rivers of Blood is still far away, and the early Uchigatana performs perfectly well without immediately committing a large number of levels into status scaling.

Level 50

By level 50, aim for approximately 25 Vigor, 20 Dexterity, and 20 Arcane.

This creates a strong foundation for a Bleed-oriented Katana setup while also meeting the eventual attribute requirements of Rivers of Blood.

Begin increasing Arcane more aggressively from this point. Your Vigor should continue developing alongside it rather than sacrificing survivability purely for additional Blood Loss buildup.

Level 100

By level 100, aim for approximately 40 Vigor, 30 Dexterity, and 45 Arcane.

45 Arcane is our first major offensive target. Arcane improves Rivers of Blood's damage while also increasing its Blood Loss buildup, making it extremely efficient during the middle portion of the build.

Once you reach 45 Arcane, the returns for additional Blood Loss buildup become considerably smaller. This makes Dexterity increasingly attractive for improving your direct weapon damage.

At this point, 20 Endurance and 17 Mind also provide enough Stamina and FP to use Corpse Piler regularly without sacrificing too many levels from your primary attributes.

Level 150

At level 150, the build transitions into a more balanced DEX/ARC hybrid.

Aim for approximately:

  • 60 Vigor / 25 Endurance / 20 Mind / 50 Dexterity / 45 Arcane

Rather than continuing to push Arcane toward 80, Dexterity becomes our primary offensive investment after reaching 45 Arcane.

This provides excellent raw weapon damage while retaining strong Blood Loss buildup and leaves enough levels for the survivability needed during endgame and Shadow of the Erdtree encounters.

Why Stop Arcane at 45?

Arcane continues increasing Rivers of Blood's damage beyond 45, so 45 isn't a hard cap.

However, its contribution to Blood Loss buildup begins providing significantly smaller returns beyond this point.

For a level 150 build, investing those additional levels into Dexterity, Vigor, Endurance, and Mind creates a more balanced character than simply pushing Arcane as high as possible.

Players continuing beyond level 150 can eventually return to Arcane after further developing Dexterity.

Dexterity

Dexterity becomes increasingly important once our initial Arcane investment is complete.

During early progression, only gradually increase Dexterity while building Vigor and Arcane. After reaching 45 Arcane, begin pushing Dexterity much more aggressively toward approximately 50.

This creates a natural progression:

  • Early game → survivability and requirements
  • Mid game → Arcane and Blood Loss
  • Late game → Dexterity and raw damage

Vigor

Rivers of Blood fights primarily at close-to-medium range, and Corpse Piler can leave you vulnerable when used during the wrong opening.

Aim for approximately:

  • 18 Vigor at LV25
  • 25 Vigor at LV50
  • 40 Vigor at LV100
  • 60 Vigor at LV150

This keeps survivability progressing alongside your damage rather than leaving Vigor until the endgame.

Mind and Endurance

Mind can remain at its starting value during the early game because Rivers of Blood isn't available yet.

Once Corpse Piler becomes part of the build, gradually increase Mind toward 17–20. This provides enough FP to use the Skill regularly without turning the build into an L2-spam setup.

Endurance should similarly increase gradually:

  • 14 → 16 → 20 → 25

This provides enough Stamina for Katana attack chains, Corpse Piler, dodging, and potentially powerstancing another Katana while maintaining Medium Equip Load.

Strength, Intelligence, and Faith

Leave these attributes untouched.

The Samurai already starts with the 12 Strength required by Rivers of Blood, while Intelligence and Faith provide no meaningful benefit to the standard build.

Those levels are much better spent on Vigor, Dexterity, Arcane, Endurance, and Mind.

Attribute Priority

Your progression should generally follow:

  • LV1–25 → Vigor + Dexterity
  • LV25–50 → Vigor + Arcane
  • LV50–100 → push Arcane toward 45 while reaching 40 Vigor
  • LV100–150 → push Dexterity toward 50, Vigor toward 60, then finish Endurance and Mind

The important transition occurs at 45 Arcane. Before that point, Arcane is our primary offensive investment. After reaching it, Dexterity becomes the priority for improving Rivers of Blood's direct damage.

Best Weapons for Rivers of Blood Builds

Rivers of Blood isn't available until the Mountaintops of the Giants, so you'll need another weapon for most of your initial playthrough.

Fortunately, the Samurai begins with one of the best progression weapons for this build, and your early Dexterity and Arcane investment can naturally transition into Rivers of Blood later.

Best Weapons Before Rivers of Blood

Uchigatana — Best Early-Game Option

Blood Uchigatana

Requirements: Strength - 11 / Dexterity - 15

The Uchigatana is the perfect starting weapon for this build and is immediately available when choosing the Samurai class.

It has innate Blood Loss buildup, an excellent Katana moveset, and can change both its Ash of War and affinity, allowing the weapon to evolve alongside your attribute distribution.

Early in the game, you can comfortably use the Uchigatana with its standard setup or a Dexterity-oriented affinity. As your Arcane investment increases, transitioning toward Blood or Occult becomes more attractive.

Blood provides significantly higher Blood Loss buildup, while Occult allows Arcane to contribute more heavily to the weapon's direct Physical damage while retaining the Uchigatana's innate Bleed.

This makes the Uchigatana an excellent weapon from the beginning of the game all the way until Rivers of Blood becomes available.

Location: Starting weapon for the Samurai, or found inside the Deathtouched Catacombs in Limgrave.

Nagakiba — Best Mid-Game Progression Weapon

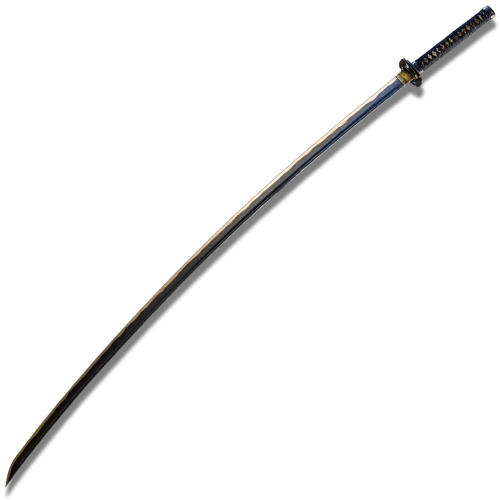
Occult Nagakiba

Requirements: Strength - 18 / Dexterity - 22

The Nagakiba provides an excellent upgrade from the Uchigatana if you're willing to meet its higher requirements.

Its biggest advantage is its exceptional reach, giving it one of the longest ranges of any Katana while retaining innate Blood Loss buildup and customizable Ashes of War.

Like the Uchigatana, it can use Blood or Occult affinity, allowing it to take advantage of the Arcane investment we're already making for Rivers of Blood.

However, don't feel obligated to spend additional Strength and Dexterity purely for the Nagakiba. The Uchigatana is perfectly capable of carrying the build until Rivers of Blood.

Location: Obtained through Bloody Finger Hunter Yura's questline, or from his appropriate later-game location if his questline isn't completed normally.

Off-Hand Weapons for Rivers of Blood

Rivers of Blood works perfectly well by itself, but Katanas can also be powerstanced by equipping another Katana in your left hand.

This gives you access to dual-Katana attacks that can rapidly apply Blood Loss without consuming FP.

Occult Uchigatana — Best Overall Off-Hand

Blood Uchigatana

The Uchigatana becomes one of the best off-hand companions for Rivers of Blood when given an Occult affinity.

Occult allows the weapon to scale strongly with Arcane while retaining its innate Blood Loss, making it naturally compatible with our 45 Arcane investment.

This gives you a strong combination of raw Physical damage and Bleed buildup without requiring a separate attribute distribution.

It's also lightweight and has relatively low requirements, making it extremely easy to incorporate.

Occult Nagakiba — Best Reach Option

Occult Nagakiba

An Occult Nagakiba provides the same basic advantages as the Uchigatana while offering substantially greater reach.

This can make the dual-Katana moveset more forgiving against enemies that frequently move just outside normal melee range.

The downside is its 18 Strength and 22 Dexterity requirements, which means you'll need additional investment before it fits the build.

By the later stages of our progression, the Dexterity requirement is no longer a problem, but Strength needs several additional levels beyond the Samurai's starting 12.

Blood Uchigatana — Best Maximum Bleed Option

Blood Uchigatana

A Blood Uchigatana sacrifices some raw Physical damage in exchange for significantly higher Blood Loss buildup.

When powerstanced with Rivers of Blood, this creates a more status-focused setup capable of rapidly building Hemorrhage through dual-Katana attack chains.

However, Blood isn't automatically better than Occult.

Against enemies with higher Bleed resistance, an Occult Uchigatana generally provides a better balance between raw damage and status buildup. Blood affinity is most attractive when your priority is triggering Hemorrhage as frequently as possible.

Single Katana vs Powerstancing

You don't need an off-hand Katana for Rivers of Blood to perform well.

Using Rivers of Blood by itself gives you:

  • Lower Equip Load
  • Lower Stamina consumption
  • Easy access to Corpse Piler
  • A simpler and more mobile playstyle

Powerstancing gives you:

  • More attacks per input
  • Higher Blood Loss pressure
  • Excellent synergy with successive-hit bonuses
  • Another strong offensive option that doesn't consume FP

Corpse Piler remains available while powerstancing because Rivers of Blood is equipped in your main hand.

Recommended Weapon Progression

For the simplest progression:

  • Uchigatana → Rivers of Blood

For players who want an intermediate upgrade:

  • Uchigatana → Nagakiba → Rivers of Blood

Once Rivers of Blood is obtained:

  • Rivers of Blood alone or
  • Rivers of Blood + Occult Uchigatana

Best Armor for Rivers of Blood Builds

Rivers of Blood benefits most from armor that supports its Blood Loss-focused aggressive playstyle while keeping the character mobile. Corpse Piler and powerstanced Katana attacks work best when you can quickly reposition, so maintaining Medium Equip Load should remain the priority.

Unlike most weapon builds, Rivers of Blood has one armor piece that provides a particularly powerful offensive bonus.

White Mask — Best Overall Headpiece

White Mask

The White Mask is the most important armor piece for a dedicated Rivers of Blood build.

Whenever Blood Loss occurs nearby, the White Mask increases your Attack Power by 10% for 20 seconds. Rivers of Blood can trigger Hemorrhage extremely quickly through Corpse Piler and regular Katana attacks, making this bonus easy to activate during most boss encounters.

The effect also stacks with Lord of Blood's Exultation, allowing a single Bleed proc to activate both bonuses simultaneously.

Because the bonus increases Attack Power rather than only Bleed damage, it improves your attacks even after Hemorrhage has already triggered.

Against enemies that are completely immune to Blood Loss, however, the White Mask loses most of its value and can simply be replaced with a more defensive headpiece.

Location: Dropped by one of the Nameless White Mask invaders in Mohgwyn Palace. Obtain it before defeating Mohg, Lord of Blood, as the invaders will no longer appear afterward.

Rakshasa Set — Best DLC Offensive Option

Rakshasa Set

The Rakshasa Set provides an additional offensive option for players who want to maximize damage.

Each piece increases the damage you deal, benefiting regular Katana attacks and Corpse Piler without requiring a Bleed proc to activate.

This makes individual Rakshasa pieces particularly useful alongside the White Mask:

White Mask + Rakshasa Chest / Gloves / Greaves

The trade-off is lower effective defense compared with similarly heavy armor, so this setup is best for players comfortable playing aggressively and avoiding enemy attacks.

Location: Dropped by Rakshasa in the Eastern Nameless Mausoleum in Shadow of the Erdtree.

Ronin's Set — Best General Katana Option

Ronin's Set

The Ronin's Set provides a good medium-weight option without forcing the build into an extremely heavy armor setup.

It doesn't directly increase Rivers of Blood's damage, but provides reasonable defenses while fitting comfortably into a mobile Katana build.

This makes it a simple choice during general progression if you're not interested in maximizing every offensive armor bonus.

Location: Obtained from Shabriri near the Zamor Ruins in the Mountaintops of the Giants.

Mixed Medium Armor — Best Balanced Setup

For most players, the strongest practical setup is simply:

  • White Mask + your best available defensive armor

The remaining three armor slots don't need any specific passive effect for Rivers of Blood to function.

Choose pieces with good Damage Negation and Poise while remaining at Medium Equip Load. This provides the White Mask's powerful Bleed-triggered damage bonus without unnecessarily sacrificing survivability.

Choosing Your Armor

For maximum Bleed synergy:

  • White Mask + mixed armor

For maximum offense:

  • White Mask + Rakshasa pieces

For general progression:

  • Best available medium armor

Against Bleed-immune enemies:

  • Replace White Mask with your best defensive headpiece

The White Mask is the only armor piece I would consider core to the standard Rivers of Blood setup. Everything else should be adjusted around defense, weight, and personal preference rather than forcing a complete armor set.

Best Talismans for Rivers of Blood Builds

Rivers of Blood benefits heavily from Talismans that improve Corpse Piler, successive attacks, and damage after triggering Blood Loss. Because Corpse Piler lands multiple hits very quickly, several powerful effects can be activated almost immediately during combat.

Shard of Alexander — Best Corpse Piler Talisman

Shard of Alexander

The Shard of Alexander increases the damage of weapon Skills by 15%, directly increasing the damage dealt by Corpse Piler.

There is no additional condition to activate the bonus, making this one of the most reliable Talismans for Rivers of Blood.

If Corpse Piler makes up a significant portion of your damage, Shard of Alexander should almost always occupy one of your Talisman slots.

Location: Obtained at the end of Iron Fist Alexander's questline in Crumbling Farum Azula.

Lord of Blood's Exultation — Best Bleed Talisman

Lord of Blood's Exultation

The Lord of Blood's Exultation increases Attack Power by 20% for 20 seconds whenever Blood Loss occurs nearby.

Rivers of Blood can trigger Hemorrhage extremely quickly, making the effect easy to activate against Bleed-vulnerable enemies.

The bonus also stacks with the White Mask, allowing a single Blood Loss proc to activate both effects and provide a substantial increase to your damage.

Against enemies that cannot Bleed, however, this Talisman loses most of its value and should be replaced.

Location: Dropped by Esgar, Priest of Blood in Leyndell Catacombs.

Rotten Winged Sword Insignia — Best Successive Attack Talisman

Rotten Winged Sword Insignia

The Rotten Winged Sword Insignia increases Attack Power as you land successive attacks.

This synergizes extremely well with Rivers of Blood because Corpse Piler rapidly lands multiple hits, allowing the Talisman's stronger damage tiers to activate much faster than they would with slower weapons.

It also benefits regular Katana combos and becomes particularly effective when powerstancing another Katana.

Location: Obtained by assisting Millicent near the end of her questline.

Millicent's Prosthesis — Best DEX and Multi-Hit Alternative

Millicent's Prosthesis

Millicent's Prosthesis increases Dexterity by 5 while also increasing Attack Power through successive attacks.

This makes it another excellent option for Rivers of Blood, since both parts of the Talisman directly support the build.

The successive-attack bonus can also stack with Rotten Winged Sword Insignia, creating a very aggressive multi-hit setup that Corpse Piler can activate rapidly.

However, the two Talismans are obtained from different outcomes of Millicent's questline, so obtaining both on the same character requires multiple playthroughs or NG+.

Location: Obtained by turning against Millicent during her questline.

Dragoncrest Greatshield Talisman — Best Defensive Option

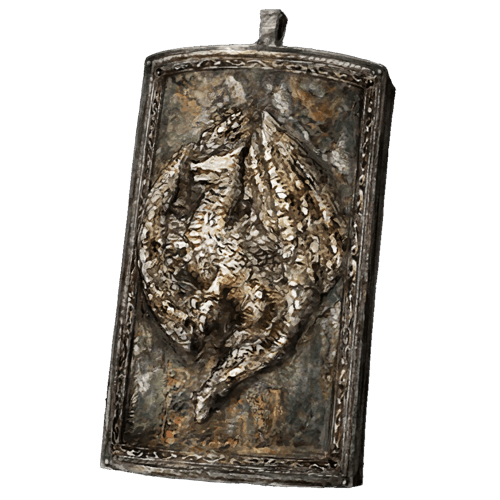
Dragoncrest Greatshield Talisman

The Dragoncrest Greatshield Talisman significantly increases Physical Damage Negation in PvE.

Rivers of Blood fights relatively close to enemies, and committing too heavily to Corpse Piler can occasionally leave you vulnerable to retaliation.

This makes Dragoncrest Greatshield an excellent fourth-slot option when survivability is more valuable than stacking another offensive multiplier.

Location: Found in Elphael, Brace of the Haligtree.

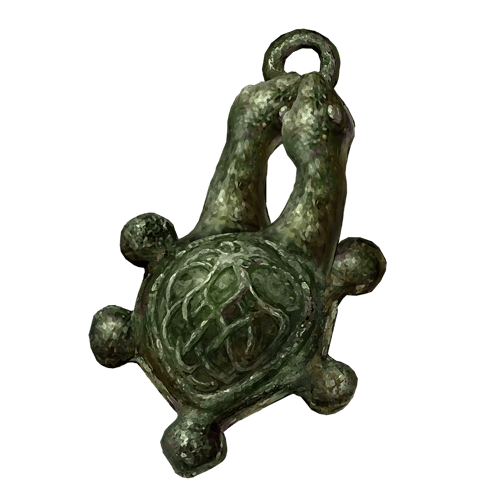
Two-Headed Turtle Talisman — Best Stamina Option

Two-Headed Turtle Talisman

The Two-Headed Turtle Talisman greatly increases Stamina recovery speed.

Corpse Piler, regular Katana attacks, powerstanced attacks, sprinting, and dodging all consume Stamina, so faster recovery helps maintain an aggressive playstyle without leaving you unable to dodge after attacking.

Before reaching Shadow of the Erdtree, the Green Turtle Talisman provides a strong alternative.

Location: Found behind a waterfall in Gravesite Plain in Shadow of the Erdtree.

Choosing Your Talismans

For maximum Corpse Piler and Bleed damage:

  • Shard of Alexander + Lord of Blood's Exultation + Rotten Winged Sword Insignia + Millicent's Prosthesis

This setup combines Skill damage, Bleed-triggered Attack Power, and successive-hit bonuses, all of which Rivers of Blood can activate extremely effectively.

For a more balanced setup, replace Millicent's Prosthesis with:

  • Dragoncrest Greatshield Talisman for survivability or
  • Two-Headed Turtle Talisman for Stamina recovery

Against Bleed-immune enemies, Lord of Blood's Exultation should usually be replaced, since you can no longer reliably activate its effect.

You also don't need both successive-hit Talismans for the build to perform well. Shard of Alexander + Lord of Blood's Exultation + Rotten Winged Sword Insignia provide an extremely strong offensive core, leaving the fourth slot free to adapt to the encounter.


Rivers of Blood Build Playstyle Tips

Rivers of Blood is strongest when you combine Corpse Piler with the Katana's regular moveset rather than treating the weapon as an L2-only build. Corpse Piler provides exceptional burst and Blood Loss buildup, but knowing when to stop attacking is essential against aggressive bosses.

Don't Always Complete Corpse Piler

Corpse Piler has multiple follow-up inputs, but you don't need to complete the entire sequence every time.

The opening portion is relatively quick and provides excellent damage and Blood Loss buildup. The later attacks deal more damage but also keep you committed to the animation for considerably longer.

Adjust the combo to the available opening:

  • Short opening → first Corpse Piler sequence
  • Medium opening → first + second sequence
  • Large opening → complete Corpse Piler combo

Save the full sequence for stance breaks, long recovery animations, and other situations where the enemy cannot immediately retaliate.

Take Advantage of Corpse Piler's Range

Corpse Piler extends significantly beyond the normal reach of Rivers of Blood.

Use this additional range to punish enemies without always standing directly next to them. Against dangerous melee bosses, positioning near the edge of Corpse Piler's reach can provide additional safety.

However, don't deliberately stay at maximum range against every enemy. Proper positioning should depend on the attacks you're trying to punish.

Trigger Blood Loss to Activate Your Damage Buffs

Blood Loss isn't only valuable for the percentage-based damage it deals.

Triggering Hemorrhage also activates:

  • White Mask → increased Attack Power
  • Lord of Blood's Exultation → increased Attack Power

These effects stack, creating a significant damage increase after the first Bleed proc.

Once activated, use the buff window aggressively rather than immediately backing away and wasting its duration.

Build Successive-Hit Bonuses Quickly

Corpse Piler's rapid multi-hit attacks are excellent at activating Rotten Winged Sword Insignia and Millicent's Prosthesis.

This means your damage can increase significantly during a sustained offensive sequence.

Powerstanced Katana attacks can also maintain these bonuses without consuming FP, giving you another way to continue pressure after using Corpse Piler.

Don't Ignore Regular Katana Attacks

Rivers of Blood still has an excellent Katana moveset.

Regular Light Attacks, running attacks, jumping attacks, and rolling attacks all provide fast damage and Blood Loss buildup without consuming FP.

Against weaker enemies, Corpse Piler is often unnecessary. Save your FP and simply use Rivers of Blood as a Katana.

Use Powerstancing When You Want More Bleed Pressure

Equipping an Occult Uchigatana or another Katana in your off-hand gives you access to the powerstanced Katana moveset.

This provides multiple hits per attack sequence, making it excellent for rapidly building Blood Loss and activating successive-hit effects.

Powerstancing does consume more Stamina, however, and you don't need it for Corpse Piler to be effective.

Using Rivers of Blood alone provides a simpler and lighter alternative.

Manage Your FP

Corpse Piler can burn through FP extremely quickly when repeatedly completing the full sequence.

Don't spend FP on enemies that regular Katana attacks can easily handle.

During boss fights, reserve Corpse Piler for meaningful attack windows rather than automatically pressing the Skill whenever you're within range.

Around 20 Mind provides enough FP for frequent Skill usage, but the build should never feel dependent on having a full FP bar.

Don't Chase the Next Bleed Proc

One of the easiest mistakes with Bleed builds is becoming overly aggressive because the enemy looks close to triggering Hemorrhage.

You cannot see the enemy's actual Blood Loss meter, and buildup gradually decreases when you stop applying it.

Don't turn a safe fight into a bad trade simply because you expect one more attack to proc Bleed.

Maintain your normal rhythm and allow Hemorrhage to occur naturally.

Bleed Resistance Increases After Each Proc

Enemies become progressively harder to Bleed after each successful Hemorrhage proc.

This means the first Bleed may occur extremely quickly, while later procs require considerably more buildup.

Don't assume Corpse Piler suddenly stopped working when the second or third Hemorrhage takes longer to trigger.

Your direct Physical and Fire damage remains important throughout the entire encounter.

Adapt Against Bleed-Immune Enemies

Some enemies cannot suffer Blood Loss at all.

Against them, Rivers of Blood loses one of its biggest advantages, but the weapon still deals direct Physical and Fire damage.

Replace equipment that depends on Blood Loss activation, particularly:

  • White Mask
  • Lord of Blood's Exultation

Use Shard of Alexander and more general offensive or defensive Talismans instead.

Most importantly, don't repeatedly use Corpse Piler expecting a Hemorrhage that can never occur.

Watch for Fire Resistance

Rivers of Blood deals split Physical and Fire damage, so enemies with high Fire resistance can reduce part of your direct damage.

This doesn't necessarily mean you need to abandon the weapon, particularly if the enemy remains vulnerable to Bleed.

However, an Occult Uchigatana or similar Physical-focused alternative can become more attractive when fighting an enemy that combines high Fire resistance with strong Bleed resistance.

Use Corpse Piler During Stance Breaks

A stance break provides one of the safest opportunities to complete Corpse Piler's longer sequence.

However, consider whether taking the Critical Hit first provides more value.

Against many enemies, you can perform the Critical Hit and still have time to pressure them as they recover.

Don't automatically sacrifice guaranteed Critical damage purely because Corpse Piler is available.

Stay at Medium Equip Load

Rivers of Blood is an aggressive melee build and relies heavily on positioning.

Maintain Medium Equip Load or lighter so you can immediately dodge after Corpse Piler, reposition during enemy combos, and quickly close distance when an opening appears.

The White Mask already provides our most important armor bonus, so there is little reason to sacrifice mobility for unnecessarily heavy equipment.

Know When to Stop Attacking

Corpse Piler makes it very tempting to continue pressing the Skill button once the combo has started.

Against late-game and DLC bosses, this is often exactly what gets you punished.

If the enemy begins recovering sooner than expected, stop the sequence and prepare to dodge.

You don't lose anything by ending Corpse Piler early. Surviving to punish the next opening is more valuable than forcing the final attacks.

Build Your Combat Around the Available Opening

A simple Rivers of Blood combat flow looks like:

  • Weak enemy → regular Katana attacks
  • Small boss opening → short Corpse Piler sequence
  • Large opening → extended Corpse Piler
  • Need to conserve FP → regular or powerstanced Katana attacks
  • Blood Loss triggers → capitalize on White Mask + Lord of Blood's Exultation
  • Bleed-immune enemy → prioritize direct damage and replace Bleed-dependent equipment
  • Dangerous retaliation incoming → immediately stop Corpse Piler and dodge

Rivers of Blood rewards controlled aggression. Use Corpse Piler to rapidly build Blood Loss and capitalize on large openings, but rely on the Katana moveset whenever committing to the full Skill would be unsafe or wasteful.

Table of Contents

See More Elden Ring

Elden Ring Madness Build - Stats, Weapons, Skills & More
Updated on Aug 23, 2026
Elden Ring Tank Build - Stats, Weapons, Skills & More
Updated on Aug 23, 2026
Elden Ring Bloodhound's Fang Build - Stats, Weapons, Skills & More
Updated on Aug 23, 2026
Elden Ring Rivers of Blood Build - Stats, Weapons, Skills & More
Updated on Aug 23, 2026
Elden Ring Lightning Build - Stats, Weapons, Skills & More
Updated on Aug 23, 2026

Like our guides?

Add Mobalytics as a preferred source on Google!