menu
MobalyticsUse your favourite features in-game with our Desktop App
Gamebase Guide

Elden Ring Tank Build - Stats, Weapons, Skills & More

Updated on Aug 23, 2026
Aug 23, 2026

Overview

Tank builds are designed around one simple idea: survive attacks that other builds would be forced to avoid, then punish enemies with powerful Guard Counters and heavy melee attacks.

Rather than relying entirely on dodge rolls, this build uses Greatshields, high Guard Boost, heavy armor, large amounts of HP and Stamina, and strong defensive Talismans to absorb incoming attacks while remaining directly in front of the enemy.

Blocking is not the same as simply holding your shield indefinitely. Every blocked attack consumes Stamina, and allowing your Stamina to reach zero will break your guard and leave you vulnerable. The strongest Tank builds therefore combine high Guard Boost with careful Stamina management, lowering your shield between attacks whenever possible to recover Stamina.

Shadow of the Erdtree expanded this playstyle significantly. The Verdigris Greatshield provides exceptional Guard Boost, while Talismans such as Pearl Shield Talisman and Verdigris Discus offer additional defensive options. The Deflecting Hardtear also introduces a more active style of blocking, rewarding precisely timed guards with improved defenses and stronger Guard Counters.

A Tank build therefore doesn't have to be completely passive. You can choose between traditional Greatshield blocking, where you safely absorb attacks before retaliating, or a more aggressive Guard Counter playstyle that rewards learning enemy attack timings.

How Blocking and Guard Boost Work

Every shield has two important defensive properties: Guarded Damage Negation and Guard Boost.

Guarded Damage Negation determines how much of each damage type is prevented when an attack is blocked. A shield with 100 Physical Guarded Damage Negation, for example, completely prevents the Physical portion of a successfully blocked attack.

Magic, Fire, Lightning, and Holy attacks are handled separately, meaning a shield that completely blocks Physical damage may still allow some elemental damage through.

Guard Boost determines how much Stamina you lose when blocking an attack.

The higher your Guard Boost, the less Stamina is consumed. This is extremely important because losing all of your Stamina while guarding causes a guard break, leaving you vulnerable to a Critical Hit or follow-up attack.

This is why Greatshields are so effective for Tank builds. They combine excellent damage negation with extremely high Guard Boost.

The DLC's Verdigris Greatshield, for example, reaches 90 Guard Boost at +10, making it one of the strongest pure blocking shields available.

Guard Counters

After successfully blocking an attack, pressing your Heavy Attack allows you to perform a Guard Counter.

Guard Counters deal excellent stance damage and give Tank builds a way to turn defense directly into offense. Repeated Guard Counters can quickly break an enemy's stance, creating an opportunity for a Critical Hit.

However, don't automatically Guard Counter after every blocked attack.

Many bosses attack in long combos, and attempting to counter after the first hit can cause you to trade into the rest of their attack chain. Learn where the actual end of the combo occurs before committing to your counterattack.

Shadow of the Erdtree makes this playstyle even stronger through the Deflecting Hardtear. Precisely guarding as an attack connects temporarily improves your guarding ability and strengthens subsequent Guard Counters.

This creates two viable approaches:

  • Traditional Tank → block safely → wait for the combo to end → Guard Counter
  • Deflecting Tank → precisely time your blocks → build Guard Counter damage → punish the opening

Both approaches use the same fundamental Tank setup, so you can freely switch between them depending on the encounter.


Pros and Cons

Pros

  • Extremely high survivability against Physical attacks.
  • Greatshields can block attacks that would stagger or heavily damage lighter builds.
  • Excellent Guard Counter and stance-breaking potential.
  • Large HP and Stamina pools make mistakes much more forgiving.
  • Heavy Strength weapons pair naturally with the build.
  • Can safely remain close to enemies instead of constantly repositioning.
  • Shadow of the Erdtree provides several excellent new defensive tools.
  • Deflecting Hardtear enables a more active perfect-guard playstyle.

Cons

  • Requires significant investment into Vigor, Endurance, and Strength.
  • Greatshields and heavy armor consume a large amount of Equip Load.
  • Blocking still consumes Stamina, and a guard break can leave you extremely vulnerable.
  • Elemental attacks can still deal damage through shields without sufficient Damage Negation.
  • Grab attacks generally cannot be blocked and must still be avoided.
  • Some attacks are better dodged than blocked because of their enormous Stamina damage.
  • Heavy equipment can easily push the character into Heavy Load without enough Endurance.
  • Tank builds can become overly passive if you don't take advantage of Guard Counters and attack openings.

All Elden Ring Guides

Check Out Our Other Elden Ring Builds and Guides

Starting Class, Attribute Leveling and Distribution

Tank builds require significant investment into Vigor, Endurance, and Strength. Vigor provides the HP needed to survive attacks that get through your guard, Endurance gives you both the Stamina and Equip Load required for heavy equipment, and Strength supports the Greatshields and heavy weapons that define the build.

Unlike the previous Bleed-oriented version, this progression focuses entirely on a Strength-based PvE Tank.

Recommended Starting Class: Vagabond

Attribute

Starting Stats

LV25

LV50

LV100

LV150

Vigor

15

22

30

45

60

Endurance

11

16

22

32

40

Strength

14

18

28

45

60

Dexterity

13

13

13

13

13

Mind

10

10

10

10

10

Intelligence

9

9

9

9

9

Faith

9

9

9

9

9

Arcane

7

7

7

7

7

The Vagabond is an excellent starting class because it begins with high Vigor and Strength while wasting very few levels on attributes the build doesn't need.

Early on, prioritize Vigor and Endurance while gradually increasing Strength to meet the requirements of your chosen shield and weapon. Tank builds are unusually dependent on Endurance because Stamina determines how many attacks you can block before your guard breaks.

By around level 50, 30 Vigor, 22 Endurance, and 28 Strength provide a strong foundation for transitioning into heavier weapons, shields, and armor.

At level 100, aim for approximately 45 Vigor, 32 Endurance, and 45 Strength. At this point, the build should have enough HP and Stamina to comfortably absorb attacks while still dealing meaningful damage with Strength weapons.

At level 150, 60 Vigor, 40 Endurance, and 60 Strength create an extremely durable endgame Tank with enough Equip Load and Stamina to comfortably support heavy equipment.

Why 40 Endurance?

Endurance is arguably just as important as Strength for a Tank build.

Blocking consumes Stamina, and if your Stamina reaches zero while guarding, your stance will be broken. More Endurance therefore directly increases how much pressure your shield can withstand.

It also increases Equip Load, which is essential when combining a Greatshield, heavy Strength weapon, and high-defense armor.

Aim to remain at Medium Equip Load whenever possible. Heavy Load is usable on an extremely defensive setup, but giving up the standard roll is rarely worth it when certain attacks still need to be dodged.

Strength and Greatshield Requirements

Don't blindly level Strength toward 60 before checking the requirements of the equipment you want to use.

Several of the strongest Greatshields require substantial Strength investment:

  • Fingerprint Stone Shield — 48 Strength
  • Verdigris Greatshield — 49 Strength

This means reaching roughly 50 Strength is an important equipment breakpoint for an endgame Tank.

After meeting your shield requirement, continue toward 60 Strength for additional weapon damage.

Why Stop at 60 Strength?

Unlike a pure two-handed Strength build, a Tank usually fights with a shield permanently occupying one hand. This means you don't consistently benefit from the 50% effective Strength bonus provided by two-handing your weapon.

60 Strength therefore provides a strong balance between damage and the large investment Tank builds already need in Vigor and Endurance.

If you continue leveling beyond 150, pushing Strength toward 80 is one of the most straightforward ways to increase your damage.

Mind, Dexterity, Faith, and Arcane

These attributes should generally remain close to their starting values.

Mind is only necessary if your chosen weapon or shield Skill consumes significant FP.

Dexterity should only be raised to meet the minimum requirement of a specific weapon.

Faith can be increased if you specifically want defensive buffs such as Golden Vow or elemental Fortification Incantations, but it isn't necessary for the core Tank build.

Arcane and Intelligence provide very little value to our standard Strength Tank and should normally remain untouched.

Attribute Priority

Your general leveling priority should be:

  • Vigor → enough Strength for equipment → Endurance → Strength

Don't sacrifice Vigor and Endurance simply to increase your weapon's Attack Rating. A Tank build becomes powerful because it can remain in combat and continuously punish enemy attacks, not because it has the highest possible damage per individual hit.

At higher levels, a good final target is:

  • 60 Vigor / 40 Endurance / 60 Strength

From there, additional levels can go toward 80 Strength, more Endurance, or Faith for defensive buffs, depending on how you want to expand the build.

Best Greatshields and Shields for Tank Builds

Your shield is the centerpiece of a Tank build. While armor determines how much damage you take when an attack connects, a strong shield can prevent that damage entirely while creating opportunities for Guard Counters.

The most important stats are Guarded Damage Negation and Guard Boost. Higher Guard Boost reduces the Stamina consumed when blocking, while the individual Damage Negation values determine how much Physical and elemental damage passes through your guard.

Best Endgame Greatshields

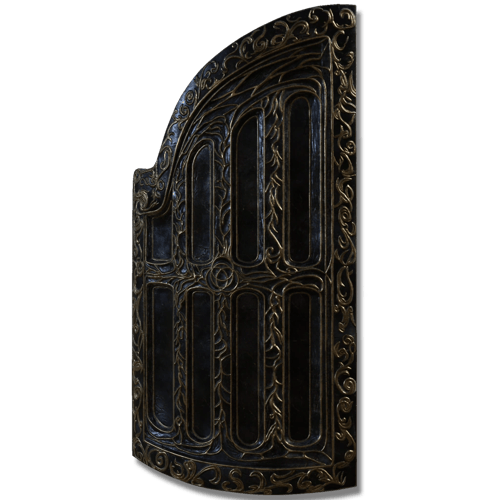
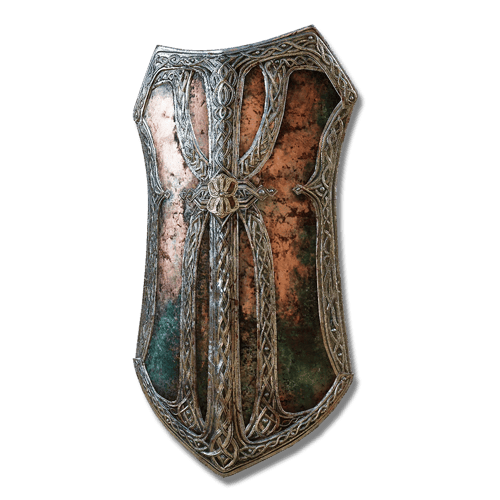
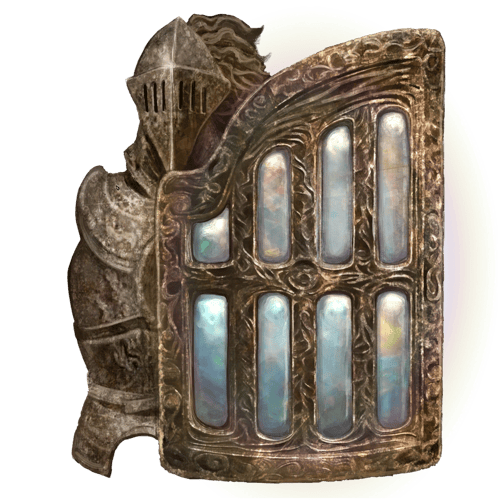
Verdigris Greatshield — Best Overall Tank Shield

Verdigris Greatshield — Best Overall Tank Shield

Requirements: Strength - 49

The Verdigris Greatshield is arguably the strongest pure blocking shield in Elden Ring.

At +10, it reaches an exceptional 90 Guard Boost, allowing it to block extremely powerful attacks while consuming significantly less Stamina than most alternatives.

It also provides 100 Physical Guarded Damage Negation and strong elemental defenses, making it excellent for simply standing your ground against aggressive bosses.

Its biggest drawback is its enormous 29.0 weight, requiring substantial Endurance if you want to combine it with heavy armor and a large Strength weapon while maintaining Medium Equip Load.

The shield comes with Moore's Charge, meaning its Skill cannot be replaced. If you frequently want to use your main-hand weapon Skill without two-handing, another shield with No Skill may be more convenient.

Location: Obtained from Moore during his questline in Shadow of the Erdtree.

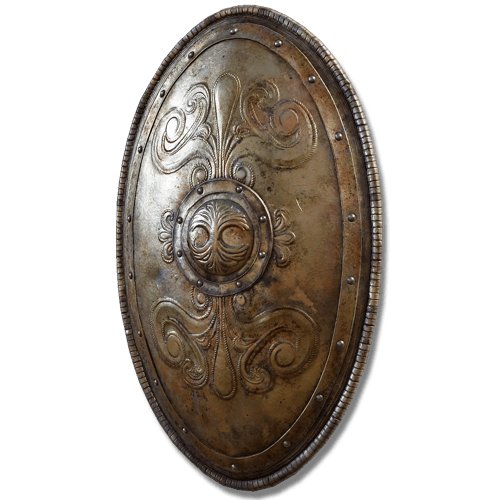
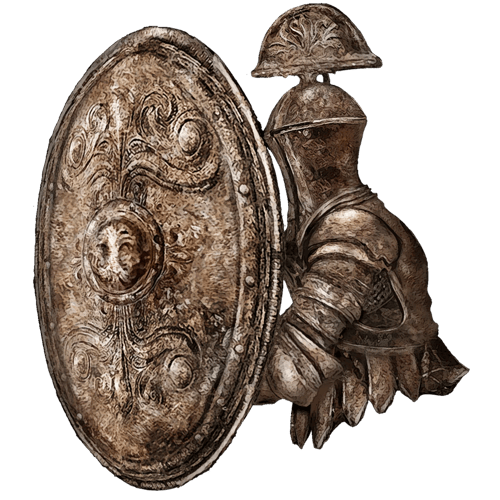
Fingerprint Stone Shield — Best Base-Game Greatshield

Fingerprint Stone Shield — Best Base-Game Greatshield

Requirements: Strength - 48

The Fingerprint Stone Shield remains one of the strongest defensive options in the base game.

It provides 100 Physical Guarded Damage Negation, extremely high Guard Boost, and excellent elemental defenses, making it particularly effective when you need to block mixed-damage attacks.

Unlike Verdigris, the Fingerprint Stone Shield can also have its Ash of War changed, giving it significantly more flexibility.

Adding No Skill allows you to freely use your main-hand weapon Skill without lowering or swapping your shield.

Its enormous weight and 48 Strength requirement make it an endgame option, but once your build can support it, Fingerprint can handle almost anything that can reasonably be blocked.

Location: Found beneath the Cathedral of the Forsaken in the Subterranean Shunning-Grounds after defeating Mohg, the Omen.

Black Steel Greatshield — Best Elemental Tank Option

Black Steel Greatshield — Best Elemental Tank Option

Requirements: Strength - 35

The Black Steel Greatshield is an excellent DLC alternative for encounters where elemental damage is a major threat.

It provides 100 Physical Guarded Damage Negation while also offering particularly strong Holy defense. It can additionally be infused, allowing you to further specialize the shield against particular damage types.

This makes it a useful shield to keep upgraded even if Fingerprint or Verdigris is your normal choice.

Rather than trying to make one Greatshield perfect against every encounter, Black Steel can be used when elemental Damage Negation matters more than maximum Guard Boost.

Location: Dropped by Black Knights wielding the Greatshield in Shadow of the Erdtree.

Best Progression Greatshields

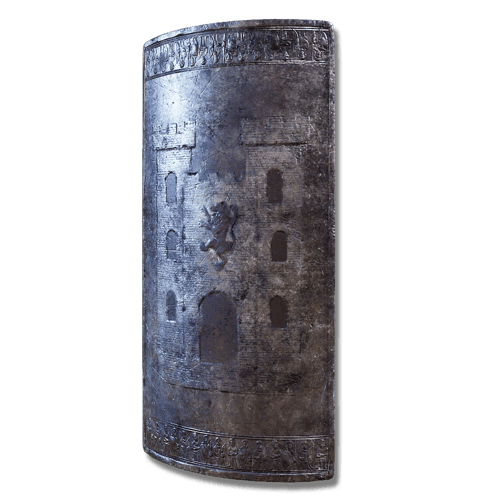
Golden Greatshield — Best Mid-Game Greatshield

Golden Greatshield — Best Mid-Game Greatshield

Requirements: Strength - 34

The Golden Greatshield is an excellent stepping stone before reaching the massive Strength requirements of Fingerprint and Verdigris.

It provides 100 Physical Guarded Damage Negation, high Guard Boost, and strong overall defenses without being quite as heavy as the endgame monsters.

It also comes with No Skill, allowing you to immediately use your main-hand weapon Skill while keeping your shield equipped.

For a straightforward Strength Tank, this is one of the best Greatshields to use throughout the middle portion of the game.

Location: Dropped by Leyndell Knights wielding Greatshields.

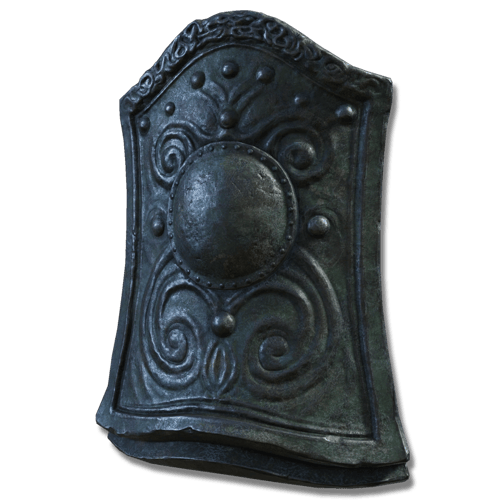
Manor Towershield — Best Early Greatshield

Manor Towershield — Best Early Greatshield

Requirements: Strength - 30

The Manor Towershield gives the build access to a proper Greatshield relatively early.

It provides 100 Physical Guarded Damage Negation and solid Guard Boost, allowing you to begin practicing the core block → Guard Counter playstyle well before the strongest Greatshields become available.

Its 30 Strength requirement is substantial early on, but our Strength progression naturally works toward it.

Location: Found inside Stormveil Castle.

Gilded Greatshield — Strong Early Alternative

Gilded Greatshield — Strong Early Alternative

Requirements: Strength - 36

The Gilded Greatshield provides another strong early-to-mid-game option with excellent Physical protection and high Guard Boost once upgraded.

Its main disadvantage compared with Manor Towershield is the higher Strength requirement, but it can potentially be obtained extremely early if you're willing to farm for it.

Location: Dropped by the Godrick Knight wielding the Greatshield in Gatefront Ruins.

Medium Shield Alternative

Brass Shield — Best Lightweight Alternative

Brass Shield — Best Lightweight Alternative

Requirements: Strength - 16

You don't always need a Greatshield to play defensively.

The Brass Shield is one of the best Medium Shields in the game, offering 100 Physical Guarded Damage Negation and excellent Guard Boost for its weight.

Its low 16 Strength requirement means it becomes available almost immediately, making it an excellent shield while progressing toward your first Greatshield.

It also weighs dramatically less than Fingerprint or Verdigris, freeing a huge amount of Equip Load for armor and weapons.

The Brass Shield remains useful even late-game when you want a lighter and more mobile version of the Tank setup.

Location: Dropped by Godrick Soldiers carrying Brass Shields, including those around Gatefront Ruins.

Shield Progression

A straightforward progression for the build is:

  • Brass Shield → Manor Towershield / Golden Greatshield → Fingerprint Stone Shield / Verdigris Greatshield

You don't need to replace a shield immediately when the next option becomes available. Upgrade level matters enormously for Guard Boost, so a heavily upgraded shield you already own may outperform a newly acquired Greatshield until you invest upgrade materials into it.

No Skill vs Shield Skills

For most Tank setups, No Skill is one of the most useful shield Ashes of War.

With No Skill equipped, pressing your Skill button while holding the shield uses your main-hand weapon's Skill instead, allowing you to remain fully equipped for defense without constantly two-handing your weapon.

However, several shield Skills are worth considering:

  • Barricade Shield temporarily improves guarding and reduces the Stamina cost of blocking.
  • Shield Bash provides an offensive option while maintaining your defensive identity.
  • Shield Crash turns your Greatshield itself into a weapon and can repeatedly hit enemies during the charge.

For a general-purpose Tank, however, No Skill provides the most flexibility.

Which Greatshield Should You Use?

For maximum pure blocking:

  • Verdigris Greatshield

For excellent defense with greater customization:

  • Fingerprint Stone Shield

For elemental encounters:

  • Black Steel Greatshield

For mid-game progression:

  • Golden Greatshield

For early-game Tank gameplay:

  • Brass Shield → Manor Towershield

The strongest shield isn't automatically the one with the highest Guard Boost. Weight, elemental defenses, Ash of War flexibility, and the attacks you're actually trying to block all matter.

Best Weapons to Build Around

A Tank weapon should complement your Greatshield rather than compete with it. Since the shield occupies one hand, the best choices are weapons that perform well one-handed, scale strongly with Strength, and have powerful Guard Counters.

Heavy weapons are particularly effective because Guard Counters already deal high stance damage, allowing Tank builds to repeatedly create Critical Hit opportunities.

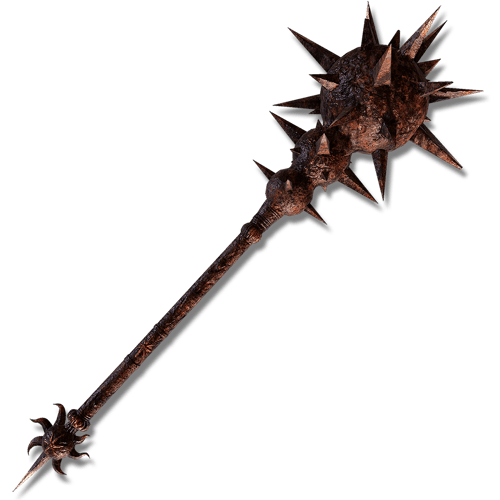
Great Stars — Best Overall Tank Weapon

Great Stars — Best Overall Tank Weapon

Requirements: Strength - 22 / Dexterity - 12

Great Stars is one of the best all-around weapons for a Tank build. It deals Strike damage, has innate Blood Loss buildup, and restores 1% of your maximum HP whenever you hit an enemy.

That healing works particularly well with a defensive playstyle. Since Tank builds are designed to survive extended fights, repeatedly recovering small amounts of HP helps offset chip damage from elemental attacks and occasional mistakes.

As a Great Hammer, Great Stars also deals excellent stance damage with Guard Counters, making it easy to transition from blocking into stance breaks.

It can also change its Ash of War and affinity. A Heavy Great Stars fits naturally into our Strength progression.

Location: Found in a carriage in Altus Plateau, guarded by enemies near the Road of Iniquity Side Path.

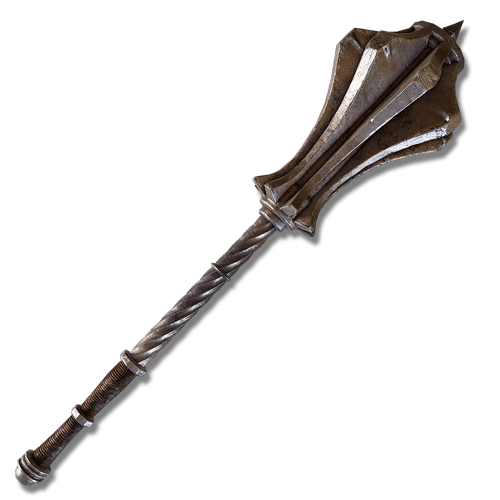
Great Mace — Best Pure Strength Option

Great Mace — Best Pure Strength Option

Requirements: Strength - 28

The Great Mace is a straightforward but extremely effective Strength weapon.

It deals Strike damage, has excellent Strength scaling with a Heavy affinity, and its Great Hammer moveset provides powerful Guard Counters and stance damage.

Unlike Great Stars, there are no status effects or healing mechanics to manage. This makes it an excellent choice if you simply want a reliable weapon that turns every successful block into a heavy retaliation.

Its Ash of War can also be changed, allowing it to adapt to different Tank setups.

Location: Found in a chest near the Grand Lift of Dectus in Liurnia.

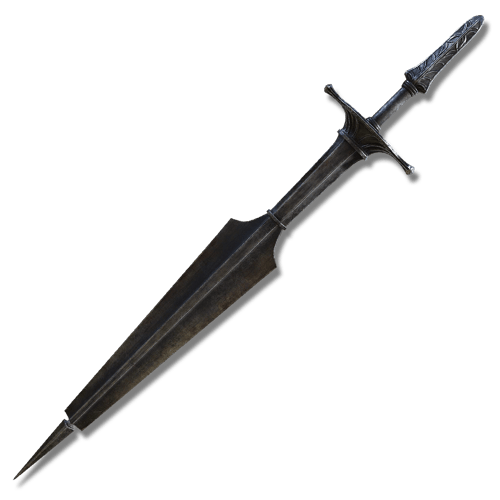
Sword Lance — Best DLC Tank Weapon

Sword Lance — Best DLC Tank Weapon

Requirements: Strength - 21 / Dexterity - 11

The Sword Lance is an excellent Shadow of the Erdtree option for Strength Tanks.

Its biggest advantage is its Heavy Thrusting Sword moveset, allowing you to use fast thrusting attacks while remaining behind a Greatshield. It also performs exceptionally well with Strength-oriented affinities.

Thrusting damage is particularly useful because Pierce attacks can benefit from counterattack damage when hitting enemies during their own attacks.

This creates an aggressive Tank playstyle where you can safely pressure enemies behind your shield rather than waiting exclusively for Guard Counter opportunities.

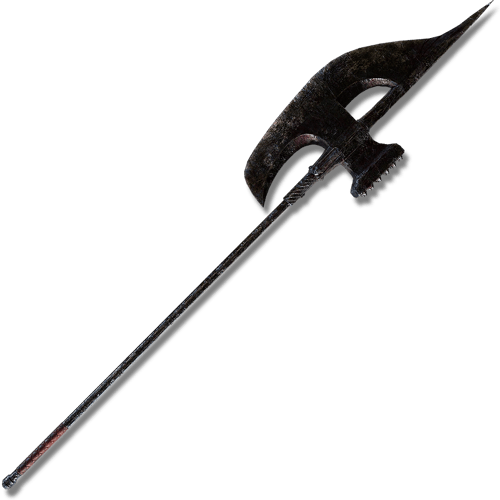
Location: Obtained by exchanging the Remembrance of the Wild Boar Rider after defeating Commander Gaius.

Nightrider Glaive — Best Reach Option

Nightrider Glaive — Best Reach Option

Requirements: Strength - 26 / Dexterity - 10

The Nightrider Glaive provides excellent reach while maintaining very strong Strength scaling.

Its longer attack range makes it easier to punish enemies after blocking without needing to move directly into them, and the Halberd moveset provides a good combination of range, damage, and stance pressure.

With a Heavy affinity, it becomes an excellent dedicated Strength weapon and can also use a wide selection of Ashes of War.

Location: Dropped by the Night's Cavalry between East Raya Lucaria Gate and Bellum Church in Liurnia.

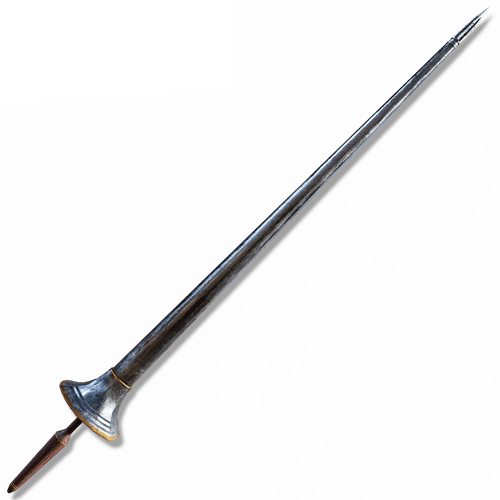
Lance — Best Shield-Poke Weapon

Lance — Best Shield-Poke Weapon

Requirements: Strength - 20 / Dexterity - 14

The Lance is one of the most natural weapons for a traditional Greatshield Tank.

As a Great Spear, it allows you to attack while continuing to guard with your shield. This lets you safely deal damage during situations where lowering your shield for a conventional attack would be dangerous.

A Heavy-infused Lance also scales well with Strength and benefits from Pierce counterattack damage.

Shield poking consumes additional Stamina, however, so don't simply hold block and attack indefinitely. Mix guarded thrusts with normal attacks and Guard Counters depending on the opening.

Location: Found on top of a ruined structure in northeastern Limgrave.

Choosing Your Weapon

For the most balanced Tank setup:

  • Great Stars → healing, Bleed, stance damage, and excellent overall utility

For straightforward Strength damage:

  • Great Mace

For an aggressive DLC setup:

  • Sword Lance

For additional reach:

  • Nightrider Glaive

For traditional shield-poking:

  • Lance

All five weapons work without changing the identity of the build. Your Greatshield remains the centerpiece, while your weapon determines whether you want to emphasize Guard Counters, sustain, reach, or safe attacks from behind your shield.


Ashes of War

Tank builds benefit most from Ashes of War that improve guarding, stance damage, or the strength of your counterattacks. Since the build already invests heavily into defense, your Ash of War should generally help turn that defense into additional offensive pressure.

Barricade Shield — Best Defensive Shield Skill

Barricade Shield temporarily strengthens your shield, significantly reducing the Stamina consumed when blocking attacks.

This is especially useful before obtaining endgame Greatshields with extremely high Guard Boost, allowing shields such as the Brass Shield or Manor Towershield to withstand much heavier attacks.

Its short duration means it should be activated before a dangerous combo rather than maintained constantly.

Location: Dropped by the Night's Cavalry in Weeping Peninsula.

No Skill — Best General Shield Ash of War

No Skill removes the Skill from your shield, allowing your main-hand weapon's Ash of War to activate without needing to two-hand it.

For most Tank builds, this is one of the best choices because you can remain behind your Greatshield while still having immediate access to your weapon Skill.

It is particularly useful on customizable shields such as the Fingerprint Stone Shield.

Location: Purchased from Knight Bernahl.

Cragblade — Best Guard Counter Damage Option

Cragblade temporarily coats your weapon in stone, increasing its Physical damage and stance damage.

This pairs extremely well with a Guard Counter-focused Tank because your counters already deal substantial stance damage. The additional boost helps break enemy stance even faster, creating more opportunities for Critical Hits.

It also works perfectly with Heavy-infused Strength weapons such as Great Stars and Great Mace.

Location: Obtained from a Teardrop Scarab near Impassable Greatbridge in Caelid.

Royal Knight's Resolve — Best Burst Option

Royal Knight's Resolve greatly increases the damage of your next successful attack.

Tank builds can take advantage of this by activating the Skill before a predictable enemy attack, blocking it, then retaliating with a powerful Guard Counter.

The buff only applies to a single attack, so it works best when deliberately preparing one large punish rather than during normal attack chains.

Location: Found in Volcano Manor.

Shield Crash — Best Offensive Shield Option

Shield Crash turns your Greatshield itself into an offensive weapon, charging forward while maintaining a defensive posture and repeatedly striking enemies.

It provides a fun alternative for players who want their shield to contribute directly to damage rather than functioning purely as protection.

It is particularly effective with large Greatshields, but using it means giving up No Skill, so you'll need to switch weapons or two-hand your main-hand weapon to access its Skill.

Location: Obtained from a Teardrop Scarab in Lux Ruins in Altus Plateau.

Choosing Your Ash of War

For a standard Tank:

  • No Skill + Cragblade

For maximum blocking:

  • Barricade Shield

For Guard Counter burst:

  • Royal Knight's Resolve

For an offensive Greatshield setup:

  • Shield Crash

Don't overcomplicate this part of the build. Blocking and Guard Counters already provide the core gameplay loop, so Ashes of War should enhance that playstyle rather than replace it.

Best Armor for Tank Builds

Armor matters considerably more for Tank builds than it does for most other playstyles. Since you intentionally remain close to enemies and occasionally take chip damage through your shield, high Damage Negation and Poise provide real value.

However, even a Tank should generally aim to maintain Medium Equip Load. Heavy Load makes avoiding grabs, unblockable attacks, and particularly dangerous boss attacks much harder.

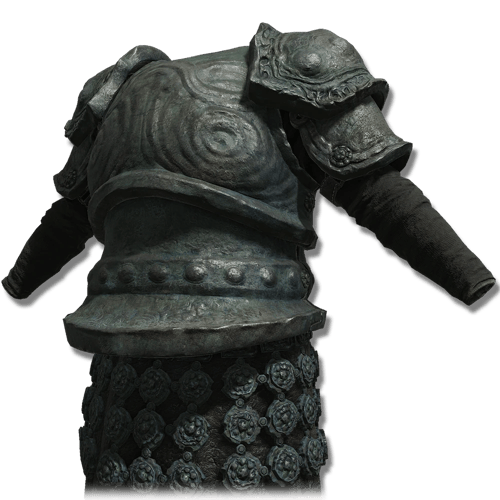
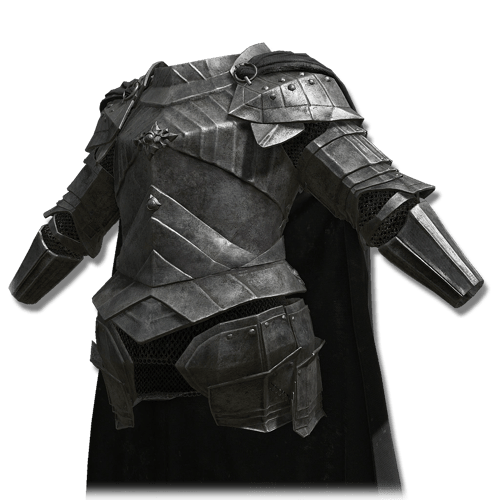
Verdigris Set — Best Overall Tank Armor

Verdigris Set

The Verdigris Set is one of the strongest pure defensive armor sets available in Shadow of the Erdtree.

It provides extremely high Physical Damage Negation and Poise, making it an excellent match for the Verdigris Greatshield and a traditional block-focused Tank.

The downside is its enormous weight. Wearing the complete set alongside a Greatshield and heavy Strength weapon requires substantial Equip Load, so don't hesitate to replace individual pieces with lighter alternatives.

Location: Obtained from Moore during his questline in Shadow of the Erdtree.

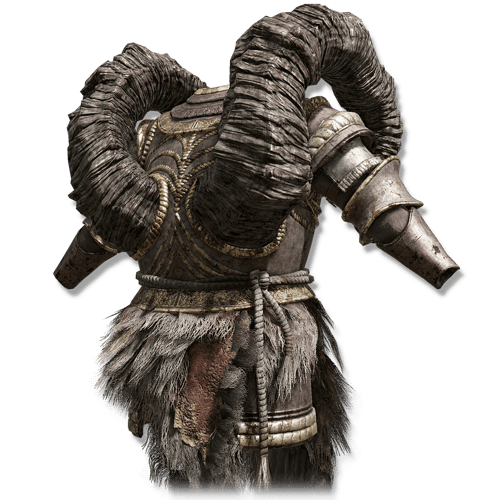
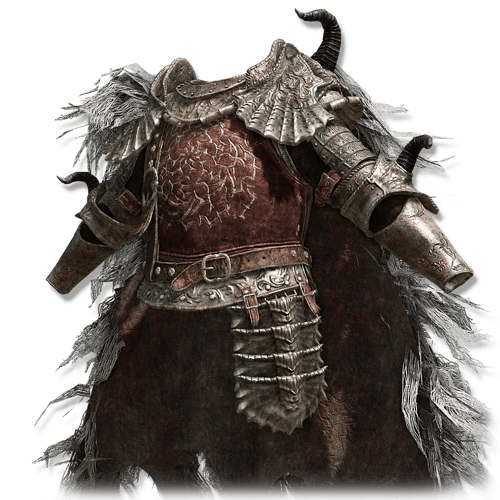
Bull-Goat Set — Best Base-Game Poise Armor

Bull-Goat Set

The Bull-Goat Set remains one of the strongest heavy armor sets in the base game.

Its extremely high Poise and defensive stats make it ideal for a Tank that frequently fights directly in front of enemies and wants additional protection when a Guard Counter or attack is interrupted.

Like Verdigris, the complete set is extremely heavy. Use individual pieces if wearing the full set pushes you into Heavy Load.

Location: Obtained by completing Great Horned Tragoth's assassination request for Patches during the Volcano Manor questline.

Solitude Set — Best DLC Defensive Alternative

Solitude Set

The Solitude Set provides excellent overall Damage Negation and very high Poise without forcing you into the exact same equipment setup as Verdigris.

It is particularly useful when you want strong defenses against encounters where blocking every attack isn't practical.

The set is still extremely heavy, so your Endurance and remaining equipment should determine whether you wear the complete set or mix individual pieces.

Location: Dropped by the Blackgaol Knight in the Western Nameless Mausoleum in Gravesite Plain.

Veteran's Set — Best Weight-to-Defense Alternative

Veteran’s Set

The Veteran's Set provides excellent protection and Poise while being somewhat easier to incorporate into a mixed armor setup than the heaviest options.

It is a strong choice during the later parts of the base game when you want substantial protection without immediately committing to something as heavy as Bull-Goat.

Location: Purchased from Finger Reader Enia after defeating Commander Niall.

Mixed Heavy Armor — Best General Setup

You don't need to wear a complete armor set.

For most Tank builds, mixing pieces from Verdigris, Bull-Goat, Solitude, Veteran's, or other heavy sets can provide a better balance between Damage Negation, Poise, and weight.

Your priorities should be:

  • High Damage Negation → enough Poise → Medium Equip Load

Don't sacrifice your ability to dodge purely to gain a small amount of additional defense.

Choosing Your Armor

For maximum overall defense:

  • Verdigris Set

For maximum base-game Poise:

  • Bull-Goat Set

For a strong DLC alternative:

  • Solitude Set

For easier weight management:

  • Veteran's Set or mixed heavy armor

A Tank should be heavily armored, but Heavy Equip Load isn't the goal. Your armor exists to protect you when blocking fails, or damage passes through the shield, while Medium Load ensures you can still avoid attacks that shouldn't be blocked.

Best Talismans for Tank Builds

Tank Talismans should improve the three things the build relies on most: blocking efficiency, survivability, and Stamina management. Several DLC Talismans provide particularly strong options for dedicated shield builds.

Greatshield Talisman — Best Blocking Talisman

Greatshield Talisman — Best Blocking Talisman

The Greatshield Talisman reduces the Stamina damage taken while guarding, making it one of the most straightforward choices for a traditional Tank.

This becomes especially valuable against bosses with long or heavy attack chains, where preserving enough Stamina to avoid a guard break is essential.

Combined with a high-Guard Boost Greatshield, it allows you to safely withstand attacks that would completely exhaust weaker shield setups.

Location: Found inside a carriage chest in Altus Plateau, east of the Erdtree-Gazing Hill.

Curved Sword Talisman — Best Guard Counter Talisman

Curved Sword Talisman — Best Guard Counter Talisman

The Curved Sword Talisman increases Guard Counter damage by 20%.

Since Guard Counters are one of the primary ways this build converts defense into offense, this provides an excellent damage increase without changing your normal gameplay loop.

It works particularly well with heavy Strength weapons that already deal high stance damage, allowing your counters to contribute both strong HP damage and stance pressure.

Location: Found inside Stormveil Castle.

Pearl Shield Talisman — Best Elemental Blocking Option

Pearl Shield Talisman — Best Elemental Blocking Option

The Pearl Shield Talisman is an excellent Shadow of the Erdtree addition for Greatshield builds.

It reduces non-Physical damage taken while guarding by 20%, helping compensate for one of the major weaknesses of shields: elemental chip damage.

This makes it especially useful against bosses that combine Physical attacks with Magic, Fire, Lightning, or Holy damage.

Location: Found inside a chest at a soldier camp near the Ancient Ruins Base in Rauh.

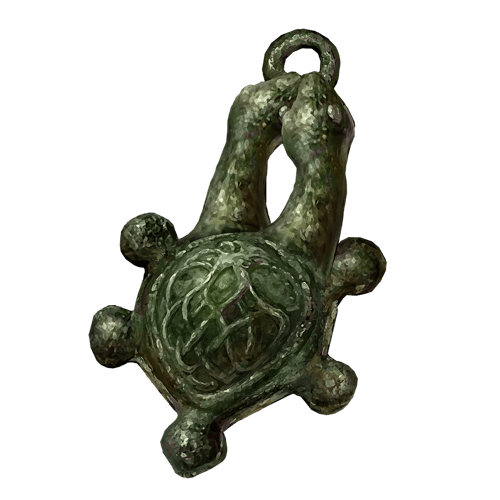
Two-Headed Turtle Talisman — Best Stamina Recovery Option

Two-Headed Turtle Talisman — Best Stamina Recovery Option

The Two-Headed Turtle Talisman greatly increases Stamina recovery speed.

Stamina controls both your offense and defense. Blocking consumes it, Guard Counters consume it, and dodging consumes it.

Faster recovery therefore allows you to lower your shield briefly between enemy attacks and recover enough Stamina to safely block the next combo.

Before reaching the DLC, the Green Turtle Talisman provides an excellent alternative.

Location: Found behind a waterfall in Gravesite Plain.

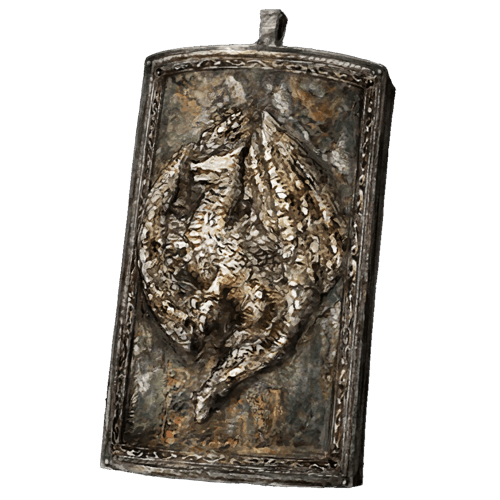
Dragoncrest Greatshield Talisman — Best Physical Defense Option

Dragoncrest Greatshield Talisman — Best Physical Defense Option

The Dragoncrest Greatshield Talisman provides a major increase to Physical Damage Negation in PvE.

Your shield already prevents most Physical damage while guarding, but this Talisman protects you when an attack catches you outside your guard, during unblockable attacks, or whenever you need to trade damage.

It is especially valuable against bosses where blocking everything isn't realistic.

Location: Found in Elphael, Brace of the Haligtree.

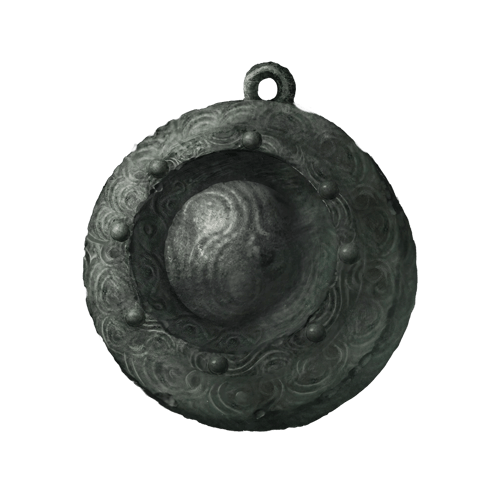
Verdigris Discus — Best Heavy-Load Defensive Option

Verdigris Discus — Best Heavy-Load Defensive Option

The Verdigris Discus increases your Damage Negation based on your current Equip Load, rewarding extremely heavy equipment setups.

This naturally synergizes with Greatshields, heavy Strength weapons, and Tank armor because your equipment is already significantly heavier than most builds.

However, don't deliberately push yourself into an impractical setup purely to maximize the Talisman. Being able to dodge grabs and unblockable attacks is still important.

Location: Obtained through a sealed area in Ancient Ruins of Rauh in Shadow of the Erdtree.

Choosing Your Talismans

For a traditional Greatshield Tank:

  • Greatshield Talisman + Curved Sword Talisman + Pearl Shield Talisman + Two-Headed Turtle Talisman

Against primarily Physical enemies, you can replace Pearl Shield with:

  • Dragoncrest Greatshield Talisman

For an extremely heavy defensive setup, Verdigris Discus can replace one of the more situational options.

Your Talismans should also change depending on the encounter. Pearl Shield is considerably more valuable against elemental bosses, while Stamina and Guard Counter bonuses provide more consistent value during normal exploration.

Tank Playstyle Tips

Tank builds are at their strongest when defense is used to create offensive opportunities. A Greatshield allows you to survive attacks that other builds would need to avoid, but simply holding block indefinitely wastes much of the build's potential.

The goal is to manage your Stamina, identify the end of enemy combos, and turn successful blocks into powerful Guard Counters and stance breaks.

Don't Hold Your Shield Up Constantly

Your Stamina regenerates significantly slower while guarding, so keeping your shield raised at all times can actually make you easier to guard break.

Lower your shield whenever the enemy isn't actively attacking to recover Stamina, then raise it again before the next attack connects.

This becomes particularly important during long boss fights where repeatedly blocking full combos can quickly drain your Stamina.

Watch Your Stamina, Not Just Your HP

For a Tank, your Stamina bar effectively becomes a second health bar.

If your Stamina reaches zero while blocking, your guard will break and leave you vulnerable. Even with Fingerprint or Verdigris, don't assume you can block indefinitely.

If your Stamina is getting low, stop attacking and prioritize recovery before the enemy begins another combo.

Guard Counter at the End of Combos

Don't automatically Guard Counter after every blocked attack.

Many bosses follow their first attack with several additional hits, and immediately countering can cause you to take the rest of the combo directly.

Instead:

  • Block the combo → identify the final attack → Guard Counter → return to defense.

Once you learn an enemy's attack pattern, Guard Counters become one of the safest ways to deal consistent damage.

Use Guard Counters to Break Stance

Guard Counters deal excellent stance damage, particularly when using Great Hammers and other heavy Strength weapons.

Repeated counters can quickly stagger enemies, creating an opportunity for a Critical Hit.

Weapons such as Great Stars and Great Mace are particularly effective because their Guard Counters combine high damage with strong stance pressure.

Learn Which Attacks Should Be Dodged

Being a Tank doesn't mean every attack should be blocked.

Grab attacks cannot normally be blocked, while extremely powerful attacks may consume so much Stamina that avoiding them is safer than absorbing them.

Elemental attacks can also deal chip damage through your shield depending on its Damage Negation.

Use your Greatshield for attacks it handles efficiently and dodge the attacks that specifically counter blocking.

Use the Deflecting Hardtear

The Deflecting Hardtear is one of the strongest DLC tools for an active Tank playstyle.

After drinking your Flask of Wondrous Physick, precisely guarding just before an attack connects greatly improves the effectiveness of your block. Successfully performing these timed guards also strengthens subsequent Guard Counters, with the bonus increasing through consecutive successful deflections.

This allows the Tank build to play much more aggressively:

  • Deflect → Deflect → identify opening → Guard Counter

You don't need to use perfect guards for every attack. Your Greatshield remains strong enough for conventional blocking when your timing isn't reliable.

Location: Dropped by the Furnace Golem in Gravesite Plain near the beginning of Shadow of the Erdtree.

Don't Force Deflects

The Deflecting Hardtear rewards precise timing, but don't turn every encounter into a parry challenge.

If you're unsure about an attack's timing, hold your shield normally.

The biggest advantage of using Deflecting Hardtear on a Tank is that failed timing doesn't necessarily mean taking an attack directly. You still have an extremely powerful Greatshield available as your fallback.

Shield Poke When Guard Counters Aren't Safe

Weapons such as the Lance and Sword Lance allow you to attack while continuing to guard.

This is useful against enemies with long or unpredictable combos where dropping your shield for a Guard Counter would be dangerous.

However, guarded attacks also consume Stamina. Don't repeatedly shield poke until your Stamina is empty, or you may immediately get guard broken.

Lower Your Shield Between Enemy Attacks

Learning when to briefly release block is one of the biggest improvements you can make when playing a Tank.

Even during boss combos, there are sometimes pauses long enough to lower your shield and recover some Stamina before blocking the next sequence.

The Two-Headed Turtle Talisman makes these short recovery windows even more valuable.

Adapt Your Shield to Elemental Damage

100% Physical Damage Negation doesn't mean your shield blocks everything.

Against enemies dealing significant Magic, Fire, Lightning, or Holy damage, check your shield's corresponding Guarded Damage Negation.

The Black Steel Greatshield, Pearl Shield Talisman, or an appropriately infused shield can substantially reduce elemental chip damage when the encounter demands it.

Use No Skill to Access Your Weapon Skill

A Greatshield doesn't need an offensive Skill of its own.

With No Skill equipped, you can keep your shield ready while immediately accessing your main-hand weapon's Ash of War.

This is particularly useful with buffs such as Cragblade or offensive weapon Skills because you don't need to constantly two-hand your weapon.

Buff Before Difficult Encounters

If you're using Cragblade, activate it before entering a difficult fight or when you have enough space to safely rebuff.

The additional Physical and stance damage complements Guard Counters extremely well.

Likewise, use Barricade Shield before a particularly dangerous sequence rather than waiting until your Stamina is already almost depleted.

Don't Overvalue Poise

High Poise is useful, but your shield should be preventing most attacks from reaching you in the first place.

Don't sacrifice enormous amounts of mobility purely to reach the highest possible Poise value.

Medium Equip Load remains extremely useful because there will always be attacks you would rather dodge than block.

Use Great Stars for Sustain

If you're using Great Stars, its healing provides additional sustain during longer encounters.

The individual healing instances are small, but a Tank is designed to remain alive for extended periods, allowing repeated hits to gradually recover HP.

This can help offset occasional chip damage without constantly consuming Crimson Flasks.

Don't Be Afraid to Play Aggressively

A Tank build doesn't need to slowly wait behind a shield for the enemy to attack first.

Your high HP, armor, and Greatshield allow you to maintain close-range pressure more safely than most builds.

Attack normally when you have initiative, then transition immediately into guarding when the enemy retaliates.

The shield should enable aggression rather than prevent it.

Maximum Defense Isn't Always Necessary

Fingerprint Stone Shield, the heaviest armor available, and four defensive Talismans can make you extraordinarily difficult to kill, but eventually additional defense provides less value than increasing your offense.

Once you can comfortably survive an encounter, consider replacing a defensive option with Curved Sword Talisman, Cragblade, or another offensive choice.

A boss cannot damage you once it is dead.

Use the Tank Playstyle as a Cycle

A typical Tank encounter should look something like:

Approach with shield ready → block or deflect the enemy combo → recover Stamina during pauses → Guard Counter the final attack → build toward a stance break → Critical Hit → repeat

Against attacks that cannot safely be blocked:

  • Recognize the attack → dodge → reposition → return to your shield

A strong Tank doesn't simply absorb damage. Manage your Stamina, learn which attacks should be blocked or avoided, and use your Greatshield to create safe Guard Counters that steadily break the enemy's stance.

Table of Contents

1. Overview2. Pros and Cons3. Starting Class, Attribute Leveling and Distribution4. Best Greatshields and Shields for Tank Builds Verdigris Greatshield — Best Overall Tank Shield Fingerprint Stone Shield — Best Base-Game Greatshield Black Steel Greatshield — Best Elemental Tank Option Golden Greatshield — Best Mid-Game Greatshield Manor Towershield — Best Early Greatshield Gilded Greatshield — Strong Early Alternative Brass Shield — Best Lightweight Alternative5. Best Weapons to Build Around Great Stars — Best Overall Tank Weapon Great Mace — Best Pure Strength Option Sword Lance — Best DLC Tank Weapon Nightrider Glaive — Best Reach Option Lance — Best Shield-Poke Weapon6. Ashes of War Barricade Shield — Best Defensive Shield Skill No Skill — Best General Shield Ash of War Cragblade — Best Guard Counter Damage Option Royal Knight's Resolve — Best Burst Option Shield Crash — Best Offensive Shield Option7. Best Armor for Tank Builds Verdigris Set — Best Overall Tank Armor Bull-Goat Set — Best Base-Game Poise Armor Solitude Set — Best DLC Defensive Alternative Veteran's Set — Best Weight-to-Defense Alternative Mixed Heavy Armor — Best General Setup8. Best Talismans for Tank Builds Greatshield Talisman — Best Blocking Talisman Curved Sword Talisman — Best Guard Counter Talisman Pearl Shield Talisman — Best Elemental Blocking Option Two-Headed Turtle Talisman — Best Stamina Recovery Option Dragoncrest Greatshield Talisman — Best Physical Defense Option Verdigris Discus — Best Heavy-Load Defensive Option9. Tank Playstyle Tips

See More Elden Ring

Elden Ring Madness Build - Stats, Weapons, Skills & More
Updated on Aug 23, 2026
Elden Ring Tank Build - Stats, Weapons, Skills & More
Updated on Aug 23, 2026
Elden Ring Bloodhound's Fang Build - Stats, Weapons, Skills & More
Updated on Aug 23, 2026
Elden Ring Rivers of Blood Build - Stats, Weapons, Skills & More
Updated on Aug 23, 2026
Elden Ring Lightning Build - Stats, Weapons, Skills & More
Updated on Aug 23, 2026

Like our guides?

Add Mobalytics as a preferred source on Google!