menu
MobalyticsUse your favourite features in-game with our Desktop App
Gamebase Guide

Elden Ring Scarlet Rot Build - Stats, Weapons, Skills & More

Updated on Aug 22, 2026
Aug 22, 2026

Overview

Scarlet Rot builds focus on applying Scarlet Rot as quickly as possible, allowing its powerful damage-over-time effect to continuously damage enemies while you continue attacking, repositioning, or playing defensively.

For this build, we will primarily use the Antspur Rapier, one of the best weapons for consistently applying Scarlet Rot. Its fast Thrusting Sword moveset, innate Scarlet Rot buildup, and ability to change Ashes of War and affinities make it extremely flexible.

Scarlet Rot is particularly effective against high-HP enemies and bosses, as the status continues dealing damage after it has been applied. This means you can play aggressively while building Scarlet Rot, then become more patient once the effect is active.

However, not every enemy can be affected by Scarlet Rot. A good Rot build should therefore maintain strong regular weapon damage and have alternative ways to deal with resistant or immune enemies.

Pros and Cons

Pros

  • Excellent damage over time against enemies vulnerable to Scarlet Rot.
  • Particularly effective against high-HP bosses and longer encounters.
  • Damage continues while you attack, dodge, heal, or reposition.
  • Antspur Rapier provides excellent flexibility through customizable Ashes of War and affinities.
  • Can combine Scarlet Rot with other status effects such as Poison, Bleed, or Frostbite.
  • Strong in both NG and NG+.

Cons

  • Dedicated Scarlet Rot weapons are difficult to obtain early in the game.
  • Some enemies and bosses are highly resistant or completely immune to Scarlet Rot.
  • Most Scarlet Rot weapons have fixed Rot buildup, limiting how much the status application itself can be improved through attributes.
  • Trying to force Scarlet Rot can encourage overly aggressive play.
  • Dedicated Rot weapons have very different attribute requirements, making it difficult to create one stat distribution that perfectly supports every option.

All Elden Ring Guides

Check Out Our Other Elden Ring Builds and Guides

How Scarlet Rot Works

Scarlet Rot is a status effect that builds up as you hit an enemy with attacks that cause Rot buildup. Once the enemy's resistance threshold is reached, Scarlet Rot activates and begins dealing continuous damage over time.

Unlike Blood Loss, which immediately deals a large burst of damage when triggered, Scarlet Rot continues damaging the target for an extended period. This makes it particularly valuable during longer boss fights.

Once Scarlet Rot is active, there is usually no reason to continue attacking recklessly just to maintain the status. Use the damage-over-time effect as additional pressure while continuing to punish safe openings.

Does Arcane Increase Scarlet Rot?

One important misconception surrounding Scarlet Rot builds is that leveling Arcane does not automatically increase Scarlet Rot buildup.

The Scarlet Rot buildup on most dedicated Rot weapons, including the Antspur Rapier, is fixed and does not scale simply because you invest additional points into Arcane.

This means you should choose your offensive attributes based primarily on the damage scaling and requirements of your weapon, rather than investing into Arcane purely because Scarlet Rot is a status effect.

There are Arcane-oriented Scarlet Rot weapons, most notably the DLC's Poleblade of the Bud, but Arcane is valuable there because of the weapon's own damage scaling rather than functioning as a universal Scarlet Rot buildup stat.

Starting Class, Attribute Leveling and Distribution

For a Scarlet Rot build, your attributes should primarily support the weapon you are using rather than Scarlet Rot itself. Most dedicated Scarlet Rot weapons have fixed Rot buildup, so investing heavily into Arcane or another offensive attribute does not automatically make the status activate faster. Scarlet Rot itself is a damage-over-time status effect.

For the main progression, we will continue using the Antspur Rapier as our primary weapon and focus heavily on Dexterity.

Dexterity Scarlet Rot Build

Recommended Starting Class: Vagabond

Attribute

Starting Stats

LV25

LV50

LV100

LV150

Vigor

15

20

30

45

60

Endurance

11

15

18

22

25

Strength

14

14

14

14

14

Dexterity

13

20

30

50

80

Mind

10

10

10

12

15

Intelligence

9

9

9

9

9

Faith

9

9

9

9

9

Arcane

7

7

7

7

7

Early in the game, prioritize Vigor and Dexterity. Dedicated Scarlet Rot weapons aren't immediately available, so your early attributes should give you enough survivability and regular weapon damage to comfortably progress toward the Antspur Rapier.

Once you reach Altus Plateau, the Antspur Rapier becomes the centerpiece of the build. It is obtained from Maleigh Marais west of the Shaded Castle.

Around level 50, aim for approximately 30 Vigor and 30 Dexterity. From there, continue increasing Dexterity while steadily raising Vigor. Scarlet Rot provides additional damage once activated, but your regular weapon damage remains extremely important, particularly against enemies that resist the status.

By level 100, 45 Vigor and 50 Dexterity provide a strong balance between damage and survivability. Endurance can remain relatively modest because Thrusting Swords are lightweight, although powerstanced setups may want additional Stamina.

At level 150, we reach 60 Vigor and 80 Dexterity. This gives the build significantly better survivability than the old 40 Vigor setup while maximizing the damage potential of a Dexterity-focused weapon setup.

Do not invest in Intelligence simply to improve Frostbite. If you use the Frozen Needle as a secondary weapon, Intelligence is unnecessary because the weapon does not require it. Likewise, Scarlet Rot itself should not be treated as a status that universally scales from Arcane.

Poleblade of the Bud — Arcane Alternative

Shadow of the Erdtree introduces a second direction for dedicated Scarlet Rot builds through the Poleblade of the Bud.

Rather than being primarily Dexterity-focused like the Antspur Rapier setup, the Poleblade has its own Strength, Dexterity, and Arcane requirements and should be built around separately.

For this version, prioritize:

60 Vigor → Weapon Requirements → Arcane → Dexterity → Endurance/Mind as needed.

The important distinction is that Arcane is valuable because of the Poleblade's own weapon scaling, not because Arcane universally increases Scarlet Rot buildup.

The Poleblade is also obtained from the Remembrance dropped by Romina, Saint of the Bud, a mandatory DLC boss in the Ancient Ruins of Rauh. This makes it a very late acquisition rather than a weapon around which you can realistically structure your initial playthrough.

For that reason, we recommend following the Dexterity/Antspur progression for a fresh character and respeccing if you later decide to build around the Poleblade of the Bud.

Alternative Strength Scarlet Rot Builds

Strength characters also have access to weapons such as the Rotten Battle Hammer and Rotten Greataxe.

However, both are late-game weapons and require a very different attribute distribution from the Antspur Rapier. Rather than compromising the main progression to support every Rot weapon, treat these as dedicated Strength alternatives and adjust your Strength and Dexterity to match their requirements.

The important rule remains the same...

Build your offensive attributes around your weapon. Don't level a stat simply because you assume it will increase Scarlet Rot buildup.

Best Weapons for Scarlet Rot Builds

Scarlet Rot has a much smaller selection of dedicated weapons than statuses such as Bleed. Fortunately, several of these weapons offer very different playstyles, ranging from the fast and customizable Antspur Rapier to heavy Strength weapons and the DLC's Arcane-focused Poleblade of the Bud.

Because most Scarlet Rot weapons have fixed Rot buildup, the best weapon isn't necessarily the one displaying the highest status number. Moveset, attack speed, regular damage, customization, and how easily the weapon can repeatedly hit an enemy are equally important.

Best Early-Game Weapons

Dedicated Scarlet Rot weapons aren't available immediately after starting the game. Until you reach the Antspur Rapier, these weapons provide a natural progression toward the finished build.

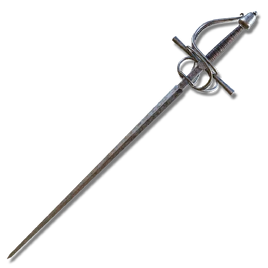
Rapier — Best Starting Replacement

Rapier — Best Starting Replacement

Requirements: Strength - 7 / Dexterity - 12

The regular Rapier is an excellent temporary weapon for players planning to use the Antspur Rapier later. It doesn't inflict Scarlet Rot, but it allows you to become familiar with the fast Thrusting Sword moveset while investing in the same primary attribute.

Its quick thrusting attacks, low weight, and strong counterattack potential make it perfectly capable of carrying the build until dedicated Rot equipment becomes available.

Once you obtain the Antspur Rapier, the transition is extremely straightforward.

Location: Purchased from the Twin Maiden Husks at Roundtable Hold.

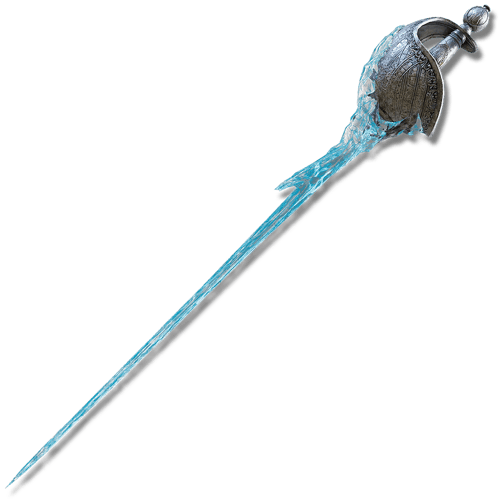
Frozen Needle — Best Early Secondary Status Weapon

Frozen Needle — Best Early Secondary Status Weapon

Requirements: Strength - 11 / Dexterity - 18

The Frozen Needle doesn't inflict Scarlet Rot, but its innate Frostbite buildup makes it an excellent secondary weapon before and after obtaining the Antspur Rapier.

It shares the Thrusting Sword weapon class with Antspur, making the two weapons particularly natural to use together. Its unique Heavy Attack can also launch a short-ranged projectile without consuming FP.

Once Scarlet Rot is available, you can use the two weapons to pressure enemies with multiple status effects rather than relying entirely on Rot.

Location: Found in a chest after defeating the Royal Revenant in Kingsrealm Ruins in Liurnia of the Lakes.

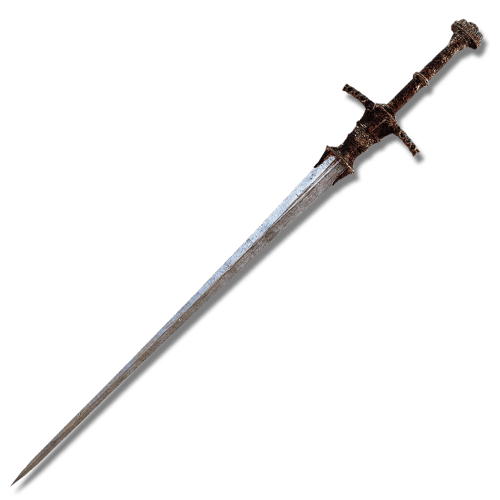
Cleanrot Knight's Sword — Best Early Farmable Alternative

Cleanrot Knight's Sword — Best Early Farmable Alternative

Requirements: Strength - 13 / Dexterity - 11

Despite its name and theme, the Cleanrot Knight's Sword does not inflict Scarlet Rot. However, it is another strong Thrusting Sword option for early progression and can be farmed before reaching the Antspur Rapier.

It offers excellent reach for its weapon class and can change its Ash of War and affinity, making it a useful temporary Dexterity weapon.

Don't farm it specifically expecting innate Rot buildup; its value here is as a weapon that naturally fits the progression toward Antspur.

Location: Dropped by Cleanrot Knights wielding the sword, including those found in Caelid.

Best Scarlet Rot Weapons to Build Around

Antspur Rapier — Best Overall Scarlet Rot Weapon
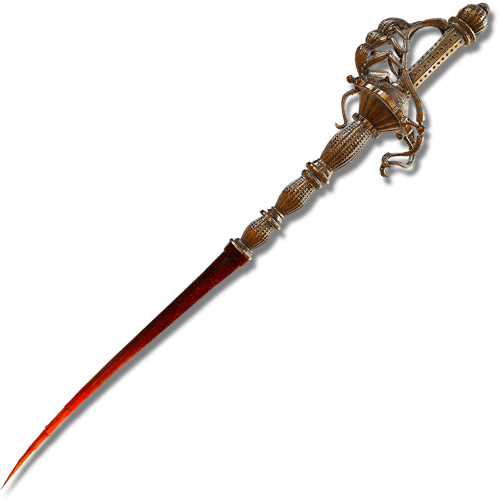
Antspur Rapier — Best Overall Scarlet Rot Weapon

Requirements: Strength - 10 / Dexterity - 20

The Antspur Rapier remains the best all-around weapon for a dedicated Scarlet Rot build.

It combines innate Scarlet Rot buildup with the speed of a Thrusting Sword, allowing it to apply Rot much more safely and consistently than the slower heavy Rot weapons.

Its biggest advantage, however, is customization. Unlike many status weapons, the Antspur Rapier can change its Ash of War and affinity while retaining its innate Scarlet Rot.

This creates several possibilities. You can optimize its regular weapon damage, add Poison or Blood Loss, or use an Ash of War that complements the rest of your setup. This makes Antspur capable of applying multiple status effects without sacrificing its core Scarlet Rot identity.

Its fast thrusting attacks also work extremely well with Pierce counterattack bonuses and successive-attack effects.

If you want one weapon around which to build a complete Scarlet Rot character, Antspur Rapier is the safest recommendation.

Location: Dropped by Maleigh Marais, Shaded Castle Castellan, west of the Shaded Castle in Altus Plateau.

Poleblade of the Bud — Best DLC Scarlet Rot Weapon
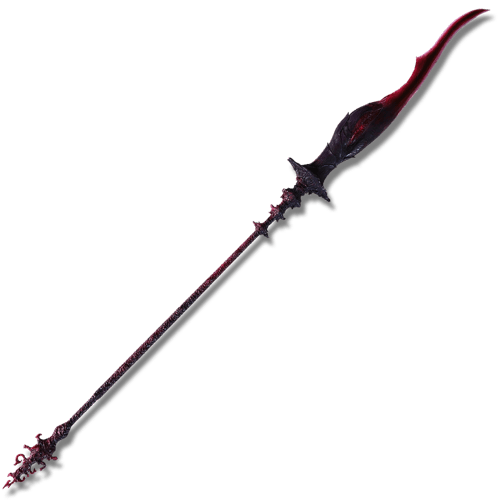
Poleblade of the Bud — Best DLC Scarlet Rot Weapon

Requirements: Strength - 14 / Dexterity - 22 / Arcane - 20

The Poleblade of the Bud is the most significant dedicated Scarlet Rot weapon added in Shadow of the Erdtree and provides a completely different alternative to Antspur Rapier.

This Halberd scales with Strength, Dexterity, and Arcane and comes with the Unique Skill Romina's Purification. The Skill launches the player into a graceful sequence of sweeping attacks surrounded by scarlet butterflies, dealing damage while applying Scarlet Rot.

Unlike Antspur, the Poleblade cannot change its Skill or affinity, so there is considerably less build customization. It instead functions as a complete weapon built specifically around its unique moveset and Skill.

Arcane is an important offensive attribute for the Poleblade because of the weapon's own scaling. However, its Scarlet Rot buildup itself should not be treated as something that simply continues scaling with Arcane.

Its biggest disadvantage is availability. You obtain it after defeating Romina relatively late in Shadow of the Erdtree, making it primarily an endgame, DLC, or NG+ build-around weapon.

Location: Obtained by trading the Remembrance of the Saint of the Bud with Finger Reader Enia.

Rotten Battle Hammer — Best Strength Scarlet Rot Weapon
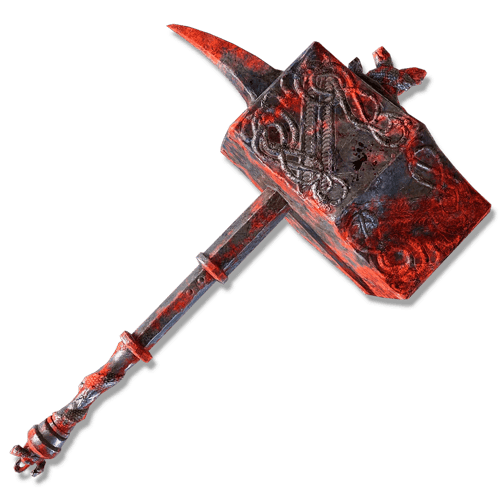
Rotten Battle Hammer — Best Strength Scarlet Rot Weapon

Requirements: Strength - 26 / Dexterity - 8

The Rotten Battle Hammer is the strongest choice for players who want to combine Scarlet Rot with a traditional Strength playstyle.

It provides innate Scarlet Rot buildup alongside Strike damage and strong stance damage, giving it advantages that faster Rot weapons such as Antspur Rapier don't have.

More importantly, it can change its Ash of War and affinity. This allows the weapon to be optimized around Strength while retaining its innate Scarlet Rot, or incorporated into more specialized status setups.

Its slower attacks mean it generally takes longer to apply Rot than the Antspur Rapier, but in return you gain substantially more damage and stance pressure per hit.

Location: Dropped by the Rotten Duelist west of the Consecrated Snowfield Site of Grace.

Rotten Greataxe — Best Colossal Scarlet Rot Weapon
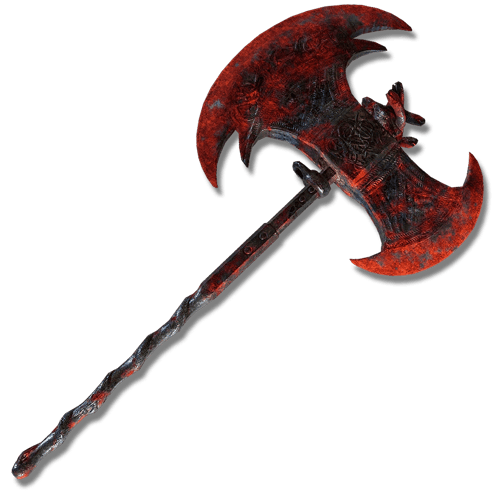
Rotten Greataxe — Best Colossal Scarlet Rot Weapon

Requirements: Strength - 30 / Dexterity - 10

The Rotten Greataxe provides Scarlet Rot on a Colossal Weapon, combining status buildup with powerful individual attacks and high stance damage.

Interestingly, the weapon isn't restricted to a pure Strength setup. Its default scaling favors Dexterity more than its appearance might suggest, while customizable affinities allow it to support different attribute distributions.

Compared with faster weapons, applying Scarlet Rot requires more commitment because each attack is significantly slower. However, you aren't dependent on Rot for damage: the weapon can still punish enemies with powerful regular and Heavy Attacks while the status builds in the background.

This makes it a strong option for players who want Scarlet Rot to complement a heavy melee build rather than define every attack.

Location: Dropped by the Rotten Duelist northwest of Ordina, Liturgical Town, in the Consecrated Snowfield.

Scorpion's Stinger — Best Fast Pure Rot Weapon
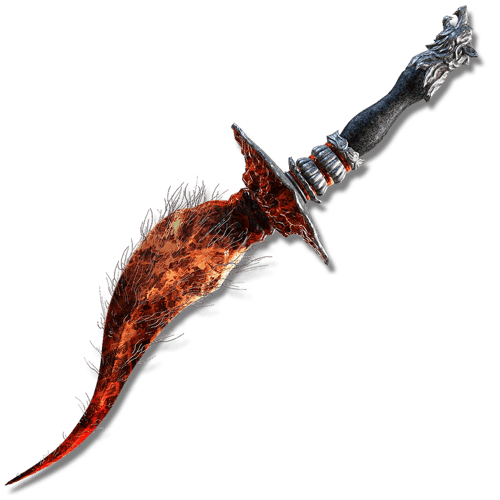
Scorpion's Stinger — Best Fast Pure Rot Weapon

Requirements: Strength - 6 / Dexterity - 12

The Scorpion's Stinger is a dedicated Scarlet Rot Dagger that trades Antspur's customization for an extremely fast and lightweight moveset.

Its rapid attacks make it capable of building Scarlet Rot quickly when you can remain close to an enemy. It also requires very little attribute investment, making it easy to incorporate into Dexterity-focused setups.

However, it has two significant weaknesses: very short range and no affinity/Ash of War customization.

For most builds, Antspur Rapier provides more flexibility and better reach, but Scorpion's Stinger remains a strong option when rapid close-range status application is the priority.

Location: Found inside the Grand Cloister after crossing the Lake of Rot.

Honorable Mentions

Rotten Crystal Spear
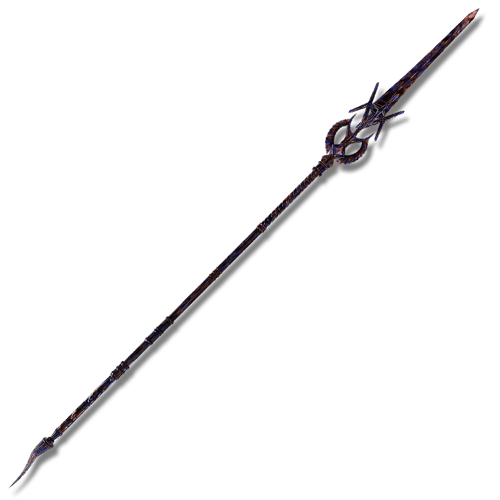
Rotten Crystal Spear

A Spear with innate Scarlet Rot that provides significantly better reach than most Rot weapons. However, its awkward Strength/Dexterity/Intelligence requirements, fixed Skill, and lack of customization make it harder to recommend as the centerpiece of a dedicated build.

Rotten Crystal Sword

Rotten Crystal Sword

The Rotten Crystal Sword combines innate Scarlet Rot with Magic damage, but its fixed Skill and mixed scaling make it less flexible than Antspur Rapier. It can still work well for characters that already meet its Intelligence requirement.

Rotten Staff
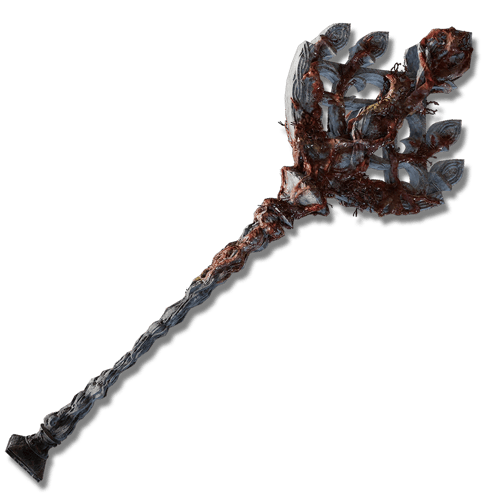
Rotten Staff

A massive Colossal Weapon with innate Scarlet Rot and extremely high Strength requirements. Its slow attack speed makes status application inconsistent compared with faster Rot weapons, but it can be fun for a dedicated heavy Rot setup.

Rotten Crystal Staff
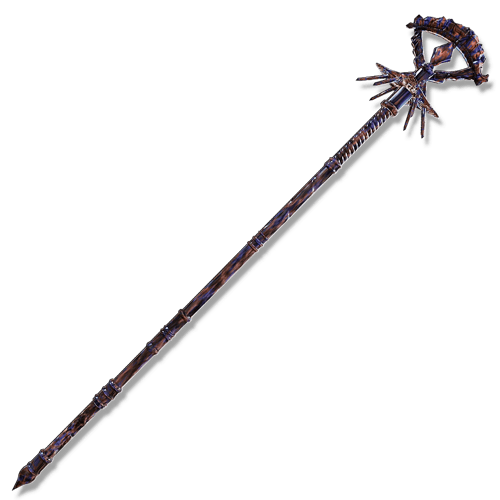
Rotten Crystal Staff

Despite its name, this is primarily a Glintstone Staff rather than a practical Scarlet Rot weapon. It can technically inflict Rot by physically striking enemies with the staff, but that isn't a realistic reason to build around it. Its real purpose is spellcasting, so it shouldn't be treated as one of the main Rot weapons.

Ashes of War

Scarlet Rot has fewer dedicated Ashes of War than statuses such as Bleed, so the best options don't necessarily inflict Rot themselves. Because weapons such as the Antspur Rapier, Rotten Battle Hammer, and Rotten Greataxe already have innate Scarlet Rot, their Ash of War can instead provide additional status effects, stronger direct damage, or useful utility.

The Poison Flower Blooms Twice — Best Scarlet Rot Ash of War

The Poison Flower Blooms Twice is easily one of the most interesting additions to Scarlet Rot builds from Shadow of the Erdtree.

The Skill launches you into the air before performing a downward kick that inflicts Scarlet Rot. More importantly, hitting an enemy that is already Poisoned or afflicted with Scarlet Rot will remove the active status and deal a large burst of damage based partly on the target's maximum HP.

This creates a completely different Rot playstyle:

Apply Scarlet Rot → let the DoT deal damage → consume the status with The Poison Flower Blooms Twice → begin building Scarlet Rot again.

You don't always want to consume Rot immediately. Against bosses with large health pools, allowing the status to run for longer can produce more total damage. The Skill is best used when the burst damage is worth sacrificing the remaining duration.

Location: Dropped by a Lesser Kindred of Rot in Rauh Base in Shadow of the Erdtree.

Poisonous Mist — Best Poison + Rot Combination

Poisonous Mist creates a poisonous cloud before coating your weapon with Poison.

It works particularly well with Scarlet Rot because Poison and Scarlet Rot can be active on the same enemy simultaneously, allowing you to stack two damage-over-time effects.

Triggering either status can also activate Kindred of Rot's Exultation and Mushroom Crown, making Poison useful even when Scarlet Rot takes longer to apply.

On something like the Antspur Rapier, this creates an easy way to combine multiple status effects without giving up the weapon's innate Scarlet Rot.

Location: Dropped by a Teardrop Scarab southeast of Castle Morne Rampart in the Weeping Peninsula.

Repeating Thrust — Best for Rapid Status Application

Repeating Thrust performs a quick sequence of thrusting attacks, making it a natural option for the Antspur Rapier.

The Skill itself doesn't add Scarlet Rot, but every applicable weapon hit contributes toward the enemy's status buildup. This makes multi-hit Skills particularly useful when your weapon already carries innate Rot.

It is straightforward, inexpensive, and available relatively early, making it a good general-purpose choice before more specialized options become available.

Location: Dropped by the Night's Cavalry in Limgrave.

Impaling Thrust — Best General-Purpose Option

Impaling Thrust performs a powerful forward thrust that partially bypasses guarding and deals strong stance damage.

It doesn't directly improve Scarlet Rot buildup, but it gives the Antspur Rapier something the build otherwise lacks: a strong single-hit punish with good forward reach and stance pressure.

This is especially valuable against enemies where Scarlet Rot is resistant or completely ineffective, since your Ash of War remains useful regardless of status susceptibility.

Location: Sold by Knight Bernahl at the Warmaster's Shack.

Blood Tax — Best Rot/Bleed Hybrid Option

Blood Tax performs a rapid series of thrusts that restores HP when the attacks connect.

When used on an appropriate status setup, it can complement the Antspur Rapier's innate Scarlet Rot with Blood Loss, allowing the build to combine Rot's sustained damage with Bleed's immediate burst damage.

The healing also makes it particularly useful during aggressive close-range fights, where repeatedly attacking to apply status effects naturally exposes you to more danger.

Location: Obtained from a Teardrop Scarab in Mohgwyn Palace.

Poison Moth Flight — Alternative Poison Burst Option

Poison Moth Flight performs a slash that deals increased damage against Poisoned enemies and removes the Poison status when its special effect activates.

Conceptually, it works similarly to The Poison Flower Blooms Twice, allowing you to turn an active Poison effect into immediate damage.

However, The Poison Flower Blooms Twice is generally the stronger and more versatile DLC option, particularly for a build that also revolves around Scarlet Rot. Poison Moth Flight remains useful before entering Shadow of the Erdtree or for a specifically Poison-focused setup.

Location: Dropped by the Night's Cavalry in Caelid.

Cragblade — Best for Raw Damage and Stance Pressure

Cragblade coats your weapon in rock, increasing its Physical damage and stance damage.

It has no direct interaction with Scarlet Rot, but that can actually be useful. Once Rot is active, your priority shifts toward dealing regular weapon damage while the status continues ticking in the background.

Cragblade also gives the build a stronger fallback against Scarlet Rot-immune enemies, where status-focused Ashes provide considerably less value.

It is particularly attractive on heavier options such as the Rotten Battle Hammer and Rotten Greataxe.

Location: Dropped by a Teardrop Scarab near the Impassable Greatbridge in Caelid.

Choosing an Ash of War

Unlike Bleed, there is little reason to insist that every Scarlet Rot build uses a Rot-themed Skill.

For Antspur Rapier, fast multi-hit Skills and secondary status effects work extremely well because the weapon already provides Scarlet Rot naturally.

For the Rotten Battle Hammer and Rotten Greataxe, raw damage and stance-focused Ashes can be more valuable because these weapons apply Rot through slower but significantly heavier attacks.

And if you're using Poleblade of the Bud, you cannot choose an Ash of War at all. Its Romina's Purification is a fixed Unique Skill and should instead be built around with your Talismans and attributes.

The main principle is simple: your weapon already provides the Scarlet Rot, so your Ash of War should cover whatever the rest of your build is missing.

Best Incantations for Scarlet Rot Builds

Scarlet Rot builds don't need Incantations to function, but a few spells can provide additional ways to apply Rot. These are best treated as optional tools rather than a core part of the build, as they require additional Faith investment.

For the main Dexterity Scarlet Rot build, none of these Incantations are required. They are simply additional options if your character already has enough Faith and Arcane to use them. 

Rotten Breath — Best Accessible Rot Incantation

Rotten Breath — Best Accessible Rot Incantation

Rotten Breath breathes Scarlet Rot across a wide area, dealing damage while rapidly building Scarlet Rot.

It can provide an alternative way to apply Rot without staying directly in melee range and is available considerably earlier than many dedicated Scarlet Rot weapons.

Requirements: Faith - 15 / Arcane - 12

Location: Purchased from the Cathedral of Dragon Communion in Caelid for 1 Dragon Heart.

Ekzykes's Decay — Stronger Dragon Communion Option

Ekzykes's Decay — Stronger Dragon Communion Option

Ekzykes's Decay is a more powerful Scarlet Rot Dragon Communion Incantation that can be cast while airborne and covers a large area.

It requires more investment than Rotten Breath and consumes considerably more FP, so it isn't necessary for our primarily melee-focused build. However, it remains a powerful optional Rot applicator for characters willing to invest further into Faith and Arcane.

Requirements: Faith - 23 / Arcane - 15

Location: Available from the Cathedral of Dragon Communion after defeating Decaying Ekzykes in Caelid.

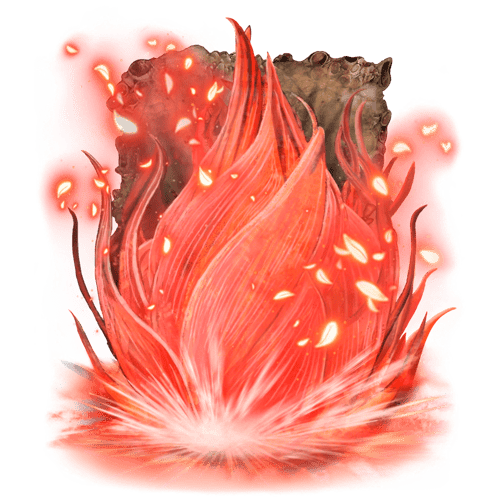
Scarlet Aeonia — Best Dedicated Rot Incantation

Scarlet Aeonia — Best Dedicated Rot Incantation

Scarlet Aeonia creates a massive scarlet flower around the caster, dealing damage and inflicting a large amount of Scarlet Rot buildup.

It can apply Rot extremely effectively, but its 35 Faith requirement is far outside the normal attribute distribution of our Dexterity build. It is therefore better suited to a dedicated Faith/Rot character or NG+ setup than something you should alter the entire build to use.

Requirements: Faith - 35

Location: Obtained by trading Malenia's Remembrance with Finger Reader Enia.

Rotten Butterflies — DLC Rot Incantation

Rotten Butterflies — DLC Rot Incantation

Rotten Butterflies surrounds the caster with scarlet butterflies that deal damage and build Scarlet Rot.

Like Scarlet Aeonia, this is more of an optional tool for a character already investing in Faith than a reason to change our main Antspur Rapier build.

Requirements: Faith - 33

Location: Obtained from the Remembrance of the Saint of the Bud after defeating Romina.

Best Armor for Scarlet Rot Builds

Scarlet Rot builds don't require a complete armor set to function. Instead, the best choices either provide a direct damage bonus when Scarlet Rot or Poison is triggered, improve your general damage, or give you enough defense and Poise to safely stay in melee range while applying the status.

For most setups, Medium Equip Load should remain the priority.

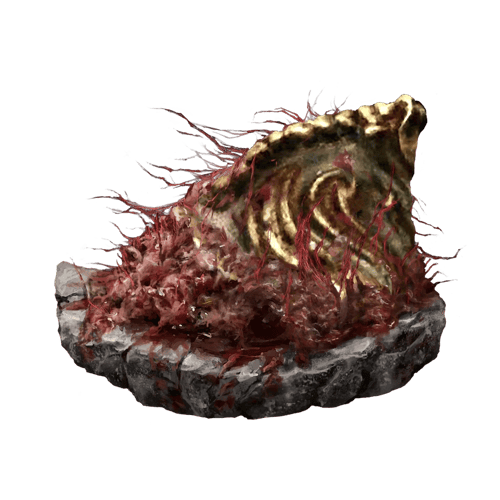
Mushroom Crown — Best Overall Scarlet Rot Armor

Mushroom Crown — Best Overall Scarlet Rot Armor

The Mushroom Crown is the most important offensive armor piece for a dedicated Scarlet Rot build.

Whenever Poison or Scarlet Rot occurs nearby, the Mushroom Crown temporarily increases your Attack Power. Since triggering Scarlet Rot is already the main goal of the build, this bonus activates naturally during combat.

It also works extremely well alongside Kindred of Rot's Exultation, allowing both effects to activate from the same Poison or Scarlet Rot proc.

Only the head slot is required, leaving the rest of your armor completely open for additional defense and Poise.

Location: Found on a corpse in the Lake of Rot.

Rakshasa Set — Best General Offensive Option

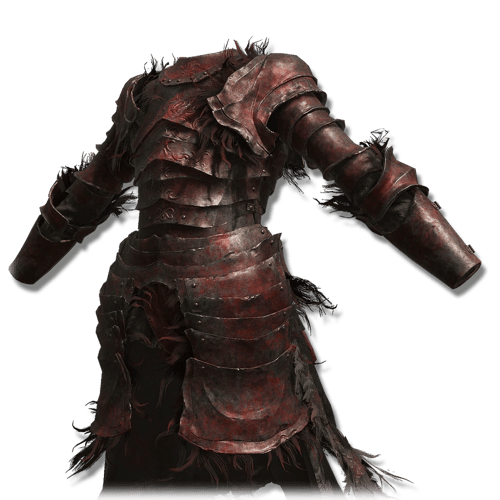
Rakshasa Set

Each piece of the Rakshasa Set increases the damage you deal, making it one of the strongest general offensive armor options from Shadow of the Erdtree.

For a dedicated Rot build, you generally don't need to sacrifice the Mushroom Crown to wear the complete set. Instead, you can combine the Mushroom Crown with Rakshasa's Armor, Gauntlets, and Greaves for additional damage.

This is particularly useful after Scarlet Rot has already been applied, when your regular weapon attacks become your primary source of active damage while Rot continues ticking in the background.

Location: Dropped by Rakshasa in the Eastern Nameless Mausoleum in Shadow of the Erdtree.

Solitude Set — Best Defensive Option

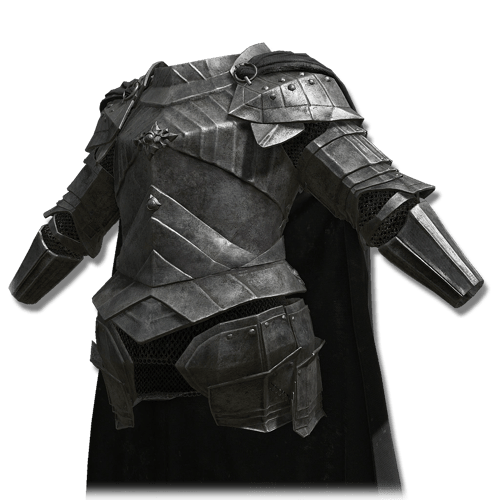
Solitude Set

The Solitude Set provides excellent Damage Negation and very high Poise, making it a strong option for players who prefer additional survivability.

Scarlet Rot weapons such as the Antspur Rapier require you to repeatedly fight at close range to apply the status. Additional protection can therefore be extremely useful, especially against aggressive bosses.

The complete set is extremely heavy, so mixing individual pieces with the Mushroom Crown is generally more practical than wearing the entire set.

Location: Dropped by the Blackgaol Knight in the Western Nameless Mausoleum in Gravesite Plain.

High-Poise Mixed Armor — Best General Setup

For most Scarlet Rot builds, mixing armor pieces is better than committing to a complete matching set.

Start with the Mushroom Crown if you want its offensive bonus, then use your remaining armor slots to gain as much Damage Negation and Poise as possible while maintaining Medium Equip Load.

This is especially useful with the Antspur Rapier because its low weight leaves plenty of Equip Load available for heavier armor pieces.

Mushroom Set — Best for Rot Resistance

Mushroom Set — Best for Rot Resistance

The regular Mushroom Set provides extremely high Immunity, making it useful when exploring areas filled with Poison or Scarlet Rot.

However, Immunity only helps protect you from status effects; it does not increase the Scarlet Rot you inflict on enemies.

For that reason, the complete Mushroom Set is more of an exploration or defensive option than an optimized combat setup. The Mushroom Crown is the important piece when maximizing damage.

Location: Found primarily in Seethewater Cave on Mt. Gelmir.

Choosing Your Armor

For most players, the setup is straightforward:

  • Maximum Damage: Mushroom Crown + Rakshasa pieces
  • General Play: Mushroom Crown + defensive/high-Poise armor
  • Maximum Defense: Solitude or other heavy armor while maintaining Medium Load
  • Rot-heavy Areas: Mushroom Set for additional Immunity

Best Talismans for Scarlet Rot Builds

Scarlet Rot builds benefit most from Talismans that reward Poison or Scarlet Rot procs, increase the damage of your primary attack style, or improve your survivability while fighting at close range. The exact setup depends on whether you're using the Antspur Rapier, a heavier Rot weapon, or the Poleblade of the Bud.

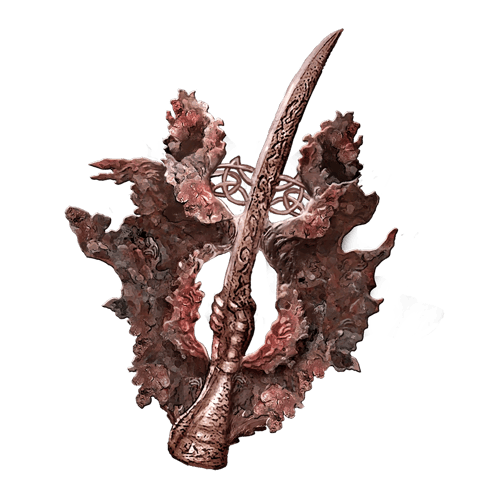
Kindred of Rot's Exultation — Best Overall Scarlet Rot Talisman

Kindred of Rot's Exultation — Best Overall Scarlet Rot Talisman

The Kindred of Rot's Exultation is the most important offensive Talisman for a dedicated Scarlet Rot build.

Whenever Poison or Scarlet Rot occurs nearby, it increases your Attack Power by 20% for 20 seconds. Since applying Scarlet Rot is already the primary goal of the build, the effect naturally activates during combat.

It also stacks with the Mushroom Crown, allowing a single Poison or Scarlet Rot proc to activate both damage bonuses simultaneously.

Location: Dropped by the Kindred of Rot boss in Seethewater Cave.

Rotten Winged Sword Insignia — Best for Successive Attacks

Rotten Winged Sword Insignia

The Rotten Winged Sword Insignia increases Attack Power as you land successive attacks.

This works particularly well with the Antspur Rapier, as its fast Thrusting Sword moveset allows you to build the bonus while simultaneously applying Scarlet Rot.

It becomes even stronger on setups using multi-hit attacks or powerstanced Thrusting Swords.

Location: Obtained near the end of Millicent's questline by assisting her.

Spear Talisman — Best for Antspur Rapier

Spear Talisman — Best for Antspur Rapier

The Spear Talisman increases the damage of Pierce counterattacks.

Because the Antspur Rapier deals Pierce damage, it can take advantage of this bonus when hitting enemies during certain parts of their attack animations.

It doesn't directly increase Scarlet Rot buildup, but it significantly improves the regular damage of the weapon we're primarily building around.

Location: Found in Lakeside Crystal Cave in Liurnia of the Lakes.

Shard of Alexander — Best for Weapon Skill Builds

Shard of Alexander — Best for Weapon Skill Builds

The Shard of Alexander increases weapon Skill damage by 15%.

This is especially useful for the DLC version of the build using Poleblade of the Bud, where Romina's Purification is an important part of the weapon's playstyle.

It is also an excellent choice when using damaging Ashes of War such as The Poison Flower Blooms Twice on compatible Rot weapons.

Location: Obtained at the end of Iron Fist Alexander's questline in Crumbling Farum Azula.

Two-Handed Sword Talisman — Best for Heavy Rot Weapons

Two-Handed Sword Talisman — Best for Heavy Rot Weapons

The Two-Handed Sword Talisman increases the damage of attacks performed while holding a weapon with two hands.

This makes it much more relevant for Rotten Battle Hammer and Rotten Greataxe setups than for the Antspur Rapier.

It provides a straightforward raw damage increase without depending on Scarlet Rot actually activating, making it particularly useful against Rot-resistant enemies.

Location: Found in Temple Town Ruins in Shadow of the Erdtree.

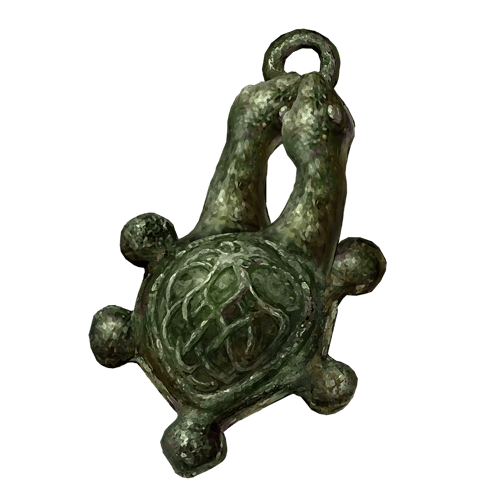
Two-Headed Turtle Talisman — Best Stamina Option

Two-Headed Turtle Talisman — Best Stamina Option

The Two-Headed Turtle Talisman greatly increases Stamina recovery speed.

Scarlet Rot builds often need to land several attacks before the status activates, making Stamina management particularly important for aggressive Antspur Rapier setups.

Before entering Shadow of the Erdtree, the Green Turtle Talisman provides a weaker base-game alternative.

Location: Found in a cave beneath a waterfall near the Rivermouth Cave area in Gravesite Plain.

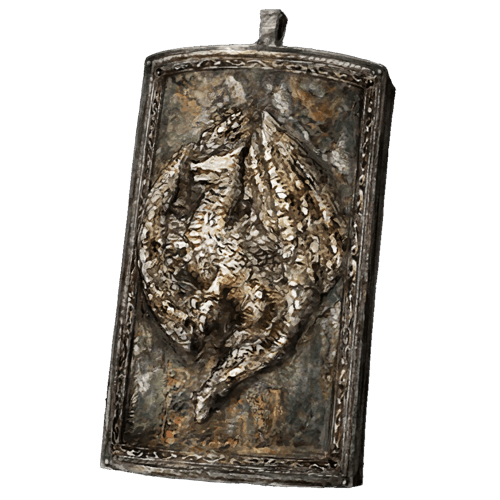
Dragoncrest Greatshield Talisman — Best Defensive Option

Dragoncrest Greatshield Talisman — Best Defensive Option

The Dragoncrest Greatshield Talisman significantly reduces incoming Physical damage in PvE.

Scarlet Rot builds often need to remain close to bosses long enough to apply the status, so additional survivability can sometimes provide more value than another offensive bonus.

It is especially useful against aggressive bosses where safely maintaining status pressure is difficult.

Location: Found in Elphael, Brace of the Haligtree.

Choosing Your Talismans

There isn't one perfect four-Talisman combination for every Scarlet Rot weapon.

For the standard Antspur Rapier build, a strong setup is:

Kindred of Rot's Exultation + Rotten Winged Sword Insignia + Spear Talisman + flexible fourth slot

For the fourth slot, use Dragoncrest Greatshield Talisman for survivability or another offensive/utility option depending on your setup.

For Poleblade of the Bud, Shard of Alexander becomes much more attractive because of Romina's Purification.

For Rotten Battle Hammer or Rotten Greataxe, successive-attack bonuses become less important, so Talismans supporting two-handed attacks, stance pressure, or general survivability are usually more appropriate.

Most importantly, Kindred of Rot's Exultation is the only Talisman here that specifically requires Poison or Scarlet Rot. The remaining slots should support how your chosen weapon actually deals damage rather than simply being selected because this is a Scarlet Rot build.

Scarlet Rot Playstyle Tips

Scarlet Rot builds are strongest when you treat the status as constant background pressure rather than your only source of damage. Your goal is to apply Rot efficiently, then take advantage of the damage-over-time effect while continuing to deal regular weapon damage.

Apply Scarlet Rot, Then Play Around It

At the beginning of an encounter, look for safe opportunities to build Scarlet Rot with fast attacks or multi-hit Skills.

Once Rot activates, there is no reason to keep attacking recklessly. The status continues dealing damage while you dodge, heal, reposition, or wait for another opening.

This makes Scarlet Rot particularly effective against aggressive bosses, as you can continue dealing damage even when you're forced onto the defensive.

Don't Get Greedy for the Rot Proc

Knowing that an enemy is only a few hits away from Scarlet Rot can make it tempting to extend your attack sequence.

Avoid forcing additional attacks when the opening isn't there. Taking a full boss combo just to trigger Scarlet Rot is rarely worth it.

Consistent pressure and good positioning are more important than applying the status a few seconds earlier.

Keep Your Regular Weapon Damage Strong

Scarlet Rot should complement your weapon damage rather than replace it.

Once Rot has been applied, your regular attacks become your main source of active damage. This is why investing properly into Dexterity for Antspur Rapier, Strength for heavier Rot weapons, or Arcane for Poleblade of the Bud remains important.

It also prevents the build from becoming useless against enemies that cannot be afflicted with Scarlet Rot.

Combine Scarlet Rot With Other Status Effects

One of the Antspur Rapier's greatest strengths is its ability to support multiple status effects.

Poison works naturally alongside Scarlet Rot by adding another damage-over-time effect, while Bleed provides powerful burst damage. Frostbite can also be applied through a secondary weapon such as Frozen Needle.

You don't need to stack every possible status effect, but having a secondary option can make the build considerably more versatile.

Take Advantage of Poison and Rot Damage Buffs

Both Kindred of Rot's Exultation and the Mushroom Crown activate when Poison or Scarlet Rot occurs nearby.

This means triggering either status doesn't only damage the enemy; it also creates a temporary window where your regular attacks deal more damage.

Use these windows aggressively when it is safe to do so, especially after Scarlet Rot has already started ticking.

Use The Poison Flower Blooms Twice at the Right Time

The Poison Flower Blooms Twice can consume an active Poison or Scarlet Rot effect to deal a large burst of damage.

However, consuming Scarlet Rot immediately after applying it can waste a significant amount of potential damage-over-time.

Against high-HP enemies, consider allowing Rot to deal damage first before consuming it. Against an enemy that is nearly dead or when you have an opportunity for immediate burst damage, consuming the status earlier can make more sense.

Don't Level Arcane Just for Scarlet Rot

Scarlet Rot being a status effect does not mean every Scarlet Rot build should invest in Arcane.

Most dedicated Rot weapons have fixed Scarlet Rot buildup. Your offensive stats should therefore be determined by your weapon's actual scaling.

For example, the Antspur Rapier build primarily wants Dexterity, while Poleblade of the Bud has a legitimate reason to invest in Arcane because the weapon itself scales with it.

Adapt Against Rot-Immune Enemies

Some enemies cannot be afflicted with Scarlet Rot at all, while others have high resistance that makes repeatedly trying to proc it inefficient.

When this happens, stop building around a status that isn't helping you. Focus on raw weapon damage, stance pressure, Pierce counterattacks, Bleed, Poison, or another available source of damage.

Antspur Rapier's customizable affinity and Ash of War make it particularly good at adapting to these encounters.

Manage Your Stamina

Fast Thrusting Sword attacks make it easy to repeatedly attack while trying to fill an enemy's Rot meter.

Always preserve enough Stamina to dodge or reposition after your attack sequence. This becomes even more important when powerstancing or using multi-hit Ashes of War.

Getting Scarlet Rot to activate slightly faster isn't worth being left without enough Stamina to avoid the next attack.

Adjust Your Playstyle to Your Rot Weapon

Not every Scarlet Rot weapon should be played like the Antspur Rapier.

Antspur Rapier rewards fast attacks, status combinations, and Pierce counterattacks.

Rotten Battle Hammer and Rotten Greataxe rely more heavily on raw damage, stance pressure, and carefully timed heavy attacks.

Poleblade of the Bud places more emphasis on its unique moveset and Romina's Purification.

Build your Talismans, armor, attributes, and playstyle around the weapon you're actually using rather than trying to force every Rot weapon into the same setup.

Scarlet Rot Is Strongest in Longer Fights

Scarlet Rot becomes increasingly valuable when an enemy survives long enough for the damage-over-time effect to run.

Against weaker enemies, applying Rot may not even be worth the effort because regular attacks can kill them faster. Save your status-focused strategy for bosses, elite enemies, and other high-HP targets where the effect has enough time to generate meaningful damage.

Apply Scarlet Rot safely, let the damage-over-time effect work for you, and keep dealing strong regular damage whenever an opening appears. Scarlet Rot should create pressure without forcing you to play recklessly.

Table of Contents

1. Overview2. Pros and Cons3. How Scarlet Rot Works4. Starting Class, Attribute Leveling and Distribution Dexterity Scarlet Rot Build Poleblade of the Bud — Arcane Alternative5. Best Weapons for Scarlet Rot Builds6. Best Early-Game Weapons Rapier — Best Starting Replacement Frozen Needle — Best Early Secondary Status Weapon Cleanrot Knight's Sword — Best Early Farmable Alternative7. Best Scarlet Rot Weapons to Build Around Antspur Rapier — Best Overall Scarlet Rot Weapon Poleblade of the Bud — Best DLC Scarlet Rot Weapon Rotten Battle Hammer — Best Strength Scarlet Rot Weapon Rotten Greataxe — Best Colossal Scarlet Rot Weapon Scorpion's Stinger — Best Fast Pure Rot Weapon Honorable Mentions8. Ashes of War The Poison Flower Blooms Twice — Best Scarlet Rot Ash of War Poisonous Mist — Best Poison + Rot Combination Repeating Thrust — Best for Rapid Status Application Impaling Thrust — Best General-Purpose Option Blood Tax — Best Rot/Bleed Hybrid Option Poison Moth Flight — Alternative Poison Burst Option Cragblade — Best for Raw Damage and Stance Pressure9. Best Incantations for Scarlet Rot Builds Rotten Breath — Best Accessible Rot Incantation Ekzykes's Decay — Stronger Dragon Communion Option Scarlet Aeonia — Best Dedicated Rot Incantation Rotten Butterflies — DLC Rot Incantation10. Best Armor for Scarlet Rot Builds Mushroom Crown — Best Overall Scarlet Rot Armor Rakshasa Set — Best General Offensive Option Solitude Set — Best Defensive Option High-Poise Mixed Armor — Best General Setup Mushroom Set — Best for Rot Resistance11. Best Talismans for Scarlet Rot Builds Kindred of Rot's Exultation — Best Overall Scarlet Rot Talisman Rotten Winged Sword Insignia — Best for Successive Attacks Spear Talisman — Best for Antspur Rapier Shard of Alexander — Best for Weapon Skill Builds Two-Handed Sword Talisman — Best for Heavy Rot Weapons Two-Headed Turtle Talisman — Best Stamina Option Dragoncrest Greatshield Talisman — Best Defensive Option12. Scarlet Rot Playstyle Tips

See More

Elden Ring Dragon Build - Stats, Weapons, Skills & More
Updated on Aug 22, 2026
Elden Ring Scarlet Rot Build - Stats, Weapons, Skills & More
Updated on Aug 22, 2026
Elden Ring Faith Build - Stats, Weapons, Skills & More
Updated on Aug 22, 2026
Elden Ring - Best Armor Sets
Updated on Aug 22, 2026
Elden Ring Bleed Build - Stats, Weapons, Skills & More
Updated on Aug 22, 2026

Like our guides?

Add Mobalytics as a preferred source on Google!