menu
MobalyticsUse your favourite features in-game with our Desktop App
Gamebase Guide

Aion 2 Templar PvE Build

Guides
Aion 2
Updated on Oct 16, 2026
Oct 16, 2026

Overview

This Aion 2 Templar PvE build combines repeated Judgment casts with charged Punishmentattacks, while keeping your defensive skills and movement under your control. It is built for players who want to contribute damage while handling their tanking responsibilities.

We will cover the core skills, recommended Specialties and Stigmas, an in-game combat macro, and the upgrades that make the rotation stronger as you progress.

If you are still getting familiar with the game’s systems, our Aion 2 beginner guide covers the early steps that help you get started.

A huge thank you to NoBS Game Guides for sharing his Templar build and rotation tips!

More Aion 2 Builds

Browse builds for all the classes

Core Templar Skills

Your main damage loop revolves around triggering Judgment, using its available casts, and maintaining your regular attacks between those openings. Punishment provides a separate charged attack that you control manually.

  • Judgment: Your main damage priority. Shield Smite, Warding Strike, Shield Rush and Doom Shield create opportunities to use it.
  • Vicious Strike: Your basic attack. Hold it alongside the combat macro to keep attacking between your other skills.
  • Pummel: A filler attack used when the higher-priority skills in its stack are unavailable. Its Punishing Strike chain becomes an important damage source as you upgrade it.
  • Punishment: A charged damage skill. Keep it on a manual key so you can complete its charge and choose when to use it.
  • Warding Strike and Shield Smite: Regular Judgment triggers that belong in the same skill stack as Judgment.
  • Annihilate and Debilitating Smash: Supporting attacks handled by their own macro stack when their activation conditions are met.
  • Poach and Shield Rush: Movement tools that help you reach your target. Shield Rush becomes available after dodging in combat, while Poach needs its movement Specialty to close the gap against bosses that cannot be pulled.

The basic setup can be developed while leveling. Add skills as you unlock them, then adjust their Specialties as your total skill levels increase.

Templar Passive Skills

Prioritize Fury for its party contribution, then develop your offensive and defensive passives together.

  • Fury: Blocking activates a damage buff for you and nearby party members for 20 seconds. Improving it benefits the whole group.
  • Punishing Benediction: An offensive passive worth upgrading to support your damage.
  • Insulting Roar: Another important offensive passive to develop alongside Punishing Benediction.
  • Enhance Health: Increases your HP, giving you more room to survive incoming damage.
  • Ironclad Defense: Improves Defense and Endurance, supporting your ability to stay in the fight.
  • Guarding Seal: Provides a protective shield when your HP falls below 50%. It adds a useful defensive buffer during dangerous moments.

Keep Fury high on your upgrade list, but continue improving your defenses as you move into harder encounters.

Recommended Skill Specialties

Specialties change how your active skills work. Their options unlock at skill levels 8, 12 and 16, while the slots for equipping them unlock at levels 8, 12 and 20. Reaching level 16 gives access to the final option, but you still have two equipped slots until level 20.

Main Level 16 Priorities

Work towards these four upgrades:

  • Judgment: Select the Specialty that removes its cooldown, allowing repeated casts during each activation window. Pair it with Extra Damage on Hit.
  • Vicious Strike: Unlock the Specialty that adds the Threatening Blow chain skill.
  • Pummel: Unlock the Specialty that adds extra damage to Punishing Strike.
  • Punishment: Select the Specialty that ignores Block and Evasion and guarantees a Critical Hit.

Judgment’s cooldown removal is especially important. You still need another skill to trigger Judgment; removing its cooldown does not make it permanently available.

Early and Supporting Selections

Use the following options as you develop the build, replacing early choices when your key level 16 upgrades become available:

  • Vicious Strike: Use the Multi-Hit option early. Its level 12 Warding Strike cooldown reduction also helps create more Judgment openings.
  • Pummel: Take increased damage against fewer targets for boss fights. The level 12 Punishment cooldown reduction supports more frequent charged attacks.
  • Judgment: Use Extra Damage on Hit while progressing, then keep it equipped alongside the cooldown-removal Specialty once that option becomes available.
  • Poach: Take the movement option for targets that cannot be pulled. Add the shield based on 10% of your maximum HP for bosses, or use the cooldown reset on enemy kills while farming.
  • Shield Smite: Prioritize its cooldown reduction and the chance to trigger Debilitating Smash.
  • Debilitating Smash: For PvE, take the additional three seconds of debuff duration and the option that ignores Block and lands as a Multi-Hit. Its incoming-healing reduction is a separate PvP choice.
  • Warding Strike: Take the five-second cooldown reduction and healing over time during Warding.
  • Shield Rush: Use the additional 10 metres of range and the ten-second cooldown reduction.
  • Annihilate: Take the bonus damage against targets immune to incapacitation and the ten-second cooldown reduction.
  • Punishment: Before the level 16 option, use the damage-over-time effect. The mobile-casting option is useful when you need more freedom to reposition.

These are upgrade priorities across different skill levels. Equip only the options your current slots allow, and revisit your selections when you reach a new milestone.

Recommended Stigmas

Use Shield of Protection, Noble Armor, Battlefield Banner and Doom Shield while progressing. For late-game group content, replace Battlefield Banner with Taunt at level 15.

Shield of Protection

Shield of Protection gives you direct control over blocking. Use it immediately before an incoming attack, then return to your rotation once the hit has passed.

You can also maintain it for roughly three seconds to cover several attacks, provided you do not interrupt it with another action. At level 5, it gains a second consecutive use.

Noble Armor

Noble Armor restores HP and applies a long-duration buff. Its two-minute duration matches its two-minute cooldown, allowing continuous uptime when you refresh it on time.

Use it before your opening attacks and make level 15 an important Stigma upgrade target. Keeping it on a manual key makes it easy to prepare before engaging, although you can include it in the macro if you prefer automatic upkeep.

Battlefield Banner and Late-Game Taunt

Battlefield Banner increases your personal damage by converting a portion of your Defense into Attack. Activate it before your opening rotation and refresh it during longer fights. Its duration improves with levels, and its base cooldown is 90 seconds.

For late-game group content, replace Battlefield Banner with level 15 Taunt. Its debuff reduces the target’s Damage Mitigation by 10%, helping the whole party deal more damage. Taunt also helps you regain enemy attention when highly geared teammates make aggro harder to maintain.

Doom Shield

Doom Shield is a dash that also triggers Judgment. It becomes particularly valuable once Judgment reaches level 16, because another activation window allows several more attacks.

Keep Doom Shield on a manual input. Use it after spending your current Judgment window and only when moving towards the target is safe.

Situational Swaps

Nezekan's Shield provides a short party shield for large incoming attacks, including raid-wide damage and mechanics that require the group to stack together.

Swap it into Doom Shield's slot when your group needs the additional protection, particularly before Doom Shield's extra Judgment openings become a major damage gain.

Templar Combat Macro

The macro handles your regular attack stacks while you hold Vicious Strike separately. Punishment, movement and defensive timing stay under your control.

Set Up Your Skill Stacks

Arrange the skills in these priority orders, with the first listed skill checked before the others in that stack:

  • Annihilate stack: Annihilate, then Debilitating Smash.
  • Judgment stack: Judgment, Shield Smite, Warding Strike, then Pummel.

Give Shield Smite priority over Warding Strike to help prevent Warding Shield from activating without hitting the target.

Keep Pummel in the same stack as Judgment, with lower priority. Putting Pummel into the other macro stack can make the macro alternate away from Judgment while Judgment is still available, wasting part of its short activation window.

Create the In-Game Macro

Add these entries in order:

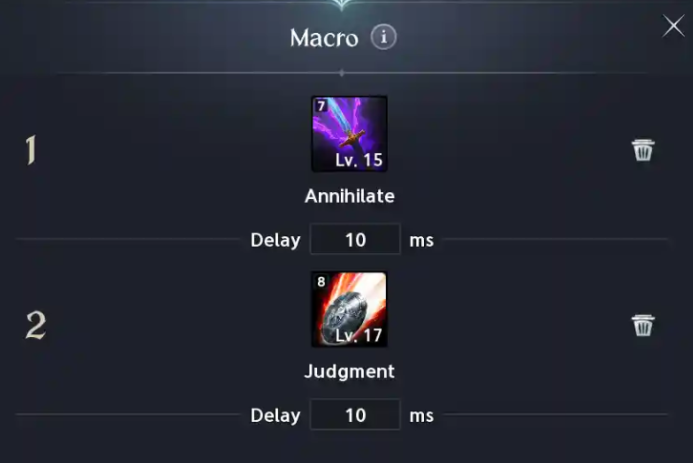
  1. Annihilate: Set the delay to 10 ms.
  2. Judgment: Set the delay to 10 ms.

Set the macro to cycle between the two associated stacks while held. Each entry uses its linked stack, allowing the other available skills in that stack to activate according to their priority.

Bind the macro to a comfortable input, then hold that input and your basic attack together. With Vicious Strike on left-click and the macro on right-click, this means holding both mouse buttons.

Our Aion 2 settings guide covers useful combat keybinds and targeting adjustments.

Keep These Skills Manual

Keep Poach, Shield of Protection, Punishment, Doom Shield and Shield Rush outside the automated attack stacks. Use Noble Armor manually for the opening rotation, along with Battlefield Banner if you have it equipped.

Automating a dash can move you back into danger while you are trying to avoid a boss mechanic. If you group Shield Rush and Doom Shield on a separate manual key, give Shield Rush priority when it is available.

Templar PvE Rotation

Open with your buffs and a fully charged Punishment, then use the macro for your regular attacks.

  1. Activate Noble Armor and, if equipped, Battlefield Banner.
  2. Use Poach to close the gap when its boss-movement Specialty is equipped and an approach is needed.
  3. Fully charge and release Punishment.
  4. Hold Vicious Strike and your combat macro together.
  5. Spend the available Judgment casts before creating another opening with Doom Shield or Shield Rush.
  6. Use Punishment again when it is ready, fitting it between Judgment windows whenever possible.
  7. Refresh your buffs and use Shield of Protection for incoming attacks.

With the late-game Stigma setup, apply Taunt once the target is in range so your party benefits from its Damage Mitigation debuff. Maintain that debuff during the fight and use Taunt to help regain aggro when needed.

Protect Your Judgment Windows

Avoid interrupting an active Judgment window just to start charging Punishment. Finish the available Judgment casts first, then use Punishment and return to the macro.

The same principle applies to your dashes. Using Doom Shield while an existing Judgment window is still active can overlap opportunities that you could have used separately.

Before Judgment reaches level 16, its cooldown still limits how frequently you can use it. Space your additional manual triggers around that cooldown rather than expecting the same repeated casts as the upgraded build.

React to Boss Mechanics

Use Shield of Protection just before a blockable hit, or hold it to cover a short sequence of attacks. Return to your regular attacks when it is safe.

Shield Rush requires a dodge in combat before it becomes available. It can help you return to a target after avoiding an attack, but only dash back once the dangerous area is clear.

Fully charging Punishment is the default for this setup. Choose a safe opening for the charge and prioritise avoiding a mechanic if the boss forces you to move.

Arcana, Daevanion and Equipment Progression

Your main progression goal is to reach level 16 on Judgment, Vicious Strike, Pummel and Punishment, then equip their important Specialties. Copying the skill layout alone will not provide the same damage as a character with those upgrades.

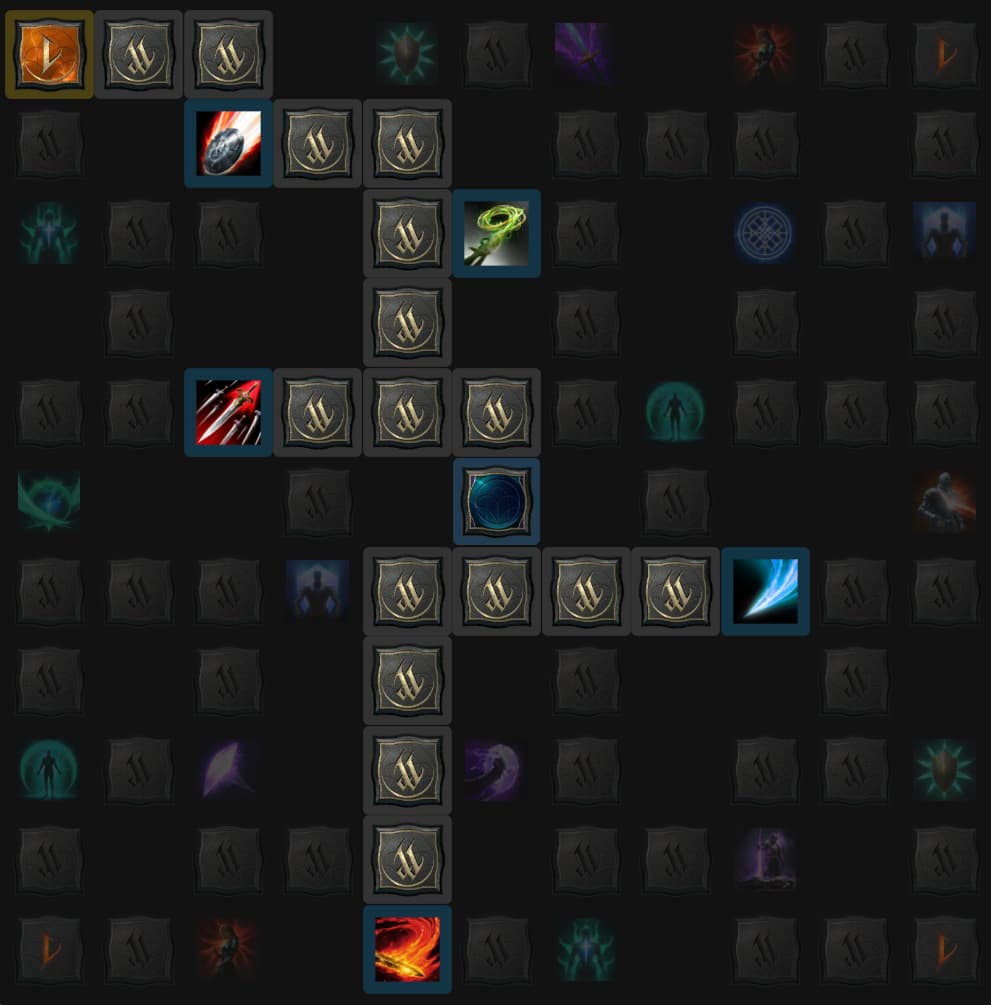
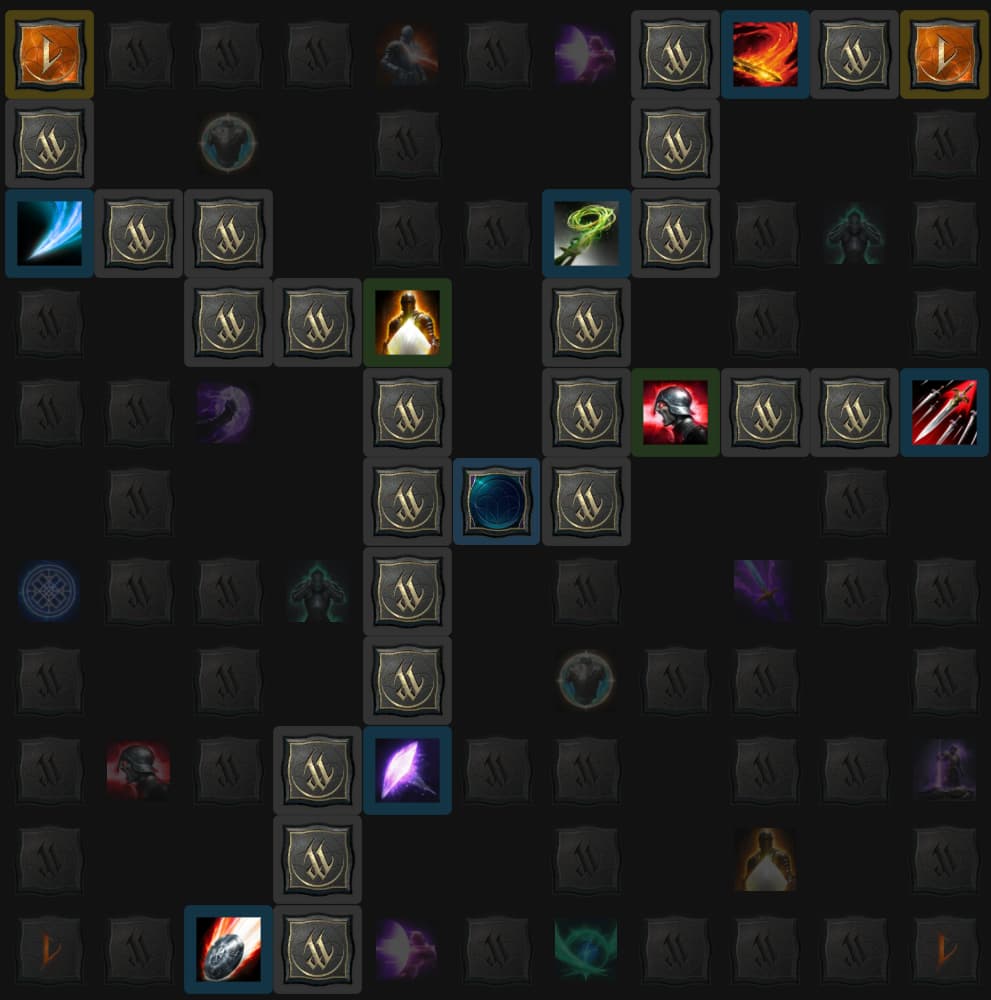
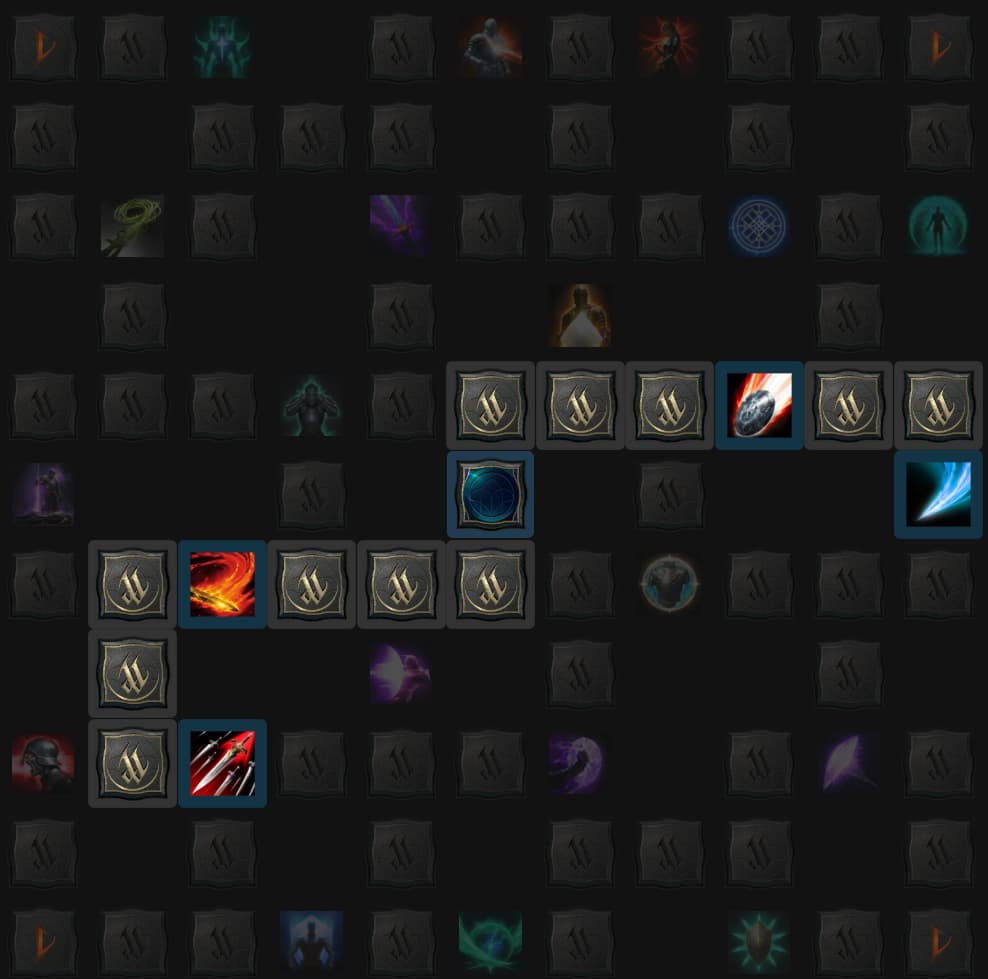
Early-Game Daevanion Tree

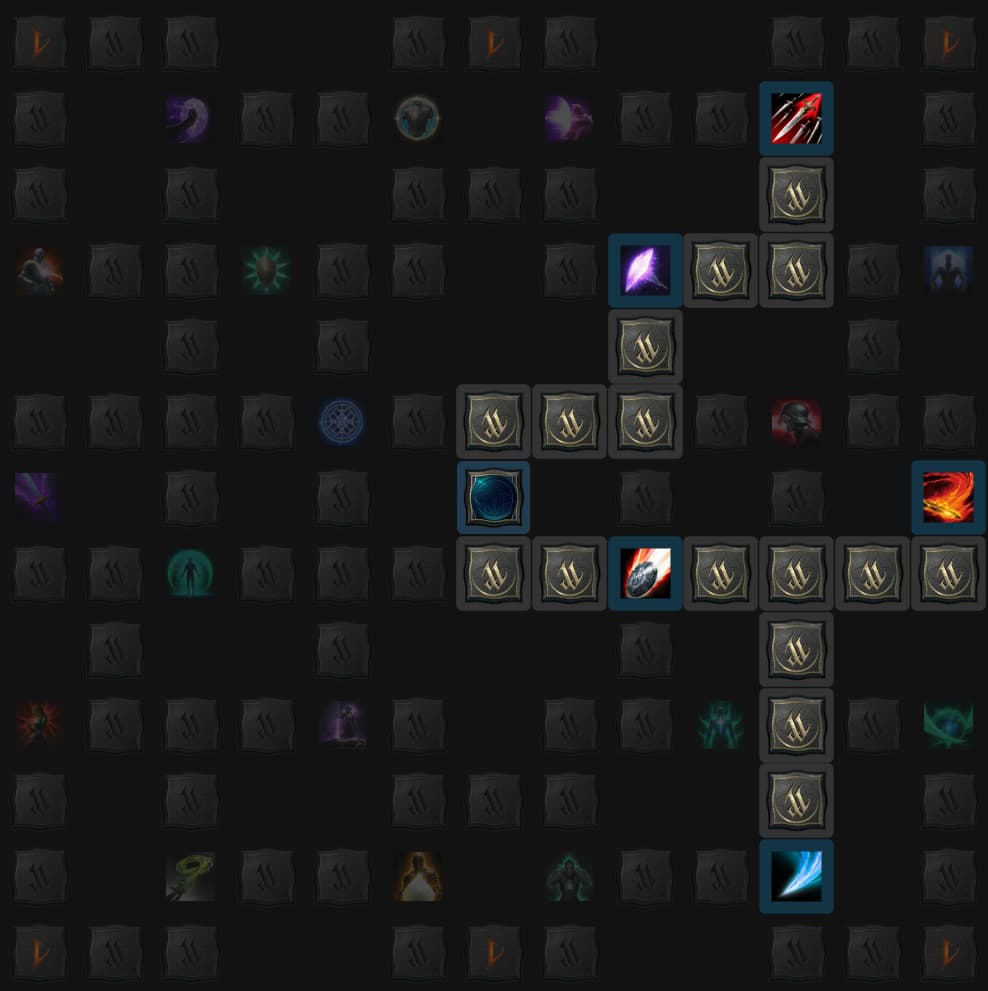
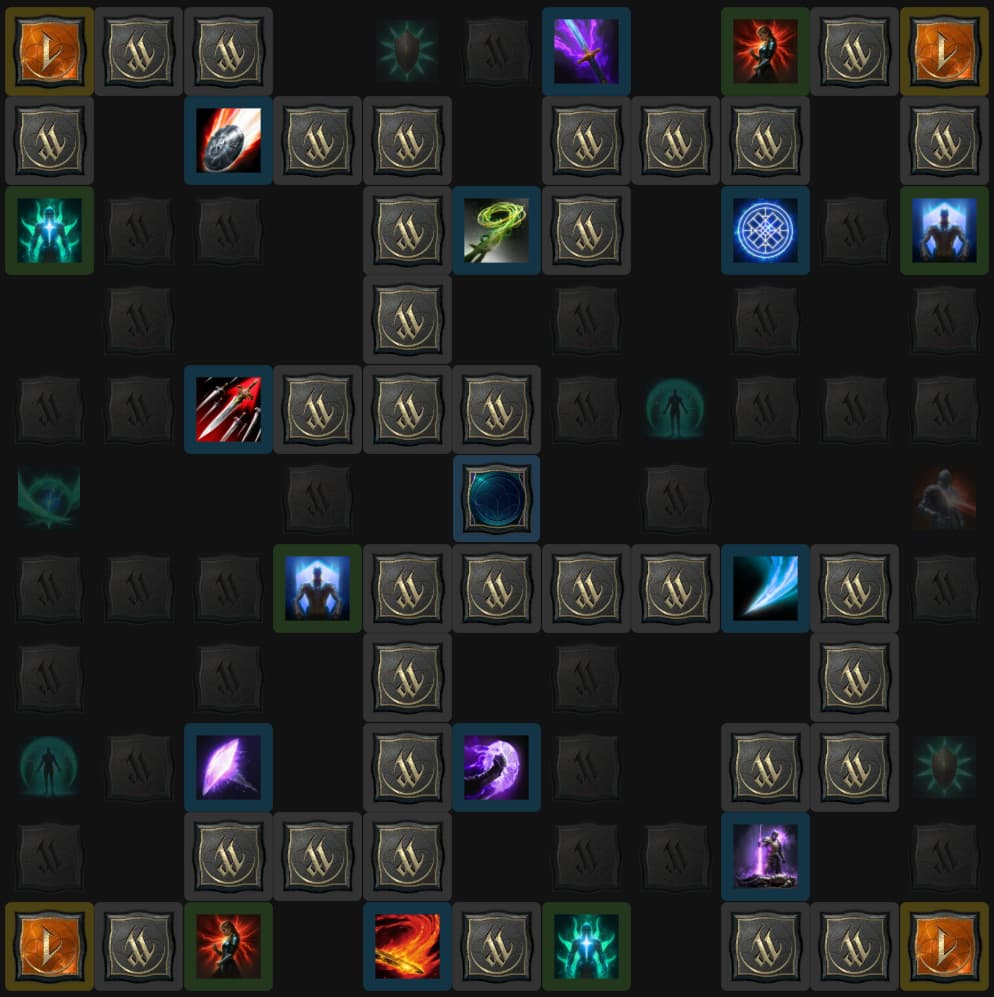
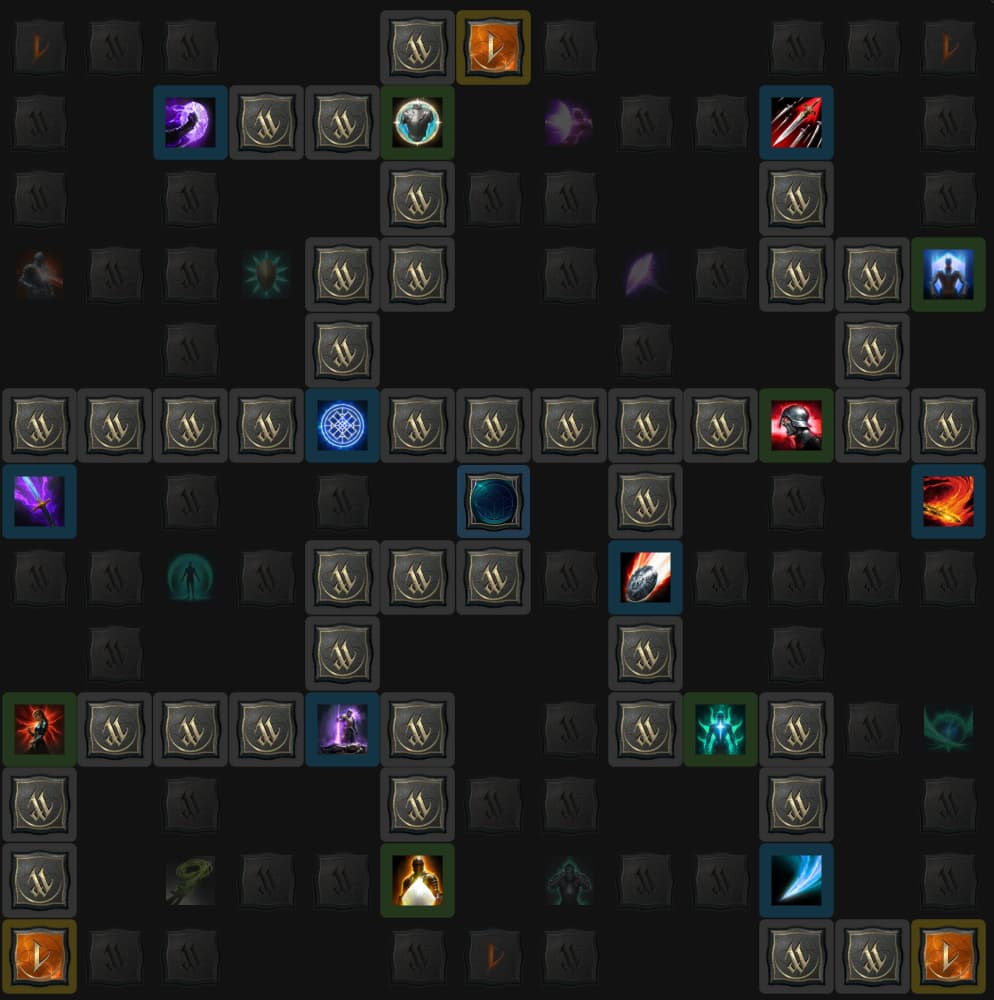
Work towards this 140-point Daevanion setup as you develop your Templar. It provides four additional levels to Judgment, Vicious Strike, Pummel and Punishment, helping you reach the level 16 Specialties that strengthen your main damage rotation.

Nezekan

Zikel

Vaizel

Triniel

Endgame Daevanion Tree

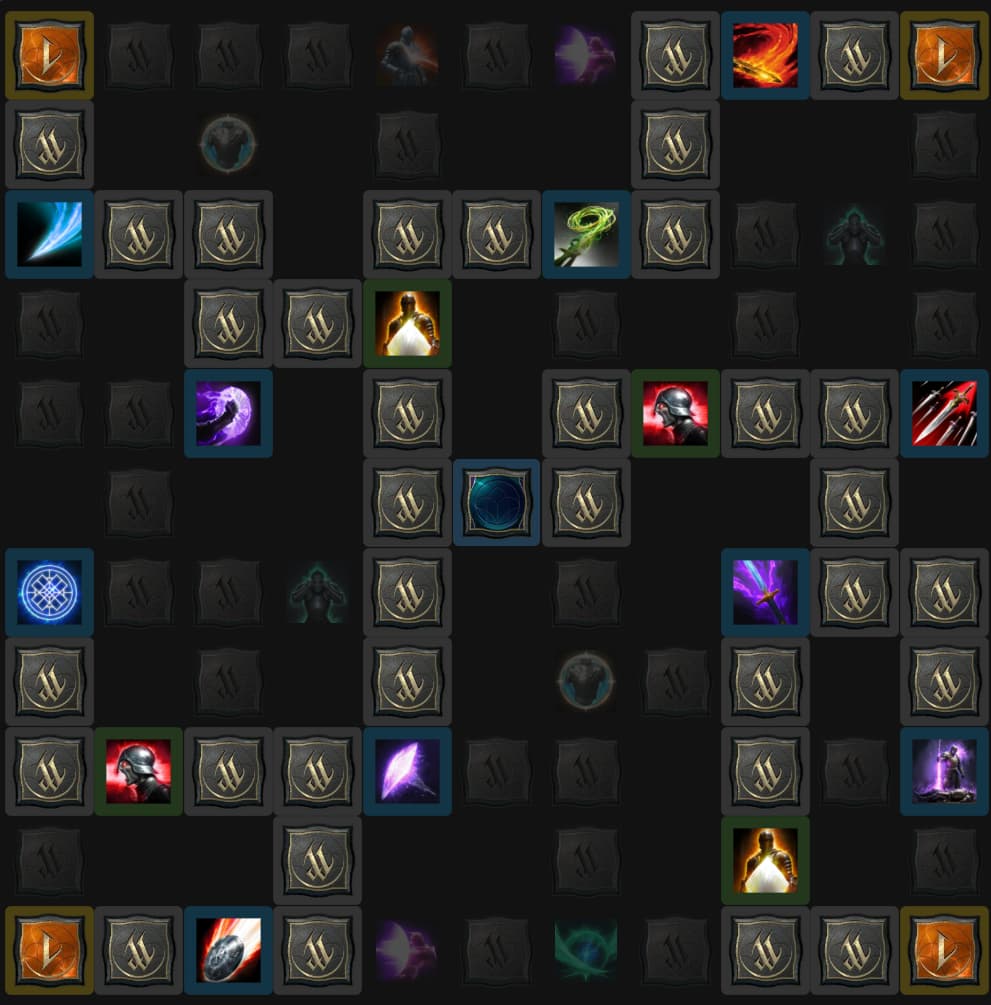
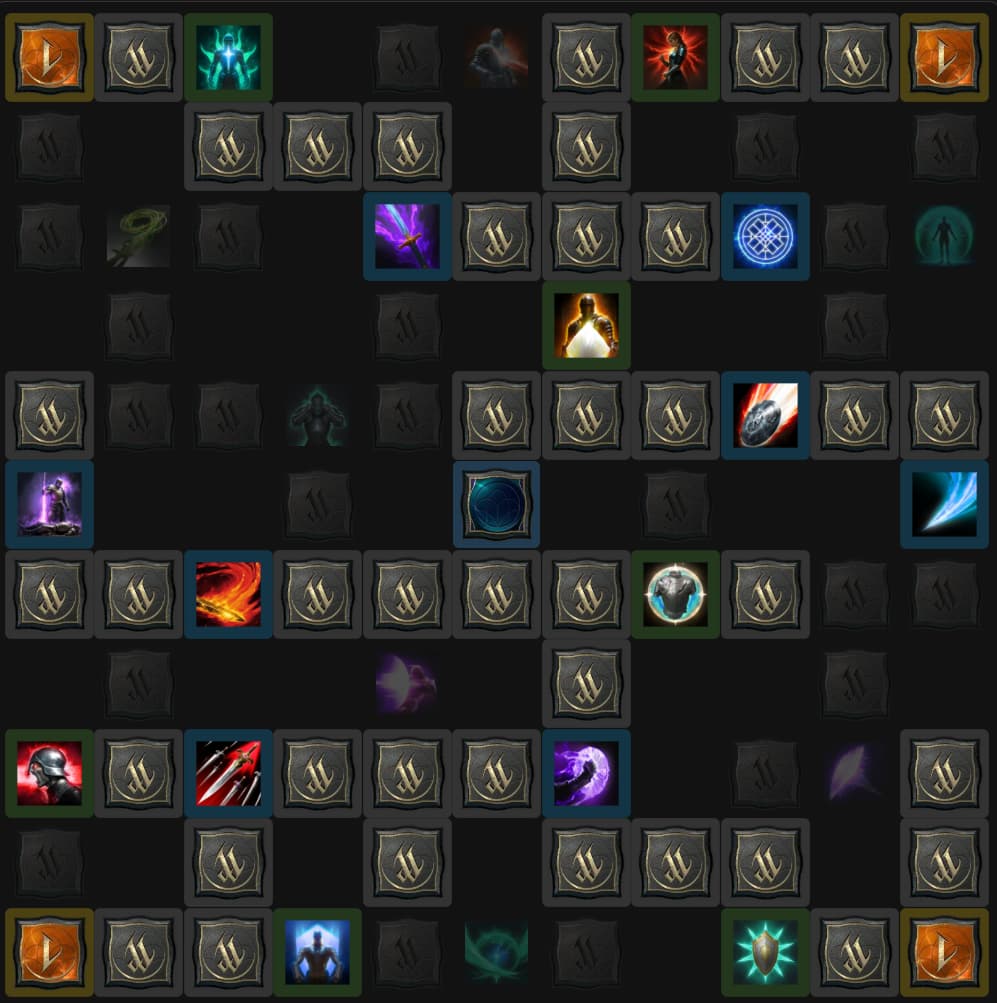
Use this 360-point Daevanion setup as your later progression target. It keeps the four additional levels on your main damage skills while expanding the bonuses to supporting attacks and passives, including Fury, Punishing Benediction and Ironclad Defense.

Nezekan

Zikel

Vaizel

Triniel

Arcana Priorities

Farm Transcendence for Arcana and look for bonuses to the four priority skills. Check how a new card changes your total skill levels before replacing an existing one, especially if the swap would remove access to a key Specialty.

Pets and Pantheon upgrades still contribute to your character. However, reaching these skill milestones should be a major focus while developing this build, particularly when Judgment is close to unlocking its cooldown removal.

Equipment and Damage Expectations

You can develop this setup using dungeon equipment without requiring a complete crafted set. Continue upgrading your equipment alongside your skills, rather than waiting for expensive replacements before learning the rotation.

For the broader equipment progression steps, our Aion 2 gear score guide explains how to work towards higher content requirements.

Early characters will deal less damage even when using the same inputs correctly. Judge your progress by your skill levels, Specialties and consistency first, then compare damage under similar conditions. Gear, buffs, encounter movement and the length of a damage test can all affect the result.

Video

Table of Contents

See More

Aion 2 Templar PvE Build
Updated on Oct 16, 2026
Aion 2 Class Builds
Updated on Oct 16, 2026
Aion 2 Chanter Dark Crush PvE Build
Updated on Oct 16, 2026
Aion 2 Shugo Festival Guide
Updated on Oct 15, 2026
AION 2 PvP Tier List (Best Classes Ranked)
Updated on Oct 15, 2026

Like our guides?

Add Mobalytics as a preferred source on Google!