This Aion 2 Gladiator PvE build focuses on dealing consistent melee damage while giving you the tools to hold an enemy’s attention and support your party.
In this guide, we will cover your main skills and passives, recommended Stigmas, a simple combat rotation and the stats to look for on your equipment. We will also go through mana sustain, pets, Arcana Cards and Daevanion priorities so you know which parts of the build to improve as your character develops.
If you are still getting familiar with the game’s systems, our Aion 2 beginner guide covers the early steps that help you get started.
A huge thank you to Ulfhednar for sharing his Gladiator build! Be sure to check out his channel for more Aion 2 content.
Core Gladiator Skills and Passives
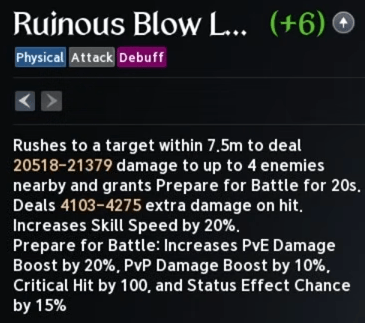
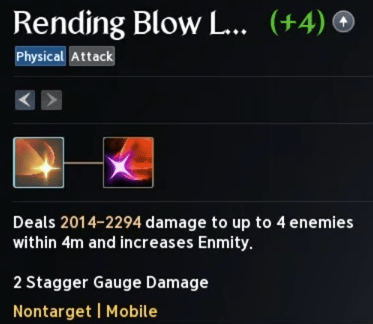
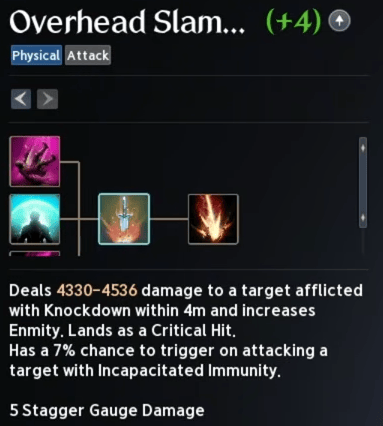
Your main damage skills are Ruinous Blow, Rending Blow and Overhead Slam. Build around these attacks while keeping a reliable way to recover the mana needed to use them.
Active Skills
Ruinous Blow: A heavy attack that also grants Prepare for Battle. Use it early in an engagement and again as it becomes available.
Rending Blow: Your regular mana-spending attack, used repeatedly alongside your other damage skills.
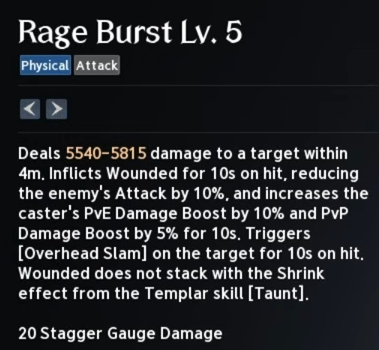
Overhead Slam: One of your core damage skills, enabled against your target through Rage Burst.
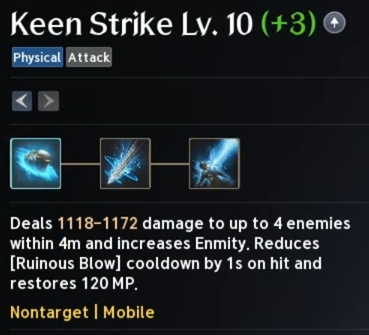
Keen Strike: Your basic attack and an important source of mana. Its mana recovery helps keep the rest of your rotation running.
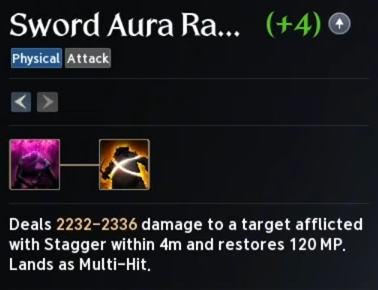
Sword Aura Rampage: Use this against staggered enemies. Select its mana-restoration Specialty if you want it to help refill your MP.
For open-world farming, choose the cooldown-reset Specialty on Leaping Slam to move quickly between enemies after securing kills. It is useful for clearing regular monsters and moving on to the next target.
Passive Priorities
Attack Preparation is a key passive to develop, including through your Daevanion board. Alongside it, focus on Impact Hit and Experienced Counterstrike.
Impact Hit supports the build’s emphasis on Smite, also described as double chance. Experienced Counterstrike provides a damage buff following a successful block, with benefits for your party as well.
That makes blocking particularly valuable when you are tanking. You can protect yourself and trigger a useful offensive bonus while continuing to deal damage.
Recommended Stigmas
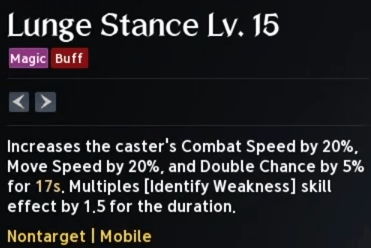
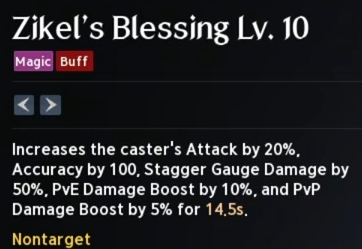
Use Lunge Stance, Zikel’s Blessing and Rage Burst as the core of this setup, with your remaining slot available for party damage, healing or additional protection.
Lunge Stance: Provides Combat Speed, with double-chance benefits available through its upgrades.
Zikel’s Blessing: Improves your damage and Accuracy.
Rage Burst: Enables Overhead Slam, making it central to your damage rotation.
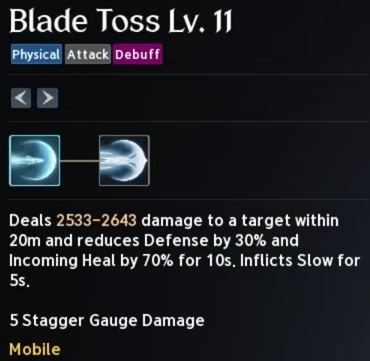
Blade Toss: The offensive flex choice, reducing the target’s Defense and helping your party deal damage.
If you need more sustain, replace Blade Toss with Lifestealing Blade. This is especially useful when you are taking repeated hits and need more healing to stay in the fight.
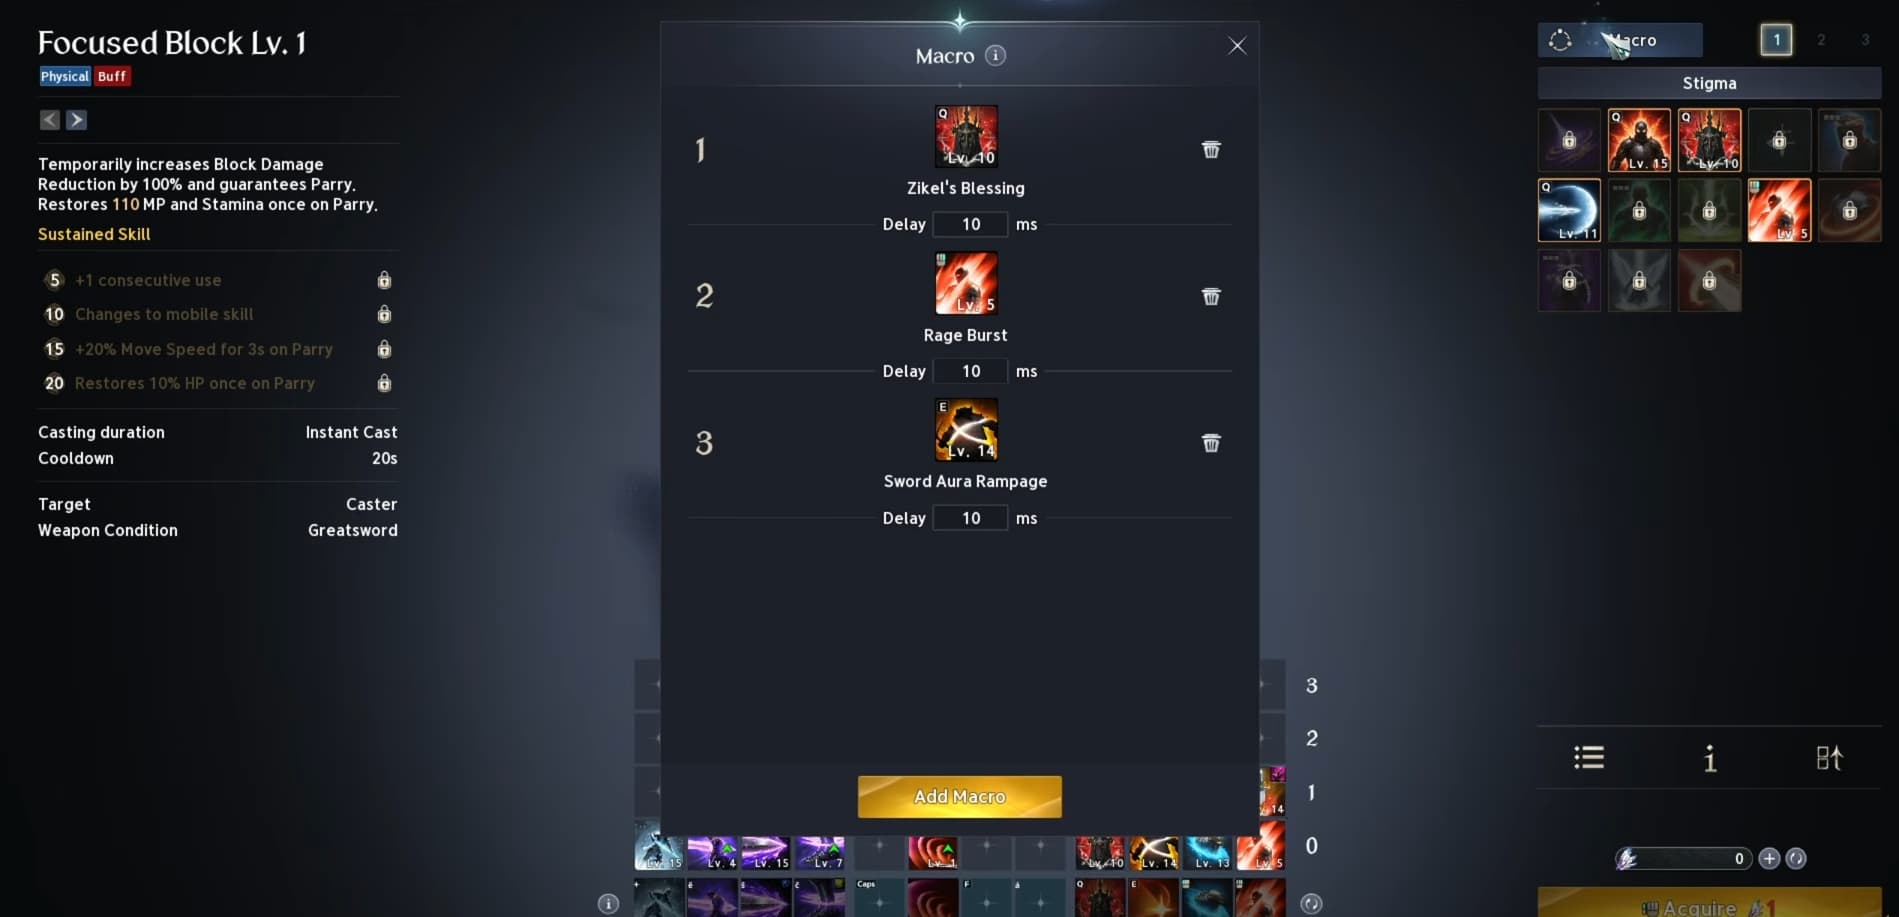
Focused Block is another option when you want a more defensive setup. Choose the fourth Stigma around the encounter and your role in the group. Blade Toss adds offensive utility, while the alternatives give you more ways to handle incoming damage.
Gladiator Rotation and Combat Macro
The basic combat loop combines your damage buffs, Rage Burst and repeated attacks while Keen Strike keeps your mana available.
Use Lunge Stance and Zikel’s Blessing to support your damage.
Apply Blade Toss if you have chosen it for your flex slot.
Use Ruinous Blow early for its attack and Prepare for Battle buff.
Use Rage Burst to enable Overhead Slam, then keep using Overhead Slam and Rending Blow as available. Reuse Ruinous Blow when it is ready.
Keep Keen Strike active to recover mana and benefit from the Ruinous Blow cooldown-reduction option.
Use Sword Aura Rampage during boss stagger windows, with its mana-restoration Specialty selected for MP recovery.
Treat this as a combat priority rather than a sequence you must finish before reacting. Move out of dangerous attacks and use your defensive tools when needed.
In-Game Macro Setup
The in-game macro system lets you group skill inputs under one binding. You can assign that binding to right-click and use it alongside left-click Keen Strike for mana recovery.
Check both your macro and quick-slot assignments when setting it up. Your damage skills, buffs and conditional attacks still need the correct bindings; assigning a macro key alone does not configure the full rotation.
Keep your defensive skills easy to reach, and make sure you can interrupt your attacking to move or block when needed.
Test the setup on a training dummy before taking it into a dungeon. Watch whether your attacks activate correctly and whether you can maintain your mana over repeated uses.
For targeting, boss orientation indicators and other useful control options, check our Aion 2 settings guide.
Attack Weaving
Attack weaving combines basic attacks and skill inputs to reduce gaps between attacks. Get comfortable with your main skills and mana recovery first, then practise the timing on a training dummy.
Compare a sustained rotation rather than a single burst. If faster inputs leave you short of mana or make it harder to respond to mechanics, work on keeping the simpler rotation consistent before adding more inputs.
Stat Priorities and Equipment
Look for offensive bonuses that support your regular attacks, including Weapon Damage Boost, Damage Boost, Combat Speed, Critical Hit and Smite. Keep Accuracy in mind as well, particularly as you move into harder PvE content.
For Soul Binding, use these priorities as a starting point:
Weapon: Weapon Damage Boost, Combat Speed, Might and Precision.
Guard: Weapon Damage Boost, Combat Speed, Damage Boost and Might.
Check the full set of bonuses on an item when comparing upgrades. A higher displayed score is useful for meeting requirements, but the affixes still matter to how the build performs.
For Pantheon bonuses, focus on these attributes:
Wisdom: Supports mana efficiency and double chance.
Time: Provides Combat Speed.
Destruction: Adds damage-related bonuses.
Illusion: An additional option for cooldown reduction once your main priorities are covered.
If you are working towards your next dungeon requirement, our Aion 2 gear score guide covers equipment upgrades, materials and progression in more detail.
Pets and Combat Power
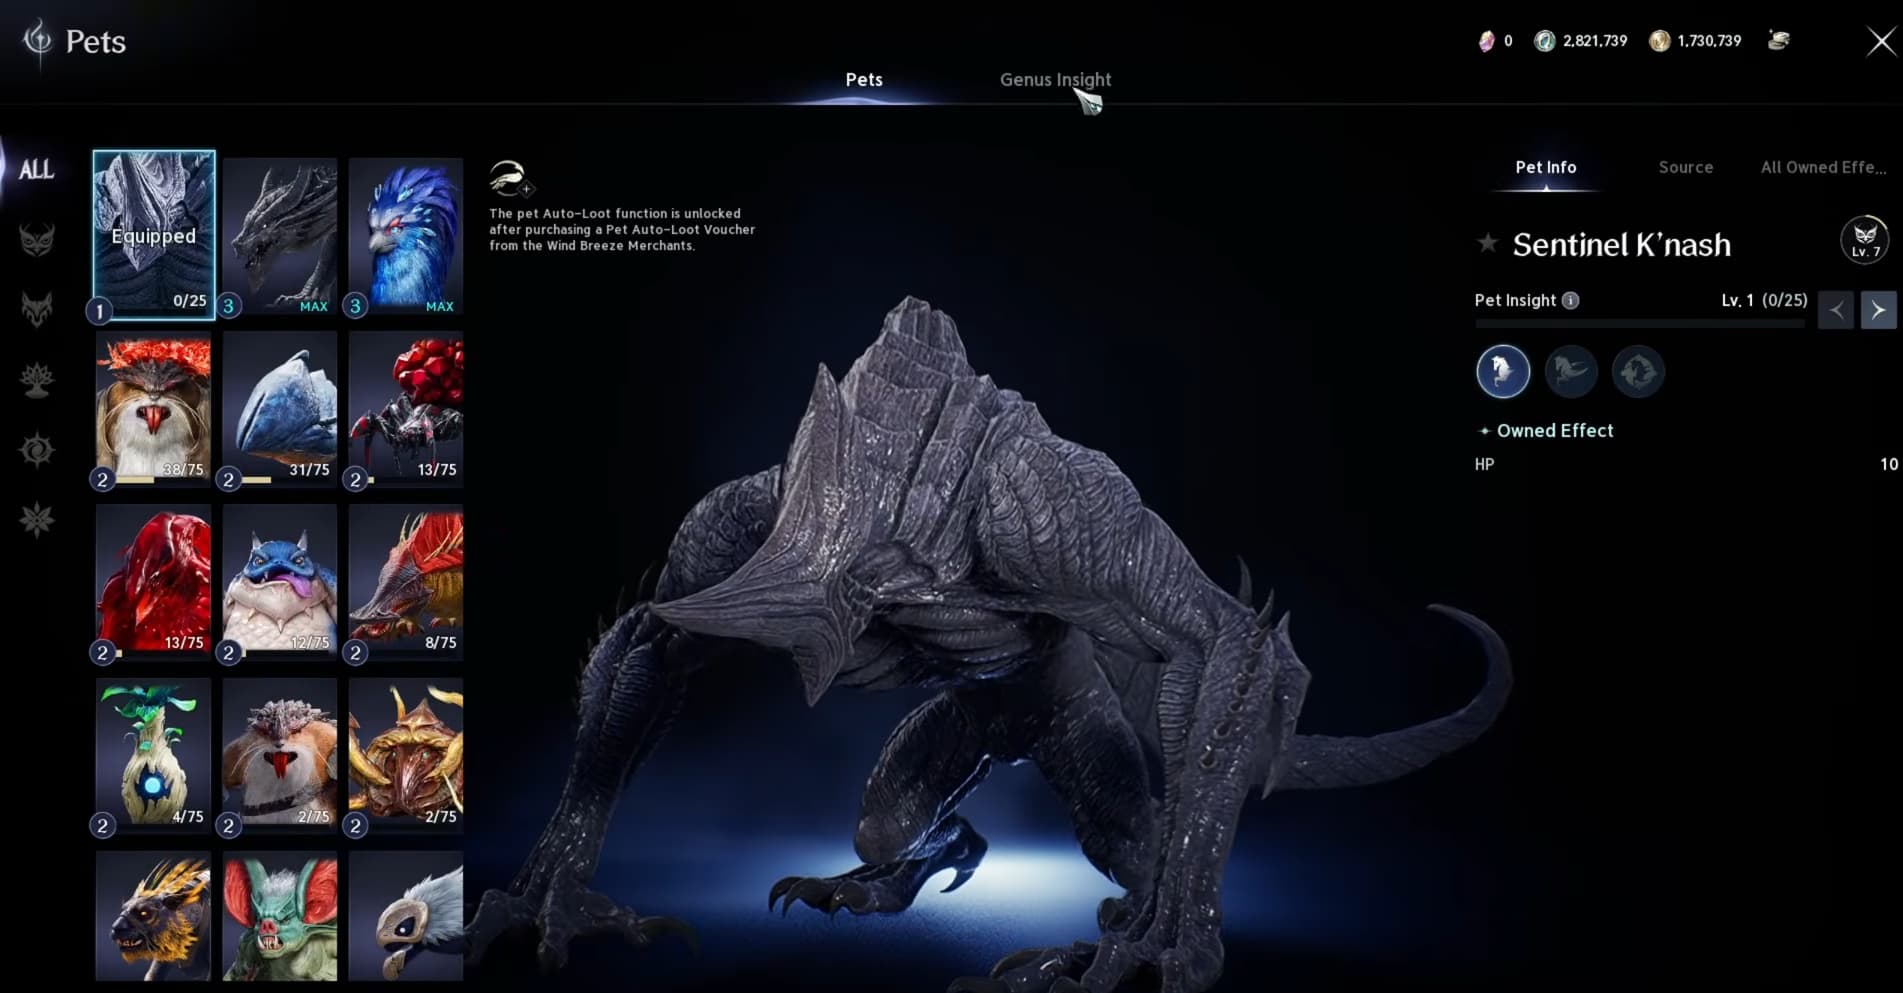
Pet stat rolls can improve your damage and raise your displayed Combat Power, but they do not increase your gear score. Keep that distinction in mind if you are trying to unlock content with an item-level requirement.
Open the pet menu and review the available stat rolls. Useful offensive options include Max Attack, Critical Hit and Damage Boost, while HP increases and damage tolerance can help defensively.
The special lines available differ between pet categories. Look out for bonuses such as Critical Damage Boost, Weapon Damage Boost, Multi-Hit Chance, Perfect Chance and double chance when they are available.
Front Damage Boost is also relevant when you are regularly attacking from the front, particularly while holding a boss’s attention. Its value depends on where you actually spend the fight.
Reroll costs can build up quickly. Use the crystals you earn from suitable Duty quest rewards, and avoid spending heavily on pet rolls when your immediate goal is an upgrade that raises your gear score.
Arcana Cards and Titles
For Arcana Cards, focus on bonuses to Ruinous Blow, Overhead Slam and Rending Blow. These support the skills at the centre of your build. Check useful set bonuses alongside the individual skill increases when comparing cards.
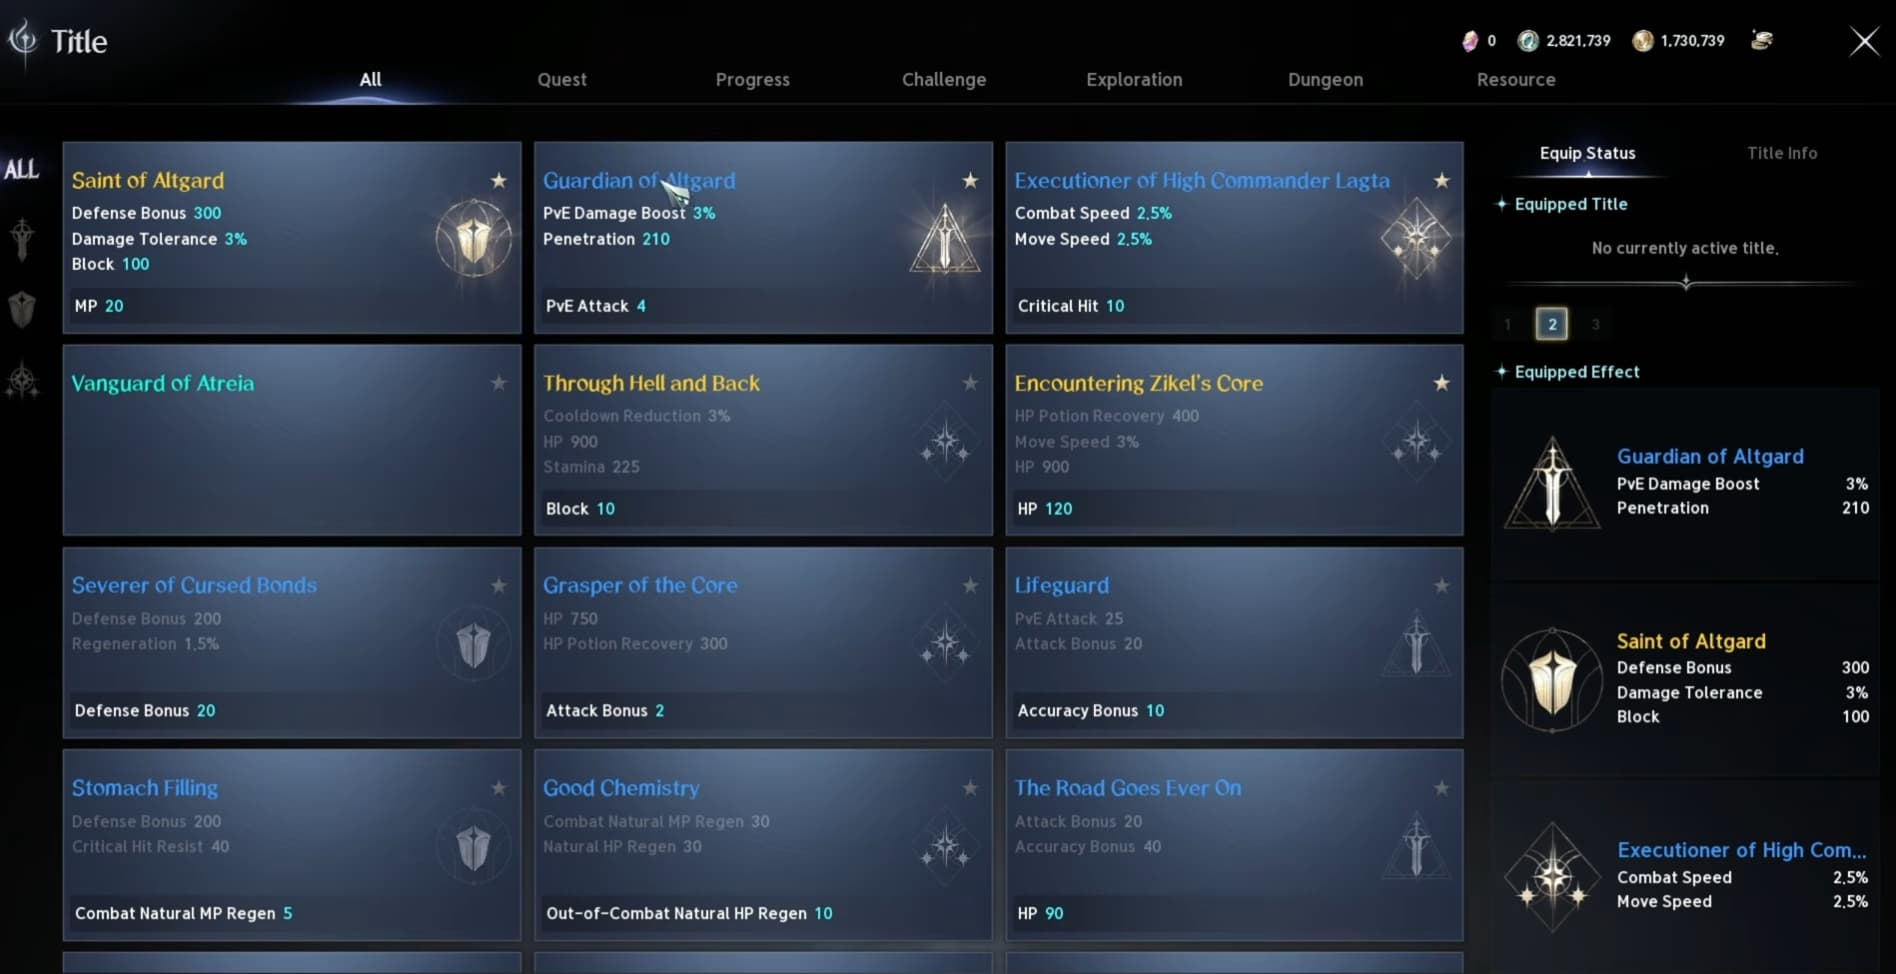
For titles, Guardian of Altgard is an offensive option with PvE-related bonuses. Through Hell and Back, obtained through Sealed Dungeon completion, offers cooldown reduction. Combat Speed titles are another option if you want to support a faster rotation.
Choose from the titles you have unlocked and compare their actual bonuses with your current setup. There is no need to delay the rest of the build while chasing a particular title.
Theostones provide another source of additional effects. Work with useful options you obtain while developing the core skills, equipment and passives that the build relies on.
You can also gain additional stats through skin combinations in the Closet. Check the cumulative bonuses as your collection grows; these smaller improvements can add up over time.
How to Sustain Your Mana
Use Keen Strike regularly and choose its mana-recovery upgrade to support your rotation. If you run out of mana during longer fights, review your skill choices and supporting stats before adding more offensive upgrades.
Several options can help:
Maximum MP: Gives you a larger reserve to work with.
MP regeneration: Helps replenish your resources over time; check the conditions on the stat.
Daevanion mana nodes: A way to add MP when your current pool feels too small.
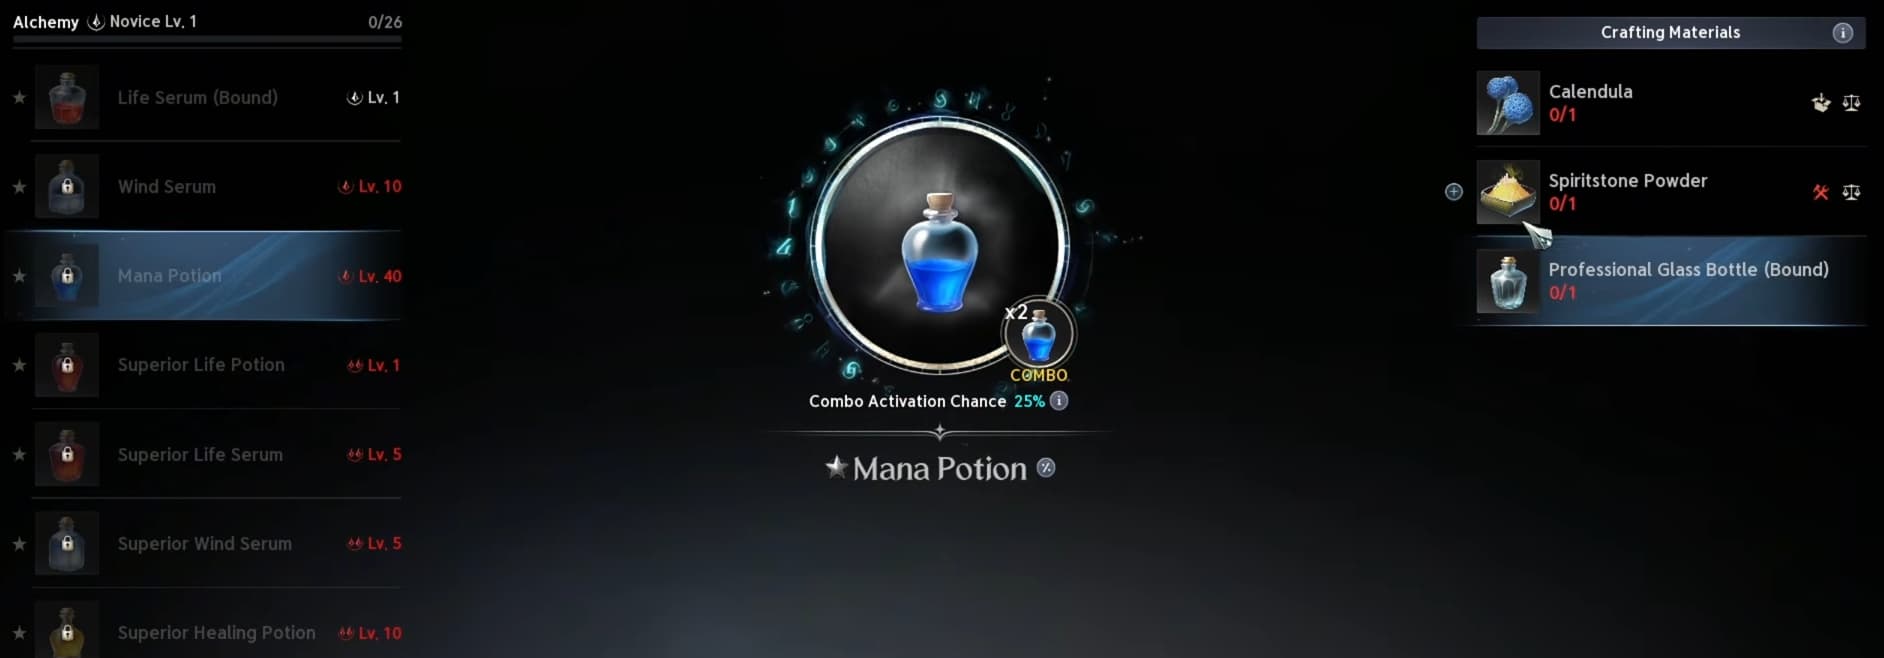
Mana potions: Craft these through Alchemy → Potions when you need an additional recovery option.
At skill level 16, Rending Blow has an option that restores mana on critical hits. Consider it if your rotation is still draining your resources too quickly.
Sword Aura Rampage also helps recover mana during boss stagger windows when its mana-restoration Specialty is selected. Make use of those opportunities so you can continue attacking when the boss recovers.
Daevanion Board Priorities
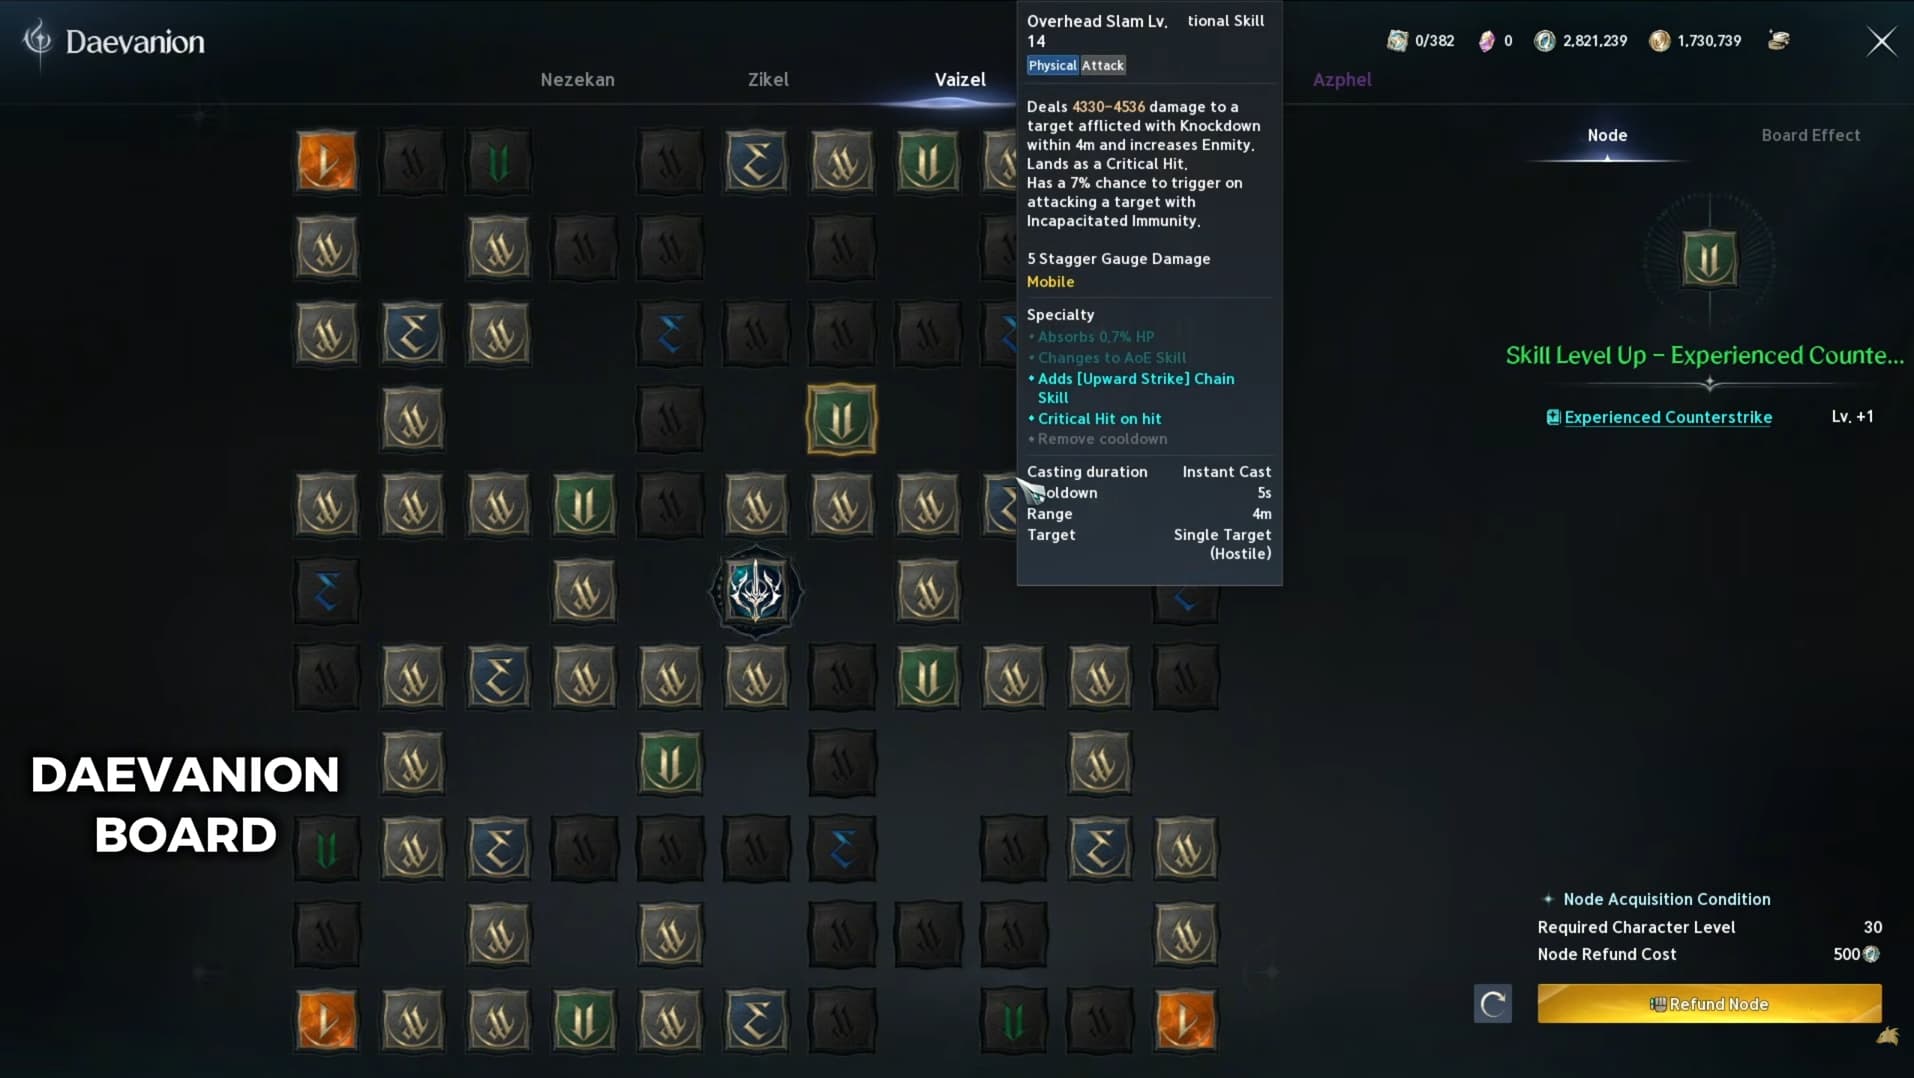
Start with Daevanion nodes that improve Overhead Slam, Ruinous Blow and Rending Blow. These support your main damage skills and help you work towards stronger skill setups.
After covering your core active skills, use this order to guide further investment:
Useful legendary damage nodes, including Damage Boost and Critical Damage Boost.
Key passive upgrades for Attack Preparation, Impact Hit and Experienced Counterstrike.
Attack nodes to add more damage.
Critical Hit nodes once your preferred Attack options are covered.
MP nodes where needed to keep your rotation sustainable.
Your immediate needs can change that order. If you are constantly running out of mana, addressing that problem helps you make better use of the damage upgrades you already have.
As your skill levels improve, revisit your Specialties rather than leaving the same choices equipped indefinitely. Overhead Slam unlocks its cooldown-removal Specialty at skill level 16. You must select that option to benefit from it; reaching the level alone does not remove the cooldown.
Tanking and Boss Fight Tips
Enmity means threat: it affects which player an enemy focuses on. Gladiator has threat generation built into its attacks, allowing you to hold an enemy’s attention while dealing damage.
When you are tanking, keep your attacks going between mechanics and look for safe opportunities to block. Experienced Counterstrike rewards successful blocks with a damage buff, making defense part of the build’s offensive support too.
Use your flex Stigma to solve the problems you encounter. Take Lifestealing Blade when extra healing would help, or Focused Block when you need more protection. Keep Blade Toss when your group benefits more from its Defense reduction.
Start by getting your main skills, Stigmas and mana recovery working together. From there, build up your damage through equipment, Arcana Cards and Daevanion upgrades while learning when each boss lets you attack safely.