This Aion 2Spiritmaster Elemental Fusion PvE Build focuses on optimizing your spirit rotation, allowing you to use Elemental Fusion as often as possible.
This guide will cover Skill priorities (Active, Passive & Stigmas), combat rotation and best practices. We'll also go through setting up specifics with macros for the Spiritmaster, as the right macro build will boost your damage numbers astronomically.
If you are still getting familiar with the game’s systems, our Aion 2 beginner guide covers the early steps that help you get started.
The core of this build focuses on rotating your summons to cast Elemental Fusion as often as possible.
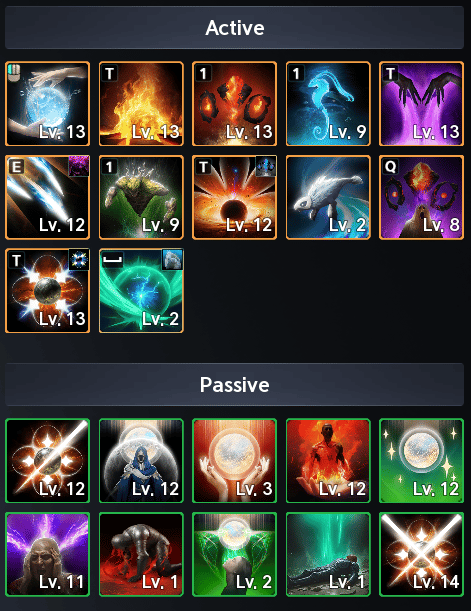
Aside from the Spirits you'll be summoning with (mainly Summon: Fire Spirit), you'll want to be putting points into Elemental Fusion whenever possible. Another good skill to prioritize focus in would be Dimensional Control.
An ideal order for levelling your skills would be as follows:
Elemental Fusion
Combustion
Summon: Fire Spirit
Cold Shock
Dimensional Control
Jointstrike: Curse
Rapid Scattershot
Summon: Water Spirit
Summon: Earth Spirit
Any extra points can be spent how you would like; however, it is not recommended to put any points into Summon: Wind Spirit, as it is not used in the skill rotation at all.
Active Skills
Elemental Fusion [2/3/5]
Elemental Fusion is where all the burst damage comes from in this build. Deals massive damage to a single target.
You do require the status Four Elements to cast it, and you gain Four Elements after four Spirit skills, allowing Elemental Fusion to be cast. This guide will cover more about this in the Combat Rotation.
Specialties: You'll want to pick option 2 for your first Specialty, as it makes the skill deal additional damage after 3 seconds of casting it, giving you more damage on top of your damage. Slotting in option 3 gives the skill a bonus to your Element Boost on hit. Lastly, when able, slot in option 5 for a 25% chance to regain Four Elements.
Combustion [2/4/5]
Combustion is your standard Mana-spending attack, which deals AoE damage to a target within 20m and up to 4 nearby enemies.
Specialties: Option 2 allows you to deal more damage when fewer targets are being hit (adding to your boss damage). Then, when able, slot in option 4 for faster skill speed, and option 5 adds an additional chain skill called Ashy Call.
Summon: Fire Spirit [2/5]
Summon: Fire Spirit summons a Fire Spirit, which rushes to a target within 20m and uses its "skill" to deal AoE damage to the target and nearby enemies. After being summoned, it will fight alongside you using basic attacks, with a chance for it to cast its "skill" again.
It is dismissed upon summoning another Spirit.
Specialties: Grabbing option 2 for additional Critical Hit damage for the spirit gives more boost to the damage, and then slotting in option 5 when able allows for a flat percentage boost to the Spirit's stats.
Cold Shock [3/4]
Cold Shock is your standard auto attack skill. This is woven into your combo to keep your mana levels healthy and, later on with Specialties, will allow you to buff your damage.
Specialties: Option 3 is great for adding a 50% Multi-Hit on hit effect to the skill, but the biggest thing for Specialties is option 4, which allows a stacking percent attack boost on landing the third hit in the auto-attack chain, Earth Tremor.
Dimensional Control [2/3]
Dimensional Control is another semi-core skill in this build, as this skill is triggered briefly each time a Spirit uses its skill. It deals massive AoE damage to a target and nearby enemies, inflicts slow, and restores Mana.
This skill is essentially a smaller version of Elemental Fusion, as it relies on your Spirits in order to cast.
Specialties: For Specialties, option 2 allows extra damage after 3 seconds on hit, and slotting in option 3 allows for the skill to have a 50% Multi-Hit on-hit chance.
Jointstrike: Curse [1/3]
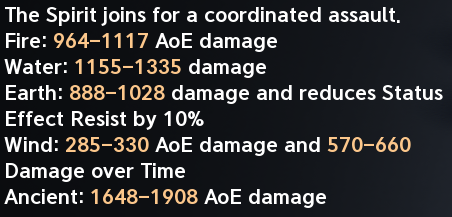
Jointstrike: Curse is a great tool in every Spiritmaster's arsenal. It deals AoE damage to a target within 20m and nearby enemies and inflicts a status known as Curse.
Curse deals damage over time to the enemies afflicted, and it also reduces damage dealt to the Spiritmaster.
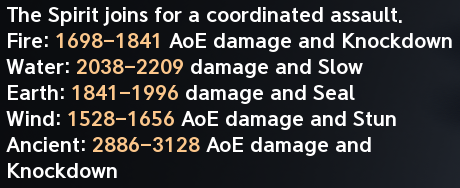
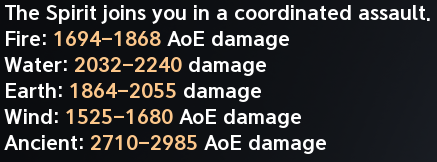
Any summoned Spirit will also join in for a "coordinated assault", each Spirit performing a unique attack. (Damage for the Spirits does scale with level.)
Specialties: Option 1 adds 2 seconds to the Curse duration, and option 3 allows this skill to be cast as a Mobile skill, letting you move while casting it.
Rapid Scattershot [4/5]
Rapid Scattershot is your standard Stagger trigger attack. Most builds don't focus this, as it doesn't provide as much utility for other classes, but for the Spiritmaster, certain Specialties make this a very overpowered skill in boss fights.
Specialties: The best options for Specialties are option 4, which allows Multi-hit on-hit; however, as soon as possible, pick option 5, which gives you -1 second to all skill cooldowns on hit. This Specialty is extremely important to pumping out insane damage numbers.
Since Rapid Scattershot relies on the last two Specialties, it's okay to pick any of the first 3 options when able. For example: If you find yourself struggling with Mana, selecting option 2 gives you 120 MP on use, which, when the boss is staggered, this skill can be spammed.
Summon: Water Spirit [2/3]
Summon: Water Spirit summons a Water Spirit, which uses its "skill" to deal damage to a target within 20m. After being summoned, it will fight alongside you using basic attacks, with a chance for it to cast its "skill" again, with the added benefit of restoring some of your Mana each time an attack lands.
It is dismissed upon summoning another Spirit.
Specialties: Grabbing option 2 for a percentage buff to the Water Spirit's attack. When able, slot in option 3 for an additional percent chance to activate the Spirit's skill.
Summon: Earth Spirit [2/3]
Summon: Earth Spirit summons an Earth Spirit, which uses its "skill" to deal damage to a target within 20m and increases Enmity by a large amount. It also has a percent chance to inflict Taunt for 2 seconds if the target is a player. After being summoned, it will fight alongside you using basic attacks, with a chance for it to cast its "skill" again, with a chance to increase Enmity each time an attack lands.
It is dismissed upon summoning another Spirit.
Specialties: Option 2 gives the Earth Spirit additional PvE and PvP Damage Tolerance, while option 3 gives an additional percent chance for the Spirit to cast its skill.
Passive Priorities
For the Spiritmaster's Passive Skills, the main focus is on Spirit Strike and Element Unification. All the other passives just add to either your defence
Spirit Strike
Mental Focus
Element Unification
Spirit Revitalization
Allows for faster casting with Spirit summons, as well as healing to any summoned spirits.
Corrode
Used to provide Critical Hit and extra damage on landing Critical Hits.
Spirit Protection
Used to give yourself and your Spirits some extra defence.
Again, feel free to use any additional points you may have afterward in any way you choose.
Recommended Stigmas
For the optimal setup for Spiritmasters, the three stigmas you'll want to focus on are:
Summon: Ancient Spirit
Summon: Ancient Spirit summons an Ancient Spirit for 30 seconds, which uses its skill to deal massive AoE damage to a target within 20m and nearby enemies.
The Ancient Spirit grants you the Four Elements status every time the Spirit uses its skill.
This skill is exceptionally good at triggering Elemental Fusion, and with later levels of this Stigma, the Ancient Spirit will use its skill after 5 basic attacks.
Enhance: Spirit's Benediction
Enhance: Spirit's Benediction increases your PvE and PvP Damage Boost, and PvE and PvP Damage Tolerance by a percentage. It also restores HP every second for 10 seconds to you and your Spirits.
This skill is unaffected by cooldown increase effects.
This skill is a great way to add to your survivability and increase your damage, and at later levels increases the boost percentage and activation chance.
Jointstrike: Corrode
Jointstrike: Corrode deals AoE damage to a target within 20m and up to 4 nearby enemies, inflicting the Corrode status for 20 seconds. Spirits also join for a coordinated assault. (Damage for the Spirits does scale with level.)
Corrode increases damage taken from Spirits by a percentage and deals damage over time every second for the duration.
At later levels, the target gains a percentage Combat Speed debuff, a percentage Incoming Heal debuff, and at max level adds 10 seconds to the duration of Corrode.
Fourth Stigma
The fourth stigma slot is typically flexed between one of two Stigma skills, depending on what skill you want to use.
The two options people choose between are Flame Blessing and Jointstrike: Destructive Attack.
Flame Blessing
Flame Blessing increases your Accuracy and has a 50% chance to deal extra damage to enemies on landing an attack for the duration. Great for additional damage or when you want to potentially burst down an enemy at a critical moment.
Jointstrike: Destructive Attack
Jointstrike: Destructive Attack deals damage to a target within 20m, and Spirits also join for a coordinated assault. (Damage for the Spirits does scale with level.)
At level 5, it changes to a Charge skill, dealing more damage, and at level 10, it increases the cast time for the Charge skill.
The most important upgrade is at level 20: it resets the cooldown of Jointstrike: Corrode and Jointstrike: Curse on use.
Spiritmaster Combat Rotation
The core of this build focuses on summoning your Spirits in quick rotation to trigger Elemental Fusion and Dimensional Control while weaving in other damage-over-time skills to damage your enemies.
Combat Rotation
A basic example of your rotation should be as follows:
If you are running Flame Blessing, cast that and Enhance: Spirit's Benediction.
Cast Summon: Ancient Spirit.
Begin your rotation through your Spirit summons and Jointstrike: Corrode and Jointstrike: Curse.
Remember, every time your Spirits use a skill, Dimensional Control triggers, so ensure you're weaving that in between summons.
When your Summons are on cooldown, ensure you use Combustion and Cold Shock between using Dimensional Control and Elemental Fusion whenever they are triggered.
The easiest way to ensure your rotation is performed optimally is by using the in-game Macro setup.
In-Game Macro Setup
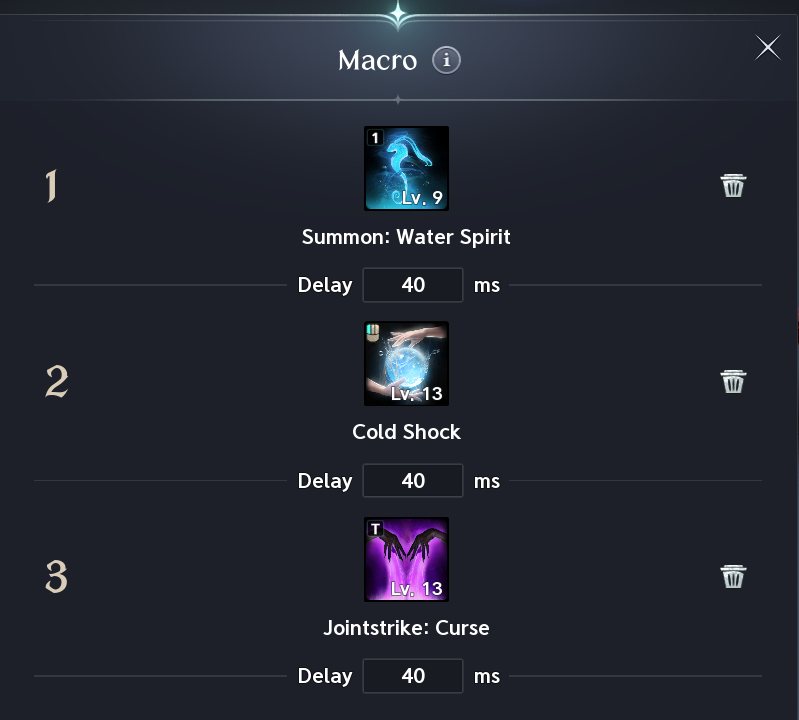
The in-game macro system is a simpler way to handle much of the basic rotation, so you don’t have to worry about activating Elemental Fusion or Dimensional Control as using the macro will allow it to activate whenever it's able to. It also allows you to pump out your Spirit summons as soon as they are off cooldown.
Check both your macro and quick-slot assignments when setting it up. Your damage skills, buffs, and conditional attacks still need the correct bindings; assigning a macro key alone does not configure the full rotation. Test the setup on a training dummy before taking it into a dungeon. Watch to ensure your attacks activate correctly and your debuffs are applied as intended.
For targeting, boss orientation indicators, and other useful control options, check our Aion 2 settings guide.
The macro relies more on your quick-slot assignments and key-bindings than it does on a specific rotation of skills to cycle through. Below is one example of how you will want to configure your key-bindings to allow an optimal casting order.
Set your macro key to your right-click and set up your Skills on that hotkey in the order of:
0 - Jointstrike: Curse
1 - Elemental Fusion
2 - Dimensional Control
3 - Combustion
This will allow Elemental Fusion and Dimensional Control to be cast whenever they are triggered.
The macro, after casting Jointstrike: Curse, will choose the next available skill in the lineup, which is Combustion, allowing you to perform your Mana-spending auto-attack as filler between triggers of Elemental Fusion and Dimensional Control.
For your Spirits, you'll want to order your Spirits on that hotkey as follows:
0 - Summon: Water Spirit
1 - Jointstrike: Corrode
2 - Summon: Earth Spirit
3 - Summon: Fire Spirit
Using this macro setup will allow you to hold down your left and right mouse buttons, seamlessly weaving your Cold Shock attacks in with your Combustion attacks, activating your Spirits whenever possible, and casting Elemental Fusion and Dimensional Control whenever triggered.
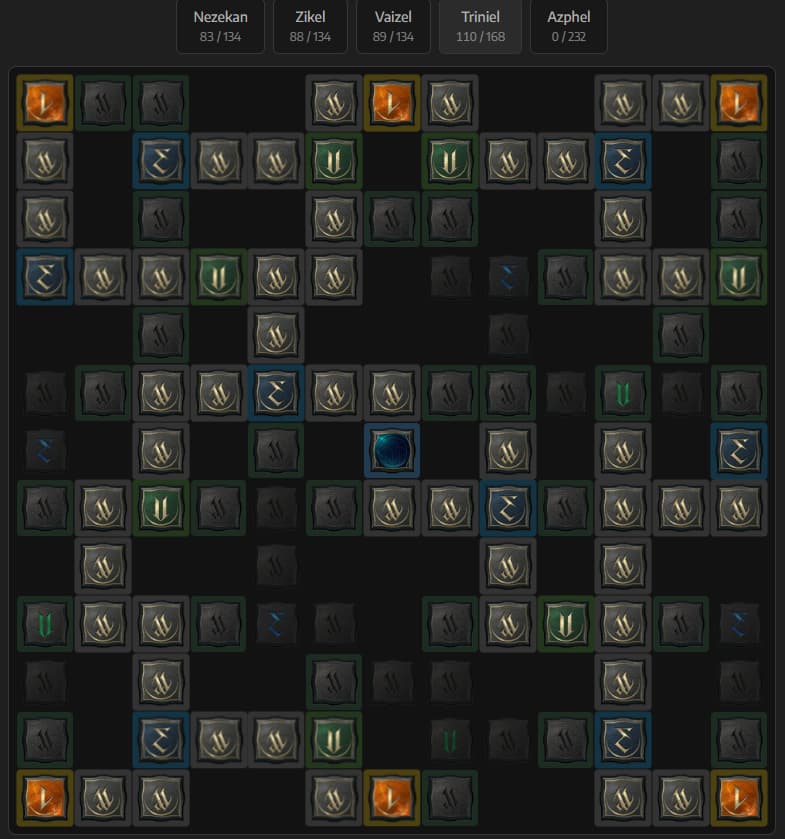
Daevanion Board Priorities
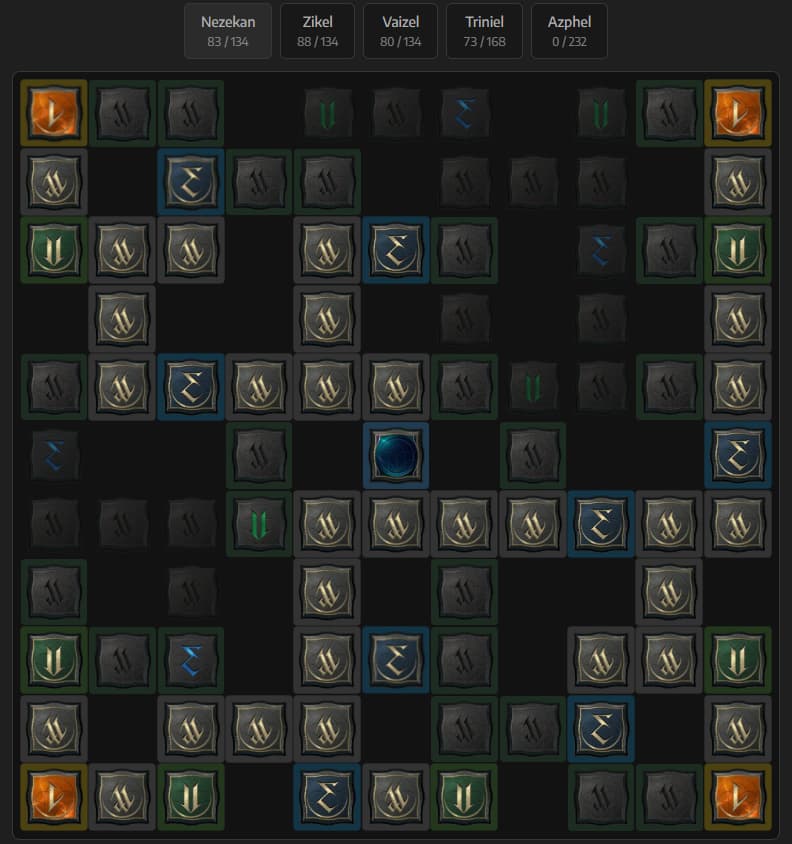
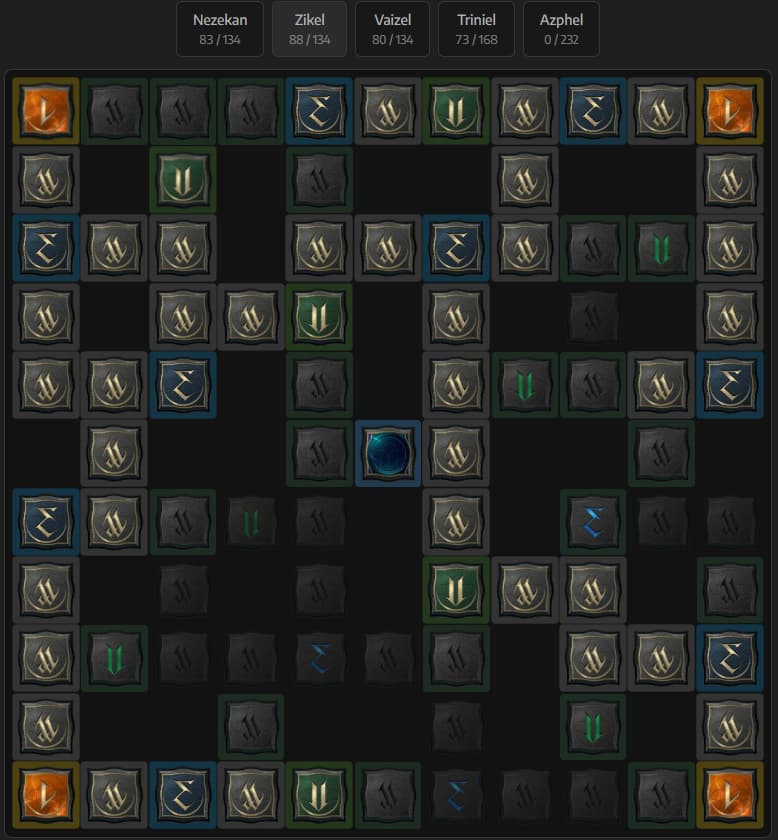
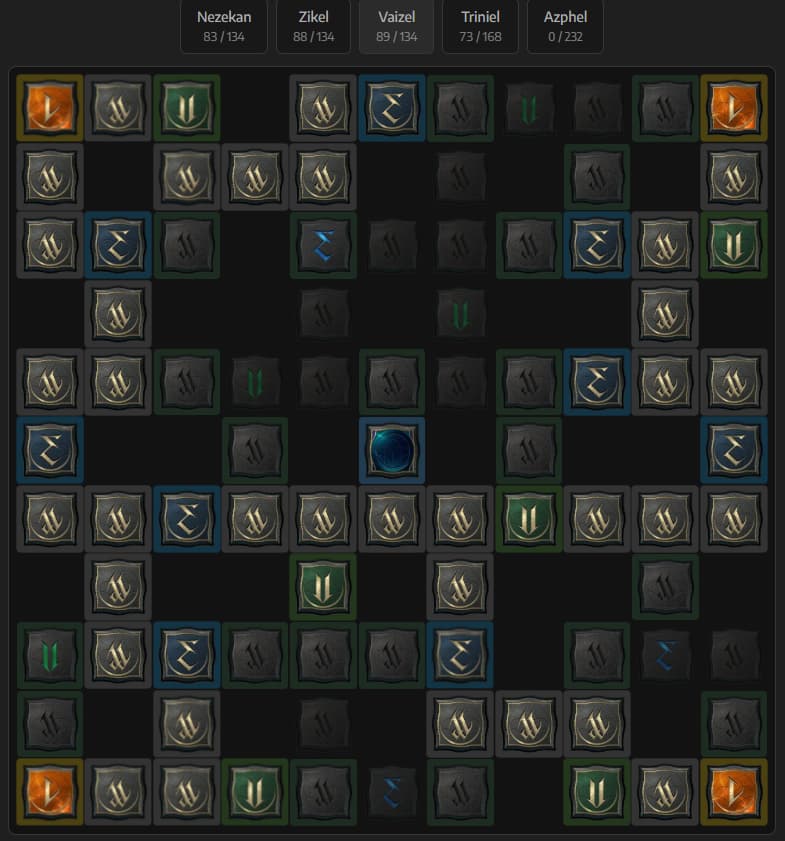
For your Daevanion Board, start with nodes that improve Elemental Fusion and Dimensional Control. The faster you can get Elemental Fusion to Level 20, the faster you can gain the Specialty to give yourself the 25% chance to regain Four Elements.
Once you’ve acquired the important nodes and begin needing to fill out your board, you can use these examples for paths to follow:
Keep in mind, the Daevanion Boards are designed to eventually be entirely filled out.
Nezekan Example
Zikel Example
Vaizel Example
Triniel Example
Additional Tips
This build is designed to maximize your damage output, and cycle through your Spirit summons, allowing for Elemental Fusion to be cast as often as possible.
Master the "Dual" Mouse Technique When playing this build and utilizing your macro, you will not want to just be "tapping" your right-click. Holding down your left and right mouse buttons simultaneously when in range will optimize your damage output.
Things to Avoid! Make sure you are not placing points into Summon: Wind Spirit, as it does not go into your Skill rotation. That includes both the Daevanion Board and your Skills. You'll also want to try to ignore Soul's Cry nodes on your Daevanion Board, as it's mainly a PvP Fear. Three points per node could be used for more important skills.
Focus on your Positioning Because the macro will do most of your skill rotation for you, it's important that you focus on your positioning in Boss fights. Make sure you are staying aware of where you are in the fight to best avoid getting caught out or hurt unnecessarily.


 Spiritmaster Elemental Fusion PvE Build focuses on optimizing your spirit rotation, allowing you to use
  Elemental Fusion as often as possible.