This Aion 2Chanter Dark Crush PvE Build focuses on pumping out large amounts of consistent damage, while also providing additional support to your party through buffs and healing.
This guide will cover Skill priorities (Active, Passive & Stigmas), combat rotation and best practices. We'll also go through setting up specifics with macros for the Chanter, as building the right macro for the Chanter is paramount to a strong addition to any party.
If you are still getting familiar with the game’s systems, our Aion 2 beginner guide covers the early steps that help you get started.
The core of this build revolves around your conditional skill, Dark Crush.
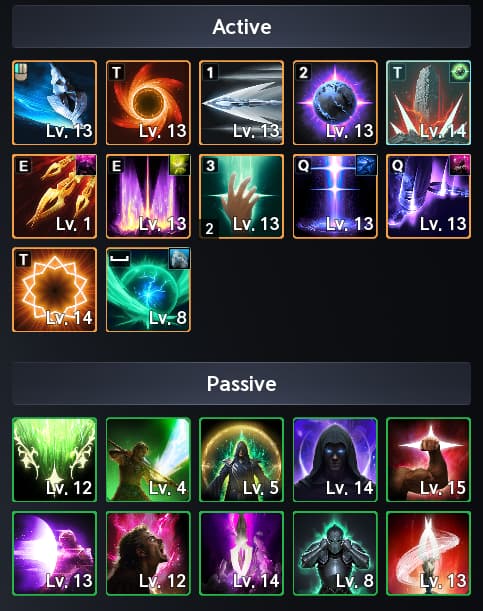
Aside from levelling your basic attack, Onslaught, prioritize putting your Skill Points into Dark Crush whenever possible, followed by the other core skills that add to the combo.
An ideal order for levelling your skills would be:
Onslaught
Dark Crush
Spinning Strike
Recuperation
Incandescent Blow
Impactful Crush
Rushing Smash
Tremor Crush
Wave Blow
Heat Wave Blow
Active Skills
Onslaught [2/4/5]
Onslaught is your standard auto attack skill. This is used to keep your mana levels healthy and later on with Specialties, allow you to stay healthy and lower cooldowns of your other abilities.
Specialties:
Dark Crush [3/4/5]
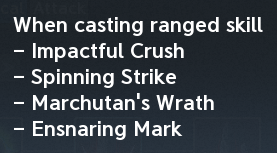
Dark Crush is the skill this build revolves around. Deals high damage to a target within 20m. (It requires the use of a ranged spell to activate it.)
Specialties: You'll want to grab options 3, 4 and 5 for your Specialties. 3 allows it to land as a Critical Hit, 4 adds an additional damage skill into the chain, Piercing Strike, and 5 removes Dark Crush's cooldown, allowing it to be used more often and ramping your damage numbers.
Spinning Strike [1/3/5]
Spinning Strike is another core skill to the combo, pumping out massive ranged AoE damage that also gives you a stacking increase to your Critical Damage Boost.
Specialties: The first Specialty you'll want to grab for this is the 1st option, which provides a flat cooldown to the skill. Once able, grab option 3 to add additional damage if there are less targets being hit. Lastly, option 5 makes the skill ignore Block and Evasion, and makes it an automatic Critical Hit.
Recuperation [1/4/5]
Recuperation is the Chanter's base healing skill. It removes debuffs from you and your party in a wide AoE and restores HP over time.
Specialties: Option 1 allows an additional use of the skill, and allows for the heal over time to stack (up to 2 times). Option 4 allows for a flat percentage of HP to be restored on cast, allowing it to provide a little bit of additional healing boost. Option 5, gives you a cooldown reduction, allowing you to keep your party nice and healthy if a Cleric doesn't happen to be around.
Incandescent Blow [3/5]
Incandescent Blow is your standard Mana-spending attack, used to deal AOE damage to up to 4 enemies in front of you.
Specialties: Grabbing option 3 allows you to deal more damage when there are less enemies. Option 5 allows the skill to ignore Block and Evasion, as well as landing as a Multi-Hit. Picking any of the other options up until you are able to unlock option 5 is fine. Option 2 can give you more Block while using it, while option 4 lowers the enemies Accuracy when you land the secondary chain of the skill, Bursting Blow.
Impactful Crush [3/4]
Impactful Crush is another way to help proc your Dark Crush. It deals ranged damage to a target and has the chance to inflict Stun.
Specialties: Grabbing option 3 will change this to a Mobile skill, allowing you to cast it without having to stop your movement, allowing this to become way more versatile. Option 4 gives you skill speed, making it cast faster. The faster this skill lands, the faster you can use Dark Crush.
Rushing Smash [4/5]
Rushing Smash is one of your gap closers. Rushes you to a target within 20m dealing AoE damage and even restores a bit of mana. Once you grab one of the Specialties, this skill becomes very reusable.
Specialties: As we just mentioned, once you grab option 4 for your Specialty, Rushing Smash resets its cooldown when you defeat an enemy, allowing you to dash from enemy to enemy once they're defeated. When you can pick up option 5, it allows the skill to ignore Block and Evasion stats and also makes the skill land as a Multi-Hit. The 5th option only unlocks once you're able to get the skill to level 16, so you can pick any of the first 3 options in the interim, however if you're wanting to pump out some extra damage, grabbing option 3 allows a change to trigger Heat Wave Blow.
Tremor Crush [2/3]
Tremor Crush is a triggerable ability that happens after using Dodge or while Flying. This skill allows you to move to a target within 10m and deal damage with a 50% chance to inflict Stun.
Specialties: Grabbing option 2 give this skill an additional 10m range, matching all of your other skills range level, making this fit into your kit a lot easier. Then adding option 3 gives you a 50% Multi-Hit on hit with the skill.
Wave Blow [1/4]
Wave Blow deals tons of damage to a nearby enemy afflicted with Stun and inflicts Knockdown on that enemy. It also has a percent chance to trigger on attacking a target with Incapacitated Immunity, changing the skill motion.
Specialties: Option 1 allows for Multi-Hit on hit and option 4 applies a PvE and PvP Damage Boost debuff to the target, giving the enemy a lot less damage output.
Heat Wave Blow [3/4]
Heat Wave Blow deals AoE damage to a nearby target and up to 4 enemies nearby that enemy with a chance to inflict Seal for 3 seconds on Block. (100% chance on NPC targets.)
Specialties: Grabbing option 3 gives more damage when more targets are hit, allowing this to add to your AoE damage. Option 4 makes the skill ignore Block and Evasion and makes the skill land as a Multi-Hit.
Passive Priorities
For Passive skills, the main two skills you'll want to focus first are Wind's Promise and Attack Preparation (Chanter). Afterwards, you'll want to focus more on Passives that add to buffing your damage output.
Wind's Promise
Attack Preparation (Chanter)
Impact Hit (Chanter)
Inspiring Spell
Earth's Promise
Blessing of Life
Survival Willpower (Chanter)
Feel free to use any additional points you may have afterward in any way you choose.
Recommended Stigmas
For the most optimal setup for Chanters, the four stigmas you'll want to focus on are:
Undefeated Mantra
Undefeated Mantra is the first stigma you should grab and the one you should be focusing first.
This mantra is a toggleable ability that increases PvE Damage Boost, PvE Damage Tolerance, PvP Damage Boost and PvP Damage Tolerance for the caster and your nearby party members.
It's important to mention that this does not stack with the Damage Boost effect from the Cleric skill Light of Protection; only the higher-level skill effect applies.
That being said, if both skills are the same level, Undefeated Mantra takes precedence.
Sprint Mantra
Sprint Mantra is another mantra that is a toggleable ability that increases your Move Speed and grants a percent chance to restore HP on landing an attack to the caster and your nearby party members.
The more this is levelled up, the more additional buffs this grants, for example:
Level 5 increases the incoming heal by 10%.
Level 10 also grants a 30% Natural Stamina Regen buff.
Level 15 grants +50% amount of HP restored if the attacker is at 50% or less HP.
Level 20 adds a 10% Restoration buff.
Marchutan's Wrath
Marchutan's Wrath is a ranged attack that deals huge AoE damage to a target within 20m and up to 4 enemies within 4m.
Dark Crush becomes available for a short period after skill use, allowing you to proc Dark Crush damage more.
Power of the Storm
Power of the Storm is a buff that affects you and your nearby party members that increases Combat Speed and reduces Skill cooldowns by a percentage for a period, which makes it great for pumping up your team at a pivotal moment in boss fights.
Another important mention is that players cannot receive the effect of Power of the Storm if Earth's Blessing (which comes from an effect of the Cleric skill Earth Punishment at later levels.) is active.
Chanter Combat Rotation
The Chanter's combat rotation revolves around a few key things: Utilizing your Mantras, managing your gap-closers, and constantly using Dark Crush through skill rotation.
Damage Rotation
A basic example of your rotation should be as follows:
Ensure that Undefeated Mantra and Sprint Mantra are active.
(These are a toggleable ability so they should always be on and will only be toggled off on Death or upon levelling up the Stigma.)
Dash into the enemy with Rushing Smash or Tremor Crush.
Use Spinning Strike or Impactful Crush to allow the use of Dark Crush.
Once you have used an ability that allows the use of Dark Crush, you will want to spam it as much as possible.
Weaving your abilities that allow you to cast Dark Crush will allow you to spam it as much as possible. (Especially if you have the skill up to Level 20 and are able to add the Specialty.)
When the skills needed to activate Dark Crush are on cooldown, resort to using Incandescent Blow or Onslaught and macro chains while waiting for skill cooldowns to reset.
In-Game Macro Setup
The in-game macro system is a simpler way to handle much of the basic rotation, so you don’t have to worry about activating Dark Crush, using the macro will allow it to activate whenever it's able to.
Check both your macro and quick-slot assignments when setting it up. Your damage skills, buffs, and conditional attacks still need the correct bindings; assigning a macro key alone does not configure the full rotation. Test the setup on a training dummy before taking it into a dungeon. Watch to ensure your attacks activate correctly and your debuffs are applied as intended.
For targeting, boss orientation indicators, and other useful control options, check our Aion 2 settings guide.
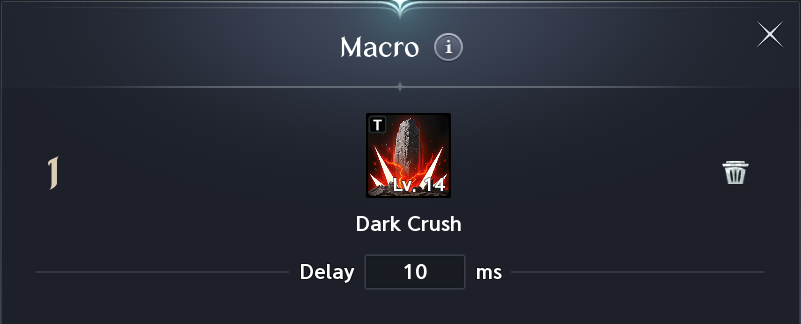
On the surface, this Macro looks very simple, as it is only one Skill; Dark Crush.
The macro relies more on your quick-slot assignments and key-bindings than it does a specific rotation of skills to cycle through. Below is one example of how you will want to configure your key-bindings in order to allow Dark Crush to be used as often and quickly as possible.
Set your macro key to your right-click and setting up your Skills in the order of:
0 - Dark Crush
1 - Spinning Strike
2 - Incandescent Blow
This allows for Dark Crush to be activated the moment its trigger condition is met. The macro, seeing that Dark Crush is not available will choose the next available skill in the lineup, being Spinning Strike.
Because Spinning Strike has a longer cooldown (which can be actively reduced by the Onslaught Specialy) it will only activate when it is off cooldown, leaving your right-click ability to use Incandescent Blow as it would normally.
Using this macro setup will allow you to hold down your left and right-click mouse buttons, seamlessly weaving your Onslaught attacks in with your Incandescent Blow attacks, and activating Dark Crush whenever using another ability that triggers it.
Daevanion Board Priorities
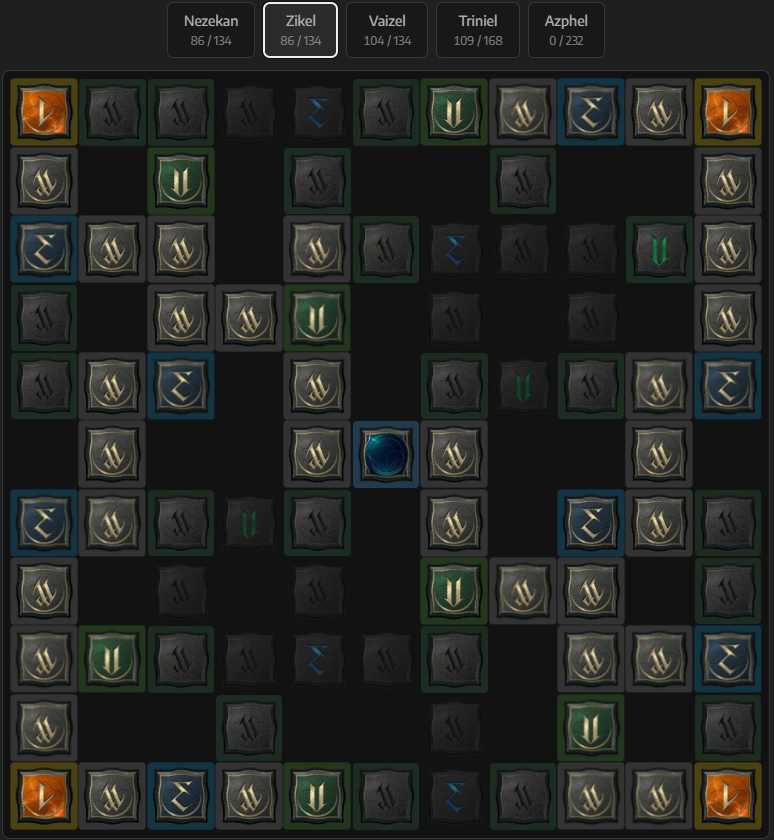
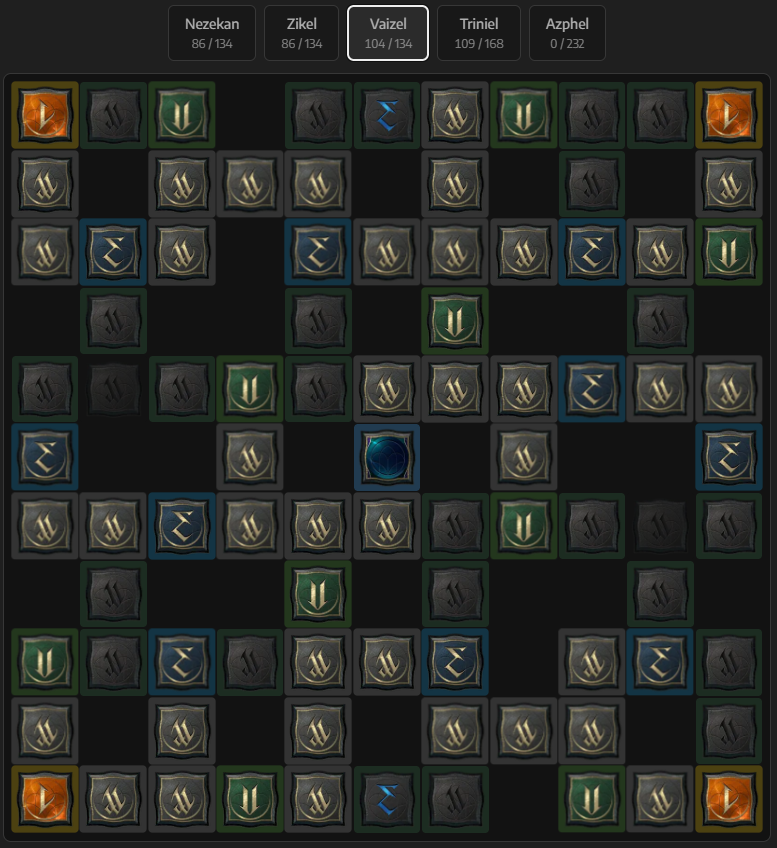
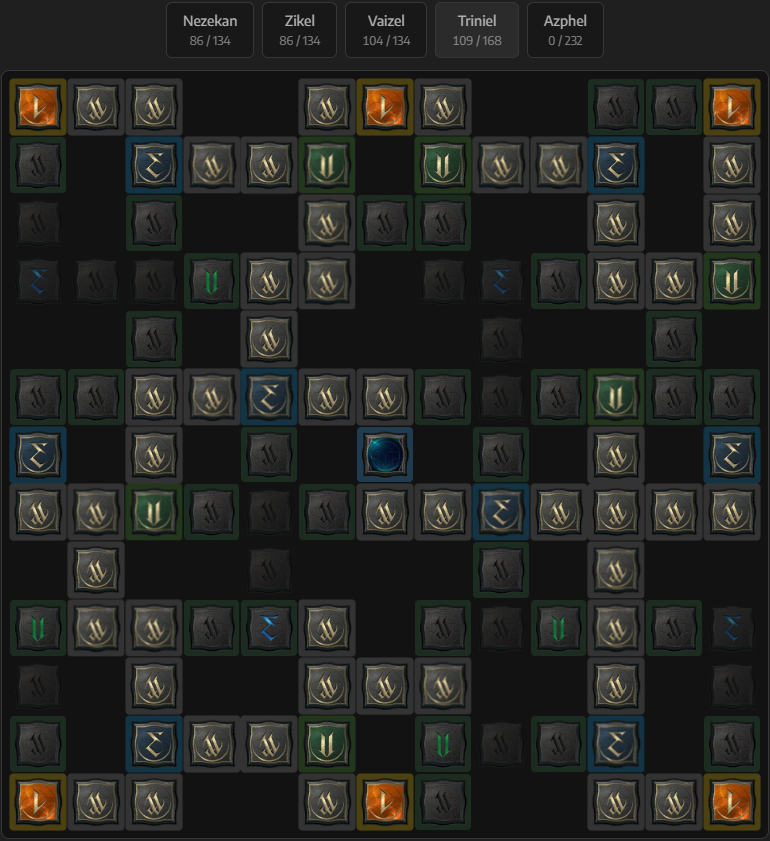
For your Daevanion Board, start with nodes that improve Dark Crush and Spinning Strike. The faster you can get your Dark Crush to Level 20, the faster you can unlock the 3rd Specialty slot, allowing you to remove the skill's cooldown.
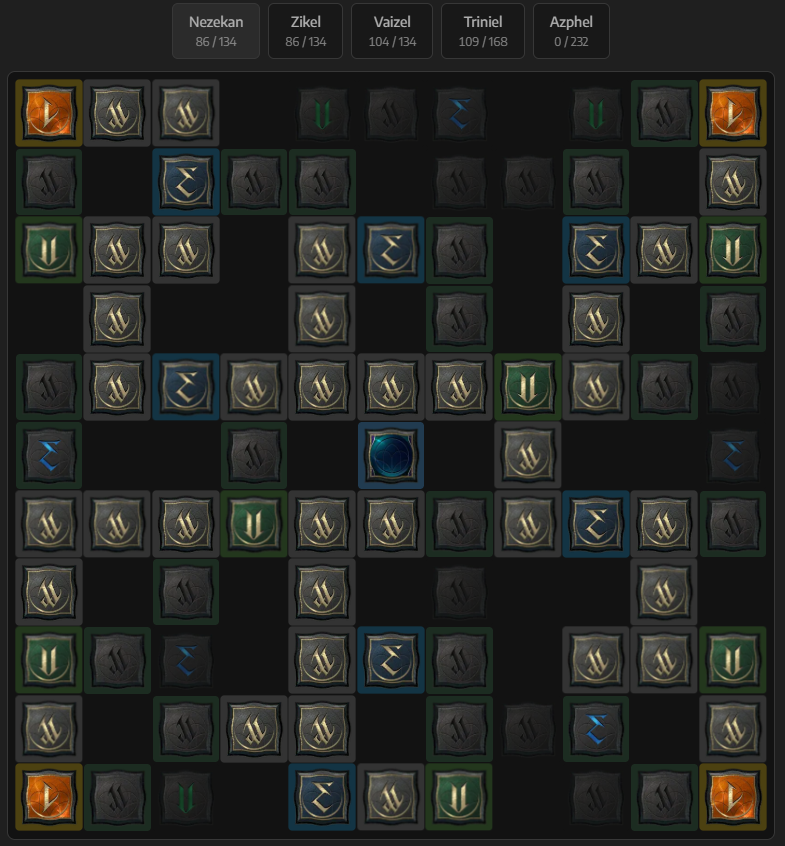
Once you’ve acquired the important nodes and begin needing to fill out your board, you can use these examples for paths to follow:
Keep in mind, the Daevanion Boards are designed to eventually be entirely filled out.
Nezekan Example
Zikel Example
Vaizel Example
Triniel Example
Additional Tips
This build is designed for the Chanter who wants to feel impactful during boss fights or Expeditions, that want to pump out outrageous damage both in solo play and group PvE content.
Master the "Dual" Mouse Technique When playing this build and utilizing your macro, you will not want to just be "tapping" your right-click. Holding down your left and right mouse buttons simultaneously when in melee range will optimize your damage output.
Clerics and Chanters Overlap Remember that a Cleric's buffs and your own can have some overlap, so make sure that in end-game content, you are coordinating with the Cleric to ensure that neither of you are wasting a Stigma on a buff that the other player is already outputting at a better rate.
Don't ignore your Off-Heals Always keep an eye on your party's health and status. Remember, Recuperation removes debuffs and allows HP over time. If your primary healer is struggling or a heavy raid wide attack hits, pause your macro for a moment to help heal up your party and remove any debuffs.
Ranged vs Melee Though a lot of your skills do have range, being in melee range is required to weave in your auto-attacks. If you attempt to exclusively cast your ranged abilities to play at a distance, you will quickly starve your mana and stall your cooldown cycling.


 Chanter Dark Crush PvE Build focuses on pumping out large amounts of consistent damage, while also providing additional support to your party through buffs and healing.