menu
MobalyticsUse your favourite features in-game with our Desktop App
Nightreign Guide

Traitorous Straghess (Dreglord) - Guide, Attack Pattern & More

Bosses
Updated on Dec 6, 2025
Dec 6, 2025

Traitorous Straghess (Dreglord)

dreglord avatar

Reward

The Night of Dregs

"A corpse fiend comprising countless bodies and discarded detritus. However, they are torn apart or pulverized, their communal resentment writhes with determination, outwitting every form of annihilation. This obsessive mound of flesh, unlike any form of life ever to exist, has no obvious weakness"

Overview

The Traitorous Straghess, also known as the Dreglord, is a Nightlord in Elden Ring Nightreign: The Forsaken Hollows DLC.

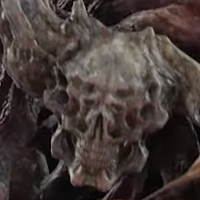
The Dreglord is the final boss of the DLC, a monster born from the flesh and souls of those fallen in battle.

We'll have GIFs soon that demonstrate every attack and mechanic, stay tuned!

General Strategy

The Dreglord has two full health bars and three phases, making it one of the most durable bosses in the game. Make sure to stock up on Consumables for the fight.

This boss has no weaknesses, so you will have to bring strong equipment rather than a specific element. However, it inflicts Scarlet Rot, so stock up on Preserving Boluses to offset the Rot, which can deal a massive amount of damage over time.

The majority of its attacks can be described as a combination of Heolstor (Nightlord) and Adel (Gaping Jaw). Its attack combos are erratic, and it moves around a lot, often hitting players that weren’t the original target. Stay close to the Dreglord and let it finish its combos before retaliating, as it deals a lot of damage.

Nightfarers that can block or have increased dodging are great for the fight. Squishy ranged characters like Ironeye, Recluse, and Revenant might find a difficult time withstanding the boss’s wide-reaching attacks.

Phase 1

The Dreglord starts off with a slow and simple moveset, consisting mostly of sweeps and slams.

Sweep and Slam

The Dreglord will hold its club up while circling around a player to then do a horizontal sweep and vertical slam. You can dodge through both attacks in a row.

Double Sweep and Slam

If the boss crouches down, it will do two side-to-side sweeps and follow up with an overhead slam after a delay. You can dodge the sweeps if you’re below it, but make sure to create some distance to avoid the followup slam.

Overhead Slam

The boss can do two slams in a row after a brief delay, covering a wide area below. You can run away, or dodge through the attacks.

Charge

The boss charges at a player while dragging the club on the ground, slashing upward once, and then performing four erratic sweeps with no clear target. Move to its left side and dodge through the charge, then get away from it.

Small Rot Ball Explosion

Around 80% HP, the boss gains a new move, where it will pick up a rot ball from the ground and slam it twice, dealing damage around it. The first part of the move can pull players into the boss, so run away as quick as you can.

Giant Rot Ball Explosion

Around 50% HP, the Dreglord will pick up a giant rot ball and leap into the air, making the ball explode after it flashes red. Run away from it and roll after you see the red flash on the ball to avoid the explosion, which can one-shot squishy Nightfarers.

After the attack, multiple Rot explosions will erupt on the ground for several seconds, and smaller enemies will appear.
Phase 2

After depleting its HP bar, the Dreglord will enter its second phase, now called the Pure Impulse Draghess. It becomes more chaotic and its moves more erratic, and gains some new rot attacks.

Phase Change Attack

After roaring three times, the Dreglord will leap at a player and sweep multiple times, then fly into the air and cause a rot explosion around. Don’t try to get away from the boss, instead dodging into him to avoid his followups, and roll or use your Ultimate Art for the followup explosion.

Combo Attack

When the boss roars, a targeting circle will appear on a player, and the Dreglord will do a log erratic combo, loosely following the targeted player around. It will run around the area, sweeping its club around, so keep an eye out and roll if it gets near you. The combo ends with a rot ball explosion that should not hit you if you stay still.

Phase 3

After the boss reaches 50% HP on its second HP bar, it will leap away and cause pillars to appear throughout the arena. The Dreglord gains new leaping moves and becomes even faster in the last phase of the fight.

Phase Change Attack

The boss will leap around the pillars and drop a rot ball on the center of the arena, causing three sets of explosions. It can be staggered out of this attack, which is easily done with Ultimate Arts.

Sweep and Slam Combos

The Dreglord attacks quicker and can attacks multiple times in succession, making it difficult to read. Stay close to it and dodge through its sweeps, and roll away from its overhead slams.

Roar Combo

The boss can perform a different set of attacks after roaring and targeting a player. This attack is similar to its phase change combo: Stay close to it and dodge into him to avoid his attacks, as it moves around a lot. You will need to run away from the final rot explosion, though.

Giant Rot Ball Combo

When the Dreglord is low on HP, it will combine its small and giant rot ball attacks: It picks up a ball from the ground and slams it twice, creating explosions that leave lingering explosive lines that reach farther. Then, it picks up a massive rot ball and leaps high, making it explode after it flashes red. Again, keep an eye on the ball and roll immediately when you see the red flash.

This attack has massive range and will inflict players with Scarlet Rot after a delay.

Pillar Jumps

The Dreglord can perch onto pillars, and rush onto a player after clenching its body. When you see it move, immediately roll to the side. Alternatively, keep running sideways to avoid the hit. It can perch and fall down again, and you can avoid the attack in the same manner as before. The boss will finish up with a rot ball explosion directly on top of a player.

Rewards

The The Night of Dregs relic increases attack power continuously while you’re being afflicted with any ailment, which makes for a great combination with Deep of Night exclusive relics that inflict ailments onto the player.

More Boss Guides

Traitorous Straghess (Dreglord) - Guide, Attack Pattern & More
By Mobalytics Updated on Dec 6, 2025
Bosses
Bosses
Weapon Bequeathed Harmonia (Balancers) - Guide, Attack Pattern & More
By Mobalytics Updated on Dec 5, 2025
Bosses
Bosses
Heolstor, the Nightlord (Night Aspect) - Guide, Attack Pattern & More
By Mobalytics Updated on Dec 5, 2025
Bosses
Bosses
Nightreign - Scholar Guide - Skills, Equipment, Scaling, Relics & More
By Mobalytics Updated on Dec 5, 2025
Classes
Classes
Nightreign - Revenant Guide - Skills, Equipment, Scalings, Relics & More
By Mobalytics Updated on Dec 4, 2025
Classes
Classes