Spoiler Warning: In case it wasn't obvious, there are story spoilers here. So definitely don't read this guide until you finish the campaign. PLEASE AND THANK YOU!
So you’ve finished the campaign and saved Kairos, and now you’re asking the question of “what do I do now?”
Borderlands 4 has scrapped the old newgame+ system in exchange for Ultimate Vault Hunter (UVH) mode. UVH has 5 total levels (so far) - each level increases enemy health and damage, as well as giving them additional challenging modifiers, but correspondingly, increased loot rarity chance and exclusive firmware.
To increase your UVH you'll have to complete specific challenges like killing bosses or completing some world events and then at the end, completing a story mission - named a Wildcard Mission - that has been spiced up by giving all the enemies additional modifiers like extra health, elemental resistances, etc..
This guide will run you all through how to unlock each UVH level as well as the locations for each of the activities/mini-bosses you have to sternly talk to (and unfortunately murder).
UVH level 1
As common sense may dictate, we start with the first UVH Level.
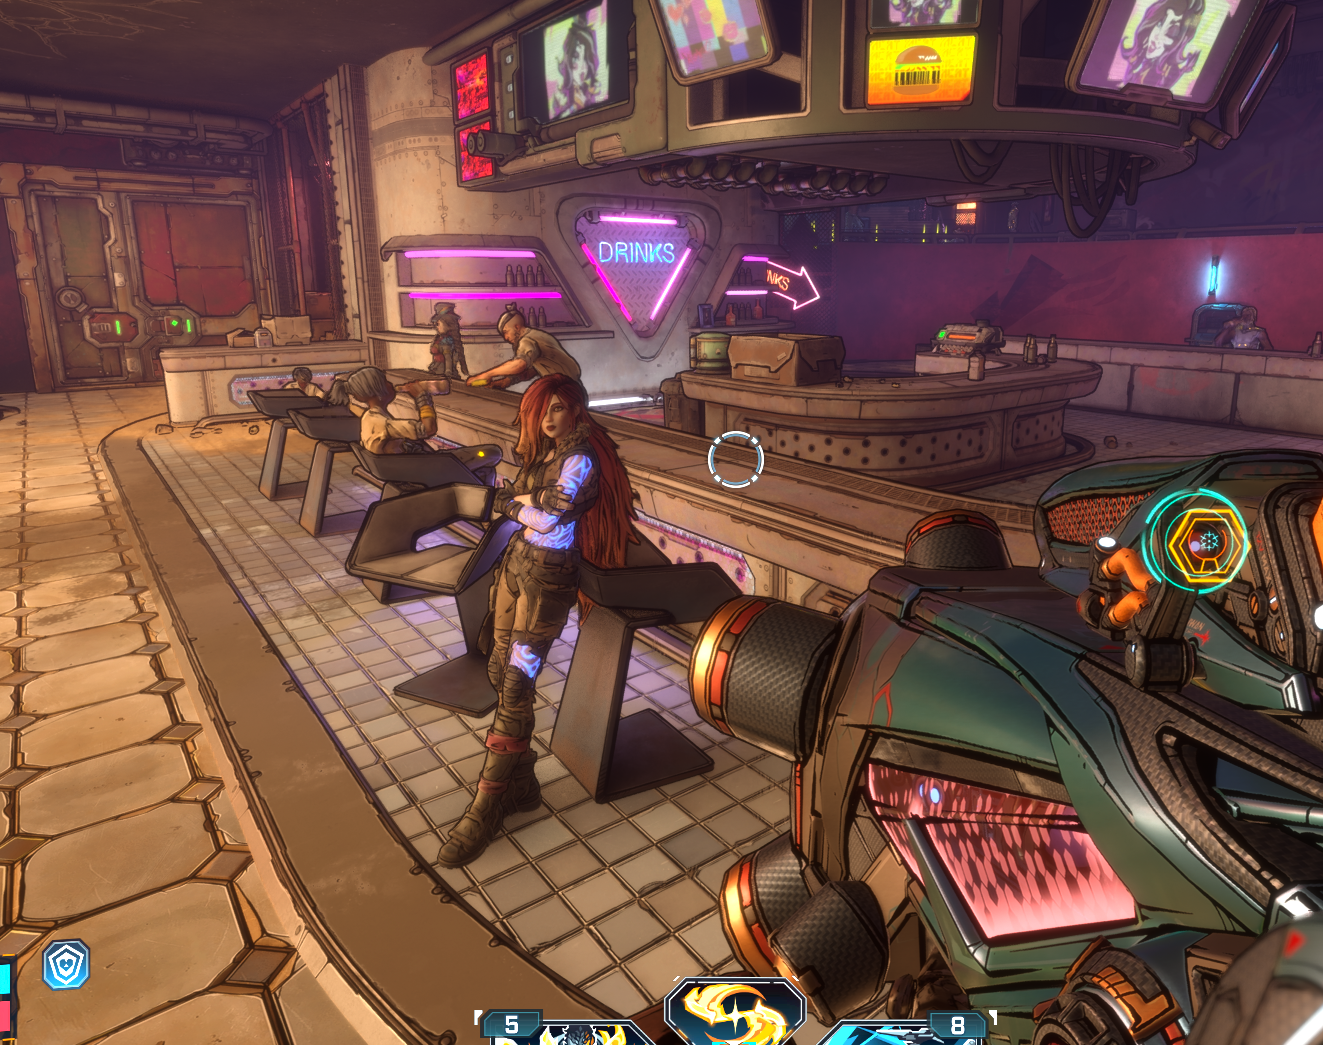
Right after you finish the campaign, you’ll find Lilith leaning against the bar at Moxxi’s looking all suave like. Long hair flowing majestically in the wind…
Talk to Lilith (AGAIN)
Anyway, talking to Lilith will kick off the quest to start getting into your first UVH Level. While this one isn’t as involved as subsequent levels, there’s still a few things that need to be done.
The quests you have to do are fairly self explanatory but I’ll explain anyway.
Mission 1
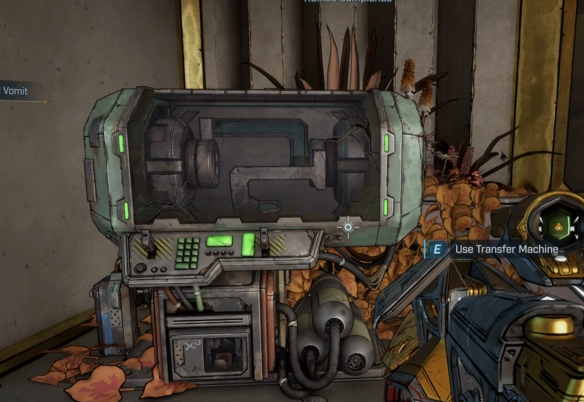
For quest 1 (Ultimate Vault Hunter: Zane’s firmware) you need to go to a firmware station to learn about the newly added Firmware system in the game (which are more or less gear specific annoints from BL3 that can drastically change the way your build plays). If for some reason, you haven’t already found a piece of gear with a firmware on it, you’re going to need to go and find one. Find a boss you can kill quickly and you’ll soon enough find yourself with a few firmware options.
Firmware station in Carcadia Burn Hub
Mission 2
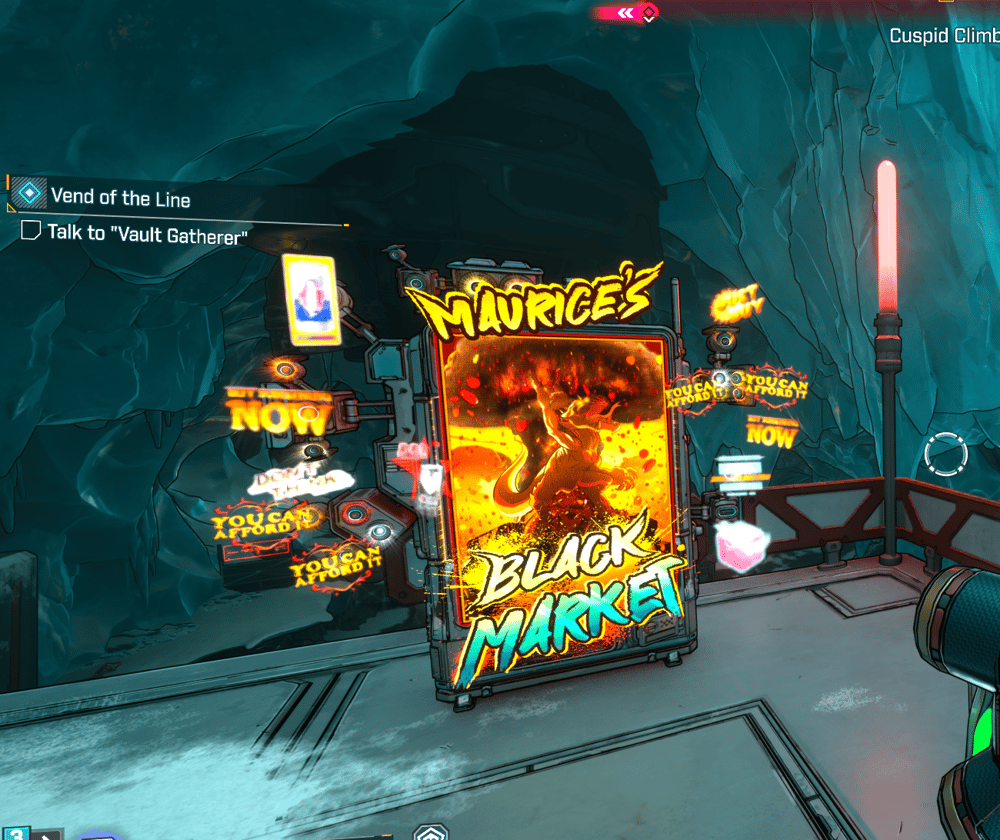
The second quest (Ultimate Vault Hunter: Maurice’s Bounty) will have you follow the waypoint until you find Maurice’s Black Market Vendor. This is another easy way to get legendaries. Every week, Maurice’s Black Market will appear in a different location with a different selection of legendary gear. For this quest specifically, buy anything you want and that will mark the completion of this quest.
Maurice's Black Market Vendor
Mission 3
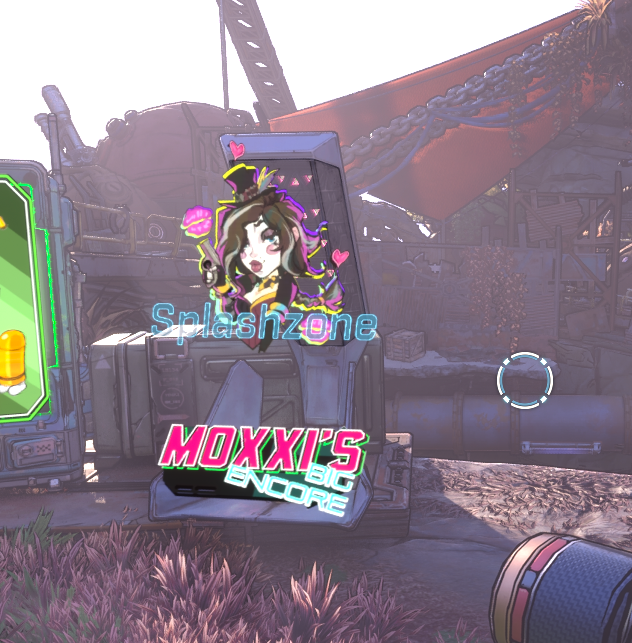
The third quest will have you learning about the new Moxxi Big Encore system. You may already be familiar with the Encore system, but if you aren’t, the Encore system is Borderlands 4’s answer to boss farming. Instead of save quitting like you would traditionally have to do, the Encore machine (tactfully positioned just before every boss arena) can be activated to respawn the boss in real time - making farming a breeze. From an endgame system perspective, the Big Encore Machine rotates weekly for a new boss each week - and gives a more challenging boss fight with a higher legendary drop change. But at a cost, the Big Encore boss does more damage and has more health. So you’ll need to be a bit more prepared than usual.
Moxxi's Encore Machine
Mission 4
And once you’ve done that, the final mission to unlock UVH level 1 becomes available. A Wildcard mission aptly titled, “Lilith’s Wildcard Mission”. Completing that will get you to your first Ultimate Vault Hunter rank! Great job. You deserve a firm handshake.
One thing worth pointing out, in case you get stuck and unsure how to progress from here, simply look through the Challenges tab in the mission section and you’ll see a separate “Ultimate Vault Hunter” section. This section will outline all the missions you need to do in order to progress through the ranks. But fear not, the rest of the guide will explain it all as well.
Onwards we march!
UVH Level 2
Once you’ve gotten acclimatised to your first UVH level, it’s time to start the upwards grind all the way to UVH5. Ultimate Vault Hunter Level 2 has a prerequisite of completing a few world events.
Mission 1
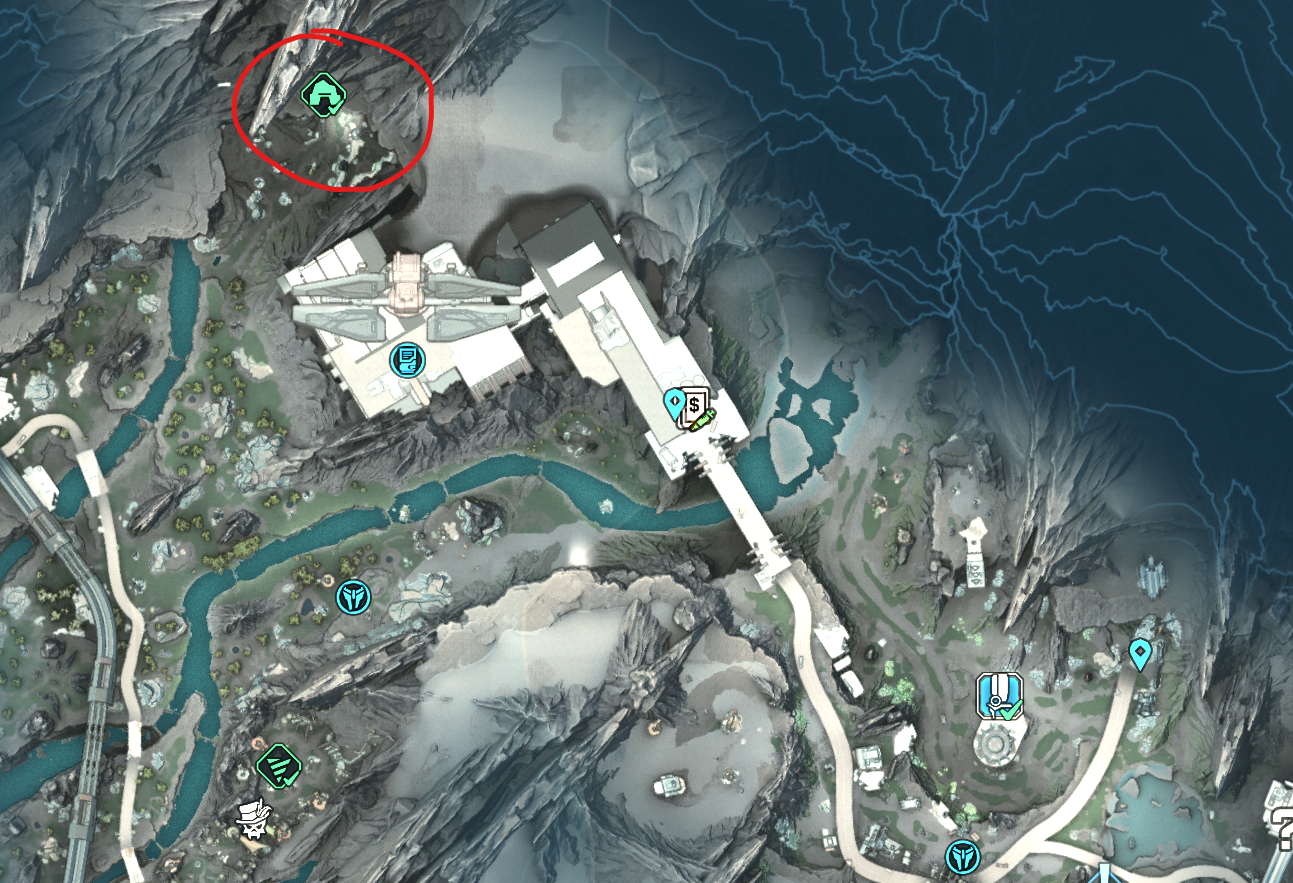
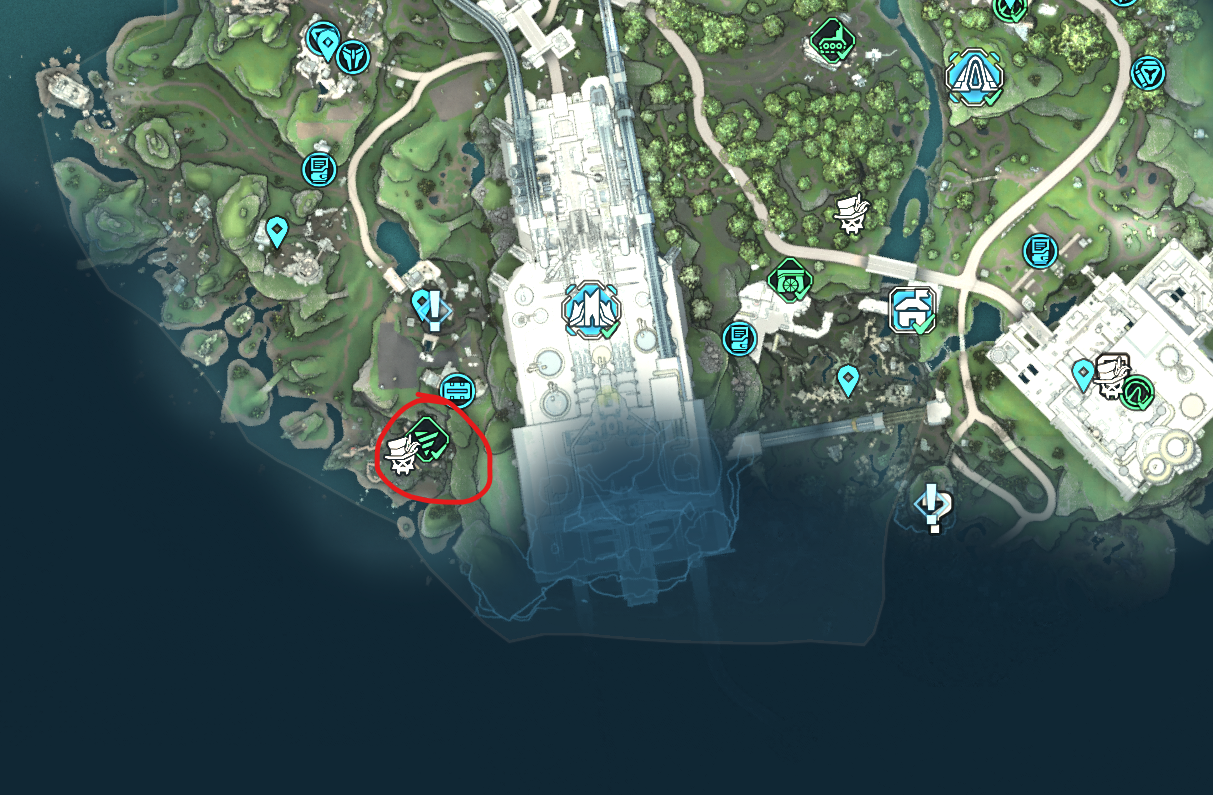
The first of many starts with eliminating Bio-Bulkhead who you can find in Synthetic Nave over in Dissected Plateau (in the Fadefields). As an added bonus, the Bio Bulkhead drops the Waterfall grenade, Budget Deity pistol and the Sho Kunai throwing knife.
The location of Bio-Bulkhead
Mission 2
The second mission needs you to kill Bramblesong who’s hiding away in the Bittervein Auger Mine which you can find in the Stoneblood Forest of Terminus Range. Bramblesong also drops the Convergence shotgun as well as the Disco grenade ordnance.
The location of Bittervein Auger Mine
Mission 3
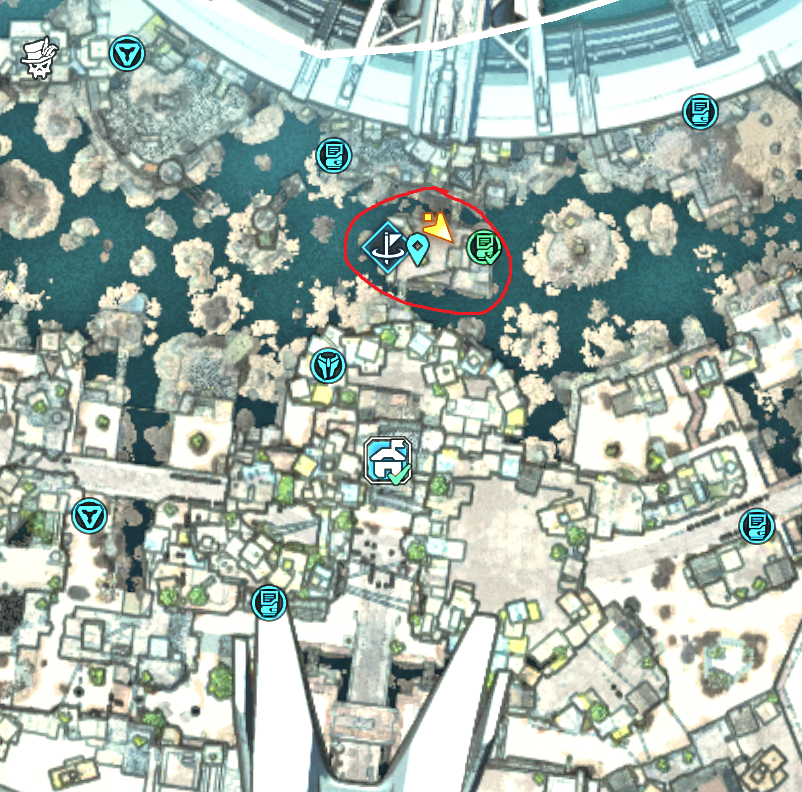
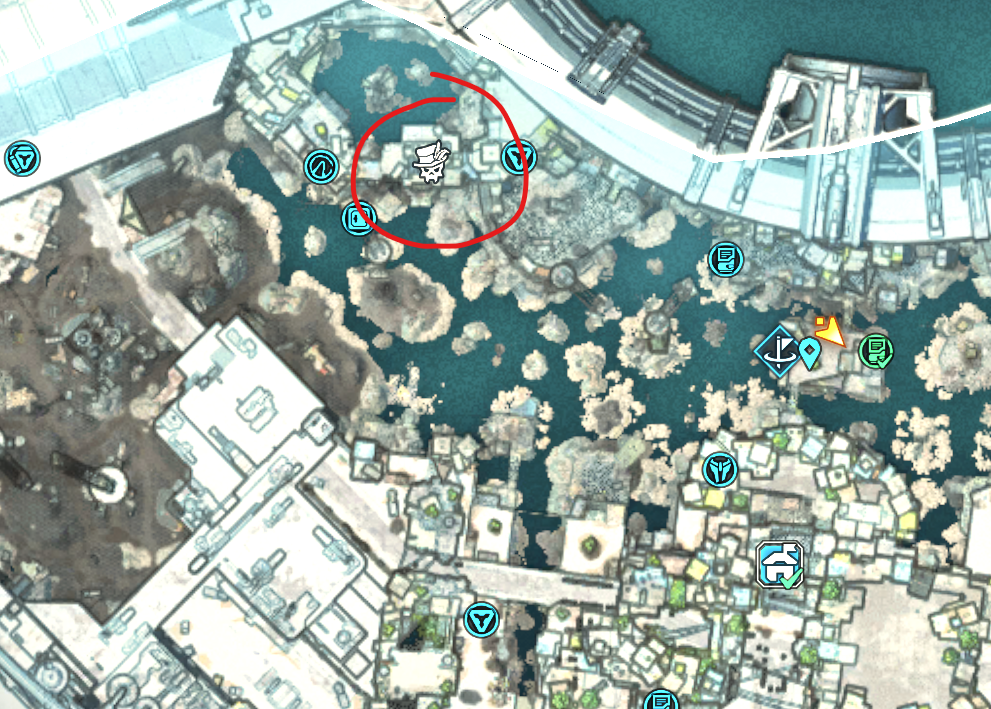
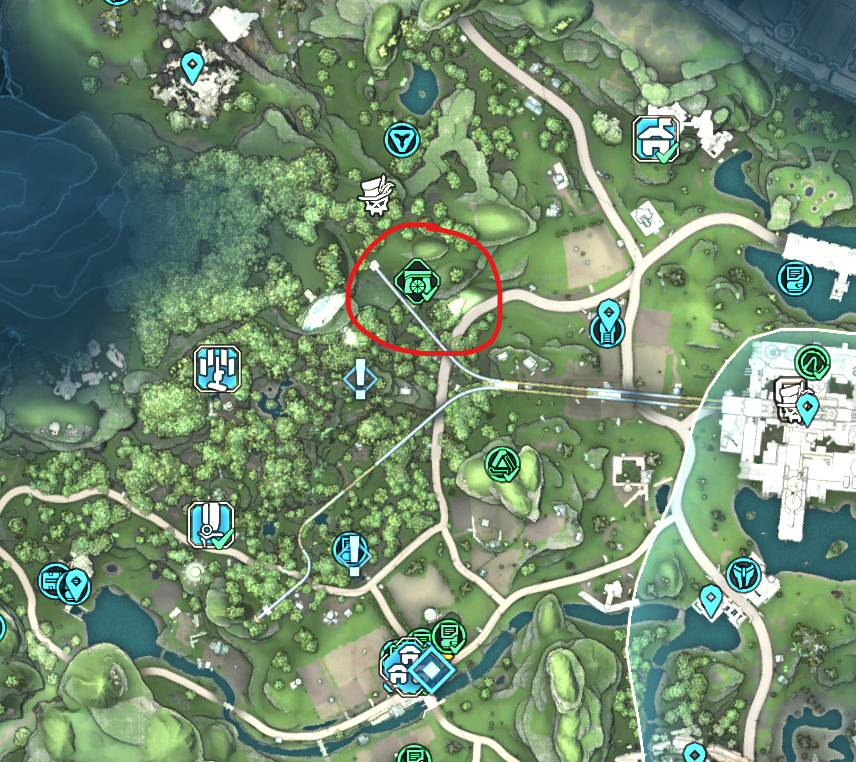
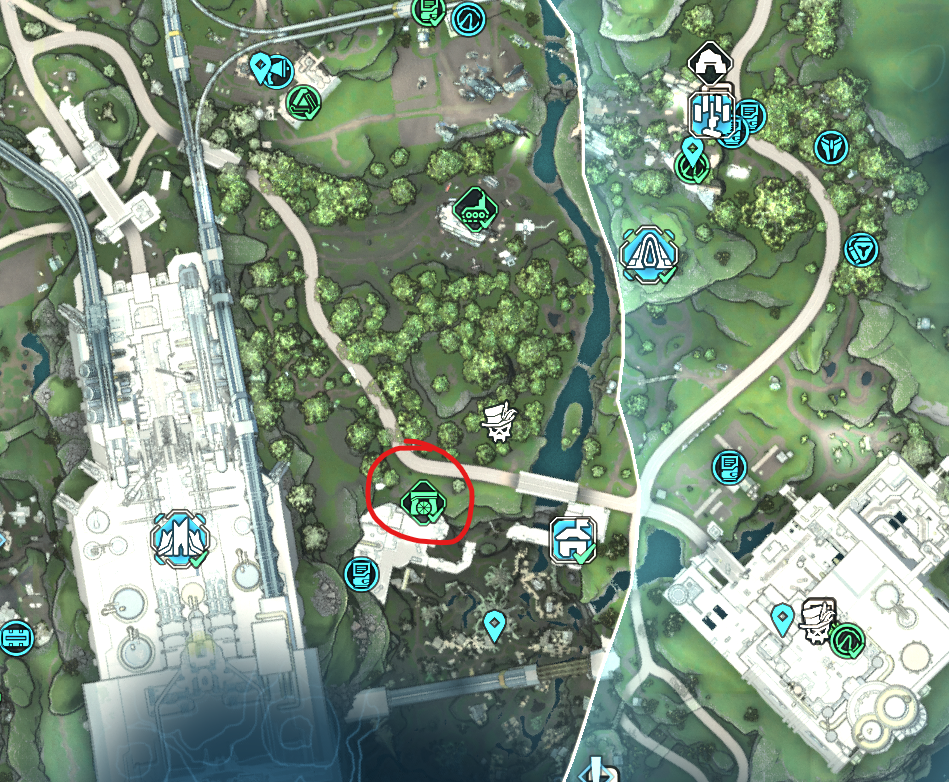
The third mission requires you to kill the Bio Armoured Omega Thresher who is the final boss of of the ‘One Slime Issue’ side mission in The Dominion. Bear in mind, this quest is part of a chain and a follow up to another quest ‘One Gassy Issue’ so there’s a bit to get through in case you haven’t done this quest during your campaign playthrough. You can find the NPC that gives this mission in the Lakeside Properties area in the Fades District (also in The Dominion). This chunky Thresher drops us the Truck sniper rifle and the Bugbear assault rifle.
The location of the NPC questgiver
The location of the Bio Thresher boss
Mission 4
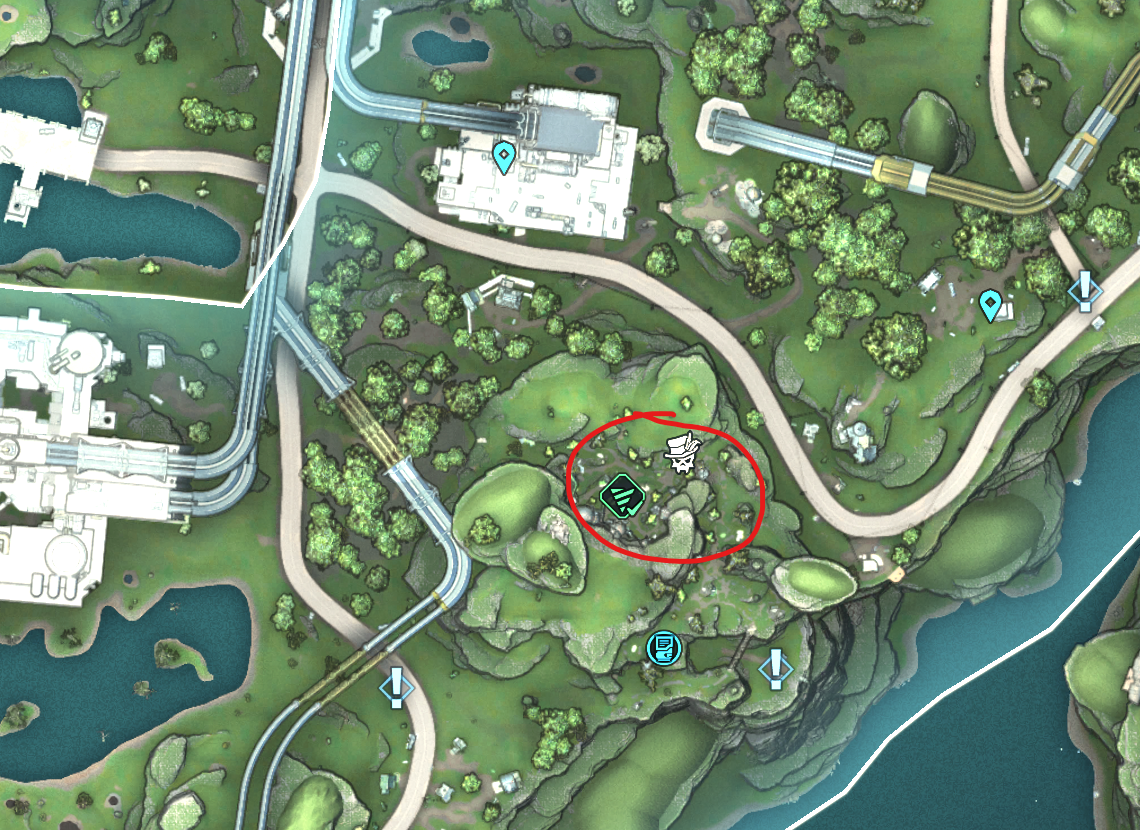
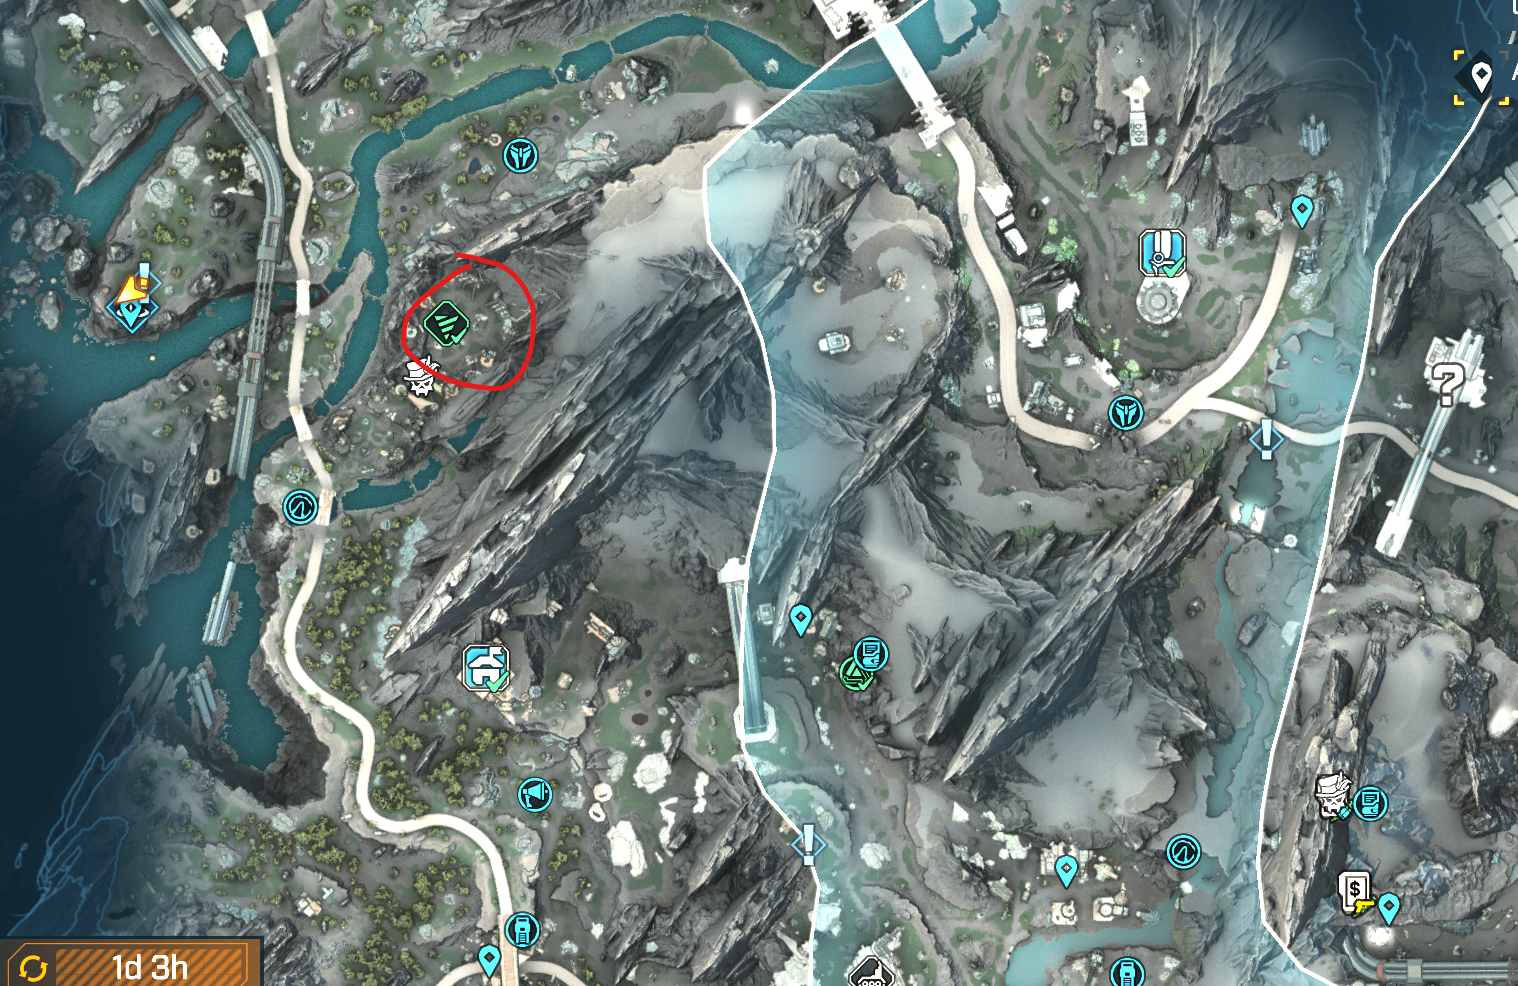
The final mini-boss you have to hunt down is our dear friend Sidney Pointylegs who is the final boss of the ripper drill site in the Hungering Plains (Fadefields). From a loot perspective, Sidney drops us the Noisy Cricket pistol, Disc Jockey launcher ordnance and the Swarm grenade.
The location of Sidney's Ripper Drill Site
Mission 5
Once you’re all wrapped up with the 4 prior missions, go back to our friend Lilith and kick off the Wildcard Mission “Rush The Gate” which will have you running through the mission that ends with killing Idolator Sol, who drops the Dancer, Bio-Robot, Furnace and Technomancer class mods, as well as the Golden God shotgun, Onslaught SMG and the Goremaster shotgun. Completing this final mission will get you to Ultimate Vault Hunter Level 2!
Great job, a nice slice of cheesecake is on the way.
UVH Level 3
If you’ve been finding UVH2 a bit too easy, then I’ve got good news for you! There’s still 3 more levels you can grind through! As has become tradition, there another 4 mini-bosses for you to kill and another story mission.
Mission 1
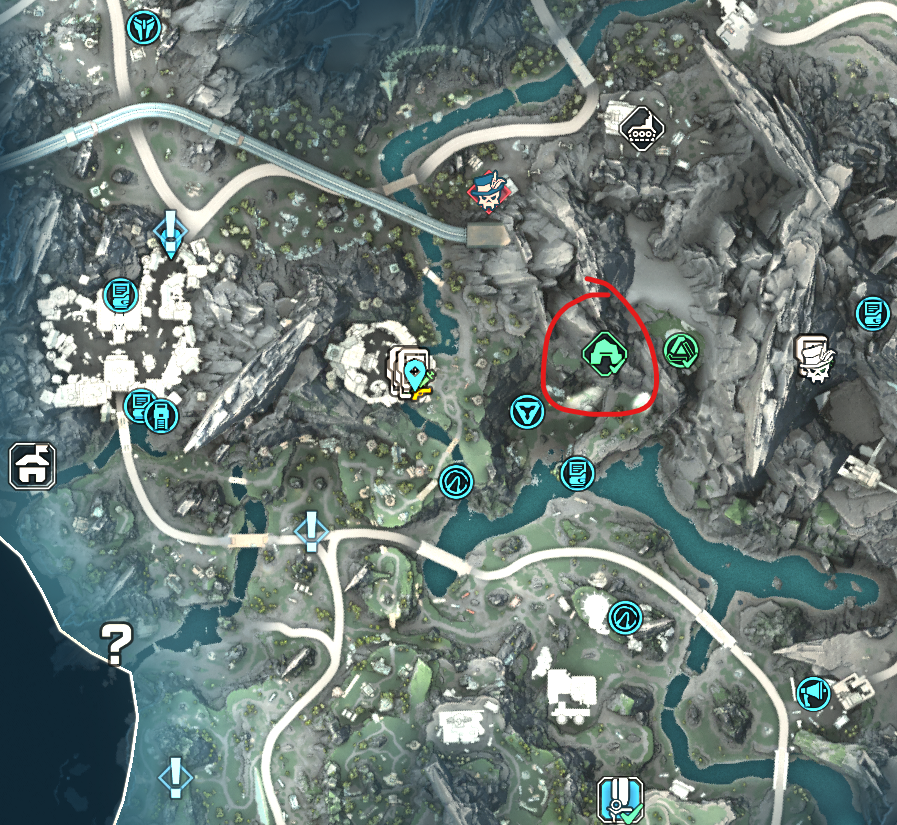
The first mission needs you to kill The Core Observer who you can find in the Blackline Order Bunker at The Howl (in the Fadefields). This contraption drops the Defibrillator shield, Bully shotgun and the Divided Focus assault rifle.
The location of Blackline Order Bunker
Mission 2
Your second target on the hit list takes you to an Abandoned Auger Mine in the Cuspid Climb region of Terminus Range, where you’ll have to kill Shadowpelt. Once you kill it, this angry dog has the chance to drop the Sparky Shield shield, Vamoose sniper rifle and the Slippy grenade ordnance.
The location of Shadowpelt's Auger Mine
Mission 3
For the 3rd target on the hit-list, we head over to another Abandoned Auger mine. This time in Trinket Crevass, Ruined Sumplands over in Carcadia Burn. The boss you have to kill here is Rocken Roller who drops the AF1000 Repkit and the San Saba Songbird pistol
The location of the Rocken Roller's Auger Mine
Mission 4
The final target is Frank the Furnace and his band of merry men, who you find in the Pitted Stain Ripper Drill site over in the Fadefields. Frank and his buddies drop the Chaumurky grenade, the Chuck assault rifle and the Bloody Lumberjack assault rifle.
The location of the Pitted Stain Ripper Drill Site
Mission 5
To round out your final mission to get to UVH3, as always, head back over to Lilith in Moxxi’s bar and get moving with the “His Vile Sanctum” mission. Finishing this off will get you Ultimate Vault Hunter Level 3. Our dear friend Vile Lictor drops the Undead Eye, Instigator, Generator and Blacksmith COMs, as well as the Ruby's Grasp pistol, Super Soldier shield and the Blockbuster grenade.
Keep up the good work champ, you get a nice cold apple juice for your efforts.
UVH Level 4
You're almost there!
Mission 1
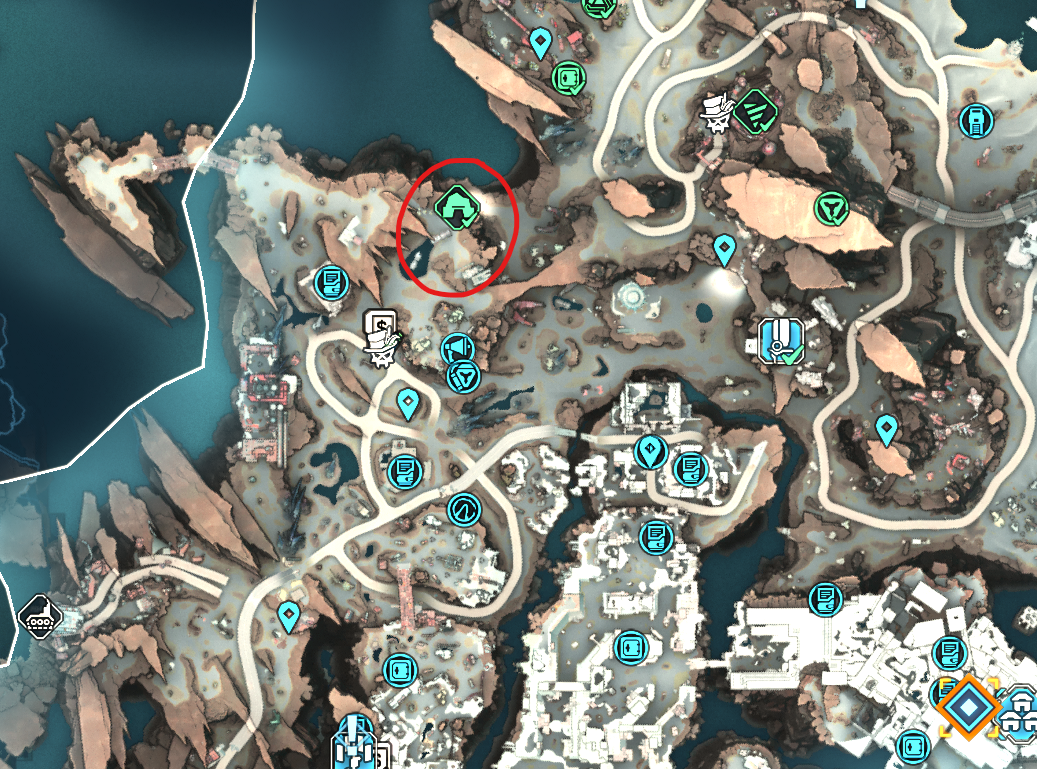
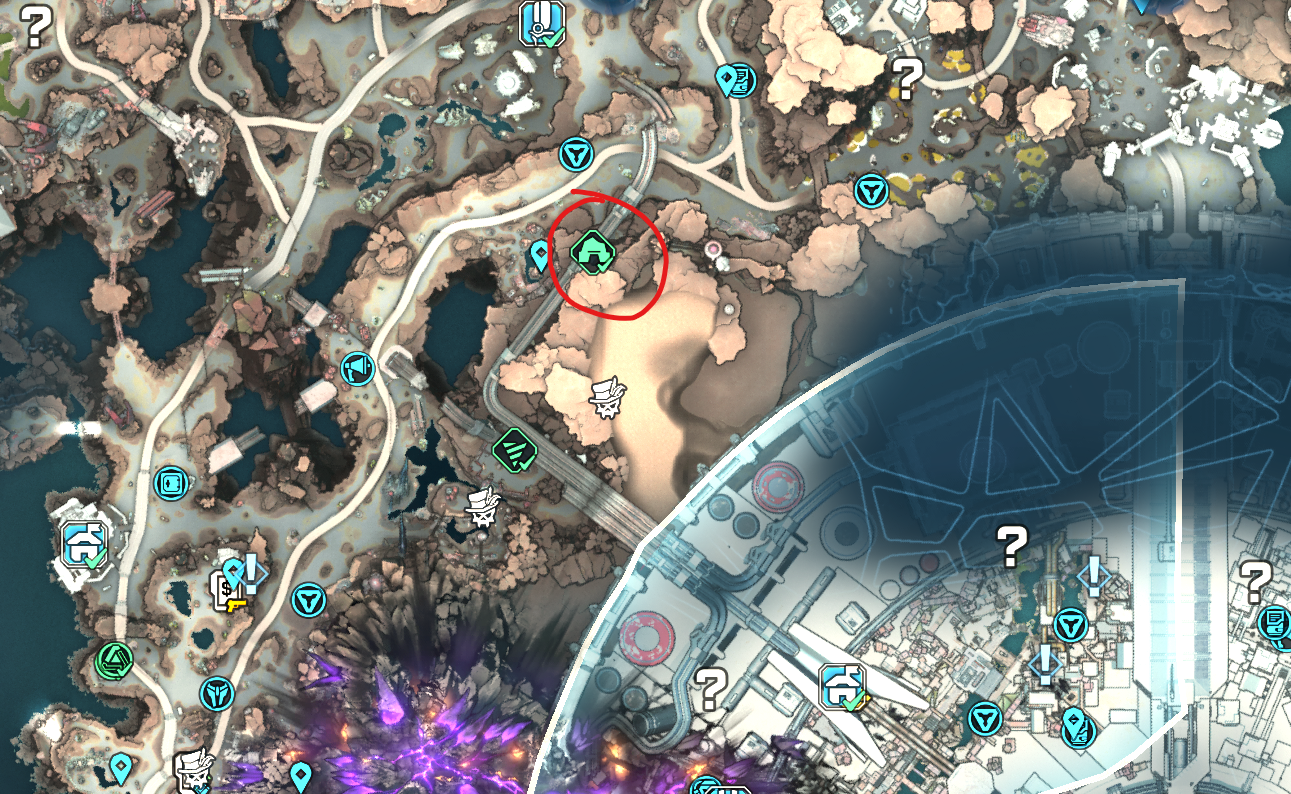
For the very first target to kick things off, we need to hunt down Mimicron. The final boss of the Tipping Point Order Bunker at Idolator's Noose in The Fadefields. If you choose to farm Mimicron, you can potentially get the Luty Madlad SMG, Complex Root sniper or the UAV grenade.
The location of the Tipping Point Order Bunker
Mission 2
After killing Mimicron, the next task is to hunt down the Immortal Boneface who we can find in the Old Scape Ripper Drill Site over yonder in the Cuspid Climb region of Terminus Range. If luck is on your side, you can hopefully get the Hellwalker shotgun, War Paint repkit and the Lucian's Flank assault rifle.
The location of the Old Scape Ripper Drill Site
Mission 3
Next, it's time to kill a big ole Elephant(?) thing, who we also like to call Battle Wagon. You can find him in The Lowering March Ripper Drill Site in the Stoneblood Forest region of Terminus Range. Battle Wagon also has the chance to drop Compleation shield, Bugbear assault rifle and the Finnity XXX-L sniper rifle
The location of The Lowering March Ripper Drill Site
Mission 4
The final mini-boss we have to kill is Skull Orchid who's hiding away in The Embossed Fault Auger Mine situated in The Grindstone of the Worthy over in Carcadia Burn. This big ole thing can drop the Roach SMG, Faulty Detonator grenade and the Oak-Aged Cask shield.
The location of The Embossed Fault Auger Mine
Mission 5
To put a bow on UVH4, go back and TALK TO LILITH and work you way through the "Her Flaming Vision" Wildcard mission and put an end to Callis. From a loot perspective, Callis can drop the Esgrimidor, Skeptic, IllusionistViking COMs, as well as the Queen's Rest pistol and Pandoran Momento shield.
After finishing this quest, you'll have UVH Level 4 unlocked. gg wp.
UVH Level 5
You're so close! Don't give up now! Getting to UVH Level 5 is a bit different to the other UVH levels. It's a bit more difficult but also significantly more straightforward. However, this doesn't mean you can breeze through this by any means. Your build will have to be somewhat optimised unless you enjoy pain and suffering. Luckily for you! Mobalytics has you covered with a host of optimised builds for you that you can find here!
Go talk to Lilith and she'll send you to clear out all 3 of the Primordial Vaults. If you don't have any of the Vaults unlocked/found, feel free to check out this handy dandy guide right here and get the Vaults unlocked FIRST!.
For once in her life, Lilith chooses to make things easy for you and she'll teleport you directly into each Vault once you speak to her to start each of the Vault missions - so there's no need to find certain locations/fast travel/drive to locations like you had to do for previous missions in the other UVH levels. Yay for convenience!
Primordial Vaults
As mentioned, there's 3 Vaults - each with their own multi stage mobbing section and wrapped up with a boss at the end. Will share some general tips for each of the bosses just so you aren't going in completely blind!
Vault of Radix
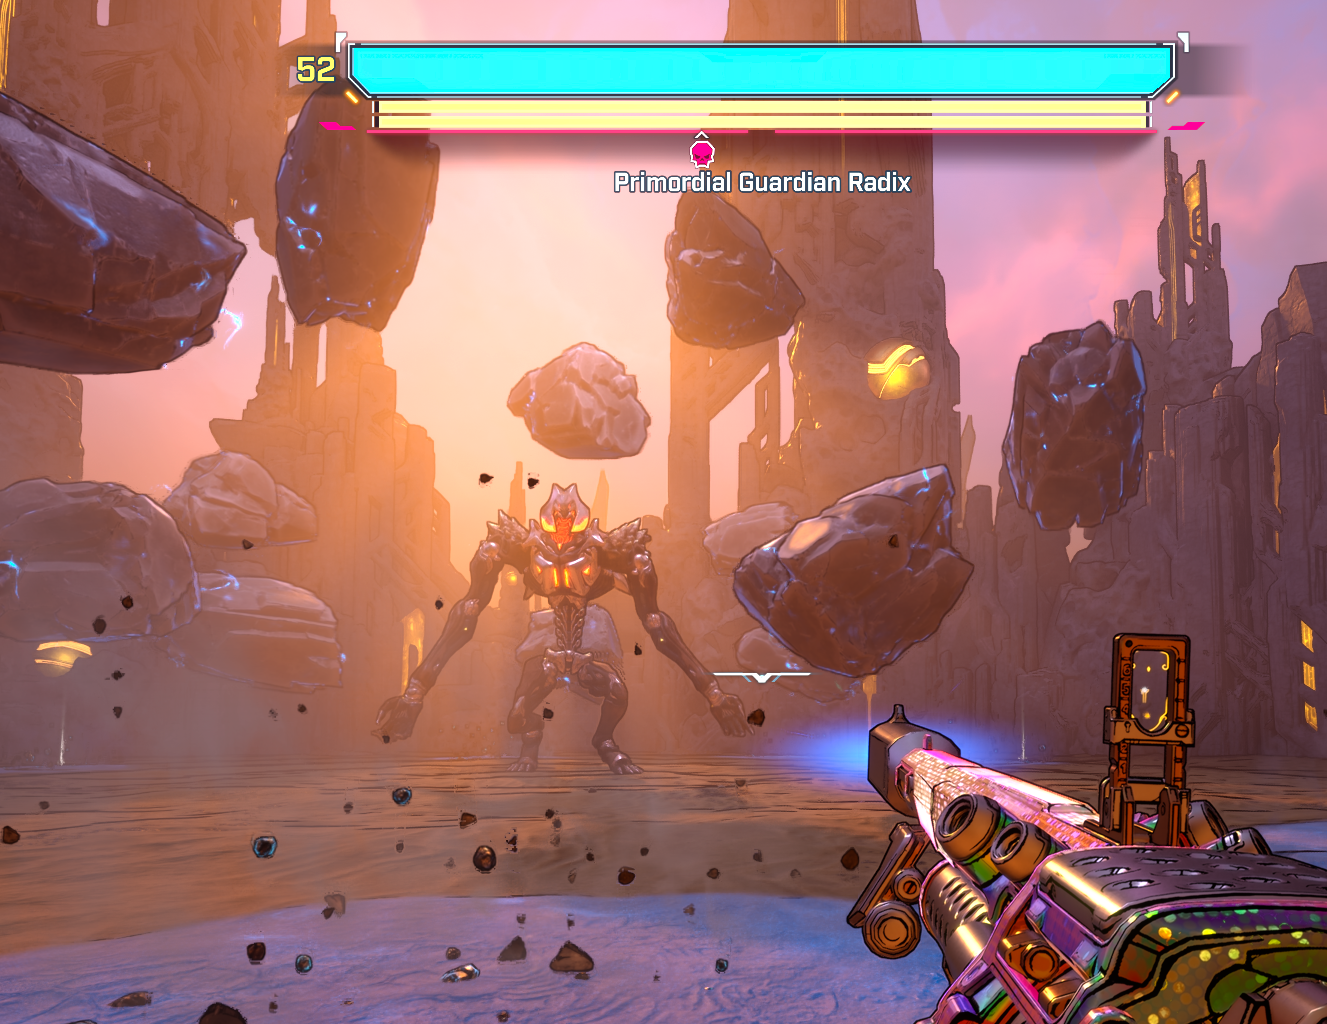
Primordial Guardian Radix
As a general rule of thumb, Radix uses a lot of shock based attacks so equipping an armour shield instead of energy shield isn't the worst idea. As you can see in the below image, his 2nd health bar is armour - so bringing a shock weapon and a corrosive weapon to match the health bars will optimise your damage output. In order to maximise your damage further, focus on Radix's crit spot - which is located at their neck (it glows orange/red so it stands out during the fight)
During the fight, there will be areas of blue highlighted - which signals where Radix will strike next. Unless you want to go into FFYL, my professional advice is that you avoid those areas and keep dashing around while shooting Radix.
Additionally, Radix also summons Pangolins which you can use a second wind fodder should you need to.
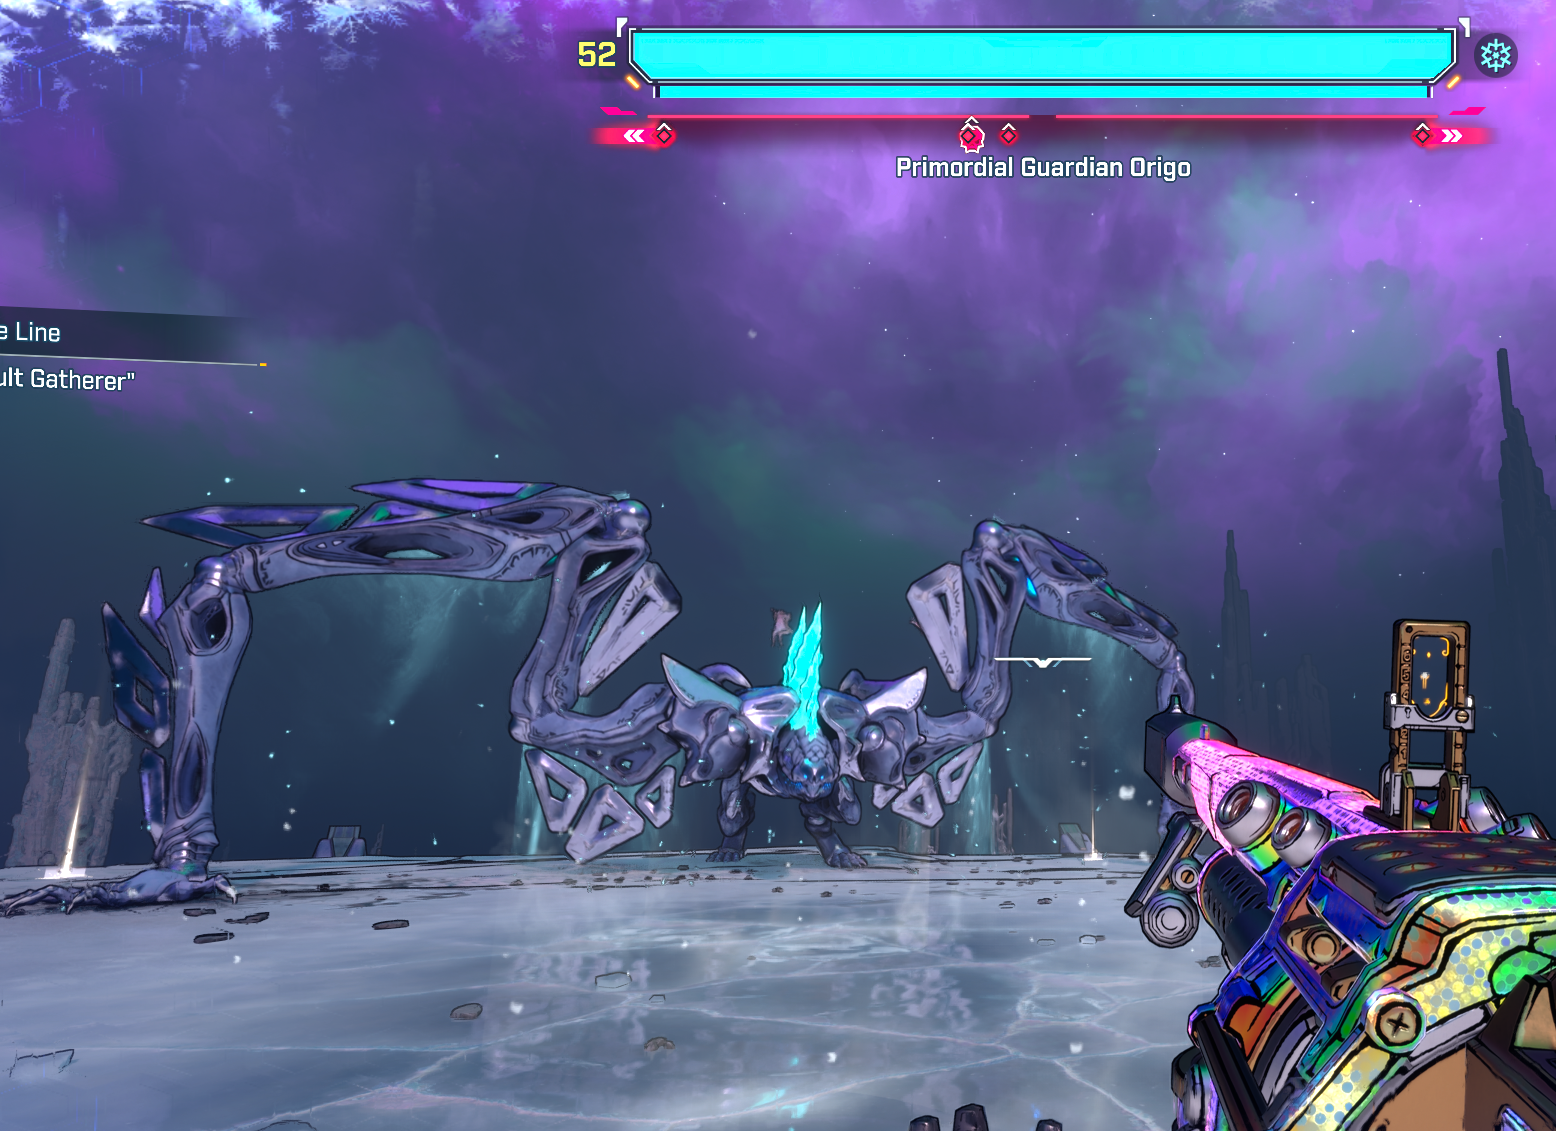
The Origo boss fight follows a similar vein of Radix, in that there are also multiple area of effect attacks that require dodging, and are all marked on the ground prior to the attack - to give you ample time to dash away and prevent yourself from taking damage. While Radix prefers to use shock based attacks, Origo likes to use a combination of shock AND incendiary attacks.
Origo's crit spots are the bright blue (or orange - depending on the stage of the fight) spikes running down their back, so focus on that area to maximise your DPS. Whittle their health down and hopefully you get bless with the Bottled Lightning launcher ordnance, Kaoson SMG, Watts 4 Dinner shield OR the Buster, Atomic Driver, Spirits or Shatterwight class mods.
Vault of Inceptus
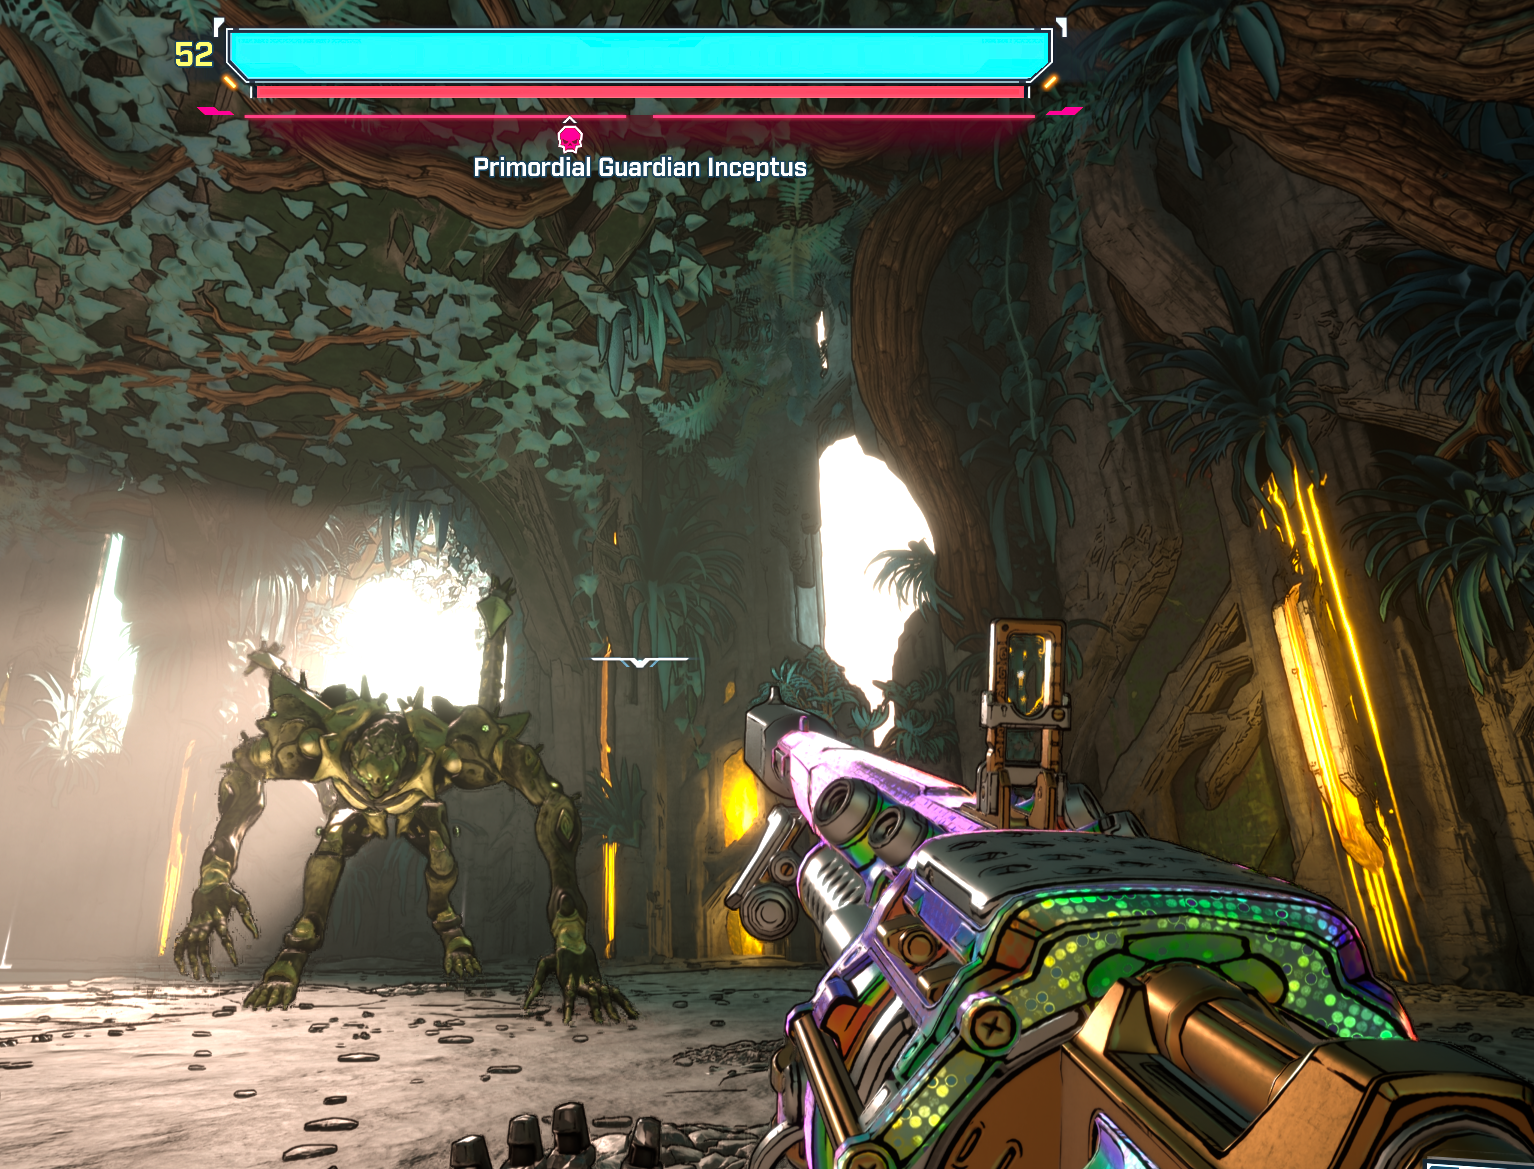
Primordial Guardian Inceptus
The final Vault boss we have in the game thus far is Inceptus - who prefers a flurry of corrosive based attacks. Inceptus makes finding their crit spots a bit more challenging this time around, and requires you to grapple armour segments on their body to then expose the crit spots which you can focus on for extra damage.
While the other Vault bosses make it a bit more straightforward to dodge their area of effect attacks, during the healing/cocoon phase of the Inceptus fight, the entire floor floods with acid, so grappling on the floating platforms is critical to avoid taking damage.
During this healing/cocoon phase, Inceptus can also heal so make sure you're shooting the bulbous growths on the cocoon to deal extra damage (and stop the healing process)
Cruise your way through all 3 of these Vaults and you'll find yourself with a final mission to get to that coveted Ultimate Vault Hunter level 5
The Final Stretch
The Timekeeper is being a pain. Go kill him. Speaking to Lilith will kick off the "The Timekeepers Order" Wildcard mission. Very straightforward. This is a 2 phase boss fight and each phase drops different loot. Hopefully you find yourselves the Timekeeper's New Shield, Symmetry sniper rifle, Star Helix assault rifle and the Borstel Ballista sniper rifle. Wrapping up this quest will grant you Ultimate Vault Hunter Level 5!
The End?
After long last, you've done it. You've climbed to the top of the Ultimate Vault Hunter Levels. You deserve a pat on the head. And dare I say it, maybe a second. Well done. You can finally rest. For now....