This guide will detail what the top meta team is for progression and the Items, decorations, engravings and inscriptions to focus on whilst levelling up.
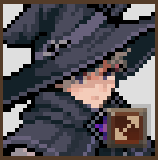
The Priestis currently a very strong pick regardless of what team setup you decide to play with. With strong defensive capabilities and team boosting buffs you will absolutely want her in your team.
Overview
Role: Tank/Support
Attack Type: Melee
Formation Slot: Front
Offensive Stats: Attack Damage, Life Leech, Life per Hit, Lightning Damage, Cast Speed
Decorations: HP, Armour, HP Regen, Life Leech, Chaos Resistance, Movement Speed
Engravings: Cooldown, HP
Inscriptions: Armour, HP, Resistances, Life on Kill
Top Skills: Blessing of Might, Wrath of Heaven, Sanctuary, Heal
Details
The Priest acts as the Tank and Healer of this team composition and should be picked as your 2ndCharacter to support your initial Damage Dealer.
You want to focus on making her tanky enough to sustain damage so focus on Defensive and Utility Stats over Offensive Stats to begin with.
Heal will be the main source of sustain early on with HP Regen also being obtainable on gear or through Decorations and Engravings.
At around Level 30 when you should have more than 20% Cooldown Reduction you can make the swap from Heal to Sanctuary for a more effective heal but comes at the cost of a higher cooldown.
Cooldown Reduction, HP Regen and Damage Absorption are essential to breaking through Normal Stage 2-8 which throws some very high damage Fire Elementals at your team.
Aim to have at least 1000+ Armour and 400+ HP by this point to help your tank survive these.
Later down the line you will swap Sanctuary for Wrath of Heaven as this grants Priest an absurd amount of damage for free so long as your base damage is decent to start with.
The reason this is so good is because when paired with Leech Leech for the 5 SecondWindow that it's active you pretty much refill your life back to maximum on each attack.
Once you're at 30% CooldownReduction or higher the downtime of Wrath of Heaven becomes lower, nearing Permanent Uptime when at the 75% Cooldown Reduction Cap.
At Level 50 the Elemental ResistanceEnhancement becomes available which is insanely strong for defence on Priest. With just 2 or 3 Points in this Enhancement you will notice your defence will drastically improve against the high damaging elemental enemies found in later stages.
Progression
Level 1 - 10
Skill: Heal (5/5)
Skill: Blessing of Might (5/5)
Level 11 - 20
Tier 1: Health (7/8)
Tier 2: Damage Absorption (3/3)
Level 21 - 30
Tier 3: Cooldown Reduction (6/10)
Tier 2: Armour (4/8)
Level 31 - 40
At this point it should be fine to swap Heal with Sanctuary now that enough Cooldown Reduction and Defence has been obtained.
Remove Skill: Heal (0/5)
Tier 1: Health (8/8)
Skill: Sanctuary (5/5)
Reduce Tier 3: Cooldown Reduction (5/10)
Tier 4: Damage Absorption (10/10)
Level 41 - 50
Tier 3: Cooldown Reduction (10/10)
Tier 4: Health (5/10)
Level 51 - 60
At Level 51 so long as you have 2% - 3% Life Leech on Priest and a decent amount of HP Regen or other sustain you can look to swap Sanctuary with Wrath of Heaven. This will grant Priest much more Healing and Damage than Sanctuary and your other characters will likely have their own sustain by this point.
Tier 6: All Elemental Resistance (1/10)
Remove Skill: Sanctuary (0/5)
Skill: Wrath of Heaven (5/5)
Tier 6: All Elemental Resistance (6/10)
Tier 4: Health (8/10)
Level 61 - 70
Tier 7: Cooldown Reduction (10/10)
Level 71 - 80
Tier 4: Health (10/10)
Tier 5: Cast Speed (6/10)
Tier 6: All Elemental Resistance (8/10)
Level 81 - 90
Tier 7: Armour (10/10)
Level 91 - 100
Tier 6: All Elemental Resistance (10/10)
Tier 5: Cast Speed (10/10)
Tier 8: Cast Speed (4/10)
Sorcerer
The Sorcerer is a very good offensive option to take early on. With high Base Damage and strong Offensive Abilities this will be a solid option when paired with a tank to protect them.
Defensive Stats: HP, Armour, HP Regen, Damage Reduction, Chaos Resistance
Utility Stats: Cooldown Reduction, Movement Speed
Decorations: Fire Damage, Cooldown, Attack Damage, Crit Chance, Chaos Resistance, Movement Speed
Engravings: Crit Chance
Inscriptions: Attack Damage, Cast Speed, Fire Damage, Area of Effect
Top Skills: Fireball, Flame Hydra
Details
The Sorcerer acts as our main AoE Damage Dealer utilising Fireball for it's Low Cooldown and Large AoE to clear groups of enemies when they bunch up on our Priest.
You want to focus on gaining as much Attack Damage as possible because the Sorcerer'sSkills large Damage Scalars on them so this is a very high value stat to search for early on.
Cooldown Reduction is another very high value stat to look for since all of the Sorcerer's Skills are Cooldown based. The more of this you have, the faster your skills will activate and the faster your clear speed will increase.
Lightning is taken early on to supplement the build until we unlock Flame Hydra at Level 21. This grants us another decent AoE option but doesn't scale with Fire Damage so later is replaced so we can focus on scaling our single source of damage, Fire Damage.
Flame Hydra is an insane skill that lasts for a long time, has a huge range and deals an excellent amount of damage, particularly Single Target Damage. If you're lucky enough to drop an Arcana Witch Staff this will also grant 200% Attack Speed to your Flame Hydra, although these are very rare drops early on.
The Sorcerer has a higher base Critical Chance than the others on the team so Critical Chance is also desirable stat if you can obtain these alongside the others above.
The one main Weakness of the Sorcerer is their Maximum Life will be pretty low until at least Level 31 where you gain access to Maximum Life in the Skill Tree. Having some HP in the Equipment can help with survivability a lot early on.
It's also worth mentioning that because the Sorcerer has such high Base Damage that Life Leech also works particularly well here. So long as you don't get One Shot you will almost certainly heal back up in no time once you have this somewhere in the Equipment.
Progression
Level 1 - 10
Skill: Fireball (5/5)
Tier 1: Attack Damage (3/3)
Tier 1: Cooldown Reduction (2/8)
Level 11 - 20
Skill: Lightning (5/5)
Tier 1: Cooldown Reduction (7/8)
Level 21 - 30
At this point we swap Lightning for Flame Hydra so we can scale both our Abilities at the same time covering both Single Target and Group Damage.
Remove Skill: Lightning (0/5)
Tier 1: Cooldown Reduction (8/8)
Tier 1: Critical Chance (3/8)
Tier 1: Area of Effect (1/8)
Skill: Flame Hydra (5/5)
Tier 3: Fire Damage (5/10)
Level 31 - 40
Tier 3: Fire Damage (10/10)
Tier 4: Health (5/10)
Level 41 - 50
Tier 5: Cooldown Reduction (10/10)
Level 51 - 60
At this point we swap Fireball for Lightning so long as you now have 50%+Cooldown Reduction so we can kill Hurt All Enemies on the battlefield each attack which Fireball doesn't do.
Remove Skill: Fireball (0/5)
Skill: Lightning (5/5)
Tier 1: Area of Effect (6/8)
Remove Tier 3: Fire Damage (0/5)
Tier 4: Lightning Damage (10/10)
Level 61 - 70
Tier 7: All Elemental Resistance (6/10)
Tier 4: Health (9/10)
Level 71 - 80
Tier 8: Cooldown Reduction (10/10)
Level 81 - 90
Tier 7: All Elemental Resistance (10/10)
Tier 6: Cast Speed (10/10)
Tier 7: Area of Effect (1/10)
Level 91 - 100
Tier 7: Area of Effect (10/10)
Tier 1: Area of Effect (7/8)
Ranger
The Ranger is an insanely strong Offensive pick regardless of what team setup you decide to play with. Wielding excellent Single TargetDamage and extremely fast Attack Speed she will really speed up your clear speed in the Mid Game once you get some Equipment for her.
Top Skills: Rapid Fire, Swift Surge, Piercing Arrow
Details
The Ranger acts as our main Single Target Damage Dealer and can scale their DPS very quickly in the Mid-Game due to having access to such high Attack Speed.
Early on Rapid Fire is taken which activates every 5 Attacks so stacking Attack Speed is preferable here to activate this as much as possible.
Arrow Rain is taken to support this as an extra means of AoE Damage in the Early Game to assist alongside Sorcerer's Fireball. Later on this will be swapped for Swift Surge at Level 21 so the Ranger can be turned into a Single TargetDestroyer.
Attack Damage and Attack Speed are absolutely mandatory on the Ranger as well as Physical Damage Decorations and Critical Chance + Critical Damage where ever you can obtain it. All these together will scale the Ranger'sDamage in a way that other classes can't easily do at this stage.
Progression
Level 1 -10
Skill: Rapid Fire (5/5)
Tier 1: Attack Damage (3/3)
Tier 1: Attack Speed (2/8)
Level 11 - 20
Skill: Arrow Rain (5/5)
Tier 1: Attack Speed (7/8)
Level 21 - 30
At this point we swap Arrow Rain for Swift Surge so we have stronger Single Target capabilities since our Sorcerer provides a lot of AoE Damage already.
Remove Skill: Arrow Rain (0/5)
Tier 1: Attack Speed (8/8)
Tier 2: Critical Chance (4/8)
Skill: Swift Surge (5/5)
Tier 3: Projectile Damage (5/10)
Level 31 - 40
Tier 4: Attack Speed (10/10)
Level 41 - 50
Tier 3: Projectile Damage (10/10)
Tier 5: Movement Speed (5/10)
Level 51 - 60
Tier 6: Life Leech (5/10)
Tier 5: Movement Speed (10/10)
Level 61 - 70
Tier 7: Projectile Damage (10/10)
Level 71 - 80
At this point we swap Swift Surge for Piercing Arrow so long as you now have an Attack Speed of 5.0+ so we can kill Hurt All Enemies on the battlefield every 13 Attacks to help with clearance.
Remove Skill: Swift Surge (0/5)
Skill: Piercing Arrow (5/5)
Tier 8: Attack Speed (10/10)
Level 81 - 90
Tier 7: Increased Area of Effect Damage (10/10)
Level 91 - 100
Tier 2: Critical Chance (8/8)
Tier 2: Critical Damage (3/3)
Tier 6: Life Leech (8/10)
Progression Tips & Tricks
General
Save all your Crafting Materials in your Stash
Focus on Crafting Items that you don't have or are under levelled or low rarity
Pick your Character Roles and specialise 100% into them.
Take Increased Chest Drop Change Multiplier Runes when you can to increase item drop chance.
Level up Runes that are significantly cheaper first. (Costs rise quickly later on)
Ignore Offline Bonus Runes unless you intend to leave it offline. (No chests drop offline)
Save all Ruby, Sapphire, Topaz and Emeralds to craft Jewellery.
Level 1 - 20
Rush the Extra Hero Slots in the Southern Rune Grid to enable a full team as early as possible.
Unlock the Extra Hero Skill Slot in the Southern Rune Grid to enable full character setups.
Use Synthesise in the Cube to fill empty item slots.
Alchemy is not recommended at this stage as it yields low value returns.
Use Decoration if you have the open slots to do so and it makes sense for your given Character Role.
Level 21 - 40
Use Alchemy to sell excess items to help rush the Rune Grid and raise the Cube Level fast.
Save all Legendary, Immortal and Arcana Items.
Level 40+
Start saving RareItems and above to Synthesise as the Higher Grade Items will help you push through Nightmare 2-8 which is a Defensive Check on your Team Setup.
Life Leech and HP Regen help a lot to keep Priest Alive as well as stacking as much Damage Absorption as possible which proves to be very strong on this character.
Changelog
12rd July 2026 / v1.0.5
Updated guide to reflect it is a Progression Meta guide (A new Endgame Meta Progression Guide is coming soon)