menu
MobalyticsUse your favourite features in-game with our Desktop App
Gamebase Guide

Elden Ring Blasphemous Blade Build - Stats, Weapons, Skills & More

Updated on Aug 23, 2026
Aug 23, 2026

Overview

The Blasphemous Blade is one of the strongest and most comfortable PvE weapons in Elden Ring, combining high Fire damage, excellent Faith scaling, powerful healing effects, and one of the best Unique Skills in the game.

Its defining Skill, Taker's Flames, sends a wave of fire across the ground that deals heavy Fire damage, knocks many enemies down, and restores HP when it hits an enemy. This allows the build to deal enormous damage while simultaneously recovering from mistakes.

The weapon also restores HP whenever an enemy dies while the Blasphemous Blade is equipped, even if the weapon itself didn't land the killing blow. This makes it exceptionally strong during exploration, where groups of weaker enemies can continuously restore your health without consuming Crimson Flasks.

While the Blasphemous Blade scales with Strength, Dexterity, and Faith, this build primarily focuses on Faith. Faith improves the Fire damage of Taker's Flames while also giving us access to powerful Incantations and buffs that complement the weapon.

The result is a durable Faith-based Greatsword build capable of dealing excellent melee damage, attacking from range with Taker's Flames, healing itself throughout combat, and using Incantations to further increase its damage and survivability.

Pros and Cons

Pros

  • Taker's Flames deals extremely high Fire damage and provides excellent range.
  • Taker's Flames restores HP whenever it hits an enemy.
  • The weapon also restores HP whenever nearby enemies die.
  • Excellent Faith scaling and synergy with Faith-based buffs.
  • Greatsword moveset provides strong regular melee damage and stance pressure.
  • Excellent survivability during both exploration and boss fights.
  • Can combine weapon damage with powerful Incantations and buffs.
  • Very beginner-friendly without sacrificing endgame power.
  • Remains extremely strong throughout the base game and Shadow of the Erdtree.

Cons

  • The Blasphemous Blade is unavailable until Rykard, Lord of Blasphemy, is defeated.
  • Taker's Flames has a noticeable startup animation and can be punished if used carelessly.
  • The Skill consumes enough FP that Mind and FP management still matter.
  • Heavy reliance on Fire damage can become less effective against Fire-resistant enemies.
  • Requires investment into multiple attributes before the weapon can be equipped.
  • Repeatedly relying on Taker's Flames can make the playstyle somewhat one-dimensional if you ignore the weapon's normal Greatsword moveset and your Incantations.

All Elden Ring Guides

Check Out Our Other Elden Ring Builds and Guides

Starting Class, Attribute Leveling and Distribution

Recommended Starting Class: Confessor

The Confessor is an excellent starting class for a Blasphemous Blade build because it begins with useful Strength, Dexterity, and Faith while also having enough Mind and Vigor to comfortably transition into a melee/caster hybrid.

Our early progression focuses on building enough survivability while gradually reaching the 22 Strength, 15 Dexterity, and 21 Faith required to equip the Blasphemous Blade.

Once the weapon is obtained, Faith becomes our primary offensive attribute, while Vigor and Mind provide the survivability and FP needed to use Taker's Flames consistently.

Attribute

Starting Stats

LV25

LV50

LV100

LV150

Vigor

10

18

30

45

60

Endurance

10

11

13

18

20

Strength

12

16

22

22

22

Dexterity

12

13

15

15

15

Mind

13

13

15

20

25

Intelligence

9

9

9

9

9

Faith

14

18

21

40

60

Arcane

9

9

9

9

9

Early Game — Levels 1-50

During the early game, Vigor should be your first priority.

The Blasphemous Blade isn't available yet, so there is little reason to rush offensive attributes at the expense of survivability. Increase Strength and Dexterity gradually while using your temporary Greatsword, and begin raising Faith alongside them.

By approximately level 50, aim for:

  • 30 Vigor / 22 Strength / 15 Dexterity / 21 Faith

This already meets all three requirements for the Blasphemous Blade, allowing you to equip it immediately after defeating Rykard.

You don't necessarily need to reach these exact numbers by level 50. If you're progressing through Volcano Manor later, continuing to prioritize Vigor beforehand is perfectly reasonable.

Midgame — Levels 50-100

Once you obtain the Blasphemous Blade, your priorities change significantly.

Rather than continuing to heavily invest in Strength, begin pushing Faith.

Taker's Flames is one of the strongest parts of the weapon, and Faith is the most important offensive attribute for maximizing its Fire damage while simultaneously improving your Incantations.

At the same time, increase Mind to approximately 20. Taker's Flames costs enough FP that the original build's extremely low Mind investment can become restrictive if you're regularly using the Skill alongside buffs and Incantations.

By level 100, aim for approximately:

  • 45 Vigor / 20 Mind / 18 Endurance / 22 Strength / 15 Dexterity / 40 Faith

This gives the build a strong combination of HP, FP, melee damage, Taker's Flames damage, and Incantation access.

Endgame — Level 150

At level 150, our target is:

  • 60 Vigor / 25 Mind / 20 Endurance / 22 Strength / 15 Dexterity / 60 Faith

60 Vigor gives the build excellent survivability, which complements the Blasphemous Blade's natural healing extremely well.

60 Faith provides excellent damage for Taker's Flames while also making your Incantations significantly stronger.

25 Mind provides a comfortable FP pool for Taker's Flames, buffs, and offensive Incantations without investing so heavily into FP that we compromise our melee attributes.

20 Endurance is enough for a comfortable amount of Stamina and Equip Load, although heavier armor setups may require additional investment.

Why Faith Over Strength?

The Blasphemous Blade scales with both Strength and Faith, but the two attributes don't contribute equally to every part of the weapon.

Strength is useful for improving the Physical portion of your regular weapon attacks. However, Taker's Flames primarily rewards Faith investment, making Faith considerably more important for a build centered around the weapon's Unique Skill.

Faith also improves the rest of our toolkit by strengthening compatible Incantations and giving us access to increasingly powerful buffs.

For that reason, we stop at the Blasphemous Blade's 22 Strength requirement during the standard progression and prioritize Faith instead.

If you primarily use normal melee attacks and only occasionally use Taker's Flames, additional Strength becomes more attractive.

Should You Take Faith to 80?

For a standard level 150 Blasphemous Blade build, 60 Faith is an excellent stopping point because it leaves enough levels for 60 Vigor, Mind, and Endurance.

However, at higher character levels, continuing toward 80 Faith is a natural way to increase the offensive potential of the build.

This becomes particularly valuable if you frequently use offensive Incantations alongside Taker's Flames.

After reaching the level 150 targets, prioritize:

  • Faith toward 80 → additional Mind or Endurance → Strength for more melee damage depending on which part of the build you want to improve.

Two-Handing the Blasphemous Blade

Two-handing increases your effective Strength by 50%, which improves the Physical portion of your melee attacks.

However, it does not provide the same benefit to Taker's Flames, so don't assume two-handing automatically makes the Skill significantly stronger.

This means you can comfortably use the Blasphemous Blade one-handed alongside a Sacred Seal when you want immediate access to Incantations.

Two-handing becomes more attractive when you're primarily using regular Greatsword attacks, especially against enemies where repeatedly using Taker's Flames isn't efficient.

Adjusting Endurance and Mind

The exact balance between Mind and Endurance depends on how you play.

If you use Taker's Flames and offensive Incantations constantly, consider increasing Mind beyond 25.

If you prefer heavier armor or spend more time using regular melee attacks, additional Endurance may provide more value instead.

The important part is that you shouldn't sacrifice Faith or Vigor simply to push both utility attributes extremely high.

Reach the weapon requirements, build enough Vigor for close-range combat, then prioritize Faith while adding enough Mind and Endurance to comfortably support your playstyle.

Weapon Progression and Path Through the Game

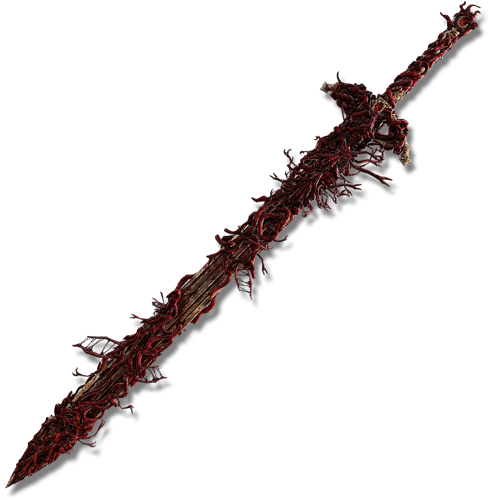
Blasphemous Blade

Blasphemous Blade

Requirements: Strength - 22 / Dexterity - 15 / Faith - 21

The Blasphemous Blade is the centerpiece of the entire build and should become your primary weapon as soon as you obtain it.

Its Physical and Fire damage allow it to benefit from several different offensive bonuses, but Faith is particularly important because it improves the weapon's Fire damage and Taker's Flames.

Taker's Flames

Taker's Flames is the main reason the Blasphemous Blade is so powerful.

The Skill raises the sword before sending a large wave of fire across the ground. Enemies hit take heavy Fire damage, and the Skill restores a portion of your HP for each enemy it hits.

This creates an extremely forgiving combat loop: take damage while trading with an enemy, create enough distance to safely use Taker's Flames, then deal damage and recover HP with the same attack.

Taker's Flames also has excellent range and can knock down or stagger many regular enemies, allowing you to control encounters without constantly fighting directly in melee range.

However, don't treat Taker's Flames as your only attack. The Blasphemous Blade is still a Greatsword with strong regular attacks, and using normal melee attacks against weaker enemies preserves FP for situations where the Skill provides more value.

Location: Obtained by exchanging the Remembrance of the Blasphemous with Finger Reader Enia after defeating Rykard, Lord of Blasphemy, in Volcano Manor.

Obtaining the Blasphemous Blade

The Blasphemous Blade cannot be obtained at the beginning of the game, so the first part of the build needs to use another weapon while progressing toward Volcano Manor.

Rykard can be reached through the Volcano Manor legacy dungeon without completing the entire Volcano Manor assassination questline. After defeating Rykard, exchange his Remembrance for the Blasphemous Blade and begin upgrading it with Somber Smithing Stones.

Because the weapon requires 22 Strength, 15 Dexterity, and 21 Faith, your early attribute progression should gradually prepare for these requirements rather than forcing a major respec immediately after obtaining it.

The Blasphemous Blade cannot be obtained until the midgame, so you'll need another weapon while progressing toward Volcano Manor.

Rather than building around an entirely different playstyle early and respeccing later, we recommend using a weapon that works naturally with the Strength and Faith investment you'll eventually need for the Blasphemous Blade.

Best Early-Game Weapons

Lordsworn's Greatsword — Best Simple Progression Option
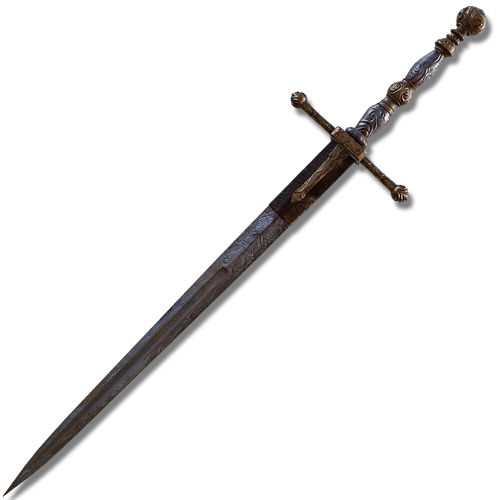
Lordsworn's Greatsword — Best Simple Progression Option

Requirements: Strength - 16 / Dexterity - 10

The Lordsworn's Greatsword is one of the easiest weapons to obtain at the beginning of the game and provides a straightforward Greatsword moveset similar to what you'll eventually use with the Blasphemous Blade.

It requires very little additional investment and can comfortably carry you through the early game while you level Vigor, Strength, and Faith.

Once you gain access to appropriate affinities, you can also adjust the weapon to better match your developing build.

Location: Found inside a carriage at the Gatefront Ruins in Limgrave.

Claymore — Best Stronger Greatsword Alternative
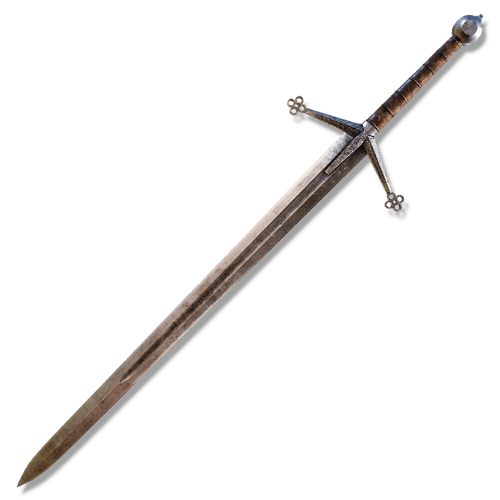
Claymore — Best Stronger Greatsword Alternative

Requirements: Strength - 16 / Dexterity - 13

The Claymore provides another excellent early Greatsword option with a versatile moveset and customizable Ash of War.

It requires slightly more Dexterity than the Lordsworn's Greatsword, but the Blasphemous Blade eventually requires 15 Dexterity anyway, so those levels aren't wasted.

Its strong regular attacks and customizable Skill make it an excellent weapon to use until you reach Rykard.

Location: Found inside Castle Morne in the Weeping Peninsula.

Winged Scythe — Best Early Faith Alternative
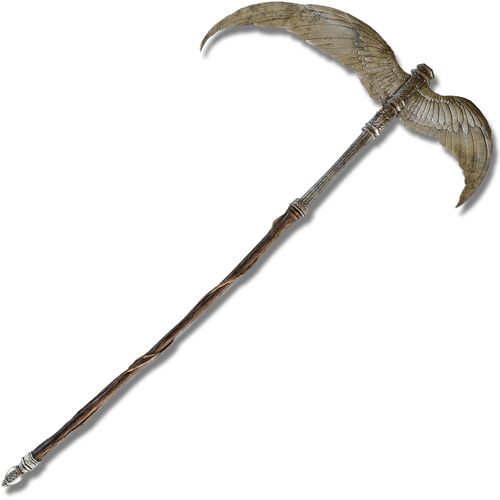
Winged Scythe — Best Early Faith Alternative

Requirements: Strength - 16 / Dexterity - 16 / Faith - 24

The Winged Scythe provides a more Faith-focused alternative if you want your early game to already feel like a dedicated Faith build.

It deals Physical and Holy damage, has innate Blood Loss buildup, and provides a powerful Unique Skill through Angel's Wings.

However, its 16 Dexterity requirement is one point higher than the Blasphemous Blade requires, while the 24 Faith requirement means you'll need to invest more heavily into Faith earlier.

This isn't a major problem for the final build, but the Lordsworn's Greatsword and Claymore provide a more attribute-efficient route if your only goal is reaching the Blasphemous Blade.

Location: Found in a chest beneath Tombsward Ruins in the Weeping Peninsula.

Path to the Blasphemous Blade

You don't need to follow a strict route through every region to make this build work.

During Limgrave and Liurnia, focus on three things:

Upgrade your temporary weapon, increase your Flask strength, and gradually reach the Blasphemous Blade's 22 Strength / 15 Dexterity / 21 Faith requirements.

Complete Stormveil Castle and continue through Liurnia as normal. You can reach Altus Plateau either through the Grand Lift of Dectus or the Ruin-Strewn Precipice, depending on your preferred progression route.

Once you reach Altus Plateau, your main build objective becomes Volcano Manor.

Reaching Rykard

There are two main ways to reach Rykard, Lord of Blasphemy.

You can complete the Volcano Manor assassination questline, eventually gaining direct access to Rykard. However, the final required assassination takes place in the Mountaintops of the Giants, making this a relatively late route if your priority is obtaining the Blasphemous Blade.

Alternatively, you can progress directly through the Volcano Manor Legacy Dungeon.

For this build, the dungeon route is recommended because it allows you to obtain the Blasphemous Blade significantly earlier without waiting until the Mountaintops of the Giants. The route takes you through Volcano Manor and the Godskin Noble before eventually reaching the teleporter leading toward Rykard.

Important: Defeating Rykard ends several Volcano Manor quest opportunities. If you want the rewards from the Manor's assassination quests, complete the ones you care about before killing him.

Fighting Rykard

Rykard is a special encounter designed around the Serpent-Hunter, which can be found inside the boss arena.

You don't need to redesign your build specifically for this fight. Use the Serpent-Hunter's special ranged attacks to fight both the God-Devouring Serpent and Rykard from outside the magma surrounding him.

After defeating Rykard, you'll receive the Remembrance of the Blasphemous.

Return to Finger Reader Enia at Roundtable Hold and exchange the Remembrance for the Blasphemous Blade.

From this point onward, prioritize upgrading the Blasphemous Blade with Somber Smithing Stones and transition fully into the build.

After Obtaining the Blasphemous Blade

Once the weapon is equipped, the build's priorities become much simpler:

Upgrade Blasphemous Blade → increase Faith and Vigor → acquire Taker's Flames supporting Talismans → collect your important buffs and Incantations.

You no longer need to maintain or upgrade your temporary early-game weapon unless you want an alternative damage type for enemies that heavily resist Fire.

Best Incantations for Blasphemous Blade Build

Incantations should primarily support the Blasphemous Blade rather than compete with it for damage. Since Faith is already our main offensive attribute, we can use several powerful buffs without changing the core playstyle of the build.

Golden Vow — Best Overall Buff

Golden Vow — Best Overall Buff

Requirements: Faith - 25

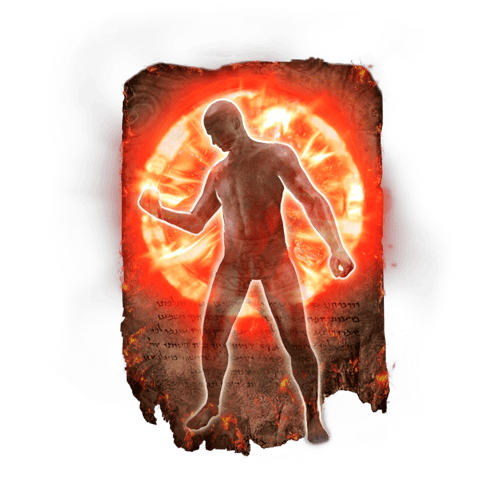
Golden Vow increases both your damage dealt and your Damage Negation, making it one of the strongest general buffs available to the build.

The offensive bonus improves both your regular Blasphemous Blade attacks and Taker's Flames, while the additional defense complements the weapon's built-in healing.

Use Golden Vow before difficult encounters and boss fights to improve both offense and survivability at the same time.

Location: Found at the Corpse-Stench Shack on Mt. Gelmir.

Flame, Grant Me Strength — Best Damage Buff

Flame, Grant Me Strength — Best Damage Buff

Requirements: Faith - 15

Flame, Grant Me Strength increases both Physical and Fire damage, making it exceptionally well suited to the Blasphemous Blade because the weapon deals both damage types.

More importantly, it provides a substantial boost to the Fire damage of Taker's Flames.

Its duration is shorter than Golden Vow, so use it shortly before engaging a boss or whenever you have an opportunity to refresh it.

Location: Found behind Fort Gael in Caelid, between two Flame Chariots.

Blessing's Boon — Best Passive Healing Support

Blessing's Boon — Best Passive Healing Support

Requirements: Faith - 24

Blessing's Boon gradually restores HP over time.

The Blasphemous Blade already provides excellent healing through enemy deaths and Taker's Flames, so additional regeneration isn't always necessary. However, Blessing's Boon can make the build even more sustainable during long encounters where healing opportunities are limited.

It is particularly useful during exploration or fights where repeatedly landing Taker's Flames is difficult.

Location: Purchased from Miriel, Pastor of Vows at the Church of Vows.

Flame, Protect Me — Best Situational Defensive Buff

Flame, Protect Me — Best Situational Defensive Buff

Requirements: Faith - 24

Flame, Protect Me massively increases Fire Damage Negation for a limited duration.

This isn't something you'll keep equipped for every encounter, but it provides an excellent defensive option against bosses and areas that deal large amounts of Fire damage.

Since the build already has more than enough offensive power, replacing an offensive option with additional defense can sometimes be the better choice for a difficult encounter.

Location: Found inside Giant-Conquering Hero's Grave in the Mountaintops of the Giants.

Recommended Buff Setup

For most difficult encounters, use Golden Vow followed by Flame, Grant Me Strength before engaging.

Golden Vow provides the longer general buff, while Flame, Grant Me Strength adds a shorter burst of Physical and Fire damage before you begin attacking.

Blessing's Boon and Flame, Protect Me are situational alternatives rather than mandatory parts of the rotation.

The Blasphemous Blade should remain your primary source of damage. These Incantations exist to support Taker's Flames and your regular Greatsword attacks, not to turn the build into a dedicated caster.

Best Talismans for Blasphemous Blade Build

Talismans are extremely important for the Blasphemous Blade because several options can directly increase the damage of Taker's Flames. Since the weapon already provides excellent healing, we can focus heavily on improving its damage while keeping one slot available for defense or utility.

Shard of Alexander — Best Overall Talisman

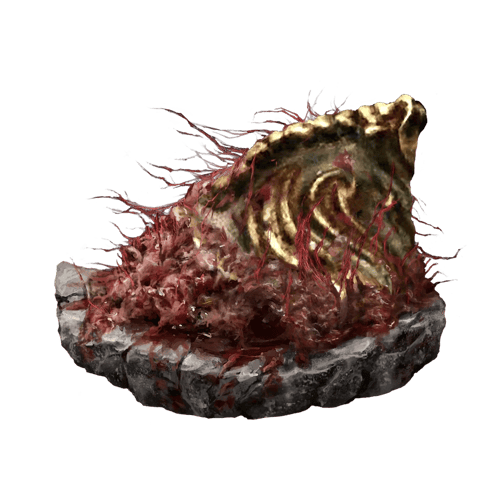
Shard of Alexander

The Shard of Alexander increases the damage of weapon Skills by 15%.

Since Taker's Flames is the centerpiece of this build, this is one of the strongest Talismans you can equip. The bonus applies every time you use Taker's Flames and requires no additional setup or condition.

If you regularly use the weapon Skill, Shard of Alexander should almost always be part of your endgame setup.

Location: Obtained at the end of Iron Fist Alexander's questline in Crumbling Farum Azula.

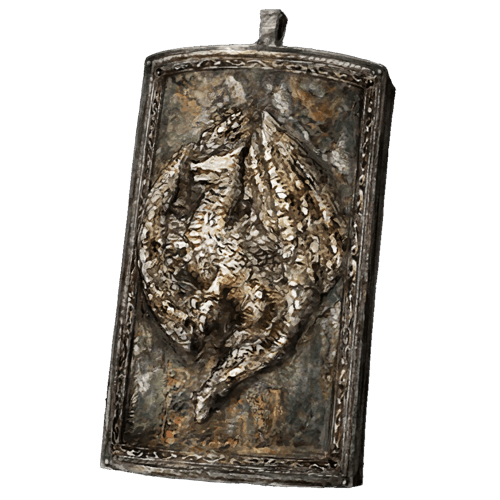
Talisman of the Dread — Best DLC Damage Talisman

Talisman of the Dread — Best DLC Damage Talisman

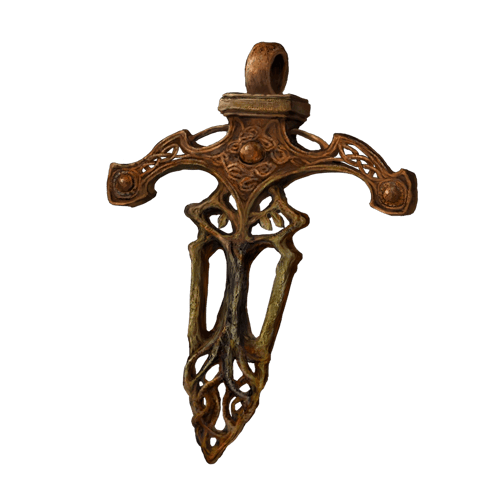
The Talisman of the Dread increases the damage of magma-based attacks by 15%.

Despite Taker's Flames dealing Fire damage rather than leaving magma on the ground, it is included among the skills affected by this Talisman. This makes it an exceptionally strong option specifically for a Blasphemous Blade build.

Combined with Shard of Alexander, you can significantly increase Taker's Flames without changing how you play the build.

Location: Found inside Elder's Hovel in Shadow of the Erdtree.

Fire Scorpion Charm — Best Fire Damage Talisman

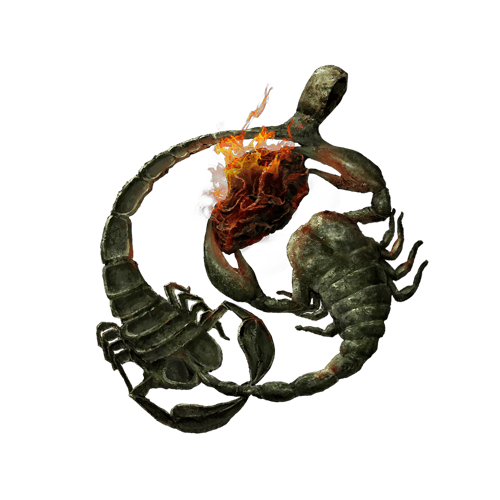
Fire Scorpion Charm

The Fire Scorpion Charm increases Fire damage by 12% in PvE.

This directly improves the Fire portion of the Blasphemous Blade and, more importantly, increases the damage of Taker's Flames.

The downside is reduced Damage Negation, making you more vulnerable to incoming attacks. This is less punishing on the Blasphemous Blade than on many other builds because Taker's Flames can restore lost HP, but the additional damage taken should still be considered during difficult encounters.

Location: Found inside Fort Laiedd on Mt. Gelmir.

Ritual Sword Talisman — Best Full-HP Damage Option

Ritual Sword Talisman — Best Full-HP Damage Option

The Ritual Sword Talisman increases Attack Power by 10% while your HP is at maximum.

Normally, maintaining full HP throughout a boss fight can make this bonus inconsistent. The Blasphemous Blade is unusually well suited to the Talisman because Taker's Flames can repeatedly restore HP during combat.

The weapon's passive healing from defeated enemies also makes maintaining full HP extremely easy during exploration.

If you're consistently able to stay at maximum health, the Ritual Sword Talisman provides another strong general damage increase.

Location: Found inside Lux Ruins in Altus Plateau after defeating the Demi-Human Queen Gilika.

Dragoncrest Greatshield Talisman — Best Defensive Option

Dragoncrest Greatshield Talisman — Best Defensive Option

The Dragoncrest Greatshield Talisman greatly reduces incoming Physical damage in PvE.

It doesn't increase Taker's Flames damage, but it makes the build considerably more forgiving when fighting at close range.

This is particularly valuable when using Fire Scorpion Charm, as the additional Physical protection can help compensate for its defensive penalty.

Location: Found inside Elphael, Brace of the Haligtree.

Carian Filigreed Crest — Best FP Utility Option

Carian Filigreed Crest — Best FP Utility Option

The Carian Filigreed Crest reduces the FP cost of weapon Skills by 25%.

Taker's Flames is powerful enough that it can be tempting to use it constantly, and repeated casts can quickly consume your FP.

Carian Filigreed Crest is therefore an excellent progression or exploration option, allowing you to use Taker's Flames more frequently before needing a Cerulean Flask.

At endgame, pure damage Talismans will generally provide more value during boss fights, but the FP efficiency remains useful during longer areas.

Location: Purchased from War Counselor Iji after progressing Blaidd's questline.

Recommended Talisman Setup

For maximum Taker's Flames damage:

  • Shard of Alexander + Talisman of the Dread + Fire Scorpion Charm + Ritual Sword Talisman

This setup heavily amplifies the weapon Skill but sacrifices some survivability through the Fire Scorpion Charm.

For a more balanced setup:

  • Shard of Alexander + Talisman of the Dread + Fire Scorpion Charm + Dragoncrest Greatshield Talisman

This retains the three major offensive bonuses while adding substantial Physical protection.

For general exploration:

  • Shard of Alexander + Talisman of the Dread + Carian Filigreed Crest + flexible defensive Talisman

The most important choices are Shard of Alexander and Talisman of the Dread. The remaining slots can be adjusted depending on whether you want maximum damage, better FP efficiency, or additional survivability.

Best Armor for Blasphemous Blade Build

The Blasphemous Blade does not require a specific armor set to function effectively. Unlike builds centered around Bleed or Poison, there is no single headpiece or armor bonus that is essential to the build.

Instead, armor should either improve your overall damage or provide enough Poise and Damage Negation to safely fight at close range while maintaining Medium Equip Load.

Rakshasa Set — Best Offensive Option

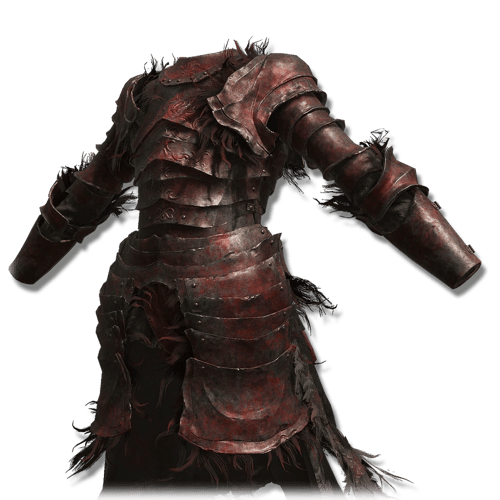
Rakshasa Set

The Rakshasa Set is the strongest straightforward offensive armor choice for the build.

Each piece increases all damage dealt by 2%, providing an 8% damage increase when wearing the complete set. This benefits both your regular Blasphemous Blade attacks and Taker's Flames.

The tradeoff is lower effective protection compared with similarly weighted defensive armor, so the full set is best used when you are comfortable avoiding enemy attacks.

You can also use individual Rakshasa pieces rather than committing to the complete set.

Location: Dropped by Rakshasa in the Eastern Nameless Mausoleum in Shadow of the Erdtree.

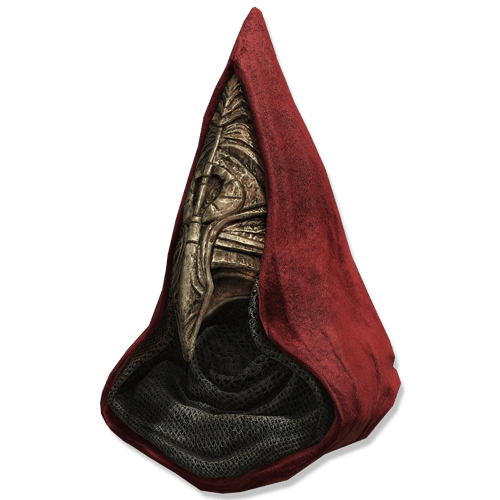
Fire Knight Helm — Best Offensive Headpiece

Fire Knight Helm — Best Offensive Headpiece

The Fire Knight Helm provides a particularly useful combination of bonuses for this build.

It increases maximum HP, Stamina, and Equip Load while also increasing Strength and Dexterity, giving you several useful benefits from a single armor slot.

The additional Equip Load can help you wear heavier armor alongside the Blasphemous Blade while remaining at Medium Load.

Location: Dropped by Fire Knights in Shadow Keep.

Solitude Set — Best Defensive Option

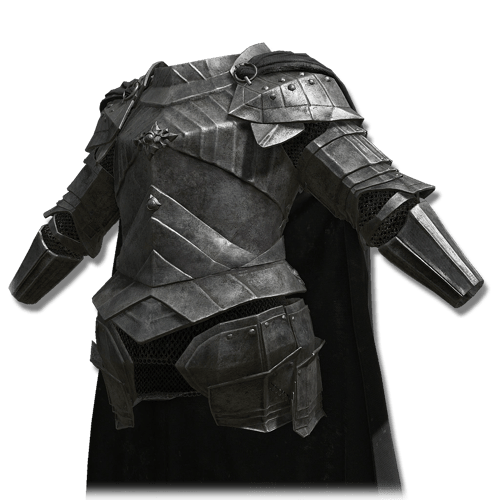
Solitude Set

The Solitude Set provides excellent defenses and very high Poise, making it a strong choice for players who want a more durable Blasphemous Blade setup.

This works particularly well with the weapon's natural healing. High Damage Negation reduces the amount of HP you lose when trading attacks, while Taker's Flames can restore HP afterward.

The complete set is extremely heavy, so you may need additional Endurance or an Equip Load Talisman to maintain Medium Load. Mixing individual Solitude pieces with lighter armor is often more practical.

Location: Dropped by the Blackgaol Knight in the Western Nameless Mausoleum in Gravesite Plain.

High-Poise Mixed Armor — Best General Setup

For most players, a mixed armor setup is the easiest and most flexible choice.

Prioritize enough defense and Poise to comfortably survive close-range combat while keeping your Equip Load below 70% for Medium Roll.

Because the Blasphemous Blade already provides exceptional sustain, increasing your effective survivability through heavier armor can make the build extremely difficult to kill.

If you want additional damage, replace individual defensive pieces with Rakshasa pieces while maintaining a comfortable amount of protection.

Choosing Your Armor

For maximum damage:

  • Rakshasa Set

For a balanced offensive setup:

  • Fire Knight Helm + Rakshasa or defensive armor pieces

For maximum survivability:

  • Solitude Set or high-Poise mixed armor

For general progression:

  • Use the strongest defensive armor available while maintaining Medium Equip Load

Armor is ultimately much less important to this build than your weapon, Talismans, and Faith investment. Don't sacrifice several levels or an important Talisman slot simply to force a particular complete armor set.

Maintaining Medium Equip Load while achieving comfortable defense and Poise should remain the priority.

Blasphemous Blade Playstyle Tips

The Blasphemous Blade is powerful enough to carry an entire build, but getting the most out of it requires more than repeatedly casting Taker's Flames. The weapon combines strong melee damage, ranged Fire damage, healing, and Faith-based buffs, allowing you to adjust your approach depending on the encounter.

Buff Before Difficult Encounters

Before bosses and other dangerous fights, use Golden Vow followed by Flame, Grant Me Strength.

Golden Vow provides a longer-lasting increase to both damage and defense, while Flame, Grant Me Strength further increases the Physical and Fire damage that the Blasphemous Blade relies on.

You don't need to repeat this process against every normal enemy. Save your buffs and FP for encounters where the additional damage actually matters.

Create an Opening Before Using Taker's Flames

Taker's Flames has excellent range and damage, but the startup animation leaves you vulnerable.

Avoid casting it directly in front of an aggressive enemy unless you know you have enough time. Instead, use it after large enemy attacks, stance breaks, knockdowns, or whenever you have created sufficient distance.

The healing only helps if the attack actually connects.

Use Taker's Flames to Recover HP

One of the biggest advantages of Taker's Flames is that offense and healing happen simultaneously.

If you take damage during a fight, look for a safe opportunity to land the Skill rather than immediately consuming a Crimson Flask. A successful Taker's Flames can damage the boss while restoring a significant amount of HP.

This can preserve your Crimson Flasks for emergencies and makes the build extremely sustainable during long encounters.

Take Advantage of Passive Healing

The Blasphemous Blade restores HP whenever an enemy dies nearby while the weapon is equipped.

This makes it particularly effective during exploration, where groups of weaker enemies can continuously replenish your health.

You don't need to kill enemies directly with the sword to receive this healing, allowing Spirit Ashes, Incantations, environmental damage, and other sources of damage to trigger the effect as well.

Don't Waste FP on Weak Enemies

Taker's Flames is extremely powerful, but normal Greatsword attacks cost no FP.

Against weaker enemies, use your regular attacks and save Taker's Flames for groups, dangerous targets, ranged enemies, or situations where you need healing.

This greatly improves FP efficiency during exploration and reduces your dependence on Cerulean Flasks.

Use the Greatsword Moveset

The Blasphemous Blade is still a powerful Greatsword even without its Unique Skill.

Its regular attacks provide solid damage, reach, and stance pressure, while jumping and charged Heavy Attacks can help break an enemy's stance.

Against enemies that don't justify spending FP, simply fight with the weapon normally.

Use Taker's Flames Against Groups

Taker's Flames travels forward across the ground and can hit multiple enemies with a single cast.

This makes groups one of the best opportunities to use the Skill. Hitting several enemies simultaneously provides excellent AoE damage while potentially restoring a large amount of HP.

Try to position enemies in front of you before casting rather than using the Skill while surrounded.

Stack Your Damage Bonuses for Bosses

Taker's Flames can benefit from several bonuses simultaneously.

Golden Vow, Flame, Grant Me Strength, Shard of Alexander, Talisman of the Dread, and Fire Scorpion Charm can all contribute to an extremely powerful Skill-focused setup.

You don't need every offensive bonus active during normal exploration, but stacking them before difficult bosses can dramatically increase your burst damage.

Use Ritual Sword Talisman With Your Healing

If you're using the Ritual Sword Talisman, try to return to maximum HP whenever possible.

Taker's Flames and the Blasphemous Blade's passive healing make this significantly easier than on most builds. Once you're back at full health, Ritual Sword Talisman activates again and increases your damage.

This creates a natural loop where dealing damage restores HP, and restoring HP can reactivate your damage bonus.

Don't Ignore Fire Resistance

A major portion of the build's damage comes from Fire, especially when relying heavily on Taker's Flames.

Against enemies with high Fire resistance, the Skill may perform noticeably worse than usual. In these encounters, make greater use of the Blasphemous Blade's Physical melee damage rather than continuously forcing Taker's Flames.

Your high Faith also gives you the flexibility to use alternative damage types through Incantations if necessary.

Manage Your FP

Repeatedly using Taker's Flames can drain your FP surprisingly quickly.

Keep enough Cerulean Flasks to support the Skill during boss fights and avoid spending FP unnecessarily during exploration.

If FP consumption becomes a problem, the Carian Filigreed Crest can make repeated Skill usage considerably more efficient.

Use Your Healing to Play Aggressively, Not Recklessly

The Blasphemous Blade's healing allows you to recover from trades that would be much more punishing on other builds.

That doesn't mean you should intentionally absorb every attack.

Use the healing to extend your resources and recover from mistakes, while still dodging and positioning normally. Trading an attack can occasionally be worthwhile when you know Taker's Flames will immediately restore the lost HP, but relying on this against heavy boss attacks can quickly get you killed.

One-Hand When You Need Your Seal

Keeping the Blasphemous Blade in one hand and a Sacred Seal in the other gives you immediate access to Golden Vow and your other supporting Incantations.

Two-handing becomes more useful when you're focusing on regular melee attacks, since the additional effective Strength improves the Physical side of the weapon.

Switch between the two depending on whether you currently need Incantations or stronger melee attacks.

Let the Weapon's Sustain Work for You

The biggest strength of the Blasphemous Blade isn't simply its damage. It is the combination of damage, range, crowd control, and healing in a single weapon.

During exploration, passive healing reduces Flask consumption. During boss fights, Taker's Flames allows you to recover HP while remaining offensive. Against weaker enemies, the Greatsword itself provides more than enough melee damage without consuming FP.

Use Taker's Flames when its range, damage, or healing provides an advantage; rely on regular Greatsword attacks when it doesn't, and use your Faith buffs to turn important openings into massive damage.

Table of Contents

See More Elden Ring

Elden Ring Arcane Build - Stats, Weapons, Skills & More
Updated on Aug 23, 2026
Elden Ring Blasphemous Blade Build - Stats, Weapons, Skills & More
Updated on Aug 23, 2026
Elden Ring Spellblade Build - Stats, Weapons, Skills & More
Updated on Aug 23, 2026
Elden Ring Moonveil Build - Stats, Weapons, Skills & More
Updated on Aug 23, 2026
Elden Ring Dexterity Build - Stats, Weapons, Skills & More
Updated on Aug 22, 2026

Like our guides?

Add Mobalytics as a preferred source on Google!