menu
MobalyticsUse your favourite features in-game with our Desktop App
Nightreign Build

Libra Expedition Revenant Build

presentationRevenant
Updated on Jul 2, 2025
Jul 2, 2025

Intro

In this Elden Ring build guide, we’ll cover the best equipment and tactics to take on Libra as the Revenant.

Libra is one of the most complex and punishing bosses in the game. He can summon sigils that explode or fire projectiles, inflict Madness and Enrage, dash unpredictably, teleport, trigger madness eruptions, and, if allowed to enter his second phase, transform the entire arena into a chaotic nightmare.

Despite how overwhelming he may seem, Libra has several exploitable weaknesses: Madness, Holy, and Fire damage are all highly effective. Defensively, you’ll need to stack Holy resistance and boost your Madness resistance to survive the relentless pressure.

As the Revenant, your role is to stay nimble and alive. Let your summons draw Libra’s attention while you strike from a safe distance. Be deliberate; casting recklessly can leave you locked in animations just long enough for Libra to plant a sigil under your feet. One misstep, and you're likely dead.

Equipment Loadout

Armaments

While the Revenant shares S-scaling in Faith with the Recluse, her lower FP pool and inability to replenish it through affinity pickups make managing your resources far more important. Even so, your primary damage will still come from a seal with strong Incant scaling and a reliable offensive spell. Keep a secondary seal on hand for team buffs or status effects, and be sure to carry a backup weapon for when your FP runs dry.

You won’t always get a great secondary spell, but certain catalysts consistently offer excellent scaling and come with high-performing, efficient spells that are especially effective against Libra.

Seal

If one of these isn’t available, prioritize upgrading any seal that includes one of those key spells.

Spell

  • Frenzied Burst
  • Scouring Black Flame
  • Catch Flame (only if you’re comfortable with melee)
  • Whirl O Flame!
  • Giantsflame Take Thee
  • Frozen Lightning Spear
  • Lightning Strike
  • Honed Bolt
  • Stone Of Gurranq

Support spells can also make a big difference, just remember that body buffs don’t stack. Focus on healing and aura-based buffs, which boost both your summons and teammates and offer strong value in team fights.

Healing

  • Blessing Of The Erdtree
  • Blessing's Boon
  • Erdtree Heal
  • Bestial Vitality

Buffs

  • Golden Vow
  • Lord's Divine Fortification
  • Black Flame's Protection
  • Howl Of Shabriri

Debuffs

  • Greyoll's Roar
  • Rotten Breath
  • Scarlet Aeonia
  • Poison Mist

When your FP is depleted, switch to a physical weapon to stay in the fight.

Weapon

If you can’t get your hands on the Serpent Bow or Black Bow, any bow will do, but those two remain top picks thanks to their status output and damage.

A bow will also allow you to destroy Libra’s sigils much more quickly, especially once they start spawning in the air.

A reliable fallback is the Revenant’s starting weapon. With the right relics, you can infuse it with Frost, Bleed, or Poison, giving you a versatile tool that performs well even in low-luck runs where high-end gear doesn’t appear.

Talismans

  • Ritual Shield Talisman
  • Radagon Icon
  • Green Turtle Talisman
  • Haligdrake Talisman
  • Ritual Sword Talisman
  • Faithful's Canvas Talisman
  • Godfrey Icon
  • Dragoncrest Shield Talisman
  • Holy/Fire/Lightning Scorpion Charm
  • Primal Glintstone Blade

Consumables

Starlight Shards are absolutely vital for the Revenant; they’re the most reliable way to restore FP in boss fights, which is crucial given her limited pool and lack of natural regeneration.

Warming Stones are also essential, providing clutch healing support when your flasks run out or when repositioning makes flasking dangerous.

Be sure to check at least one merchant in Limveld. Their inventories are shared, and they occasionally stock powerful items like Wending Grace for 10,000 runes. These grant you a second chance if your entire team goes down during a Night Boss or Lord encounter.

Armoatics

  • Uplifting Aromatic
  • Bloodboil Aromatic

Flask

  • Opaline Bubbletear
  • Holy/Flame/Lightning Shrouding Cracked Tear 
  • Cerulean Crystal Tear
  • Greenburst Crystal Tear
  • Crimsonburst Crystal Tear

Food

  • Clarifying Boluses
  • Pickled Turtle Neck
  • Boiled Crab
  • Boiled Prawn

Throwing

  • Rot Pot
  • Poison Pot
  • Fetid Pot
  • Freezing Pot
  • Poisonbone Dart

Dormant Powers, Passives, and Relics

Dormant Powers

  • Wending Grace
  • Reduced FP Consumption
  • FP Restoration upon Successive Attacks
  • Reduced FP Consumption
  • Area of Darkness Conceals Caster While Walking
  • Improved Stamina Recovery
  • Improved Dodging
  • Improved Holy Damage Negation
  • Ice Storm Surge Sprint
  • Improved Ultimate Art Gauge Charge Speed
  • Increased Maximum FP
  • More Runes From Defeated Enemies
  • Rune of the Strong

Relics

You’ll want to complete the Revenant’s Remembrance Quests to unlock her most powerful relics: the Old Portrait (blue) and the Small Makeup Brush (blue), which grant:

Old Portrait:

  • [Revenant] Trigger ghostflame explosion during Ultimate Art activation
  • [Revenant] Expend own HP to fully heal nearby allies when activating Art
  • Defeating enemies fills more of the Art gauge

Small Makeup Brush:

  • [Revenant] Power up while fighting alongside family
  • Increased rune acquisition for self and allies

Other relic effects to prioritize include:

  • Attack power permanently increased for each evergaol prisoner defeated
  • Increase rune acquisition for self and allies
  • Stonesword Key in possession at start of expedition
  • Attack power up when facing frostbite-afflicted enemy
  • Nearby Frostbite Conceals Self
  • [Revenant] Strengthens family and allies when Ultimate Art is activated
  • Holy/Fire/Lightning Attack Power Up
  • Ultimate Art Gauge+
  • Attacks Inflict Frost
  • Attacks Inflict Poison
  • Attacks Inflict Blood Loss
  • Flask Also Heals Allies
  • Max FP permanently increased after releasing Sorcerer's Rise mechanism
  • Max FP Up with 3+ Sacred Seals Equipped

Weapon Passives

  • Improved Spell Casting Speed (+30)
  • Dmg Negation Up While Casting Spells (+30%)
  • Improved Damage Negation at Full HP (+40%)
  • Reduced Spell FP Cost (+20%)
  • Improved Holy Damage Negation (+16%)
  • FP Restoration Upon Attacks (+2)
  • Improved Attack Power at Full HP (+14%)
  • Less Likely to Be Targeted
  • Attack Up when Wielding Two Armaments (+7%)
  • Improved Charged Incantation (+9%)
  • Improved Incantations (+8%)
  • Improved Holy/Fire/Lightning Attack Power
Frenzied BurstSpell
Scouring Black FlameSpell
Catch FlameSpell
Whirl O Flame!Spell
Serpent BowBow • Lvl Required 7
Black BowBow • Lvl Required 7
Revenant's Cursed ClawClaw • Lvl Required 1
Ritual Shield TalismanTalismans
Radagon IconTalismans
Green Turtle TalismanTalismans
Uplifting AromaticConsumables
Opaline BubbletearConsumables
Clarifying BolusesConsumables
Rot PotConsumables
Wending GraceDormant Powers
Reduced FP ConsumptionDormant Powers
FP Restoration upon Successive AttacksDormant Powers
Improved Sorceries & IncantationsDormant Powers
Improved Spell Casting Speed (+30)Weapon Passive
Dmg Negation Up While Casting Spells (+30%)Weapon Passive
Improved Damage Negation at Full HP (+40%)Weapon Passive
Reduced Spell FP Cost (24%)Weapon Passive
Old PortraitRelics
Small Makeup BrushRelics

Game Plan and Pathing

Day 1

The Revenant starts with one of the lowest health pools in the game, making it essential to stick close to your team early on to avoid unnecessary deaths. A clean, efficient Day 1 path is crucial; every death costs precious time you can’t afford to waste.

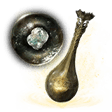
Your top priority is leveling up quickly and stopping at every church you can to increase your flask charges. Open the map overview and mark locations with guaranteed sacred seal drops. Prioritize sites with Madness, Holy, Fire, Frost, Rot, Bleed, or Poison affinities, in that order, as these deal the most damage to Libra.

If you selected the relic effect “Attack power permanently increased for each Evergaol prisoner defeated,” then be sure to clear every cathedral and Evergaol you can. Each cathedral guarantees a Stonesword Key in its chest, making it the most consistent way to unlock more Evergaols.

Similarly, if you took the “Max FP permanently increased after releasing Sorcerer's Rise mechanism” effect, try to clear a few Rise locations if they’re not too far off your route.

Once you’ve picked up a solid seal and hit at least level 4, head for the central castle. Start in the basement, there’s only one boss to deal with, and beating it rewards you with a boss drop and a guaranteed talisman from the chest behind it. If you have time, level up at a nearby grace and continue climbing the castle for extra runes.

Equip any weapon with a useful passive as soon as you find it. To save time, scoop up all gear as you move and sort through it between locations.

Day 2

At this stage, you should be properly geared and leveled to begin tackling the tougher zones across Limveld. If you’ve selected the Evergaol relic, aim to clear at least two more Evergaols today, especially if they’re close to your current path. The passive bonus stacks for each Evergaol and will pay off quickly.

If a Shifting Earth is active, make it your main objective for the rest of the day. These zones are packed with enemies and high-tier loot, and can easily push you to level 15 by the end. If a field boss happens to be nearby on your route, it’s worth the short detour; they often drop major upgrades that will help you clear the area faster.

If there’s no Shifting Earth event, then redirect your focus toward hunting field bosses. Many will have spawned by now, and they offer the best odds for rare gear and significant rune rewards. Still haven’t cleared the central castle? This is the perfect opportunity. With your improved stats and equipment, both the basement and rooftop bosses should be much easier to handle.

After you’ve dealt with the Night Boss, you can continue farming nearby areas if you still feel underleveled. Zone damage is low at this point, so you can grind without much risk of being overwhelmed.

Day 3

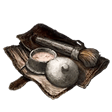
Once you arrive, spend any leftover runes to level up, then stock up on any final upgrades or consumables from the merchant. Ditch any unused keys or upgrade materials; they won’t help in the final battle. Instead, prioritize items you’ll actually use in combat.

Buy Starlight Shards: these are essential for the Revenant. With her limited FP pool and no way to regenerate it passively, Shards give you the breathing room to cast longer and harder. Even one or two can be the difference between a win and a wipe, so spend whatever you’ve got left to grab them.

Choosing Your Deal, when the fight begins and you’re offered a deal, consider the following:

“I wish for eventual greatness”

  • Temporarily reduces HP, FP, and Stamina by 30% for 2 minutes. Once it expires, all three stats gain a permanent +20% boost based on their original values. Risky early, but worth it long-term.

“I want resistance to ailments”

  • Grants +150 to all resistances, including Madness, in exchange for a 10% Stamina reduction. The Stamina hit is manageable and well worth the defensive payoff, especially in this fight.

Additional Tips

  • Stay at max casting range to avoid damage and reduce the chance of pulling aggro.
  • Keep your distance from Libra whenever possible; getting too close puts you at risk of his heavy-hitting attacks, with little to gain in return.
  • Watch the ground for the glowing sigils he summons. These are proximity-triggered traps that explode on contact and can easily kill you if you’re not paying attention.
  • When Libra becomes enraged and charges, roll backwards with precise timing to avoid the impact. After dodging, reposition just behind and slightly to his right; this angle provides the safest positioning, allowing you to sidestep most of his follow-up swings and bypass his charge entirely.
  • Whatever you do, don’t allow him to reach phase two. If he transitions, the arena becomes saturated with homing projectiles and explosive AOE effects that are extremely hard to avoid and often lethal. The key is to manage his sigils and burst windows before he gets the chance to escalate.
  • If a teammate goes down, lock on before casting a spell at them. This increases your accuracy and makes the process faster and more reliable under pressure.
  • Be disciplined with your casts. One greedy or mistimed spell is enough to get you killed.
  • When FP runs dry, switch to your backup weapon and play cautiously. If it’s melee, only strike during clear, punishable windows, ideally when the boss is locked into a recovery animation. The Revenant’s low HP doesn’t leave room for errors.

Ultimate Usage – Very Important:

  • Only use your Ultimate to revive teammates. It instantly revives any downed ally (even at 3 bars) and grants them brief immortality to avoid an immediate follow-up death.
  • This is especially critical since revived allies return with reduced HP by default, unless you’ve got the relic that heals them at the cost of your own life. Time your revive carefully to prevent a wipe.

Table of Contents

Explore Other Builds

Gnoster Expedition Ironeye Build
Updated on Nov 13, 2025
Gnoster Expedition Recluse Build
Updated on Jul 10, 2025
Recluse Best Relics for Every Nightlord
Updated on Jul 4, 2025
Libra Expedition Revenant Build
Updated on Jul 2, 2025
Libra Expedition Guardian Build
Updated on Jul 2, 2025