Day 1
Ironeye starts out with a relatively low health pool, so be cautious early on, maintain your distance and use your dash defensively. Each death costs you precious time, and early setbacks can derail your entire run.
Stick with your team and play smart. As a ranged fighter, you’re safest holding the backline. This not only keeps you alive, but also gives you a clear view of the map so you can help guide your group’s routing.
Your priorities on Day 1 are simple: level up quickly, secure a strong weapon, and visit every church you come across to increase your flask charges.
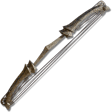
Open the map overview to locate guaranteed bow drops. Prioritize areas with Fire, Frost, Rot, or Bleed effects, in that order, as these will deal the most effective damage against Gnoster.
If you’ve chosen the relic that boosts your attack power permanently for each Evergaol prisoner defeated, you’ll want to make clearing cathedrals and Evergaols a top priority. Each cathedral chest includes a guaranteed  Stonesword Key which makes it easy to unlock more Evergaols and stack the relic’s bonus early. Try to clear at least two today, more if they’re conveniently located.
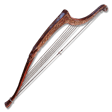
If you’re running relics that alter your base bow, make it a point to raid a nearby cave and find a merchant to upgrade it to Epic quality as soon as possible.
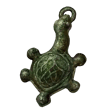
Be sure to check at least one merchant in Limveld. Since inventories are shared, finding one gives you access to nearly everything. You might get lucky and snag a rare item like a  Wending Grace, which grants you a second life if your team wipes during a Night Boss or Lord fight. Settlements are also worth a visit as their merchants always carry rare talismans, consumables, and useful weapons.
Once you have a reliable bow and have hit level 4 or higher, head for the central castle. Start from the basement; there’s just one boss, and defeating it nets you a solid drop and a guaranteed talisman from the chest beyond. If time allows, rest at a nearby grace and work your way through the upper levels to farm additional runes.
As soon as you find a weapon with a strong passive effect, equip it. Don’t waste time sifting through gear on the spot, grab everything and sort your inventory while you’re en route to your next location.
Day 2
By this point, you should be well-prepared, both in gear and levels, to start clearing the more demanding regions of Limveld.
If you’re using the Evergaol relic, make it a goal to complete at least two more Evergaols today, especially if they’re not far from your planned path. Each one stacks your passive bonus and can significantly increase your damage output.
Should a Shifting Earth event be active, prioritize it above all else. These zones are packed with high-value loot and dense enemy spawns, making them ideal for farming and reliably pushing your level to 15 by the end of the day. If a field boss is nearby, it’s well worth the detour; taking it down could reward you with a major upgrade that makes the rest of the zone much easier.
If there’s no Shifting Earth, shift your focus to hunting field bosses. With many now populating the map, they’re your best shot at quickly collecting rare equipment and racking up a significant rune reserve.
If the central castle remains uncleared, now is the perfect opportunity to tackle it. The bosses in the basement and on the rooftop are far more manageable with your current loadout, and each guarantees rewards that are too good to pass up.
Once the Night Boss is dealt with, don’t hesitate to farm nearby areas if you feel slightly underpowered. Environmental hazards are low at this stage, and the abundance of grace points and flask charges nearby makes it easy to farm safely and efficiently.
Day 3
Once you arrive, make a quick stop at the merchant to check for any rare items, then use your leftover runes to grab a final level or two.
Ditch any unused upgrade materials or keys as they won’t do you any good in the final encounter. Instead, prioritize consumables you’ll actively rely on, like healing items, damage boosters, or utility tools.
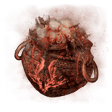
If your team includes a Revenant and you’ve got extra runes, pick up some  Starlight Shards for them. Their limited FP pool makes every extra cast count, and even a couple of shards can be the difference between a clean win and a total wipe.