Day 1
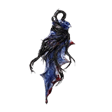
The Revenant begins with one of the lowest health pools in the game, so it's crucial to stick with your team early on to avoid deaths. A clean and efficient Day 1 route is critical; every death wastes precious time you can’t afford to lose.
Your first priority is to gain as many levels as possible and stop at every church possible to increase your flask charges.
Use the map overview to mark guaranteed sacred seal drops. Prioritize locations with lightning, frost, rot, bleed, or poison affinities, in that order, as they’re most effective against Fulghor. Avoid holy camps entirely, as Fulghor is highly resistant to holy damage.
If you’ve taken the Improve Dragon Cult Incantations relic effect, aim for lightning affinity locations with seals to maximize your chances of getting value out of it. Likewise, if you selected the Max FP permanently increased after releasing Sorcerer's Rise mechanism effect, be sure to clear a few Rise locations if they’re not too far out of your way.
Once you have a decent seal and reached at least level 4, make your way to the central castle. Start from the basement, which only contains one boss. Defeating it earns you both a boss drop and a guaranteed talisman from the chest behind it. If time permits, level up at a nearby grace and continue upward through the castle to farm additional runes.
Equip any weapon with a useful passive as soon as possible. To save time, grab everything you find and sort through it while traveling to the next location.
Day 2
By now, you should be well-equipped and leveled enough to start tackling the more demanding areas in Limveld.
If a Shifting Earth event is active, head there first; it’s the most rewarding zone available. Between the high-value loot and sheer number of enemies, you can reliably push to level 15 by the end. If a field boss happens to be on the path, it’s worth detouring to defeat it; there’s a good chance it’ll drop a major upgrade that will help to clear the shifting earth.
No Shifting Earth? Then focus your efforts on field bosses. With many of them spawning now, they’re your best shot at scoring rare gear and large rune hauls.
If the central castle is still uncleared, this is an ideal time to handle it. Both the basement and rooftop bosses should go down much easier now that you’re better geared and higher leveled.
Once the Night Boss is defeated, you can safely farm nearby areas if needed. The environmental damage at this point is minimal, so there’s little risk in squeezing out a few more levels before moving forward.
Day 3
Once you’ve arrived, use any leftover runes to level up, then pick up any last-minute upgrades or consumables from the merchant.
Ditch any unused upgrade materials or keys; they won’t help you in the final fight. Instead, prioritize consumables you’ll actually rely on in combat.
Buy Starlight Shards: These are absolutely essential for the Revenant. With her limited FP pool, Shards let you extend your casting window significantly. Even just one or two can make the difference between victory and a wipe, so spend whatever you have left to secure them.