League of Legends
 Teamfight Tactics
 Valorant
 Lost Ark
 Destiny 2
 Diablo 4
 Download APP
 Collapse
How to Play Against Every Valorant Agent
Valorant separates itself from other tactical shooters due to the presence of playable agents that have a wide variety of unique abilities.
Although mechanical skills like aiming and gunplay are certainly crucial in order to succeed, it’s important to adjust your play based on the different agents in your match.
In this Valorant beginner guide, we’ll be covering different mental checks to keep in mind when playing against every agent.
If you want to know who the best agents are in the current meta, check out our Valorant agent tier list!

There are some fundamental reoccurring themes like turning away from flashbangs or clearing high ground against agents with upward mobility but there are unique nuances for all of the characters.
We’ll be adding more tips over time so be sure to check back for more later!
Jump to an agent:
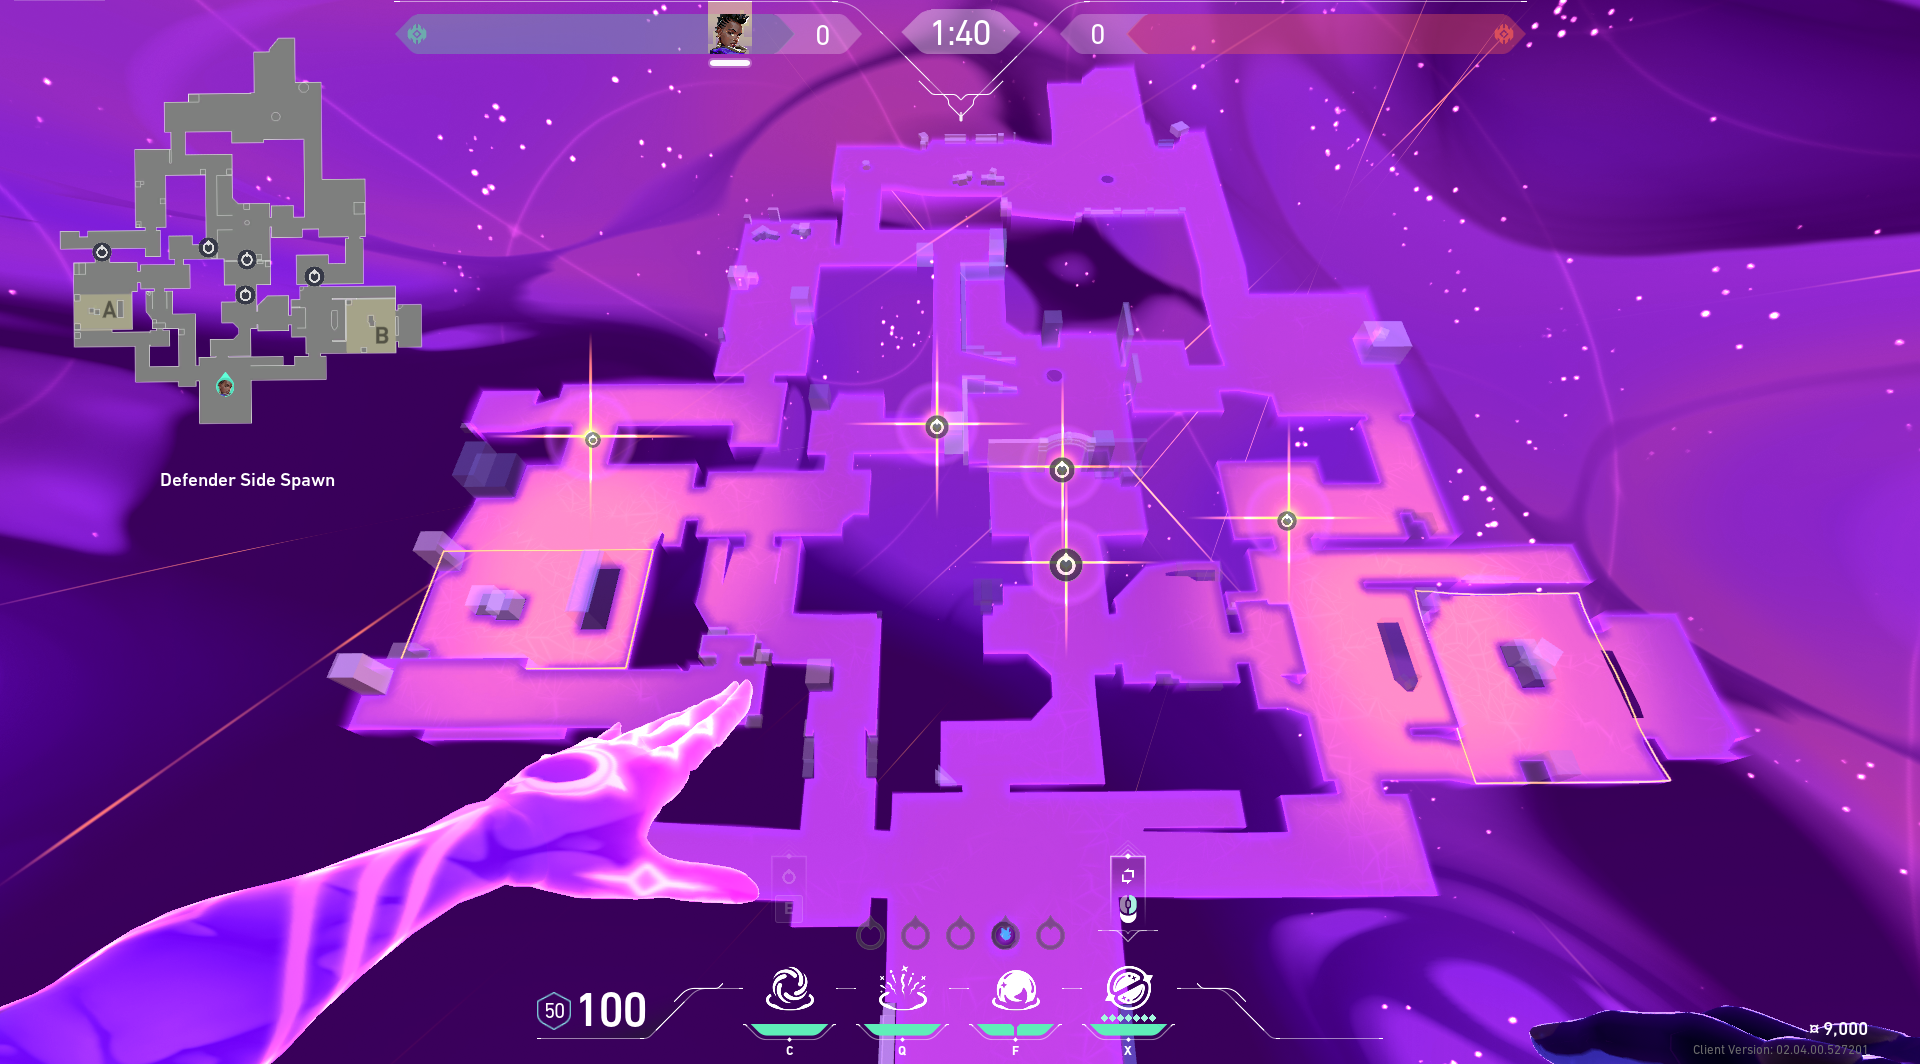
How to Play Against Astra
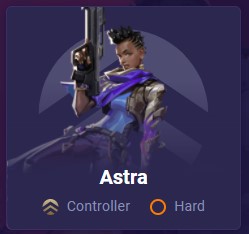
[Learn more about Astra]
Watch out for very short-lasting smokes
When Astra recalls a Star after she placed it somewhere on the map, a smoke that acts and sounds the exact same as Astra’s normal smoke, Nebula, appears where the Star was.
However, this smoke only lasts 2 seconds instead of 15 seconds.
Check out the Recall at 0:10 below:
This is easily able to trick opponents into thinking that they can comfortably hide in the smoke. But the moment the “fake smoke” fades away after 2 seconds, these players are just standing in the open, exposed to everything.
So, to be absolutely sure you have to wait at least 2 seconds after the Star is activated before you can safely approach Astra’s smoke without having to fear complete exposure shortly after.
Don’t jump to conclusions based on placed Stars
In the beginning of each round, many current Astra players just place all available Stars at spots all over the map and simply recall the ones they don’t need at a later time in the round.
In addition to that, the positioning of the Stars oftentimes doesn’t suggest the exact ability the each Star will turn into.
For example, if you wrongly assume a certain Star is going to be used as a smoke and suddenly you are pulled right into the middle of a Gravity Well, it might cost you your life and your team the round.
In summary, the position of a Star alone doesn’t reveal anything regarding the coming round and therefore you shouldn’t jump to conclusions only based on placed Stars in the beginning of the round.
Be aware of Stars while planting the Spike
Thankfully, Astra’s Gravity Well isn’t capable of dragging you away from the Spike while defusing.
Having said that, it is indeed able to pull you out of the plant zone and therefore stop you planting the Spike when placed properly.
To be fair, for that to happen the correct plant spot must be predicted by the enemy Astra and it also must be close enough to the edge of the plant zone for the Gravity Well to be able to pull you out of it.
But in theory, it is completely possible and you should at least have an eye on potential Astra Stars placed in your direct environment because in situations where the time is low it could cost you the round.
Increase the overall pace of your game
Astra is a great agent for strategically planning and anticipating certain scenarios with her utility. But when it comes to reacting to certain plays, Astra can feel a bit unwieldy.
Her Astral Form, the HUD in which you place her Stars, is everything but easy and quick to manage – even with lots of training.
Other Controllers like Omen and Brimstone are noticeably more intuitive to handle and thus a lot more responsive in that regard.
That’s why you can take a great share of her impact out of the game by simply playing at an overall higher pace because she probably is going to have problems adapting in time.
Especially in ranked matchmaking where communication generally isn’t that great, Astra players can’t really counter fast plays with such a lack of information.
How to Play Against Breach

[Learn more about Breach]
Respect his range and adjust your positioning
Breach’s Fault Line can stun you from very far away so consider playing at safer angles if you’re anticipating him coming to your area.
For example, if you’re defending hookah on Bind, you probably don’t want to take a forward position near the attacker’s entrance since they can stun you and then rush in to kill you.

Instead, you may want to set up behind the box, behind the window’s wall, or somewhere on site so you can take cover until the stun wears off or avoid it altogether.

This sort of positioning will also help against his other abilities. Basically the more time you have to react, the harder it will be for Breach to have his way with you.
Avoid getting hit by Rolling Thunder
Breach’s ultimate is one of the best engage tools in the game due to its long range and potent CC when it lands.
You can see his ult move across the minimap. Depending on your situation you can switch to your knife and run to the side to avoid it

If you’re hit by it, try to take cover or start pre-firing if you’re in a position that will get rushed down.
Be ready to react to his Flashpoint
Similar to playing against Phoenix, be ready to turn away or take cover to avoid being blinded.
If you’re blinded, pre-fire at the angle to try to deter attackers from approaching or do as much damage as you can before dying.
Back to top!
How to Play Against Brimstone

Use his smokes to narrow down his location
Brimstone’s smokes have a limited range so if he places them, you can use the info to predict where he is.
For example, if he smokes the garage and C Long on Haven, that’s a clear tell that he launched the smokes from that side of the map.

Switch to your knife to evade Orbital Strike
Orbital Strike deals an incredible amount of damage but does have a slight delay before dropping and it deals damage in ticks rather than an instant burst.

If you’re inside the circle, switch to your knife to increase your chances of escaping and surviving.
In most cases, Brimstone will wait until his enemies are in an enclosed space to maximize Orbital Strike’s effectiveness so keep that in mind when planning your movements.
Use Rapidfire to your advantage
Brimstone’s Stim Beacon grants all agents who enter its field a buff called Rapidfire.
Rapidfire grants benefits such as increased firing rate and being able to switch your weapons faster.
Keep in mind though that it will make your gun feel different than its usual recoil pattern and so forth so be sure to compensate for that.
Be extra cautious when approaching a placed Beacon however as its an easy way for Brimstone to get multiple kills quickly, especially if he has a heavy machine gun or SMG.
If you’re unsure of where he is, it may be better to just wait until the Beacon disappears before moving in.
Jump to reduce Incendiary’s damage
Similar to Phoenix’s Hot Hands and Viper’s Snake Bite, you can reduce the amount of damage you take from Brimstone’s Incendiary grenade by jumping as you move through it.
Back to top!
How to Play Against Cypher

Understand how to deal with his Trapwires
Cypher’s invisible Trapwires can control the flow of battle by limiting the movements of his enemies and making them think twice about approaching.
If you’re attacking against a Cypher and don’t have information on his whereabouts, be sure to approach narrow pathways with caution to avoid setting off a trap and getting stunned.
An important thing to note is that if you get close enough to a wire, it will reveal itself by sight and sound.
At this point, you have several options:
- Your most basic option is simply shooting it to destroy it. This isn’t always the best choice because it will reveal your location both by your gun’s sound and on the minimap due to the wire disappearing.
- However, if your team is rushing a site, just use this method for the sake of speed over sneakiness to maximize your push before enemy help arrives.
- You can also use abilities like Raze’s Paint Shells and Sova’s Shock Bolt to destroy the wire from afar.
- This will give you additional safety and flexibility in case Cypher or another enemy is waiting to peek.
- If the wire is placed high or low, you can jump over it or duck under it.
- You may be able to use nearby things like boxes or vases to help navigate around a wire. Be resourceful!
- A very sneaky option is to stand close to the wire and peek around it. Since the Trapwire will be displayed on the map, the enemy team may fall into a false sense of security thinking that there aren’t any enemies in the area. This can allow you to make cheeky picks.
- See the image below:
Here, the Sova waits close to the wire and kills the Cypher after they peek from behind cover.

The last thing to keep in mind is that good Cypher players will mix up the locations and placements of their wires between rounds.
Stay on your toes to be ready for mind games and adaptations.
Understand how his Spycam works
Cypher’s Spycam will remain invisible until he looks through it. You will hear a distinct noise when he activates and it will have bright lights on it.
Note that if you miss your shot while it’s revealed and it turns invisible, you can still destroy it. It isn’t indestructible.
After destroying it, Cypher can’t cast it again for another 45 seconds so use that window to your advantage.
Similar to Sova, Cypher is stationary when looking through his camera.
You may be able to find him off-guard (they’ll usually be in better hiding spots than the Cypher below though).

Lastly, did you know that the Spycam is affected by crowd control effects?
For example, Reyna’s Leer will blind the cam as if it was an agent.

It’s more of a niche thing and will only work with certain agents but it’s a good thing to have up your sleeve when looking to push a site with a Spycam.
Back to top!
How to Play Against Jett

Abuse the delay when Jett dashes
It can be daunting at first, but if a Jett dashes toward you, stay calm, it takes about one second for her to be able to pull her gun out again and fire so you have a window to kill her before she can react.
A similar delay also applies to her boost jump ability, Updraft.
Be sure to clear and expect higher angles
Speaking of Updraft, be ready to check high ground angles as good Jett players will look to engage you from creative angles.
If you’re within range, you’ll be able to hear her cast the ability so listen closely. If you hear her cast it, there’s a good chance she’ll be on top of a box or other terrain nearby.
Be careful when engaging a Jett that has a shotgun or Classic (alternate fire) as she’ll be able to fire it accurately when in the air.
Look out for sneaky Blade Storm angles
During rounds where she ults, be careful of certain angles where she can jump and use Updraft + hover to throw knives.

A common example is through the windows that are between the garage and B Site on the Ascent map.
Back to top!
How to Play Against Killjoy

You can destroy all of her abilities
All four of Killjoy’s gadget abilities can be destroyed.
Her Turret has 125 HP while her ultimate, Lockdown, has 150 HP.
Although they’re invisible, if you get close enough to Killjoy’s Alarmbot or Nanoswarm, they will be revealed similarly to Cypher’s Trapwire.

It only takes one shot to kill them (Alarmbot will take two Classic shots if it’s active and jumping towards you).
If you have agents like Raze or Sova, you can use abilities like Shock Dart and Blast Pack to destroy Killjoy’s abilities from a safe distance.
Use smokes to “blind” her Alarmbot and Turret
Killjoy’s Alarmbot and Turret rely on line of sight in order to activate.
Because of this, you can use smokes to protect yourself and walk past them without triggering their effects.
Do note that since Omen’s smoke is hollow, you will get detected by the gadgets if you walk inside of the smoke while the gadget is inside.
Smart Killjoy players may use this against you and set up traps inside the smoke so be careful and listen closely.

Other smokes that are opaque, like Jett’s, will keep the gadgets blinded when you walk through it.
Understand how to play around her ultimate
Lockdown, Killjoy’s ultimate, is incredibly powerful so it’s crucial to understand how to play around it.
The basics are that it channels for 13 seconds before detonating. Once it detonates, all enemies who are caught inside of it will be disarmed, meaning that they won’t be able to shoot, use abilities, plant/defuse the spike, and will be severely slowed.
Disarm’s effect lasts for 8 seconds which is basically an eternity in Valorant time. So how do you deal with it?
When casts Lockdown, its range will be displayed on the minimap.

The destructible device will always be at the center of the circle so it’s relatively easy to find, you just need to account for height (such as whether she plants in heaven or hell at Site on Haven).
If you have a numbers advantage, you may be able to rush in during the 13 seconds, secure the site, and destroy the device before it sets off.
If you think you’re at a disadvantage, wait or rotate elsewhere if you have time. If you don’t have time to wait or rotate, you’ll probably want to save (obviously if it’s match point you’ll have to try to make a play).
You can use agent ultimates like Sova’s Hunter’s Fury to easily destroy the ultimate as well, so consider saving it if you notice that Killjoy has her ultimate available or will have it soon (by checking the scoreboard).
Back to top!
How to Play Against Omen

Understand his hollow smokes
Omen’s smokes are hollow so be careful when entering them if they’ve been placed for a while.

He or one of his allies may be waiting inside so be ready to engage as you pass through it.

He can also use his smokes in combination with his teleportation abilities by tp’ing either into or out of the smokes.
Clear additional angles
Omen is the biggest trickster of all the Valorant agents due to his Shrouded Step ability.
It’s a short-range teleport that allows him to sneak around the map into areas relatively unnoticed.
The ability does have a sound cue but it reveals where he cast it from, not where he is teleporting to.
Because of this, you’ll have to clear additional areas that you wouldn’t normally clear against other agents.
For example, at the beginning of a round when attacking Split’s B site, you will need to check this corner cubby.

Otherwise, your team can get severely blindsided as seen in this clip here.
Lastly, Shrouded Step also allows Omen to have upward mobility.

So similar to playing against Jett and Raze, you’ll need to check higher angles as well.
Understand how to play around From the Shadows
Omen’s ultimate, From the Shadows, allows him to teleport anywhere on the map.
It has a very loud sound queue when he lands so you may be able to hunt him down if he’s flanking your team from your spawn or you may even catch him as he’s manifesting into form.
If you kill him as he manifests, he will teleport back to his original location. He also has the ability to cancel the teleport before manifesting if he realizes that he’ll be in danger.
So if you see him teleporting to a location, do your best to hide so he thinks it’s safe and then kill him after he’s completed the teleportation.

When defending against an Omen that has his ultimate available, be careful not to fully rotate your whole team to defend a site.
This is because it’s a common tactic for an Omen to teleport across to the opposite site with the spike and plant there.
During these sorts of rounds, consider keeping a defender at least halfway across the map like a safety in football so they can quickly rotate back if needed.
Back to top!
How to Play Against Phoenix

Be prepared to avoid Curveball
Phoenix’s flashbang, Curveball, comes out very quickly but you can avoid it by turning away or taking cover when you hear him throw it.
If you’re blinded and hear enemies immediately approaching, do your best to fire at the angle they’ll be entering from.
You may be able to delay them long enough to get your vision back or deal some damage before you die.
Punish him for healing
Phoenix can use his Blaze or Hot Hands to heal himself but it’s hard for him to do so in an inconspicuous way due to how large their effects can be.

Consider blind firing through his Blaze wall or trying to wallbang if you see his Hot Hands flames seeping out from behind cover.
You may be able to limit how much he heals by dealing damage or even killing him this way.
As always, just be sure to weigh whether it’s worth potentially revealing your location before making the attempt.
Jump to reduce the damage from Hot Hands
Similar to Brimstone’s Incendiary or Viper’s Snake Bite, you can decrease the amount of damage dealt by Hot Hand by jumping through or out of it.
Play around Run It Back
Phoenix’s ultimate, Run It Back, can be a scary thing to face as it allows him to play very aggressively.
The ult has an indicator of where he’ll return to so if you’re flanking or lurking, you may have the opportunity to kill him after its duration ends and he is brought back to the starting point.
Another option is to simply hide until the ability’s duration completes.
Similar to Raze or Reyna, you can track this by keeping an eye on the green indicator behind his icon at the top of the screen.

Back to top!
How to Play Against Raze

Expect unusual mobility and unique angles
Raze has explosive mobility with the help of her Blast Packs. Here’s a quick look at Flights, one of the Raze players who’s leading the way for developing and optimizing her movement options.
Be sure to listen closely for the sound cues and try to catch her in the air since she won’t be able to fire accurately.
She can use her Blast Packs to move quickly both horizontally and vertically so be sure to check high ground angles like you would against Jett and Omen.

The last thing to note about Blast Pack is that it can also be used to boost her Boom Bot over terrain.
It’s a rarer option but it’s definitely something to keep in mind.
Be ready for Boom Bot entries
Speaking of Boom Bot, although it’s loud and predictable, it’s an incredibly useful tool for helping her team push.
If you hear it coming, you should expect enemies to be following closely behind like you would with Sova’s Drone Owl so plan accordingly.
Play patiently until she uses her abilities
Raze thrives in chaotic situations and can punish rushes so consider playing patiently until she uses her Paint Shells and Boombot.

She will often use these abilities in common choke points so look to bait her into using them before you approach.
Play around Showstopper
Showstopper can be one of the most frustrating ultimates to play against due to the amount of instant killing power it provides.
If you hear her pull it out, consider hiding until its duration ends. Similar to Phoenix’s ultimate, you’ll see a green indicator behind her agent icon at the top of your screen during the ult’s duration.

In situations where you don’t have time to hide, you and your allies should try to spread out to prevent her from getting more than one kill.
Back to top!
How to Play Against Reyna

Understand Leer’s health
Reyna’s Leer can be destroyed but it is tankier than you’d think.
According to Redditor, limelego who tested Leer against different guns, here are some references:
- Operator: 1 shot
- Sheriff: 2 shots
- Phantom/Vandal (at most ranges): 3 shots
- Ghost: 4 shots
Use this knowledge when making the decision between trying to kill it or hiding until it disappears.
Waste her utility
Reyna’s Leer is her only form of utility so be sure to count how many she uses per round and use that to your advantage. You’ll see it on the map as a large circle.

This is her only way of delaying off a push on defense so if you successfully force her to use both of her charges, she’ll be a liability compared to other agents.
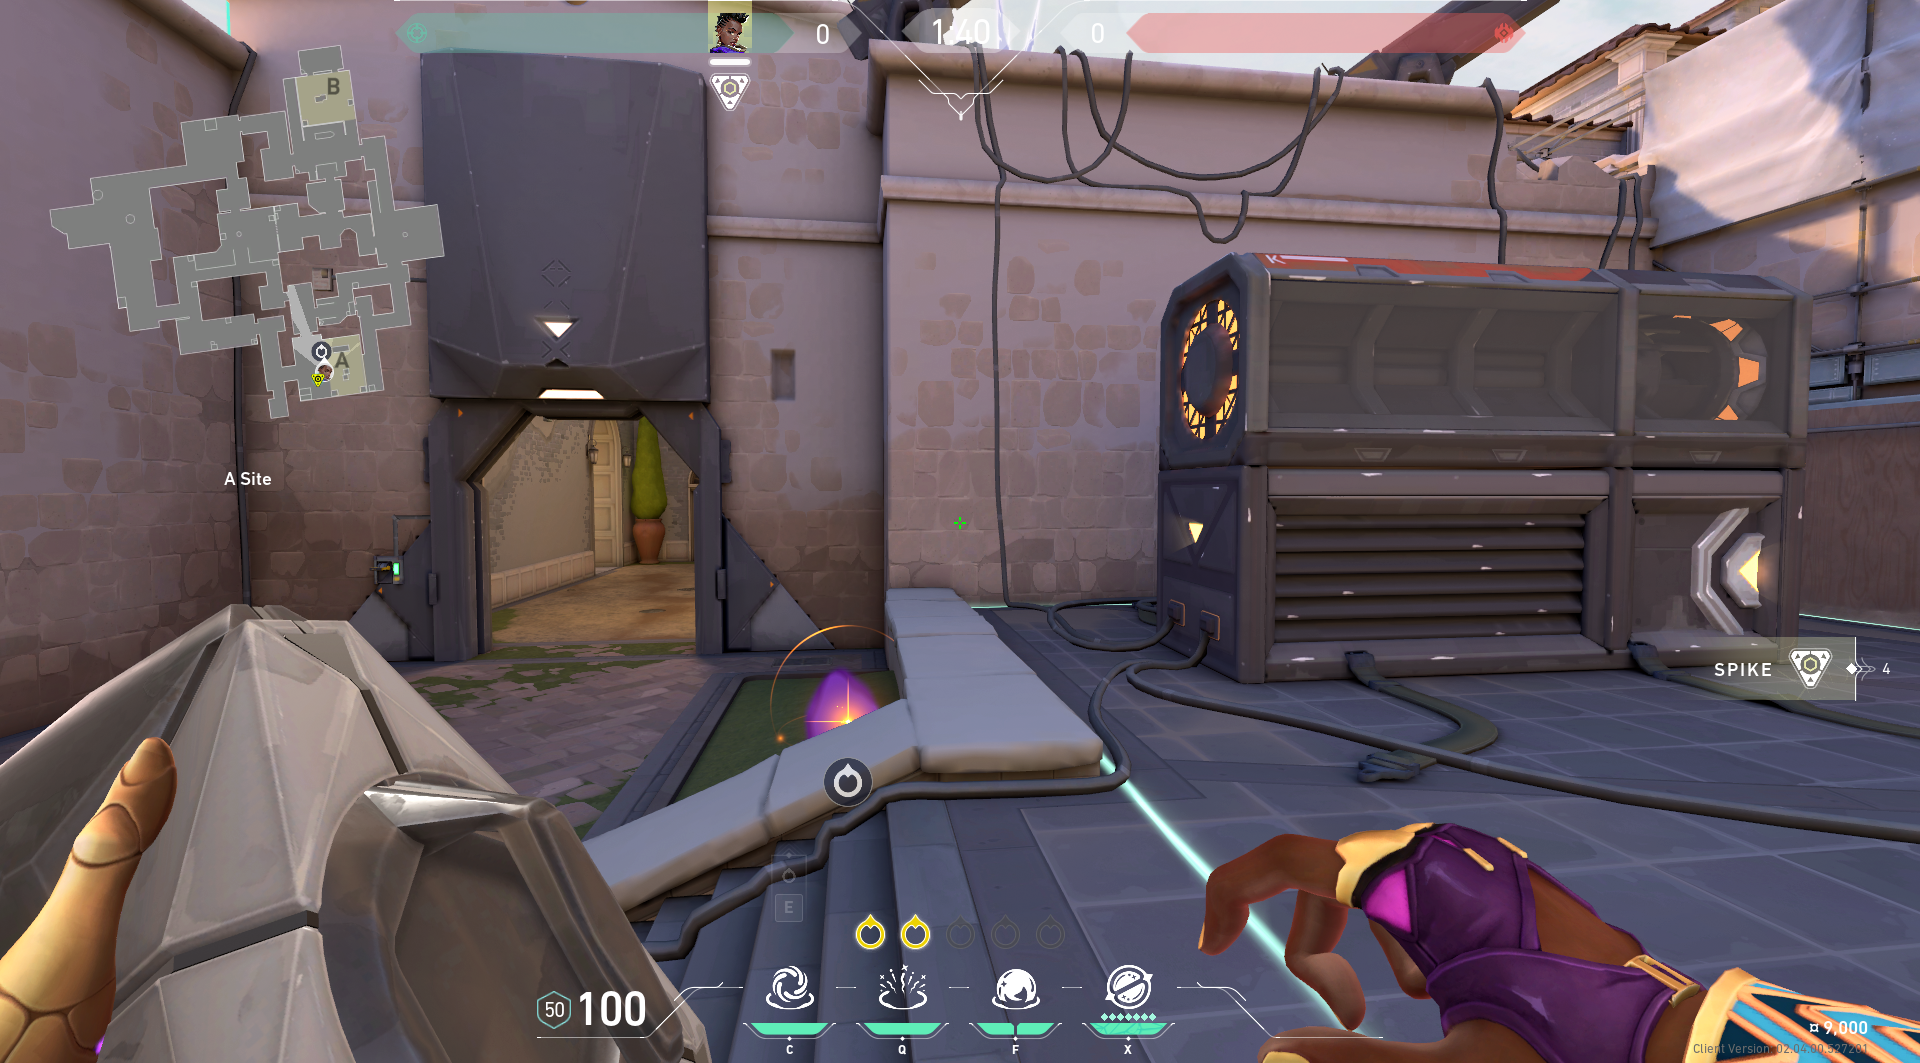
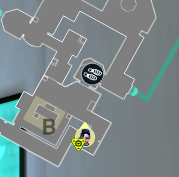
Track her location when she Devours
If Reyna uses Devour, it will connect to her with a tether. Use that to your advantage to either kill her or keep tabs on her general location.
For example, in the image below, we can see that she’s somewhere near the stairs and market on Ascent.

Keep in mind that this tether range can be very far and stretch across the map.

Don’t panic when Empress is activated
When ulting, Reyna can turn invisible after getting a kill. This invisibility lasts around 2 seconds but she can cancel it early.
In most cases, she will try to swing left or right so if you’re alone you might have to take a 50/50 decision and try to kill her when she manifests.
If she’s very close to you before she turns invisible, she’ll likely try to go behind you.
If you’re with your allies, try to avoid stacking up so she can’t kill multiple people with the same angle and look to make the trade as she reappears.
You can also try to hide from Reyna until her ultimate’s duration has ended, especially if she uses it early on in the round.

Similar to Phoenix, and Raze, you’ll be able to see when her ultimate is activated due to the green indicator behind her icon.
Back to top!
How to Play Against Sage

Understand how to deal with her wall
Sage’s infamous Barrier Orb wall can be annoying to deal with but there are definitely options to deal with it outside of knifing it.
When you want to play aggressively, use an Ares or Odin to melt through it incredibly quickly.
 If you have a Raze on your team, her Blastpack and Paint Shells can destroy it easily as well.
During matches where you have your own Sage, consider boosting your team up and over it.

Another underrated option is to simply wait near the wall until it disappears on its own, especially if Sage used it early in the round.
This can take enemies by surprise since they’ll have a slight sense of security while the wall is up and may not have that many team members in the area.
Be ready for a Sage to peek from high ground or on top her wall
We may sound like a broken record at this point if you’ve been reading all the other agents, but be ready to clear high ground angles when you’re playing against a team with Sage.
It’s slightly different than Jett, Omen, and Raze since the wall isn’t as sneaky as the options these agents have but it does have its advantages.
For example, she has the ability to peek in and out of cover from on top of the wall.
Doing so in places like hookah is especially common so be ready for it.

Keep track of where her allies died
When playing against a Sage that has her ultimate, try to keep in mind where different enemies were killed.

This will help you track where she is when she uses her ultimate and help your team proceed as best as possible.
There is a slight delay before the agent she resurrected can act, so if you’re quick and within range, you may be able to get a kill or two with abilities like Brimstone’s Orbital Strike or Raze’s Showstopper.
Walk through her slow
Running through Sage’s Slow Orb makes a lot of noise and makes you incredibly slow so it’s better to just walk through it

Doing so won’t make any sound at all so you may be able to get a pick on Sage if she’s peeking the wrong angle in some instances, such as if she was looking at catwalk instead of the angle shown above.
Back to top!
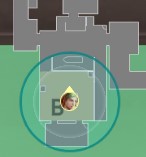
How to Play Against Skye
Watch out for enemies following her abilities
Skye’s scouting Tasmanian tiger (“Trailblazer”) and her Ultimate (“Seekers”) are both excellent to draw attention, get information, and interfere with your enemy’s crosshair placement.
That’s why oftentimes players follow up behind Skye’s abilities and benefit from the fact that enemies already are called out, distracted, or blind.
Or even all of the above. Not having to clear corners is a huge advantage when it comes to executes in Valorant.
Because of that, we advise you to not focus all of your attention on destroying or dodging Skye’s casted ability. Also watch out for enemies who could go along with her abilities.
One flash rarely comes alone
Skye has the luxury of having three very powerful flashes (“Guiding Light”) in her arsenal.
Due to that fact, you can almost always anticipate multiple flashes from where the first one comes from.
Therefore, don’t peek immediately after you retrieved your eyesight after the first suicide bird. Expect more to come and adjust your positioning accordingly.
One way to react to executes with multiple Skye flashes could be to hide out the first few seconds of the execute and peek with a delayed and noticeably better timing.
Don’t zero in on called-out HP of agents
Everybody knows this feeling:
Your teammate told you “You got this, he/she is only 10 HP” in a 1v1. And when you are confidently aiming at the enemy’s trunk instead of the head due to that call, you lose the duel.
Because he/she was healed by Skye earlier and was, in fact, not 10 HP anymore.

But there’s a lesson learned. Not zeroing in on called-out HP is a healthy attitude to have in Valorant in general, since there are several agents who can regain health for themselves or for others.
Besides Skye, there are Sage, Reyna, and Phoenix with abilities capable of doing that.
Nonetheless, remember to not take specific call-outs regarding health on enemies too seriously or as a plain fact when playing against a team including Skye.
Her healing ability (“Regrowth”) really quickly regenerates everyone in a certain radius but herself.
In summary, Skye’s health can only be slowly regenerated by Sage but everyone else’s can easily be brought back to a hundred by Skye. Keep that in mind.
Back to top!
How to Play Against Sova

Understand how to play around Owl Drone
When Sova is sending out his Owl Drone from behind cover, you can destroy the drone but consider rushing him down if you think he’s alone.
This is because he’ll be completely stationary, similar to Cypher when he’s looking through his camera and he’ll have a slight delay before he’s able to pull his gun back out.
In most cases though, the drone will likely be accompanied by a nearby ally.
Here, we see the Reyna in position to peek as the owl chases the Viper.

You can adapt to this situation by trying to hide from the drone entirely or holding the angle behind the drone to be ready to engage any enemies that are following up.
Unless you’re revealed, don’t destroy the Recon Bolt
One of Sova’s main strengths is being able to scout for his team.
If a Recon Bolt lands in your area and it doesn’t reveal you, don’t shoot it because you won’t gain anything out of doing so.
![]()
Although the Sova will have a bit of information based on where he shot the arrow, it will keep him and his team guessing more so than if you confirmed that you were in the area by destroying it.
Learn how to evade Hunter’s Fury
If Sova is targeting you with his ult, switch to your knife to increase your movement speed and your chances of dodging it.

Here you can see Jett dancing around its blast with her knife out.
![]()
If Sova is close enough to you and isolated, you may be able to run past the blast and kill him since there is some delay between him putting his bow away and bringing his gun back out.
Back to top!
How to Play Against Viper

Understand how Decay works
The toxic gas emitted by Viper’s Poison Cloud, Toxic Screen, and Viper’s Pit deal Decay damage. This means that standing inside of it will reduce your health and armor temporarily down to one health.

As soon as you exit the gas, it will quickly return to what your armor and health were before you entered it. You’d be surprised by how many players don’t understand this mechanic.
Beware one-way smokes
If you see an elevated Viper Q, proceed with caution because it will often be a one-way smoke.
This means that Viper can position herself in a way where she can see you but you can’t see her.
For example, below, she’d be able to see the legs of the attackers while they wouldn’t be able to see her due to how close they are to the smoke.

There is a delay between when she can reactivate it so just wait until it turns off before approaching if you have time.
If you don’t have time, try to lead the way with an ability like a flashbang or Raze’s Boombot.
Understand how to play around Viper’s Pit
Viper’s Pit can be one of the toughest ultimates to deal with when shes camping the spike after a plant.
Try forcing her to leave the pit with abilities like Raze’s explosives, Brimstone’s Orbital Strike, or Breach’s Rolling Thunder.
Another cool option is Reyna’s Empress since she’ll be able to see Viper and other enemies through the gas.

Jump to reduce the damage from Snake Bite
Similar to Phoenix and Brimstone, you can jump through Viper’s Snake Bite damage to reduce the amount of damage it inflicts
Back to top!
How to Play Against Yoru
Always destroy his Gatecrash if you get the chance to
Destroying Yoru’s Teleport Orb (“Gatecrash”) is almost in every situation the better choice compared to purposefully ignoring it – provided you get the chance to destroy it.
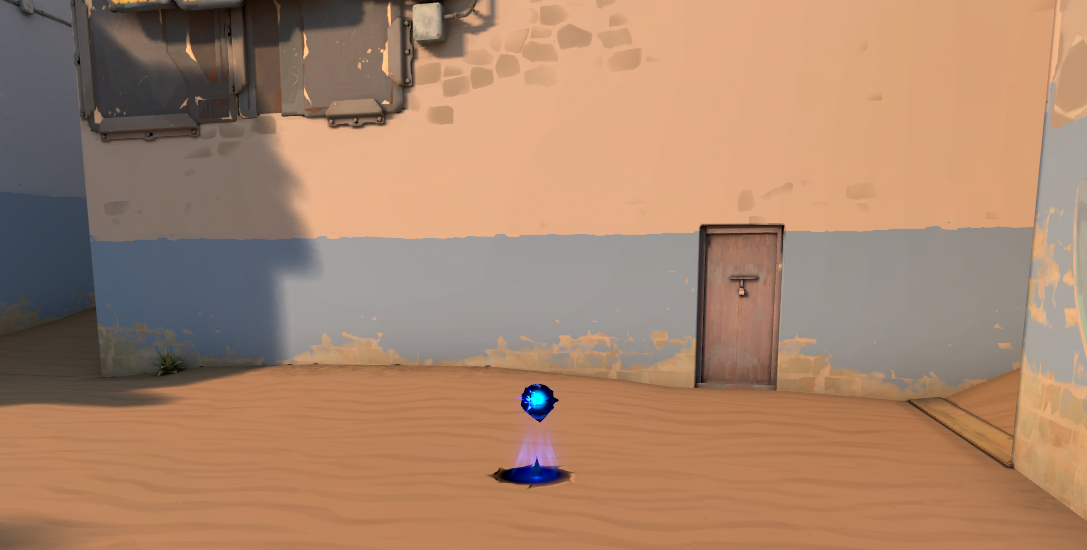
You can hear the noise Gatecrash makes from afar but actual sight on the ability is pretty limited. You have to be very close to it to be able to see it and successfully destroy it.
And even if you know exactly where Yoru’s Gatecrash is located, it’s not at all certain that he will teleport back to it in the first place.
So, just eliminate the possibility for him to benefit from it and you already made a huge impact. No need to overthink and risk anything.
Don’t weigh yourself in false security
Yoru can literally pop up anywhere at any time with both his Ultimate (“Dimensional Drift”) and his Teleport Orb (“Gatecrash”).
So, always keep a gun in your hands and be prepared to react quickly in case a wild Yoru appears out of nowhere.
Basically, expect the unexpected with this Duelist in the enemy team.
Be skeptical about steps potentially caused by Fakeout
The moment you first see a Yoru picked in the enemy team, you must not treat steps in the game equal to actual players.
With Yoru, there always is a possibility for fake steps and even misleading portal sounds in the case of the map Bind.
The other way around, don’t draw any conclusions early if you see Fakeout being used in a certain location. This alone means nothing.
There still could be five enemies following the ability or no one at all and additionally, these steps can be triggered from all around the map.
So, constantly question the plausibility of the steps you hear. If it doesn’t make any sense for the opponent to reveal their position by stepping as loud as an elephant, it is likely to be a trick of some kind.
Thanks for reading, we hope you learned something new. If you think we missed a tip, let us know in the comments below and we’ll add it to the article!