menu
MobalyticsUse your favourite features in-game with our Desktop App
PoE Build

Kinetic Fusillade Elementalist - Lolcohol

3.27 KotF
Verified
Featured
presentationWitch
presentationElementalist
Updated on Nov 25, 2025
Nov 25, 2025

Path of Building Code

Build Overview

Campaign Leveling Guide: https://mobalytics.gg/poe/profile/lolcohol/builds/kinetic-fusillade-leveling-lolcohol

This is my Kinetic Fusillade Elementalist build for PoE 3.27. This is a new Wand Skill added in Keepers of the Flame that features a really interesting and unique playstyle and scaling. If built properly, the build can have extremely fast clear and high single-target damage, but will require some knowledge and understanding of the game or at least for the user to pay close attention to the details of the build.

This isn't a beginner-friendly build but still requires a little bit of reading to understand how it functions.

Read the "How it Works" section below to understand how this skill works and how to scale it correctly.

Strengths and Weaknesses

  • Fun and Fast
  • Extremely high damage and massive scaling potential
  • VERY high single-target and strong clear
  • Comfy Leveling
  • Some maths is involved to ensure you're dealing the correct amount of damage, meaning a bit of tinkering between your APS, Duration and # of Projectiles (explained below)
  • Not beginner-friendly

Build Variants

Campaign Leveling Guide: https://mobalytics.gg/poe/profile/lolcohol/builds/kinetic-fusillade-leveling-lolcohol

You can use Kinetic Fusillade as early as Level 12, which is what I did, but the build will really start to shine once you are able to at least gain access to a 5-link and a couple of Unique items (Timeclaspand Warped Timepiece)

Equipment

Blasting Wand
Timeclasp
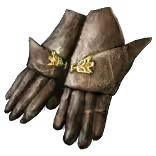
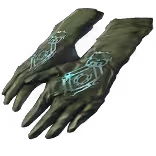
Stealth Gloves
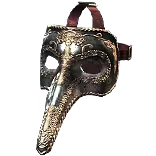
Jester Mask
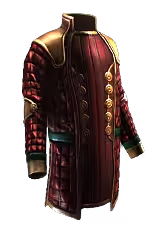
Sanguine Raiment
Cloth Belt
Warped Timepiece
Ruby Ring
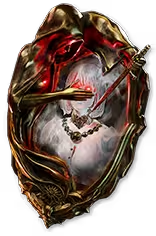
The Ghastly Theatre
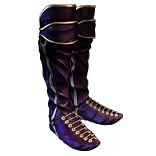
Sorcerer Boots
Jolting Eshgraft
Storming Eshgraft
Diamond Flask
Divine Life Flask
Sulphur Flask
Quicksilver Flask
Jade Flask
Hypnotic Prism
Morbid Call
Oblivion Glisten
Spirit Essence

The gear in this early Maps setup is unusually strong because of the power of the Breach crafting mechanic in PoE 3.27. Most of this gear is extremely affordable, even with a character with only a few Chaos Orbs

Uniques

  • Timeclasp: Aim for one with as low Reduced Skill Effect Duration and Attack Speed as Possible. For example, 19-20% Reduced Skill Effect Duration, 11% increased Attack Speed
  • Warped Timepiece: Same as Timeclasp - Low Reduced Skill Effect Duration and Attack Speed

The reason for the need of these values on these particular mods is discussed in the How It Works section of the guide

Gloves, Boots, Helmet, Chest - Evasion/Energy Shield Bases

Life, Resistances, Dexterity and Strength are the main mods we're looking for these gear slots (use the Crafting Bench for Strength). For specific pieces:

  • Gloves: Aim for some Flat Damage to Attacks on Prefixes. You can also use Doedre's Tenure early for a big chunk of #% increased Spell Damage
  • Chest: Try to get one without Maximum Life so that you can allocate the Life Mastery that grants 15% increased Life if Body Armour has no Life modifiers
  • Boots: Movement Speed

Wand

  • Prefixes: Flat local Lightning and Cold Damage on your Wand. Fire works too early on. #% increased Spell Damage is also good for Kinetic Fusillade's damage
  • Benched "Attacks with this Weapon Penetrate #% Elemental Resistances" is strong if you have an empty Prefix
  • Suffixes: Crit Chance, Crit Multi. Try to not get too much Attack Speed

Shield

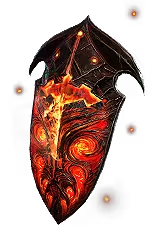
The Ghastly Theatre is a great very early option to aid with Physical Damage early on.

Dawnbreaker is better later on, but you might only have access to this later in Maps and when you have the heft 159 Strength required to wear it

Belt

  • Prefixes: Life is most important, increased Elemental Damage with Attacks is great too and # to Energy Shield
  • Suffixes: Strength should come first, then Resistances

Ring

  • Prefixes: Flat Elemental Damage to Attacks, Life. If you have an empty Prefix, you can bench on -# to Mana Cost of Attacks
  • Suffixes: Attributes and Resistances to fill out what you're missing

Passive Tree

main:
123
123
ascendancy:
8
8
Keystones
Ghost Reaver
Leech Energy Shield instead of Life Maximum total Energy Shield Recovery per second from Leech is doubled Cannot Recharge Energy Shield
Lethe Shade
Take 50% less Damage over Time if you've started taking Damage over Time in the past second 100% more Duration of Ailments on you
Ghost Dance
Cannot Recover Energy Shield to above Evasion Rating Every 2 seconds, gain a Ghost Shroud, up to a maximum of 3 When Hit, lose a Ghost Shroud to Recover Energy Shield equal to 3% of your Evasion Rating
Masteries
Wand Mastery (2)
0.5% of Attack Damage Leeched as Life
0.5% of Attack Damage Leeched as Mana
Wand Attacks fire an additional Projectile
Mana Mastery (1)
12% increased Mana Reservation Efficiency of Skills
Critical Mastery (1)
50% increased Effect of non-Damaging Ailments you inflict with Critical Strikes
Accuracy Mastery (1)
+500 to Accuracy Rating
-2 to Accuracy Rating per Level
Elemental Mastery (1)
Hits have 15% chance to treat Enemy Monster Elemental Resistance values as inverted
Cold Mastery (1)
Chills from your Hits always reduce Action Speed by at least 10%
Energy Shield Mastery (1)
100% increased Energy Shield from Equipped Helmet
Life Mastery (1)
15% increased maximum Life if there are no Life Modifiers on Equipped Body Armour
Lightning Mastery (1)
+15% to Maximum Effect of Shock

Skills

Gloom Suit
Sanguine Raiment
Kinetic Fusillade
Less Duration
Greater Volley
Trinity
Sacred Wisps
Victory Star
Jester Mask
Frostblink
Faster Attacks
Shield Charge
Summon Lightning Golem
The Ghastly Theatre
Teak Round Shield
Anger
Summon Stone Golem
Summon Flame Golem
Victory Nails
Stealth Gloves
Assassin's Mark
Lifetap
Mark On Hit
Sorrow Goad
Sorcerer Boots
Sigil of Power
More Duration
Increased Area of Effect
Dusk Song
Blasting Wand
Spellslinger
Hydrosphere
Dusk Song
Blasting Wand
Summon Ice Golem
Victory Nails
Stealth Gloves
Herald of Ice

In instances where there are more Gems than Links, the additional Gems there are to provide options in case you can't get the right colours on your Sockets, or because Sacred Wisps might be a better Support than Trinity (tl;dr latest patch made it seem to function, but must still test more)

Early Kinetic Fusillade Links

  • Less Duration and Greater Volley are critical to use early for a smooth feel
  • Added Cold can be swapped for Increased Elemental Damage if you have a Red Socket
  • Increased Critical Damage can be swapped with Sacred Wisps once you have the Gattling Gun feel, discussed below

How it Works

Kinetic Fusillade

Firstly, read the Skill Gem from top to bottom.

This Skill has a very unique function that makes it unlike other skills, and it's important to understand the following points to get the rapid-fire feeling without the delay

Early Kinetic Fusillade

Early on, do not worry about the Gattling Gun feel of Kinetic Fusillade - just stack as much Attack Speed, Reduced Skill Effect Duration and Projectiles (up to a max of either 6 or 12). You shouldn't be concerned with Attack Speed caps like you will need to after transitioning to the next version of the build

Gattling Gun Mode

The main thing is to have your Attack Speed SLOWER than your Duration on the Skill. Once you have the minigun version and start adding more projectiles, there's some complex maths that is involved in making sure you're firing off the maximum number of projectiles without dropping any additional projectiles per attack. Nemrod has created some documents to help with this:

You might need to remove some Attack Speed from your gear to balance this out. It's much easier to lower your Attack Speed than it is to get more Reduced Duration, so unspeccing nodes like Wandslinger and taking the left path of the Disintegration wheel instead of the right can help lower it further. Try to not have #% increased Attack Speed on your Wand if you're really struggling to reduce your Attack Speed

Additional Projectiles

Adding additional Projectiles will cause KF to produce additional projectiles per Attack. Before getting the "minigun" feel of the skill, this will mean you need to perform fewer Attacks to get to max projectiles before releasing. After getting the minigun version, you will fire off as many projectiles as you generate per attack without waiting for the maximum. This is important to understand because the more projectiles we fire, the more #% More damage we get for additional projectiles (read the Skill Gem)

___________________________________________

How to Adjust Attack Speed

To lower Attack Speed

  • Path on the left side of the Wand wheel, instead of the right, at the top of the Tree that contains Fusillade and Disintegration

  • Remove the Wandslinger wheel
  • Get a Timeclasp and Warped Timepiece with the lowest possible Reduced Skill Effect Duration, but also very low increased Attack Speed
  • Make sure your Wand doesn't have any Attack Speed on it (this will massively increase your Attacks per Second)
  • Allocate the Depth Perception wheel instead of Acuity
  • Don't add quality to Lightning Golem, or lower the level of Lightning Golem
  • Remove Blood Rage if you are still using it for some reason
  • Remove sources of Frenzy Charges
  • Remove sources of Onslaught such as with a Silver Flask

To increase Attack Speed

In order to increase your Attack Speed, just do the opposite of the above (except make sure that your Timeclasp and Warped Timepiece still have the lowest possible Reduced Skill Effect Duration). Other suggestions

  • Add Speed Quality to Warped Timepiece with Accelerating Catalysts (or Abrasive if you are playing SSF and don't have enough Accelerating)

___________________________________________

12 Projectiles vs 8 Projectiles

Early on, you'll likely be running 7 or 8 Projectiles, with Multishot on the tree, the Wand Mastery, the Skill's base Projectile and then either Greater Volley or Awakened Greater Multiple Projectiles. This is fairly normal before acquiring low enough Skill Effect Duration before adding in 11/12 with (Awakened) Greater Multiple Projectiles

However, once you are more geared up, it is worth checking in your PoB whether or not you could gain more damage by instead running 8 Projectiles with higher Attack Speed by dropping Greater Volley and instead swapping in something like Awakened Elemental Damage with Attacks or Sacred Wisps. Because you're running fewer Projectiles, you can push your APS higher without crossing the cap, which could mean higher damage. I'm not 100% sure when this breakpoint occurs, but it's worth checking occasionally after making major upgrades. This will mean that you need to configure your PoB correctly, which I will explain in the section below

___________________________________________

PoB Configuration

Make sure your PoB is updated to the latest version that includes updates to Kinetic Fusillade damage scaling. This makes it easier to setup

It's hard to see how much damage you're dealing with Kinetic Fusillade if you haven't configured your PoB correctly. Here's how to do it:

Skills Section

  1. In the Skills section, click Kinetic Fusillade and at the top click "Include in Full DPS"
  2. In the same section, to the right of Kinetic Fusillade, select the number of Projectiles you have in the "Count" box WE NO LONGER NEED TO DO THIS WITH THE LATEST POB UPDATE

Configuration Section

1. Simulating the More Damage per Previous Projectile in Sequence needs to be done manually. NOT ANYMORE

2. Turn on any consistent buffs you might have such as:

  • Power Charges, Frenzy Charges, Endurance Charges, assuming you have the latter two from the Tree/Body Armour Implicit respectively
  • Rage to 30
  • Is the Enemy Shocked? - Yes
  • Is the Enemy Chilled? - Yes
  • Is the Enemy Ignited? Only Yes if you're using Shaper of Flames or have Fire Damage on your character with 100% Crit Chance
  • Set Resonance to 50
  • Is the Enemy Exposed to Lightning - set to Yes if you have this mod on your Gloves
  • Have you Killed/Shocked Recently? Can be set to Yes to simulate Mapping

3. Conditional Buffs

These are temporary boosts to your character's damage and defences that you can turn on to check your burst damage or damage/defence while Flasks are up:

  • Turn on Flasks - these will be up consistently for Mapping
  • Sigil of Power - you can set this to 4 to see the DPS/EHP increase, but it's unrealistic to leave it on
  • Enable Wrath Aura from Summon Lightning Golem: can check to be On to see the increase. He will be in your presence most of the time, but not 100% of the time

Grafts

In the Custom Modifiers section of the Configuration Tab, you can add modifiers to simulate the bonuses from your Grafts

  • Adds 18 to 279 Lightning damage (based on the amount granted by Wreathed in Light from your Storming Esh Graft)
  • 30% more maximum attack damage (based on the Level of your Overcharged Sinews from your Jolting Eshgraft)
  • Your Damage with Hits is lucky (simulates standing in Radiant ground from Wreathed in Light)
  • 60% increased Critical Strike Chance (based on if your Jolt grants Critical Strike Chance from the modifiers on your Jolting Eshgraft)
  • 10% more damage taken (simulates having 10 Jolt Stacks from your Jolting Eshgraft

___________________________________________

Crafting Guides

I've created a series of Trees useful for creating items for this build:

Boots coming soon

Cluster Jewels

You do not need the EXACT Cluster Jewel that I am using in this build. What is most important is to make sure the desired Notable isn't at the back, forcing you to waste additional points to allocate it.

You can use a site like https://theodorejbieber.github.io/PoEClusterJewelCalculator/ to check which combination of Notables can be used together to make sure the desired Notable isn't at the back

  • Lightning Damage Large Cluster: Important Notable is Stormdrinker. These can usually just be bought fairly cheaply on the Trade Site or Alt/Aug/Regalled in SSF
  • Attack Damage while While Holding a Shield Large Cluster: Important Notable is Prodigious Defence. I crafted this one with Lucent + Serrated Fossils and just happened to hit Devastator, which isn't needed for the build

___________________________________________

Map Regexes

Here are some suggested Regexes for your Maps. I recommend you adjust these slightly depending your character. You can make one yourself on poe.re or adjust them according to your specific build

  • Early Maps: "!efl|eec|gen|o al"
  • Once You Have High Block Chance: "!efl|eec|ur$|gen|o al"
  • T17 Maps: "!s refl|eec|o al|'v|ur$|gen|efe|net"

These can and should be adjusted based on your gear and depending on what you feel you are struggling with. For example, Volatile Cores or Meteors can be frustrating for some players, so you can add those in to prevent rolling Maps with those modifiers.

For "Monsters have a Chance to Block", you can allocate the Attack Mastery in Multishot to prevent monsters from Blocking

Changelog

24 November

  • Added a Mageblood Mapping and Bossing setup (very expensive). Also, PoB is more up to date with Kinetic Fusillade now so it's easier to test and check damage

18 November

  • Now Sacred Wisps DOES seem to be working and dealing far more damage than other Supports. Try it yourself. I'm so confused.
  • Added a section on 8 Proj vs 12 Proj
  • Added section for how to setup PoB Correctly
  • Added some Map Regexes, but use these at your own risk.
  • Updated Ward Version with 8 Projectile Setup
  • Added Large Cluster Jewel Craft suggestions

15 November

Video build guide is out!

  • Sacred Wisps Update: I've done a little bit of testing, and the Support Gem definitely IS visible now, but I'm not entirely sure how much DPS it is adding compared to Trinity. I'm going to leave Trinity in for now but have Sacred Wisps as a "6th Support" that you can test to try for yourself. It might be optimal if not using Trinity.
  • Sacred Wisps: I'm going to be testing this Support again as it seems that this Support Gem may be functioning after the latest patch (according to Nemrod, the Wisps are actually visible when using the Skill now too). This felt weird in the campaign, so I dropped it, then tried it later and it felt amazing, then later after some testing, it seemed to not be adding as much damage as alternatives such as WED and Volatility, now apparently it is "working" again (?). In instances of the PoB where you see more than five Supports per socket, this is so that you know what to use if Sacred Wisps doesn't feel as good
  • Trinity: in most cases, I've dropped Trinity in favour of Sacred Wisps. The additional benefit to this, if it is as good as expected, is that we can change our Wand slightly
  • Wand Change for Non-Trinity Builds: instead of using flat Cold as a Prefix, instead go for #% increased Spell Damage along with the usual flat Lightning and Penetration. If we don't need the Cold Damage to build Trinity Resonance, #% increased Spell Damage is favourable.

I will confirm ASAP if this change to Sacred Wisps is ideal

Video Guide

Stats

Stats are displayed for the "Mageblood (Mapping)" Variant only
Character
Attributes
117 / 
169 / 
297
Movement Speed
243%
Charges
Endurance Charges
3
Frenzy Charges
3
Power Charges
5
Defensive
Life
1
Energy Shield
8,318
Mana
827
Armour
3,660
Evasion Rating
19,096
Block
52%
Resistances
75% / 
75% / 
76% / 
-60%
Simulated
Effective Health Pool
156K
Max Hit
11K / 
31K / 
31K / 
32K / 
∞
Skill DPS Estimation
Kinetic Fusillade
89M

Table of Contents

Featured Builds

Shins - Bleed POP INF EHP Cyclone Glad - 8Mod/T17 Mapper
Updated on Dec 4, 2025
Bleed Eviscerate/ Vaal Earthquake Gladiator - Walking Simulator - Final Update - Nov 29th
Updated on Dec 4, 2025
Boneshatter of Carnage Juggernaut - A Absolutely Stunning Build!
Updated on Dec 3, 2025
CWS Chieftain
Updated on Dec 3, 2025
[GIGA AOE] Atziri's Rule Saboteur
Updated on Dec 3, 2025

Become a Creator

Want to earn rewards by sharing your builds with your community?