menu
MobalyticsUse your favourite features in-game with our Desktop App
PoE 2 Build

Spiral Volley Deadeye (Poison)

0.3 TTE
presentationRanger
presentationDeadeye
End Game
SSF
Creator
Updated on Sep 4, 2025
Sep 4, 2025

Build Overview

Live Update

Overview

Spiral Volley lives! The Skill just needed some time to ripen. Now it has become a fine Poison, ready to kill everything it touches!

This Build uses the Interaction between Resonance and Armour Break II / Armour Break III to generate Frenzy Charges for near-permanent Frenzy Charge Uptime. Bypassing the Delay and Situational Uptime of Frenzy Charge Generators like Combat Frenzy or Sniper's Mark.

This PoE2 Deadeye Bow Build is all content viable. However, due to its nature of being a Damage over Time (DoT) Build, Boss Fights can take a couple of Seconds and you will have to interact with the Boss Mechanics. [Truly as GGG intended].

The Build truly shines during Breaches, Abysses, and Rituals, where the Enemies are overlapping and Spiral Volley goes absolutely insane.

The Gameplay Loop for the Build is very simplistic. Fire Spiral Volley to clear the Screen of Enemies and Poisonburst Arrow for Rares or Bosses.

Adding a couple more Poison Skills, as well as High Evasion and Energy Shield, creates a truly amazing all-rounder.

Why Deadeye and not Pathfinder

To maintain a smooth Frenzy Charge Uptime, we want Avidity from the Deadeye Ascendancy and Gathering Winds is just straight up Broken.

Pathfinder would offer us +6 Passive Points and Free Herald of Plague, which is convenient, but not as good as Tailwind.

If we only focus on Bossing Overwhelming Toxicity is a good Argument for Pathfinder, but this is a Variant focused on Clear.


SSF Viability

This build is semi-SSF Viable. The best iteration of the Build relies on Original Sin however, earlier versions can use Plaguefinger to utilize Elemental Damage Rolls on Bow, Quiver, and Rings. For a pure SSF Start, only use Physical Rolls on Gear.
Level as

I rerolled from Lightning Arrow into this at Level 94. I have not looked into Poison Leveling yet. Let me know if you would prefer Poison Leveling over Lightning Arrow

Ranger Levelling for 0.3

Campaign Bonuses

  • Medalion: Whatever
  • Venom: Ailment Threshold
  • Tattoos: Resistances
  • Pillars: Movement Speed
Strengths and Weaknesses

  • 1-Button Screen Clear
  • Simple Boss Skill Rotation
  • Very High Evasion Pool
  • Hybrid Life/Energy Shield Hit Pool
  • Scales well with Investment
  • Isn't Lightning Arrow / does not need a Gemini Bow
  • Crit & Non-Crit Viable
  • Damage over Time
  • Ramping Single Target Damage
  • Attribute Requirement is a minor Annoyance

Build Variants

We can choose between two different Variants for the Tree, either with Critical Nodes or without them. The Non-Crit variant feels more consistent and easier to set up.


After writing this Guide and recording the initial Build Guide Video, I did more consideration on Plaguefinger vs Original Sin. I still lean slightly towards Original Sin, cause we can use a better Glove Base for Slightly more Evasion/Energy Shield. But Plaguefinger should result in more Damage, with the 2nd Socket Corrupt and easier Rarity as we can use a Gold Ring. We do sacrifice Chaos Res and Energy Shield for this though.

Equipment

item
9
item
7
item
1
item
2
item
6
item
8
item
10
item
3
item
5
item
4
item
item
item
item
item
item
item
Equipment Priority
0
Helmet
Ancestral Tiara
1
Body
Slipstrike Vest
2
Gloves
Elegant Wraps
3
Boots
Drakeskin Boots
4
Belt
Double Belt
5
Amulet
Stellar Amulet
6
Left Ring
Original Sin
7
Right Ring
Prismatic Ring
8
Main Hand
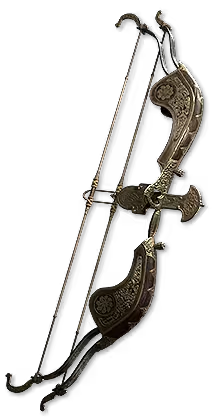
Warmonger Bow
9
Off Hand
Cadiro's Gambit

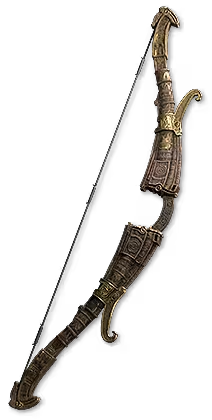
Bow

Best Base is Warmonger Bow

Get as much Damage as Possible on the Bow. If you search for high DPS, ignore Bows with Attack Speed. We care more about the High Hit Part than the High Attack Speed.

2 Important Stats on our Bow are to Level of Projectile/Attack Gems and Base Crit. The Importance of Crit, even in the Non-Crit Varian,t is explained in How it Works.

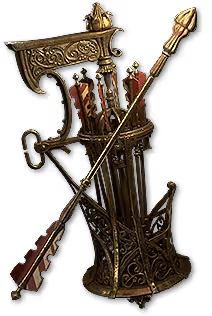
Quiver

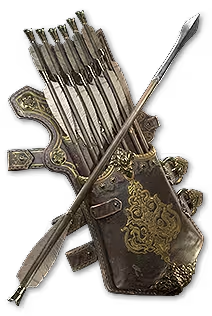
Best Base is Primed Quiver or Toxic Quiver

Just like on Bow, get as much Damage on the Quiver as possible. Flat Damage and Bow Damage.

Preferably get +2 to Projectile Skills on Quiver, otherwise get Attack Speed.

[If you use a Toxic Quiver, drop some of the Poison Chance Node on the Tree]

Alternative for Weapon Set 1, use Cadiro's Gambit, it has absolutely insane Clear Potential. Do still lock your Bow and use it for both Weapon Set 1 and 2, but use 2 separate Quivers.

Body Armour

Best Base is Slipstrike Vest

Get as much Evasion Rating on the Body as possible. We get Flat Energy Shield based on our Evasion on the Body with Spectral Ward.

Also get Deflection Rating equal to % of Evasion Rating here and any Elemental Resistance(s).

Helmet

Best Base is Ancestral Tiara

Get as much Energy Shield on the Helmet as possible. We get Flat Evasion based on our Energy Shield on the Helmet with Subterfuge Mask.

Also get any Elemental Resistance(s) here.

I recommend always sticking with an Energy Shield Helmet even at lower Budget Levels. We are not anointing Subterfuge Mask and are pathing next to it.

Gloves

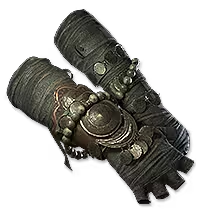
The best base is Elegant Wraps

Get 1-2 Flat Damage Rolls and Flat Life on Gloves, also try to get Rarity and any 2 Resistances.

Boots

The best base is Drakeskin Boots

The focus Stat is Movement Speed, after that High Life, and any amount of Resistances.

Amulet

Expect to spend at least some Currency on your Amulet. Level to Gems is super Important for our Build, and the most desired Stat on the Amulet.

If you can, get +30 Spirit on the Gem. This is not required and is only for convenience. Allowing us to reserve both Herald of Plague and Withering Presence at the same Time. See Skill Gems for more Details

Other Good Stats are Flat Life, % Life, Flat Energy Shield, % Energy Shield, and (very powerful for Surv) desecrated increase Evasion from Body Armour.

Annoints: Lasting Trauma [Expensive] or Serrated Edges [Cheap]

Rings

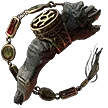
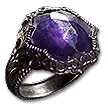
While not Build enabling Original Sin is a huge Damage boost to our build. If it is too expensive or not available, you can use a Plaguefinger in your Gloves Slot or only get Physical and Chaos Damage on Gear.

[Don't forget to Chaos Quality your Original Sin]

Good Ring Bases are Breach Ring, Gold Ring, Amethyst Ring and Prismatic Ring

Get 1-2 Flat Damage Rolls on your Ring(s), any Amount of Life, as well as Resistances or Rarity.

Belt

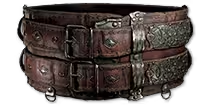
Any Base is fine, but check that it has 3 Charm Slots

Rare Belts are fairly weak in PoE 2 compared to PoE 1 Belts. Use it to fix Res and gain some Life. Alternatively, use any of the powerful Unique Options like Headhunter, Ingenuity or Darkness Enthroned(Boots Variant with MS Runes).

Additional Gear Notes

Resistance Cap

We need about 12 30%+ Elemental Resistance Rolls distributed across our Gear to get Res Capped.

Attributes

You will need to get some Attributes on Gear to be able to use high-level skill Gems. I have 2 ~25 Dexterity Rolls on Gear. Remember that any Attribute is good to get. We can just spec other Attributes on our Passive Tree.

Rarity

Try to get up to 100% Rarity on Gear, if able to. After 100% you get diminishing Returns.

Sockets

The most Important Sockets are on our Bow, both Fenumus' Rune of Agony and Talisman of Thruldana are huge boosts to our Damage. On Body and Helmet, we want Greater Iron Rune for added Defenses. As for the Rest, we are Flexible, use Resistance Runes if needed or get additional QoL with Talisman of Egrin, Farrul's Rune of the Chase and Courtesan Mannan's Rune of Cruelty.


Skill Gems

Support Gem Requirements:

Str 35

Dex 60

Int 45

Expand all
1

Spiral Volley

Spiral Volley
supportarmourbreakplayerthree
supportcorrosionplayer
supportburstingplagueplayer
supportpoisonplayerthree
supportperpetualchargeplayer
2

Poisonburst Arrow

Poisonburst Arrow
supportescalatingpoisonplayer
supportdeadlypoisonplayertwo
supportarakaalislustplayer
supportconcentratedareaplayer
supportrigwaldsferocityplayer
3

Vine Arrow

Vine Arrow
supportswiftafflictionplayertwo
prolongeddurationsupportplayertwo
supportmagnifiedareaplayer
4

Toxic Domain

Toxic Domain
supportlongfuseplayertwo
supportoverreachplayer
prolongeddurationsupportplayertwo
supportefficiencyplayertwo
5

Despair

Despair
supportcurseeffectplayer
supportrapidcastingplayertwo
supportfocusedcurseplayer
supportmagnifiedareaplayertwo
6

Herald of Plague

Herald of Plague
supportchaosmasteryplayer
7

Withering Presence

Withering Presence
prolongeddurationsupportplayertwo
supportchaosmasteryplayer
8

Ghost Dance

Ghost Dance
compresseddurationsupportplayertwo
supportclarityplayer
9

Wind Dancer

Wind Dancer
supportblindplayertwo
supportpunchthroughplayer
Gem Priority
+28

Socket Priority on all Gems is Left to Right

Weapon Set

Use Poisonburst Arrow, Toxic Domain and Vine Arrow in Weapon Set 2, we use the 2. Weapon Set to utilize Rigwald's Ferocity.

Use Spiral Volley and Despair in Weapon Set 1.

Do not forget to lock your Weapon and Quiver to be used in both Sets.

Link Priority

Poisonburst Arrow 5L/6L > Spiral Volley 5L/6L > Despair 5L> Toxic Domain 5L

Quality Priority

Poisonburst Arrow > Spiral Volley > Vine Arrow > Despair > Ghost Dance > Toxic Domain > Withering Presence > Herald of Plague > Wind Dancer

Spirit Gems

Always use Wind Dancer, Ghost Dance and Clarity I.

Use Herald of Plague for Weapon Set 1 and Withering Presence on Weapon Set 2. [Or manually toggle them on a big Boss Fight]

Alternatively, get +30 Spirit on Amulet [Expensive]


Passive Tree

main:
123
123
set 1:
20
20
set 2:
20
20

The Above Tree is at Level 94

Nodes to drop at a lower Level

  • The Nodes around Oasis
  • Disorientation
  • Impending Doom
  • Master Fletching
  • Prolonged Assault
  • The Winter Owl
  • Small Poison Duration Nodes

Ascendancy Order

Gathering Winds > Projectile Proximity Specialisation [Point Blank] > Avidity > Wind Ward

Jewels

  • A Rare Sapphire with Mana on Kill
  • From Nothing
  • Heart of the Well
    • Damage as Extra Chaos Damage
    • Crit Chance
    • Crit Damage Bonus
    • Attack Speed or Skill Speed
How it Plays

Mapping

  1. Use Spiral Volley
  2. Hit Enemies
  3. Enemies die to Poison and will generate new Frenzy Charges
  4. Use Spiral Volley when you see Enemies at the Edge of your Screen
  5. Clear Everything!

If anything survives Spiral Volley, like Proximity Enemies or Untargetable ones, use Poisonburst Arrow to kill them.

Bossing

  1. Before Boss is Targetable
    1. Cast Toxic Domain
    2. Place Vine Arrow
  2. As the Boss becomes Targetable
    1. Cast Despair
  3. Killing Phase
    1. Circle the Boss, try to stay in Range for Withering Presence and in your Toxic Domain
    2. Fire Poisonburst Arrow
    3. Recast Vine Arrow and Toxic Domain as needed.

How it Works

Spiral Volley

Spiral Volley is an absurd skill, which was overshadowed by Lightning Spear in 0.2.

Spiral Volley fires a lot of Projectiles in a Circle and has a decent base Damage Multiplier. To make it absurd, it can be empowered by Frenzy Charges. Whenever you use Spiral Volley, you consume all your Frenzy Charges and Spiral Volley gains 100% More Damage + 30% More Damage per Frenzy Charge consumed, and gains +1 Chain for each Frenzy Charge consumed.

This results in a Skill that on its own gains 4-5 Support Gems' worth of Damage by consuming 5 Frenzy Charges.

The Issue we face now is just how to generate the Frenzy Charges. Dreamy, a great buddy of mine, found a Way to generate close to permanent max Frenzy charges during Mapping.

Spiral Volley is a pure Physical Skill. By linking Armour Break III to Spiral Volley, we can strip enemies of their armour and generate an Endurance Charge when we do. Resonance converts the Endurance charge to a Frenzy Charge when gained. That then gets consumed by Spiral Volley to repeat the Loop. As a Poison Variant, we can add Corrosion to the Setup, which makes sure that the Enemies only Die after their Armour is broken, giving us more Chances for Charge Generation.

Poisonburst Arrow

Poisonburst Arrow is a Skill with 2 Steps. The first Step is a normal Projectile that can hit and crit. It needs Accuracy and poisons based on Poison Chance. The 2nd Step is a Poison Cloud that is guaranteed to Poison but cannot Crit. Modifiers to Bow Damage, Skill Effect Duration and Area Damage all affect the Poison Cloud.
Crit Fishing

To maximize Singel Target Damage, we can add some Crit to our Build, allowing the Hit Portion of Poisonburst Arrow to Crit and apply a Stronger Poison.

The Way poison works in PoE2 is that an infinite Amount of Poison can be applied to an Enemy, but only the X most Potent ones apply. By default, X is 1, but we can increase X in several Ways like Stacking Toxins or Escalating Poison.

If we invest in Critical Hit chance and Crit Damage Bonus, we keep stacking more and more Poisons on the Boss. And eventually, all our strongest Poisons are from Crits and do more damage. This is when our ramping Damage Caps. To make sure we can Crit Fish, we do need at least 3 Seconds of Duration on our Poisons, based on my Experience.

Vine Arrow

Vine Arrow applies a native DoT on nearby Enemies. We can amplify this DoT by poisoning the Vine Bloom with Poison Skills like Poisonburst Arrow.

This kind of allows us to Double Dip on our Poison, applying it to Damage directly and via the Vine Arrow.

Toxic Domain

Recently Added to the Game in 0.3 is Toxic Domain. This Skill increases the Cost of our Skills while on top of the Domain, but allows all our Skills to apply Toxic Postulates on Hit.

These Postule store the Poison we apply via Poisonburst Arrow and explode for up to 300% more Damage. We can link Long Fuse II to Toxic Domain without delaying the Damage of the Postules, as they will explode once storing enough Poison.

The Explosions can Poison again, helping us apply stronger Poisons on the Boss. The Postules of Toxic Domain are ~40% stronger than the ones from Toxic Growth.

Defense Layers

Our Setup uses Life, Evasion, Energy Shield and Deflect as Defense Layers.

  • Scaling Flat Life from Gear
  • Very High Evasion Rating with a High Eva. Body Armour and Beastial Skin
    • With 0.3 the Evasion we need to evade Hits got slightly increased, but we can now evade everything except Red Marked Attacks/Spells.
    • We further Scale our Evasion Rating with Gathering Winds and Wind Ward
  • Deflect, based on our Evasion Rating
    • Deflect is another newly added Mechanic in 0.3, allowing a Chance to take Less Damage based on our Deflect Rating.
    • We gain Deflect Rating as a Secondary Stat from scaling Evasion Rating and the mod: % of Evasion Rating as Deflection Rating.
  • Energy Shield from a High ES Helmet and Spectral Ward.
    • A good Secondary hit Pool
    • Which we can recover almost instantly with Ghost Dance, recovering a portion of Energy Shield based on our Evasion Rating

Evasion Rating

Evasion is not a flat Chance to dodge. Whenever a melee attack or projectile hits our character. Their Accuracy Rating is subtracted from our Evasion Rating Pool. When our Evasion Rating hits 0 or below, we will take the Damage from that hit, and our Evasion Rating resets to full.

The more Evasion Rating we have, the more time we have between hits.

Changelog

03.09.2025 | Initial Write Up

Path of Building Code

Table of Contents

Featured Builds

Invoker Hollow Palm - Campaign to Endgame
Updated on Dec 4, 2025
0.3 Bigdaddy Arc/Spark CoC Stormweaver
Updated on Dec 4, 2025
LICH Minions Leaguestarter (being updated for 0.4, WIP right now)
Updated on Dec 4, 2025
0.3 Fubgun's Lightning Arrow Deadeye leveling Guide
Updated on Dec 4, 2025
[0.3] Skadoosh's Poison Pathfinder Leveling 1-58
Updated on Dec 3, 2025

Become a Creator

Want to earn rewards by sharing your builds with your community?