menu
MobalyticsUse your favourite features in-game with our Desktop App
PoE 2 Build

Spiral Volley Amazon

presentationHuntress
presentationAmazon
Starter
Creator
0.3 TTE
Updated on Aug 29, 2025
Aug 29, 2025

Build Overview

WARNING SPIRAL VOLLEY BREAK ENDURANCE INTERACTION NERFED, AMAZON NODES NERFED, HIGH RISK STARTER, PLEASE CONSIDER GOING DEADEYE INSTEAD AND I WILL LOOK HOW TO MAKE THIS WORK ASAP!!!

Evasion Rating Changes makes it easier to Cap our Crit, but we can only get 6,25% flat Crit maximum [The 25% to 15% nerf on Critical Strikes has been reverted]

Spiral Volley is one of the most Insane Clear Skills, covering every angle, and has free Chain and More Damage built in.

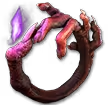
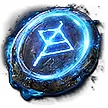
The Build uses a neat Interaction between Break Endurance and Resonance to have Permanent Uptime on Frenzy Charges.
[More about this in How it Works]

With 0.3, Evasion Builds get a Massive Survivability buff, which should allow Pure Evasion Builds to shine. Getting 40% less Damage taken from Deflect and Flat Life from Dexterity (new Passive Node on Tree) makes this Build survive well in the upcoming Patch.

For Single Target, we have 5 Flex Spots, at the moment Lightning Arrow & Lightning Rod is recommended, but might change depending on new Uniques and Discoveries in 0.3.

The Nerf to Amazon 
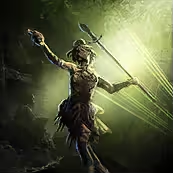
Critical Strike from 25% to 15% is noticeable, but manageable. We just invest slightly more into Accuracy, and it will still cause a lot of Crits.

For Levelling, refer to Ranger and Huntress Bow Levelling Guide.
The Levelling Guide can directly transition into this Build. The Trees overlap to 95%. You can transition once you have a 5 Link Spiral Volley.

Why Amazon and not Deadeye?

The Key Interaction of this build can work on any Ascendancy. However, Amazon 
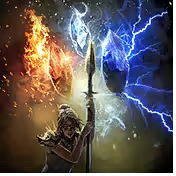
Elemental Infusion utilises the Spiral Volley Interaction the best. Another benefit is, that by going Amazon, we do not compete on our Bows with Deadeyes, as we use high Accuracy Bows.

The Resonance Interaction was found by my Buddy Dreamy, all Props to him for finding and sharing it with me!

Strengths and Weaknesses

  • Off-Screen Clear
  • One-Shots anything In-Map
  • Nukes Bosses
  • Great Evasion-Based Survivability
  • 3-Step Single Bossing Setup
  • High Mana Consumption

Build Variants

More Variants will be added as I explore the Build in 0.3.

Equipment

item
1
item
9
item
5
item
2
item
3
item
10
item
4
item
8
item
7
item
6
item
item
item
item
Equipment Priority
0
Main Hand
Gemini Bow
1
Body
Hyrri's Ire
2
Amulet
Beacon of Azis
3
Off Hand
Visceral Quiver
4
Helmet
Trapper Hood
5
Boots
Dragonscale Boots
6
Belt
Wide Belt
7
Gloves
Barbed Bracers
8
Left Ring
Amethyst Ring
9
Right Ring
Emerald Ring

Gear Overview

Uniques

Hyrri's Ire is Key for Survivability, giving us Acrobatics without the Evasion Penalty. We invest quite a bit in Evasion Rating to achieve between 10,000 and 14,000. This allows our Evasion Build to have a Smooth Mapping Experience and even survive some Minor Mistakes in Boss Fights.

Beacon of Azis is another Key Unique to our Build. However, for Damage this time. Almost all of our Hits are Critical Strikes, which allows us to deal Massive Damage to Unique Enemies or on Maps with a bonus to elemental resistances, without having to invest in Curses or Exposure.

One thing to note, depending on the Price and Rarity of Rakiata's Flow, we might use that and drop Beacon for a Rare Amulet.

Rares

Bow

Thanks to our Ascendancy Penetrate, we highly benefit from Accuracy on the Bow. Thus, we do not compete with other Bow Builds for High PDPS Bows and can instead go for High Accuracy Bows.

We still need +1 Arrow on Bow either from Suffix or Implicit for our Single Target Setup.

Other Good Stats are Base Crit, Crit Multi, flat Phys or Lightning Damage, and Attack Speed.

Helmet

To reach High Evasion Numbers, we need a Helmet with as much Evasion as Possible. We do not have enough Int to use a high Energy Shield Helmet and Subterfuge Mask.

Other Good Stats are Dexterity and Resistances, as well as the new Deflect Mod

Quiver

There are several good Mods on Quiver that benefit the Build. The strongest are +2 to Projectile Skills, Bow Damage, and Flat Lightning. Crit Multi and Attack Speed are also decent.

Gloves

On Gloves, we want Life and High Evasion, Deflect Chance, and any amount of Resistances.

Other good Mods are Flat Lightning or Physical Damage, Attack Speed, or Dexterity.

Boots

Most Important Stat on Boots is Movement Speed and flat Life

Other good Stats are Deflect Chance, Resistances, Dexterity, and Evasion Rating.

Belt

Early on, use a Rare Belt with Life and Resistances.

Good Unique Belts to aim towards are Headhunter, Ingenuity or the new Darkness Enthroned

Rings

As Basetype use Prismatic Ring, Gold Ring, Emerald Ring or Amethyst Ring early. Later on, a solid Breach Ring is recommended.

Aim for Flat Lightning or Flat Physical Damage with Life here.

Other Good Stats are Resistances, Attributes, and Accuracy Rating.

Annoint

Stormcharged is the BiS Anoint early on.

Overwhelming Strike is another decent alternative.

Sockets

Early Game

Our Bow Greater Vision Rune results in both Flat Damage and Crit Chance, and is our best Early Option

For all other Slots, either fix Resistances or use Greater Body Rune for Flat Life.

Lategame Options

Gloves: Talisman of Sirrius (Attack Speed)

Boots / Belt: Farrul's Rune of the Chase (Movement Speed)

Weapon: Saqawal's Rune of the Sky (Damage as Extra of all Elements)

Body: Greater Iron Rune (Defenses)


Skill Gems

Support Gem Requirements:

Str 60

Dex 115

Int 35

Expand all
1

Spiral Volley

Spiral Volley
supportendurancechargeonarmourbreak
supportarmourbreakplayer
supportheftplayer
supportincreasedarmourbreakplayer
supportvoltplayer
2

Infuse Weapon

Infuse Weapon
supportinnervateplayer
supportexploitweaknessplayer
supportincreasedareaofeffectplayer
supportaddedlightningdamageplayer
supportreachplayer
3

Lightning Arrow

Lightning Arrow
supportweaponelementaldamageplayer
supportfasterattackplayer
supportchargedshotsplayer
supportadditionalaccuracyplayer
supportblindplayer
4

Lightning Rod

Lightning Rod
supportelementalfocusplayer
supportconcentratedeffectplayer
supportoverextendplayer
supportclosecombatplayer
supportblindsideplayer
5

Tornado Shot

Tornado Shot
moredurationsupportplayer
supportincreaselimitplayer
supportragefountainplayer
supportmanafountainplayer
6

Barrage

Barrage
supportempowereddamageplayer
supportsecondwindplayer
supportcooldownreductionplayer
7

Stormcaller Arrow

Stormcaller Arrow
supportoverchargeplayer
supportambushplayer
supportcullingstrikeplayer
8

Wind Dancer

Wind Dancer
supportmaimplayer
supportpunchthroughplayer
supportarmslengthplayer
9

Herald of Thunder

Herald of Thunder
supportfarcombatplayer
supportlightningpenetrationplayer
supportelectrocuteplayer
supportdeadlyheraldsplayer
supportexecuteplayer
10

Mana Remnants

Mana Remnants
supportprecisionplayer
supportcannibalismplayer
supportmagnetismplayer
supportdissipateplayer
Gem Priority
+42

I am still using 0.2 Gem Setup and will update once 0.3 Gems are available

Link & Quality Priority

Infuse Weapon gets its Sockets as we level up and we start using it when we use Spiral Volley.

Use Spiral Volley only once you have a 5Link, use Stormcaller Arrow from the Levelling Build before or use Lightning Arrow for clear.

Spiral Volley > Lightning Rod > Lightning Arrow > Herald of Thunder > Tornado Shot > Barrage > Wind Dancer > Mana Remnants

Weapon Set 2

Use Stormcaller Arrow with Weapon Set 2 to apply a Shock with much more Magnitude.

This is only really giving us a noticeable Buff on Pinnacle Bossing.

Might just change this Flex Slot to something else.

Rest use on Weapon Set 1

Spirit Gems

Herald of Thunder > Wind Dancer > Mana Remnants > Precision > Cannibalism > Magnetism > Deadly Herald

Total Spirit needed is 145, with a perfect Implicit Roll Beacon of Azis we get all the Spirit we need.

With 0.3 Support Gem Changes, we can likely drop Deadly Herald though, allowing us to get any Beacon of Azis Roll.

Passive Tree

main:
123
123
set 1:
20
20
set 2:
20
20

The Passive Tree is still the 0.2 one and will be updated once we get the 0.3 Tree. I expect some slight changes.

Ascendancy

During Campaign, we get Predatory Instinct for massive Damage Boost and Critical Strike to get close to Crit Capped still during Campaign.

Penetrate once we want to use a High Accuracy Weapon, and Elemental Infusion once we have a 5 Link Spiral Volley.


How it Plays

Mapping

  1. Use Spiral Volley
  2. Hit Enemies, generate Frenzy Charges
  3. Use Spiral Volley when you see Enemies at the Edge of your Screen
  4. Clear Everything!

If anything survives Spiral Volley, like Proximity Enemies or Untargetable ones, Lightning Arrow to kill them.

Bossing

  1. Pre-Fire Step 2 to 4 before the Boss is targetable. If the Boss is proximity-triggered, consider setting up from further away.
  2. Barrage
  3. 5x Lightning Rod
  4. Tornado Shot
  5. Lightning Arrow
  6. Repeat 2 to 5 every couple of Seconds when all the Lightning Rod are used up.

How it Works

Spiral Volley

Spiral Volley is an absurd skill, which was overshadowed by Lightning Spear in 0.2.

Spiral Volley fires a lot of Projectiles in a Circle and has a decent base Damage Multiplier. To make it absurd, it can be empowered by Frenzy Charges. Whenever you use Spiral Volley, you consume all your Frenzy Charges and Spiral Volley gains 100% More Damage + 30% More Damage per Frenzy Charge consumed, and gains +1 Chain for each Frenzy Charge consumed.

This results in a Skill that on its own gains 4-5 Support Gems' worth of Damage by consuming 5 Frenzy Charges.

The Issue we face now is just how to generate the Frenzy Charges. Dreamy, a great buddy of mine, found a Way to generate close to permanent max Frenzy charges during Mapping.

Spiral Volley is a pure Physical Skill. By linking Splinter and Break Enduranceto Spiral Volley, we can strip enemies of their armour and generate an Endurance Charge when we do. Resonance converts the Endurance charge to a Frenzy Charge when gained. That then gets consumed by Spiral Volley to repeat the Loop.

Infuse Weapon

Infuse Weapon gets triggered whenever we consume a Charge and grants us an Infusion, buffing the next Attack we do with an additional Explosion.

The absurd part is that each Attack consumes 1 Infusion, but all Projectiles fired will benefit from the Buff and cause Explosions. So in our case Spiral Volley, that fires 29 Arrows, will cause 29 Explosions.

[I am still working on a Way to also abuse Charges on Bossing while using Resonance]

Lightning Arrow and Lightning Rod

Lightning Arrow and Lightning Rod are created to work specifically together. While Lightning Arrow works well on its own for clear. Its true potential is the single-target interaction with Lightning Rod.

Each placed Lightning Rod can be retriggered 8 times.

Lightning Arrow fires up to 4 Beams which each can chain 2 Times every time it hits an enemy. Those Arrows can hit Enemies, but also theLightning Rods. So whenever a Boss is hit by an Lightning Arrow while standing on top of Lightning Rods. Each Lightning Rod hit by one of the Beams gets retriggered and applies its Damage again.

Tornado Shot

Tornado Shot has an interesting Interaction with Lightning Arrow and Lightning Rod. If a normal Lightning Arrow hits an Enemy, we can only trigger a portion of the Lightning Rod based on the amount of Beams and Chains from our Beams.

However, if we fire 2+ Lightning Arrows, one can hit the Boss and another can hit the Tornado Shot, of which it then chains off the Beams and causes Lightning Rods to trigger AND one of the projectiles splits off the Tornado Shot can hit the Boss again, causing another Hit and Beams.

This Results in a lot faster trigger of all Lightning Rods and additional hits from Lightning Arrow.

Defense Layers

Our initial Setup uses Life, Evasion, and Deflect as Defense Layers.

  • Scaling Flat Life from Gear and Dex to Life Node.
  • Very High Evasion Rating with Hyrri's Ire
    • We can evade all Hits, including AoE Attacks of Bosses
  • Deflect, if scaled to 100% is a 40% less damage taken. Before 100%, there is a chance to take 40% Less Damage.
    • Deflect scales based on our Evasion Rating. We do not know how many Nodes we need to invest in Deflect on the Tree, and how much Evasion Rating is needed for 100%

Evasion Rating

Evasion is not a flat Chance to dodge. Whenever an enemy melee attack or projectile hits our character. Their Accuracy Rating is subtracted from our Evasion Rating Pool. When our Evasion Rating hits 0 or below, we will take the Damage from that hit, and our Evasion Rating resets to full.

The more Evasion Rating we have, the more time we have between hits.

Path of Building Code

Video Guide

Table of Contents

Featured Builds

[0.4] Bigdaddy Arc/Spark CoC Stormweaver
Updated on Dec 5, 2025
[0.4] One-Shot Hollow Palm Monk - Uber Endgame to Starter Build Guide
Updated on Dec 5, 2025
Poison Pathfinder League Start Build (Leveling)
Updated on Dec 5, 2025
[0.4] Invoker Hollow Palm - Campaign to Endgame
Updated on Dec 5, 2025
[0.4.0 Changes] 100% Crit/Recoup Chronomancer
Updated on Dec 4, 2025

Become a Creator

Want to earn rewards by sharing your builds with your community?