menu
MobalyticsUse your favourite features in-game with our Desktop App
PoE 2 Build

Trinity Firestorm Stormweaver - Full Endgame Guide (T16+)

0.3 TTE
End Game
Verified
presentationSorceress
presentationStormweaver
Updated on Nov 20, 2025
Nov 20, 2025

Build Overview

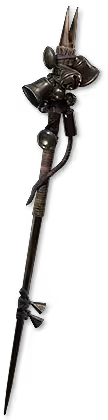
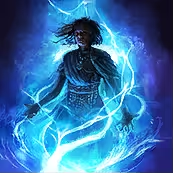
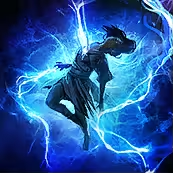
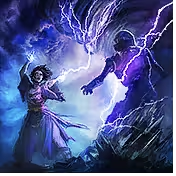
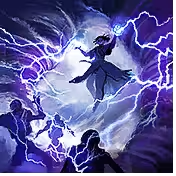
This Stormweaver build focuses on using all Three Elements (Fire, Cold, Lightning) and utilising the new Elemental Infusion System to become a True Tri-Elemental Caster Build.

This build also uses a New Zero Energy Shield Defence Tech that makes you Incredibly Tanky for a Sorceress utilising a number of the new mechanics made available in 0.3.0, so if you fancy playing somything a bit different this will be a lot of fun for you!

This build will was based upon an SSF Levelling run using the Levelling guide so be sure to check this out if you are not yet at Mapping.

The Endgame build is based upon a mixture of Self Found Gear and Trading which hasn't been too expensive because a lot of this build is playing into Techs that aren't common knowledge right now.

If there are any Coming Soon areas in the guide, I will get round to updating those ASAP but if you have any questions be sure to reach out through the various methods of contacting me linked in my profile above.

NOTE: This build is still a work in progress. If you have any questions about the build, feel free to jump in my Discord and ask me questions directly.

-----

I'l be live streaming most evenings (GMT) so this is a good time to come ask me questions directly!

Strengths and Weaknesses

  • Insane Clearance
  • Excellent Crowd Control
  • Very Tanky For A Sorceress
  • Zero Energy Shield Playstyle
  • Fun To Play!
  • Doesn't Work Until Mapping
  • Spirit Dependant
  • Hurts the frames!

Build Variants

This variant is designed to get you from Early Mapping to Mid Mapping and will be progressive whilst you work towards the sort of Equipment is shown below. This is a copy of what I used to get to T15 mapping and it was working quite well in both Solo and Group situations.

Enjoy!

Pre-Requisites

  • Level 65+.
  • 1500+ Maximum Mana (after taking Eldritch Battery).
  • 800+ Maximum Life
  • Painter's Servant Unique Gloves.
  • ~70% Damage Taken From Mana Before Life.

Equipment

item
item
4
item
2
item
3
item
6
item
5
item
item
1
item
8
item
7
item
item
item
item
item
Equipment Priority
0
Gloves
Painter's Servant
1
Helmet
Skycrown Tiara
2
Body
Vile Robe
3
Left Ring
Ruby Ring
4
Right Ring
Pearl Ring
5
Amulet
Gold Amulet
6
Boots
Dunerunner Sandals
7
Belt
Rawhide Belt
8
Main Hand
Chiming Staff

Overview

The above stats are by no means an exact blueprint of what the build requires. The Eye Symbol when you Highlight an item in the Equipment above signals the Stats you should Look To Prioritise First. They are supposed to act as a guideline for what would be useful to look out for whilst levelling up. You won't reasonably get items with the above stats before level 6 so just get the best you can. The below covers the overall Stat Priorities for this stage of the game:

Attribute Priority

  • Intelligence
  • Dexterity (As Required)
  • Strength (As Required)

Stat Priorities

Primary Focus

  • Movement Speed
  • Maximum Mana
  • Damage Taken From Mana Before Life (Passive Tree + Chest + Jewels)
  • Spirit (to get to X+ Maximum Spirit)
  • + Level of all Fire Skills
  • Elemental Resistances (Fire, Lightning, Cold)
  • Chaos Resistance
  • Mana Regeneration

Secondary Focus

  • Cast Speed
  • Gain % of Damage As Extra Y Damage. (Y = Cold, Lightning, Fire)
  • Maximum Life
  • + Level of All Spell Skills

Bonus Stats

  • Increased Critical Hit Chance
  • Increased Critical Damage
  • Increased Rarity Of Items Found

Charms

The biggest issue the Sorceress Class has defensively more than anything is being crowd controlled in general so we use our Charms to combat the worst of these to our benefit. The following charms are recommended in this order depending on how many Charm Slots you have:

  • Thawing Charm
  • Stone Charm
  • Silver Charm

Uniques

We can make use of the Painter's Servant because it takes all of our Elemental Damage and flattens it across our build to be 33% Cold, 33% Fire and 33% Lightning. This allows all of our skills to Ignite, Shock and Freeze so long as you are hitting hard enough which is very useful, particularly for the Freeze Potential. It also grants us a fairly decent amount of Extra Cold, Lightning and Fire Damage which is more than we can normally achieve on a pair of Rare Gloves. There is a world where Rare Gloves would be better because of the Extra Mana and Energy Shield it could grant us but this is fairly cheap to acquire on the Market and drastically improved the build in Early Mapping.

Jewel Stat Priorities

Any of the below stats will be great for the build. I would highly recommend trying to get Gain % Meta Energy where you can but the others are up for grabs.

  • Damage Taken From Mana Before Life
  • Area Of Effect
  • Mana Regeneration
  • Gain % Mana on Kill
  • Gain % Life on Kill
  • Increased Skill Effect Duration
  • Spell Damage
  • Increase % Magnitude of Shock
  • Spell Critical Chance
  • Spell Critical Damage
  • Maximum Resistances
  • Elemental Damage

Amulet Annointments

Here are some useful amulet annointments in order of cost, feel free to use what you prefer:

  • Mental Perseverance (Cheap Early Option)
  • Conservative Casting (Cheap Mana Sustain)
  • Frazzled (Mana Reneration + Shock Magnitude)
  • Molten Being (Physical Damage Reduction)
  • The Cunning Fox (+5% Quality To All Gems)

Skill Gems

Support Gem Requirements:

Str 25

Dex 55

Int 115

Expand all
1

Elemental Storm

Elemental Storm
supportmagnifiedareaplayer
prolongeddurationsupportplayertwo
supportcooldownrecoveryplayertwo
supporttempestuoustempoplayer
2

Firestorm

Firestorm
supportincreaselimitplayertwo
supporttempestuoustempoplayer
supportmagnifiedareaplayer
supportfiremasteryplayer
supportzenithplayertwo
3

Fireball

Fireball
supportnovaprojectilesplayer
unleashplayer
supportprojectileaccelerationplayerthree
supportmobilityplayer
4

Orb of Storms

Orb of Storms
supportincreaselimitplayertwo
supportfleetingremnantsplayertwo
supportshockplayer
supportrapidcastingplayerthree
5

Frost Bomb

Frost Bomb
supportincreaselimitplayertwo
supportspellcascadeplayer
supportfleetingremnantsplayertwo
supportcooldownrecoveryplayertwo
6

Living Bomb

Living Bomb
supportincreaselimitplayertwo
supportfleetingremnantsplayertwo
supportrapidcastingplayertwo
supporttempestuoustempoplayer
7

Elemental Weakness

Elemental Weakness
prolongeddurationsupportplayertwo
supportritualisticcurseplayer
supportmagnifiedareaplayertwo
supportcursedgroundplayer
supportcurseeffectplayer
8

Blasphemy

Blasphemy
temporalchainsplayer
supportritualisticcurseplayer
supportmagnifiedareaplayertwo
9

Mana Remnants

Mana Remnants
supportfleetingremnantsplayertwo
supportinterludeplayerthree
supportcannibalismplayer
10

Siphon Elements

Siphon Elements
supportfleetingremnantsplayertwo
supportclarityplayer
11

Sigil of Power

Sigil of Power
supportmagnifiedareaplayertwo
supportcooldownrecoveryplayertwo
prolongeddurationsupportplayertwo
Gem Priority
+38

Skill Gem Overview

A detailed explanation of the skill gems and their various support gems is down below in the How It Works section, so be sure to check that out for a better idea of gem selection and progression.

To equip all of the above Spirit Related Skills you will need 145 Spirit by default without any Spirit Efficiency on the build. If you don't have this then I'd recommend removing Clarity I and Cannibalism I to make room for everything else until you can put them both back on again.

Note: The attribute requirements are just above the skill gems.

Weapon Set Priority

Set 1

  • Firestorm
  • Fireball
  • Frost Bomb
  • Orb of Storms
  • Living Bomb
  • Elemental Weakness

Set 2

  • Sigil of Power

Both

  • Blasphemy
  • Mana Remnants
  • Siphon Elements

Gem Upgrade Priority

  1. Firestorm
  2. Fireball
  3. Frost Bomb
  4. Orb of Storms
  5. Living Bomb
  6. Elemental Weakness
  7. Temporal Chains
  8. Mana Remnants
  9. Siphon Elements
  10. Blasphemy

Gem Socket Priority

  1. Firestorm
  2. Fireball
  3. Frost Bomb
  4. Blasphemy
  5. Elemental Weakness
  6. Orb of Storms
  7. Living Bomb
  8. Siphon Elements
  9. Mana Remnants

Gem Quality Priority

If you're lucky enough to come across some Gemcutter Prism consumable items or are able to trade for some, you will want to upgrade the quality of your skill gems in the following order:

  1. Firestorm
  2. Siphon Elements
  3. Fireball
  4. Mana Remnants
  5. Blasphemy
  6. Frost Bomb
  7. Orb of Storms
  8. Elemental Weakness
  9. Temporal Chains
  10. Living Bomb

Passive Tree

main:
123
123
set 1:
20
20
set 2:
20
20

Overview

The start nodes are currently set above to go more offensive so you can focus going more defensively with the gear.

Note: Please follow the Notable Priority above to know which order to take nodes in.

Passive Tree Paths

The Passive Tree line colours represent the following:

  • Yellow -> Main Path
  • Pink -> Weapon Set 1
  • Green -> Weapon Set 2

Ascendancies

I recommend taking the following ascendancies in this order:

  1. Constant Gale
  2. Force of Will
  3. Tempest Caller
  4. Multiplying Squalls

For now I recommend taking Constant Gale first to gain permanent Arcane Surge for the extra free Cast Speed & Mana Regeneration.

Secondly we will take Force of Will for the potentially very valuable layer of defence in the newly baked in +20% Damage Taken From Mana Before Life which with enough Mana Regeneration will essentially make us much tankier. It also means as we get lower on Mana our Cast Speed and Mana Regeneration drastically increase from Arcane Surge.

We take Tempest Caller because we can increase our Limit on this skill by a fair number through the use of Overabundance II to allow us to have multiple of these. Considering we're taking so much Area of Effect and Duration on this build anyway this would allow us to keep these up and sustain them for much longer giving us a lot of extra Clearance Power and potentially more Boss Power but I'm still yet to test this.

Multiplying Squalls just makes sense for this build as it increase our Limit on so many skills in our arsenal including but not limited to the following:

  • Orb of Storms
  • Frost Bomb
  • Living Bomb
  • Firestorm
  • Elemental Storm

This will improve our Infusion Generation as well as Damage Output and Crowd Control Utility through allowing more instances of most of our Core Skills.

Atlas Tree

How it Plays

Build Rotation

This build has an Interactive Play Style and requires you to Combo Your Skills instead of being a One Button Build. If you like builds that have a more Methodical Approach whilst still being able to blast then this build is for you. The following is the recommended rotation:

Repeat To Keep Up

  • Place Orb of Storms for Chain Freeze Buildup and Infusion Generation.
  • Place Frost Bomb for Elemental Exposure Buildup and Infusion Generation.
  • Place Sigil of Power for Extra Damage.
  • Place Elemental Weakness to Multiply Our Damage Further.
  • Cast Firestorm frequently enough so it's Always Up.
  • Cast Fireball if enemies are surrounding you for Extra Trash Clearance.
  • Apply Living Bomb as often as possible for Big Damage and extra Infusion Generation.

It might not be possible to keep this entire rotation up if in a sticky situation so the main things to keep going are at least 1x Orb of Storms, 1x Frost Bomb and your Firestorm to try Freeze surrounding enemies and get back on top of the combat situation.

Use your Dodge Roll actively to get our from being overrun if you are struggling to Freeze the enemies which is your main source of Crowd Control besides Temporal Chains for Slowing The Enemies Down.

How it Works

Note: This is being actively updated so I will aim to flesh out all the missing areas ASAP.

Skill Info

Frost Bomb is early on is quite a useful skill for clearance and an extra source of damage. Later on it tails off though so we end up using it for the many other useful attributes it brings to the table. It provides a base 20% Elemental Exposure and is the only skill that can provide up to 50% Elemental Exposure based upon how many pulses hit your targets. This is a great way to gain an extra source of Damage Multiplication and acts as a hidden damage source. The secondary benefit is that each time a Frost Bomb explodes it grants us a Cold Infusion or a Random Infusion when Elemental Equilibrium has been taken which drastically improves our Infusion Generation. This in conjunction with Overabundance II and either Spell Echo or Spell Cascade means we can exceed the +1 Limit and multiply how fast we Apply Elemental Exposure and Generate Infusions.

Sigil of Power

Sigil of Power is made available through equipping a Chiming Staff in our Weapon Set 2 equipment slot so it doesn't require a free Skill Slot. It boosts our damage drastically which is very useful against Harder Single Target Enemies especially Boss Fights. The size is increased through Increased Area of Effect passives, Jewels and increasing the quality of the Chiming Staff to 20%, giving a +0.8m size increase. The duration is increased through the use of Increased Skill Duration passives allowing for durations upwards of 30 seconds+ in conjunction with Prolonged Duration II support gem.

In the End Game the aim is to get the Sigil of Power to last as long as possible with a size that is useful in combat situations where you have to avoid big attacks, giving options on where you can position yourself and still benefit from this huge damage boost. Clever use of Weapon Set passives allow us to unspec non-essential damage passives from Weapon Set 2 so we can allocate these points into Increased Area Effect and Increased Skill Duration clusters while allocating the damage nodes back to Weapon Set 1 to avoid any damage loss on our damage skills.

Mana Defence

This build does something wild and takes a Zero Energy Shield approach by taking Eldritch Battery and converting All Energy Shield To Mana. This can grant us a much higher Mana Pool at the cost of Doubling Our Spell Mana Costs.

It's worth noting that After Taking Eldritch Battery you really need to have a minimum of 1500+ Maximum Mana and 800 - 1000 Maximum Life for this to start to work, so please bare this in mind.

The thing about the Stormweaver is they added in their Ascensions access to 20% Damage Taken From Mana Before Life and many other ways to gain access to this stat in the Endgame Loop.

We don't want to take 100% Damage Redirect To Mana because this would make it so we run out of mana and can't cast. What we can do though with the help of the new Infusion System is create a system of sustain that is similar to what the Old Grim Feast used to be like for Energy Shield but for Life & Mana.

There are some New Notables that are exceptional for this setup and make it viable. For Mana consumption we can take Efficient Casting and Efficient Killing for Huge Mana Efficiency and 4% Mana On Kill. We can also take the newly added Vigorous Remnants and Arcane Remnants to grant us 3% Life and 3% Mana when Collecting A Remnant. The important thing to note here is that Infusions count as Remnants the same as any other Remnant you generate such as Mana Remnants. This can provide an INSANE amount of sustain which we spread mostly into our Mana Pool but allow some to go to our Life Pool so that we can still benefit from the Life On Remnant Collection and you coud even add some Life On Kill to the build as well to help with this through the use of Cannibalism I for example.

Mana Remnants is taken to generate us a huge amount of Remnants granting us a lot of Mana Sustain. This can be doubled in effectiveness using the newly added Empowering Remnants as well as getting access to 40% More Effectiveness from Remnant Potency III.

We're also generating a Metric Ton of Infusions which by casting Firestorm frequently enough will Consume one of each Infusion allowing us to pick up more in the process. Each Infusions we pick up grants us all the same Sustain Benefits that any other Remnant does so this doubles down on increasing our Effective HP.

As you manage to get your Mana Pool higher and as a result your Mana Regeneration a lot higher, you can look to scale a Higher Percentage of Damage Redirect To Mana. To start with I would recommend aiming for a 70% Balance scaling up towards an 80% Balance once you're nearer 3000 Maximum Mana and 500 Mana Regeneration.

The current known sources of Damage Taken From Mana Before Life include:

  • The Ascension Node Force of Will. (Max 20%)
  • Mental Perseverance Passive Node. (Max 10%)
  • Lucidity Passive Node. (Max 16%)
  • Chakra of Thought Passive Node. (Max 16%)
  • Adverse Growth Passive Node. (Max 8%)
  • Abyssal Suffix Modifer on Body Armours. (Max 20%)
  • Abyssal Suffix Modifer on Amulets. (Max 20%)
  • The Greatwolf's Rune of Willpower Body Armour Socketable. (Max 20%)
  • Sapphire Jewels (Max +4% per Jewel)

Mana Stacking

Mana Stacking was nerfed quite a bit in Patch 0.2.0 but with the new changes in Patch 0.3.0 we are again able to make use of the Eldritch Battery key passive which became basically unusable before. This allows us to Convert All Base Item Energy Shield to Mana allowing us to build up a much bigger Mana Pool.

It's worth noting that the larger your Mana Pool becomes the higher your base Mana Regeneration becomes since it's based upon a a percentage of your Maximum Mana.

Not only does Stacking Mana become the majority of your Effective HP Pool, it also scales your damage by taking Arcane Intensity which provides 3% Spell Damage Per 100 Maximum Mana. This is particularly valuable once you get to 1500+ Maximum Mana. It's also worth noting that because Mana Remnants allows us to Overflow Our Mana it grants us more damage when this is the case, and we aim to be in this situation as frequently as possible

Changelog

3rd Sept. 2025 / v0.1

  • Initial Planner Added
  • Added Weapon Set Priorties to Gems Section.

3rd Sept. 2025 / v0.2

  • Added Elemental Storm to the Gems Section + Supports.
  • Updated the Support Gems for most skills.

5th Sept. 2025 / v0.3

  • Added Sources of Mana Damage Redirect to Mana Defence Section.
  • Changed T1 - T15 to T1 - T14 to prepare for a T15 variant.
  • Updated Notable Priority for T1 - T14.
  • Added Video for Initial Build and Techs. (releasing 2pm BST 6th September 2025)

8th Sept. 2025 / v0.4

  • Changed T1 - T14 to T1 - T10 to smooth out the mapping experience.
  • Changed T15+ to T10 - T15 to smooth out the mapping experience.
  • Added a T16+ Variant.
  • Changed the Variant Requirements a little to reflect better the Spirit Requirements of each Variant.
  • Added Stat Priorities to Equipment.
  • Added better Variant Descriptions for Changes and Requirements.
  • Updated Gem Sections for All Variants.
  • Updated Atlas Trees for All Variants.

Note: Loot filter is coming in the near future!

Video Guide

Table of Contents

Featured Builds

Invoker Hollow Palm - Campaign to Endgame
Updated on Dec 4, 2025
0.3 Bigdaddy Arc/Spark CoC Stormweaver
Updated on Dec 4, 2025
LICH Minions Leaguestarter (being updated for 0.4, WIP right now)
Updated on Dec 4, 2025
0.3 Fubgun's Lightning Arrow Deadeye leveling Guide
Updated on Dec 4, 2025
[0.3] Skadoosh's Poison Pathfinder Leveling 1-58
Updated on Dec 3, 2025

Become a Creator

Want to earn rewards by sharing your builds with your community?