menu
MobalyticsUse your favourite features in-game with our Desktop App
PoE 2 Build

Chaos Totem Lich - T16+ Endgame

0.2 DotH
presentationWitch
presentationLich
End Game
Creator
Updated on Apr 23, 2025
Apr 23, 2025

Build Overview

This Witch Lich build focuses on levelling using Chaos Damage skills as the primary source of damage then later transitioning into a Chaos Totem Build.

This build is based on a Solo Self Found run through after patch 0.2.0 went live and has been adapated according to the experience of that run and the pain points that were met to try create a smooth levelling experience.

Be sure to check out the Starter Planner here if you're starting out a new league.

NOTE: This build is still a work in progress and I'l aim to get it updated in full over over the next few days once I'm back from being away. If you have any questions about the build, feel free to jump in my Discord and ask me questions directly.

-----

I'l be live streaming most evenings (GMT) so this is a good time to come ask me questions directly!

Strengths and Weaknesses

  • Excellent Clearance
  • Excellent Crowd Control
  • High Damage Output
  • Good Single Target Damage
  • Unique Playstyle
  • Relatively Easy To Get Online
  • Super Fun
  • Requires A Deeper Knowledge Of Totems And How They Scale.
  • High Spirit Requirement
  • Build Rotation Requires More Than One Button Mechanics.
  • Totems Can Die On Tougher Fights

Build Variants

This build is designed to get you from the start of a fresh league all the way through to mapping. It's more of a guideline of how to get there rather than an exact blueprint. Enjoy.

Pre-Requisites

  • Reach Level 60+.
  • 1500+ Life.
  • 3000+ Energy Shield.
  • Resistances all at 50%+.

Campaign Rewards (Non-Changeable)

There are not many of these in the game, but there are two rewards that can be chosen as part of the campaign that are Permanent and Can Not Be Changed, both in Act 3 & Act 3 (Cruel Mode).

You get the choices as below:

Act 3:

  • 25% increased Stun Threshold.
  • 30% increased Elemental Ailment Threshold.
  • 25% increased Mana Regeneration Rate.

Act 3 - Cruel

  • +10% to Chaos Resistance.
  • +5 to All Attributes.
  • 15% reduced Slowing Potency of Debuffs on you.

-----

We won't be able to take Chaos Inoculation with the Lich Ascension Soulless Form which makes our Mana Regeneration scale based on the size of our Maximum Life Pool, so I would recommend you go with the following choices:

Act 3:

  • 25% increased Mana Regeneration Rate.

Act 3 - Cruel

  • +10% to Chaos Resistance.

Equipment

item
2
item
4
item
1
item
7
item
6
item
4
item
3
item
8
item
9
item
10
item
item
item
item
item
item
Equipment Priority
0
Helmet
Jungle Tiara
1
Main Hand
Volatile Wand
2
Off Hand
Stoic Sceptre
3
Left Ring
Amethyst Ring
4
Right Ring
Amethyst Ring
5
Amulet
Solar Amulet
6
Body
Sacramental Robe
7
Gloves
Grim Gloves
8
Belt
Linen Belt
9
Boots
Sandsworn Sandals

The above stats are by no means an exact blueprint of what the build requires. They are supposed to act as a guideline for what would be useful to look out for whilst levelling up. You won't reasonably get items with the above stats before level 6 so just get the best you can. The below sections will cover priority whilst including a bullet point list of priorities for easier reading.

Mobility

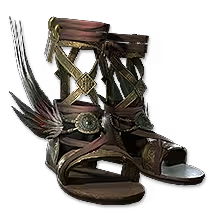
Movement speed should be your absolute priority #1 when starting out a new character. This will naturally allow you to move and attack better as well as just generally stay away from groups of enemies trying to swarm you and avoid big attacks from bosses. Your lives will be forever better when you have movement speed on your boots.

Offence

Offence can be scaled in many ways but early on your can look for +skills ranks, cast speed and increased damage (spell / chaos). Try to prioritise getting a decent amount of cast speed early on as this will make any caster build you play feel much better.

I would prioritise trying to get enough of a Mana pool to be able to cast without the worry of running out of Mana all the time.

After this the general passive tree track will scale your damage so you can focus on defences and utility on your gear.

Defence

I'd highly recommend stacking maximum life along with whatever resistances you can get hold of.

Energy shield will the primary source of defence on this build so we want to stack it where ever we can.

You can reasonably stack energy shield along with maximum life to stay alive so long as you have some amount of resistances.

I can't emphasise enough how important resistances are for staying alive so make sure to prioritise this where you can.

Offhand

The recommended offhand item for New Players as a League Starter is a shield with both Armour and Energy Shield on it. This will provide some extra defence in the form of Blocking and it can roll extra Elemental Resistances much easier than on Wands and Focuses. The Campaign can be pretty challenging to start with so this will give you an extra bit of repreive from incoming damage, particularly from bosses and can be the difference between being one shot or not.

If you are a more experienced player then the following options can be looked at:

  • Wand (Main Hand) / Sceptre (Offhand)
  • Scepter (Main Hand) / Focus (Offhand)

The loot you get from league start is not something that can be controlled so if you come across a very nice item that makes sense to use with the above combinations then the recommendation is to use them, particularly if you come across any nice Uniques that makes sense.

Flasks

I would take whatever flasks have the highest heal amount over the shortest time and not worry about these too much else early on.

Charms

If you're lucky enough to get hold of a or Thawing Charm I would put these on as required to help remove the worry of these when in hectic fights.

You will only be able to equip one to start with until you get +1 Charm Slots somewhere on the build so prioritise whichever is causing you the biggest issue. I would expect the Thawing Charm to be more useful later when as we can stack Stun Threshold based on Energy Shield quite easily on this build.

Attribute Priority

  • Intelligence
  • Dexterity (As Required)
  • Strength (As Required)

Stat Priorities

Primary Focus

  • Movement Speed
  • Maximum Life
  • Cast Speed
  • + Level of Chaos Spell Skills
  • Elemental Resistances (Fire, Lightning, Cold)
  • Chaos Resistance
  • Increased Maximum Energy Shield
  • Increased Energy Shield
  • Spirit (to get to X+ Maximum Spirit)
  • Mana Regeneration

Secondary Focus

  • + Level of all Spell Skills
  • + Level of Projectile spell Skills

Offhand

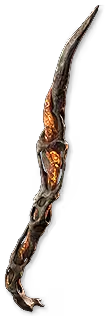
You will want to have a Stoic Sceptre in your offhand as this makes it a lot easier to get the spirit required to allow the higher number of Dark Effigy totems.

As of patch 0.2.0f sceptres can also be socked with Talismans for extra buffs to Allies which are super useful as well.

Jewel Stat Priorities

If you're just starting out then you won't have much available here so use whatever you can get your hands on.

Any of the below stats will be great for the build:
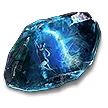
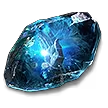
Sapphires

  • % Increased Maximum Energy Shield
  • % Faster Energy Shield Start Rate
  • Mana Regeneration
  • % Mana On Kill
  • Spell Damage
  • Chaos Damage
  • Cast Speed
  • Freeze Buildup

If Eternal Life has not been taken:

  • Recover % Maximum Life On Kill
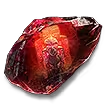
Rubys

  • Totem Damage
  • Totem Life
  • Totem Placement Speed
  • Increased Skill Duration

Skill Gems

Support Gem Requirements:

Str 20

Dex 35

Int 80

Expand all
1

Dark Effigy

Dark Effigy
supportfastercastplayer
supportgreatwoodplayer
supportzenithplayer
supportcontrolleddestructionplayer
supportconcentratedeffectplayer
2

Essence Drain

Essence Drain
supportgambleshotplayer
supportmultipleprojectilesplayer
supportmultiplepoisonplayer
supportchancetopoisonplayer
3

Contagion

Contagion
supportunleashplayer
supportswiftafflictionplayer
supportacrimonyplayer
4

Profane Ritual

Profane Ritual
supportexpanseplayer
supportprofanityplayer
supportcorpseconservationplayer
5

Despair

Despair
supportdecayinghexplayer
supportcursedgroundplayer
supportinspirationplayer
supportchaoticfreezeplayer
6

Blasphemy

Blasphemy
temporalchainsplayer
supportcurseeffectplayer
supportencumberanceplayer
7

Withering Presence

Withering Presence
supportchaosmasteryplayer
8

Convalescence

Convalescence
moredurationsupportplayer
supportcooldownreductionplayer
9

Discipline

Discipline
supportclarityplayer
supportvitalityplayer
10

Sigil of Power

Sigil of Power
supportincreasedareaofeffectplayer
Gem Priority
+28

Passive Tree

main:
123
123
set 1:
20
20
set 2:
20
20

Overview

The start nodes are currently set above to go more offensive so you can focus going more defensively with the gear.

Passive Tree Paths

The Passive Tree line colours represent the following:

  • Yellow -> Main Path
  • Pink -> Weapon Set 1
  • Green -> Weapon Set 2

Levelling Path

Below is a list of what Notables to take in what order. As always this is a guideline so feel free to experiment as you like.

Coming Soon

Key Passives

At this point we will be looking to be able to Apply Two Curses which requires either Whispers of Doom or Dominion Over Flesh. The former is a Key Passive which allows us to Apply +1 Curse but at the trade off of Doubled Activation Time of Curses. At this point, this is an acceptable trade off to allow us to Slow Down Enemy Movement Speed drastically with Temporal Chains.

We also incorporate Ancestral Bond which uncaps our Totem Limit but makes each Totem cost 100 Spirit. This has two benefits for us:

  1. We can instantly cap Greatwood to start with whilst we build a larger Spirit pool.
  2. We can get more than 2x Dark Effigy without the need to use the Overabundance support.

Ascendancies

We change up our ascendancies at this point because we have managed to acquire power through items and passives that allow us more damage than survivability, so we want to shift our focus to defense during the early mapping phase.

I recommend going for Necromantic Conduit to start with as it provides 30% as Extra Chaos Damage at the cost of 5% Mana Loss per Second. It should be possible to solve Mana Renegeration at this stage so it's a juicy damage boost assuming we can.

Secondly we take Soulless Form which changes where our characters base Mana Regeneration is sourced from. It will now be based upon our 6% Maximum Life value instead of our Maximum Mana value and is significantly stronger if your Maximum Life is the same value as your Maximum Mana.

Note: You will want to make sure you have some Life Regeneration or Life Sustain on the build to help counter some of the damage bypassing your shield.

Once you can get your Third Set of Ascendancy Points I would trail into Eternal Life which means all damage bypassing your Energy Shield will be negated so long as you have some Energy Shield remaining.

If and when you can get the 4th Set of Ascendancy Points I would trail back into the jewel socket. Originally I recommended Blackened Heart but unless you have a Metric Ton of Mana you won't gain that much damage once it has stacked with all your other bonuses. Jewel Sockets are much rarer and valuable now and on top of this, your ascension Jewel Socket is doubled in power. The fact you get 20% Maximum Energy Shield along the way is a bonus as well.

Recommended:

  1. Necromantic Conduit
  2. Soulless Form
  3. Eternal Life
  4. Jewel Socket

Atlas Tree

Atlas Philosophy

Coming Soon

How it Plays

Cast Despair to prime enemies within it's area with Decaying Hex which reduces an enemies Chaos Resistance, amplifies all Chaos Damage you inflict on them and counts as an extra Chaos Damage Over Time Debuff for our Dark Effigy projectile scaling.

Once enemies are inflicted by Despair it's time to place Dark Effigy down in a sensible location where it can setup and start attacking all enemies inflicted with Chaos Damage Over Time Debuffs that are within range.

Note: It's important to understand how Dark Effigy works as a Totem Skill and in regards to it's Projectile Scaling. Check out the Skill Info section below for further details.

Once the Dark Effigy is placed and doing it's thing it is recommended to cast Contagion on a few different enemies whilst also casting Dark Effigy combine with the Envenom support to apply extra Debuffs to large groups of enemies, further boosting the projectile output of our Dark Effigy.

Profane Ritual can be cast on a nearly enemy Corpse to produce another Chaos Damage Over Time damage source to all enemies within it's Area of Effect.

A list of all the Chaos Damage Over Time Debuffs are as follows:

  • Essence Drain
  • Contagion
  • Profane Ritual
  • Decaying Hex
  • Envenom

Convalescence is available as a Panic Button to quickly regenerate our Energy Shield at the recharge rate the player has when it naturally recharges. This is a very powerful Defensive Skill if used correctly.

Withering Presence automatically applies Withered to enemies that come within our Presence for extra damage.

Blasphemy automatically applies for us to all enemies within range.

Sigil of Power becomes available to us by equipping a Chiming Staff to Weapon Set 2.

Aim to place Sigil of Power somewhere central to where you want to run around so you can start charging it up and give yourself plenty of area to move around whilst benefitting from the extra damage it provides if you have to avoid incoming damage. Reset the placement if it ends before the fight is over, in most cases this won't be the case.

NOTE: Make sure to assign all damage skills to Weapon Set 1 only so that when you cast an offensive skill you will automatically swap back to your main weapon and off-hand. Sigil of Power is automatically allocated to weapon set 2 as it's a skill that is attached to the staff we equip. You can leave Blasphemy on both Weapon Set 1 and Weapon Set 2 so it stays active regardless of what set we have equipped at any given time.

How it Works

Skill Gems

Coming Soon

Skill Info

Coming Soon

Changelog

10th Apr. 2025 / v0.1

  • Added Initial skeleton planner.
  • Added T16+ Variant
  • Added initial Atlas Points for T16+ Variant.

16th Apr. 2025 / v0.2

  • Modified Pre-requisites
  • Added How It Plays
  • Added Jewel Stat Priorities
  • Changed T16+ Variant to T1 - T14 Variant
  • Added T15+ Variant
  • Added Skill Gem Cutting Information
  • Added Jewellers Orbs Priortities
  • Added Gem Quality Priorities
  • Added Offhand Explanation
  • Modified Atlas Tree
  • Updated Equipment
  • Added Passive & Key Passive Information

23rd Apr. 2025 / v0.3

  • Modified T15+ Variant items.
  • Updated Socketables on equipment.
  • Slightly modified Support Gems in T15+ Variant.
  • Updated Passive Tree for T15+ Variant.
  • Updated Ascensions for T15+ Variant.
  • Updated Atlas Tree for T15+ Variant.
  • Added T16+ Variant.
  • Added Jewels into Passive Tree & Equipment.
  • Added Strengths & Weaknesses.

Work in Progress

I am going to aim to have these complete these in the near future so keep an eye out for this.

  • Build Overview Extra Detail
  • Levelling Paths
  • How It Plays
  • Skills Gems Explanation
  • Skill Info Explanation

Table of Contents

Featured Builds

Invoker Hollow Palm - Campaign to Endgame
Updated on Dec 4, 2025
0.3 Bigdaddy Arc/Spark CoC Stormweaver
Updated on Dec 4, 2025
LICH Minions Leaguestarter (being updated for 0.4, WIP right now)
Updated on Dec 4, 2025
0.3 Fubgun's Lightning Arrow Deadeye leveling Guide
Updated on Dec 4, 2025
[0.3] Skadoosh's Poison Pathfinder Leveling 1-58
Updated on Dec 3, 2025

Become a Creator

Want to earn rewards by sharing your builds with your community?