menu
MobalyticsUse your favourite features in-game with our Desktop App
PoE 2 Build

Chaos Totem Lich - League Starter / Early Endgame

presentationWitch
Starter
presentationLich
0.3 TTE
SSF
Verified
presentationEnd Game
presentationTier
Updated on Nov 20, 2025
Nov 20, 2025

Build Overview

This Witch Lich build focuses on levelling using Chaos Damage skills as the primary source of damage then later transitioning into a Chaos Totem Build.

This planner was originally built in 0.2.0 and has been updated for 0.3.0.

NOTE: I'l be aiming to update this in the next day or two on my day off.

The build should work just fine as so long as the supports haven't changed too drastically and it turns out there is a straight up buff in Ancestral Bond this league which makes this build stronger than before in the latter stages of the build.

I'l be sure to work on an endgame planner post launch for this build as this will require some extra knowledge before it can really be put together properly. Be sure to Favourite This Guide to keep updated in the Change Log when there are updates.

NOTE: This build is still a work in progress. If you have any questions about the build, feel free to jump in my Discord and ask me questions directly.

-----

I'l be live streaming most evenings (GMT) so this is a good time to come ask me questions directly!

Strengths and Weaknesses

  • Great League Starter
  • Excellent Clearance
  • Excellent Crowd Control
  • High Damage Output
  • Good Single Target Damage (Level 31+)
  • Unique Playstyle
  • Relatively Easy To Get Online
  • Super Fun
  • Requires A Deeper Knowledge Of Totems And How They Scale.
  • Can't gain access to Dark Effigy until Level 31+.
  • Build Rotation Requires More Than One Button Mechanics.
  • Totems Can Die On Tougher Fights

Build Variants

This build is designed to get you from the start of a fresh league all the way through to mapping. It's more of a guideline of how to get there rather than an exact blueprint. Enjoy.

Pre-Requisites

Absolutely none, this can be played right from the very start of a league.

Campaign Rewards (Non-Changeable)

There are not many of these in the game, but there are two rewards that can be chosen as part of the campaign that are Permanent and Can Not Be Changed, both in Act 3 & Act 3 (Cruel Mode).

You get the choices as below:

Act 3:

  • 25% increased Stun Threshold.
  • 30% increased Elemental Ailment Threshold.
  • 25% increased Mana Regeneration Rate.

Act 3 - Cruel

  • +10% to Chaos Resistance.
  • +5 to All Attributes.
  • 15% reduced Slowing Potency of Debuffs on you.

-----

We won't be able to take Chaos Inoculation with the Lich Ascension Soulless Form which makes our Mana Regeneration scale based on the size of our Maximum Life Pool, so I would recommend you go with the following choices:

Act 3:

  • 25% increased Mana Regeneration Rate.

Act 3 - Cruel

  • +10% to Chaos Resistance.

Equipment

item
3
item
5
item
2
item
8
item
7
item
6
item
4
item
9
item
10
item
1
item
item
item
Equipment Priority
0
Boots
Straw Sandals
1
Helmet
Twig Circlet
2
Main Hand
Clasped Sceptre
3
Off Hand
Sigil Crest Shield
4
Left Ring
Sapphire Ring
5
Right Ring
Ruby Ring
6
Amulet
Lapis Amulet
7
Body
Feathered Robe
8
Gloves
Torn Gloves
9
Belt
Rawhide Belt

Overview

The above stats are by no means an exact blueprint of what the build requires. The Eye Symbol when you Highlight an item in the Equipment above signals the Stats you should Look To Prioritise First. They are supposed to act as a guideline for what would be useful to look out for whilst levelling up. You won't reasonably get items with the above stats before level 6 so just get the best you can. The below covers the overall Stat Priorities for this stage of the game:

Attribute Priority

  • Intelligence
  • Dexterity (As Required)
  • Strength (As Required)

Stat Priorities

Primary Focus

  • Movement Speed
  • Maximum Life
  • Cast Speed
  • + Level of all Chaos Skills
  • Elemental Resistances (Fire, Lightning, Cold)
  • Chaos Resistance
  • Increased Maximum Energy Shield
  • Increased Energy Shield

Secondary Focus

  • Spirit (to get to X+ Maximum Spirit)
  • + Level of all Spell Skills
  • + Level of Projectile spell Skills
  • Mana Regeneration

Bonus Stats

  • Increased Critical Hit Chance
  • Increased Critical Damage

Mobility

Movement speed should be your absolute priority #1 when starting out a new character. This will naturally allow you to move and attack better as well as just generally stay away from groups of enemies trying to swarm you and avoid big attacks from bosses. Your lives will be forever better when you have movement speed on your boots.

Offence

Offence can be scaled in many ways but early on your can look for +skills ranks, cast speed and increased damage (spell / chaos). Try to prioritise getting a decent amount of cast speed early on as this will make any caster build you play feel much better.

I would prioritise trying to get enough of a Mana pool to be able to cast without the worry of running out of Mana all the time.

After this the general passive tree track will scale your damage so you can focus on defences and utility on your gear.

Defence

I'd highly recommend stacking maximum life along with whatever resistances you can get hold of.

Energy shield will the primary source of defence on this build so we want to stack it where ever we can.

You can reasonably stack energy shield along with maximum life to stay alive so long as you have some amount of resistances.

I can't emphasise enough how important resistances are for staying alive so make sure to prioritise this where you can.

Offhand

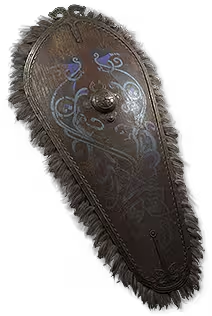
The recommended offhand item for New Players as a League Starter is a shield with both Armour and Energy Shield on it. This will provide some extra defence in the form of Blocking and it can roll extra Elemental Resistances much easier than on Wands and Focuses. The Campaign can be pretty challenging to start with so this will give you an extra bit of repreive from incoming damage, particularly from bosses and can be the difference between being one shot or not.

If you are a more experienced player then the following options can be looked at:

  • Wand (Main Hand) / Sceptre (Offhand)
  • Scepter (Main Hand) / Focus (Offhand)

The loot you get from league start is not something that can be controlled so if you come across a very nice item that makes sense to use with the above combinations then the recommendation is to use them, particularly if you come across any nice Uniques that makes sense.

Flasks

I would take whatever flasks have the highest heal amount over the shortest time and not worry about these too much else early on.

Charms

If you're lucky enough to get hold of a Stone Charm or Thawing Charm I would put these on as required to help remove the worry of these when in hectic fights.

You will only be able to equip one to start with until you get +1 Charm Slots somewhere on the build so prioritise whichever is causing you the biggest issue. I would expect the Thawing Charm to be more useful later when as we can stack Stun Threshold based on Energy Shield quite easily on this build.

Uniques

This build is intended to be possible without any uniques.

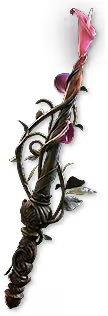
If you are lucky enough to drop a Lifesprig this will easily carry you until Cruel Mode. This is an incredible starter weapon that gives you everything you need offensively for this build early on.
Another very useful unique that can help tremendously through the first campaign playthrough is the Luminous Pace boots which can drop as early as after the first town. These give you that much needed Movement Speed, some extra Mana through the Intelligence it provides and more importantly it gives +30 Maximum Energy Shield and 100% Faster Start Of Energy Shield Recharge which is super godly early game for sustaining damage in longer fights, such as boss fights.

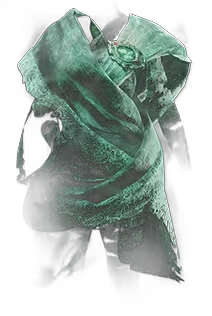
Another reasonable unique that will help carry any Energy Based build through the campaign is the Ghostwrithe body armour. This will not only provide a huge boost to our Maximum Energy Shield, it also provides a nice amount of Chaos Resistance which is hard to come by in the early game. Since we don't want to ever run out of a Energy Shield the conversion of 25% Life -> Energy Shield also plays nicely for this ascendancy in the early game.
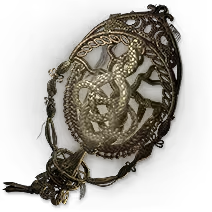
If you're lucky enough to drop a The Devouring Diadem on your journey, this is a pretty strong option for boosting your overall defences early on, particularly because it provides Chaos Resistance as well as consuming corpses to heal you for 20% of your life every 3 Seconds. Any where we can get Chaos Resistance which isn't at the expense of the rest of our defences is useful during the early portion of the game as it's not a common affix to come by and Incoming Chaos Damage can be devastating without it.

If you get lucky and drop the Threaded Light focus and feel that you have enough defense to survive without a shield on, this will drastically boost your damage early game with a sceptre equipped.
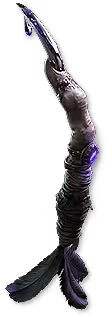
The newly added wand The Wicked Quill is an exceptionally great unique for this build to level on if you're lucky enough to drop one early enough as it gives us everything we would need at this point of the game. A huge amount of Spell Damage, Maximum Mana, Chaos Resistance and it makes all of our spells have a 25% to inflict Withered which isn't that easy to cap out at 10 stacks early on.
Skill Gems

Support Gem Requirements:

Str 5

Dex 5

Int 20

Expand all
1

Chaos Bolt

Chaos Bolt
2

Unearth

Unearth
3

Skeletal Warrior

Skeletal Warrior
supportlastgaspplayer
supportmeatshieldplayer
4

Contagion

Contagion
supportunleashplayer
5

Essence Drain

Essence Drain
supportfastercastplayer
supportchainplayer
6

Frost Bomb

Frost Bomb
supportspellcascadeplayer
7

Flame Wall

Flame Wall
Gem Priority
+6

Skill Gem Overview

A detailed explanation of the skill gems and their various support gems is down below in the How It Works section, so be sure to check that out for a better idea of gem selection and progression.

Note: The attribute requirements are just above the skill gems.

Skill Gem Cutting Priority

T1

Contagion / Frost Bomb / Flame Wall

T3

Essence Drain

Support Gem Cutting Priority

These are in roughly the correct order you want to cut them from your Uncut Support Gems.

T1

Last Gasp / Unleash / Chain / Arcane Tempo / Spell Cascade / Meat Shield

Other Useful Support Gems

Fast Forward / Magnified Effect / Scattershot / Swift Affliction / Pierce

Gem Upgrade Priority

  1. Essence Drain
  2. Contagion

Gem Socket Priority

Lesser Jewellers Orbs

  1. Essence Drain
  2. Contagion

Gem Quality Priority

If you're lucky enough to come across some Gemcutter Prism consumable items or are able to trade for some, you will want to upgrade the quality of your skill gems in the following order:

  1. Contagion
  2. Essence Drain

The rest are optional and don't really impact the build in any meaningful way.

Passive Tree

main:
123
123
set 1:
20
20
set 2:
20
20

Overview

The start nodes are currently set above to go more offensive so you can focus going more defensively with the gear.

Passive Tree Paths

The Passive Tree line colours represent the following:

  • Yellow -> Main Path
  • Pink -> Weapon Set 1
  • Green -> Weapon Set 2

How it Plays

Level 1 - 30

To start with you will need to use whatever skills are available to you before Level 31 and obtaining a Level 9 Skill Gem which is the point at which Dark Effigy becomes available to us.

Skeletal Warrior will be auto-summoned for us by having the Rattling Sceptre equipped so we can just let them do there thing and tank for us in the early game.

Cast Contagion liberally when engaging enemies to infect one or more of them so when they die it spreads all Chaos Damage Over Time Debuffs to nearby enemies.

Cast Frost Bomb under large groups of enemies or larger targets for huge demolition style AOE damage. This is excellent for clearance and for big damage on bosses when they are stationary or crowd controlled.

Essence Drain should be cast liberally to spread it's Chaos Damage Over Time Debuff to nearly enemies. This be be further boosted by casting Flame Wall and firing Essence Drain through it for Additional First Damage for each projectile that passes through it.

If a Corpse happens to be nearby Profane Ritual can be cast to Consume it and create an extra source of Chaos Damage Over Time for enemies that stand inside it's Area of Effect.

Activate Convalescence when youe Energy Shield is low or depleted to instantly start regenerating Energy Shield at your Energy Shield Recharge Rate.

Level 31+

Cast Despair to prime enemies within it's area with Decaying Hex which reduces an enemies Chaos Resistance, amplifies all Chaos Damage you inflict on them and counts as an extra Chaos Damage Over Time Debuff for our Dark Effigy projectile scaling.

Once enemies are inflicted by Despair it's time to place Dark Effigy down in a sensible location where it can setup and start attacking all enemies inflicted with Chaos Damage Over Time Debuffs that are within range.

Note: It's important to understand how Dark Effigy works as a Totem Skill and in regards to it's Projectile Scaling. Check out the Skill Info section below for further details.

Once the Dark Effigy is placed and doing it's thing it is recommended to cast Contagion on a few different enemies whilst also casting Essence Drain combine with the Envenom support to apply extra Debuffs to large groups of enemies, further boosting the projectile output of our Dark Effigy.

Profane Ritual can be cast on a nearly enemy Corpse to produce another Chaos Damage Over Time damage source to all enemies within it's Area of Effect.

A list of all the Chaos Damage Over Time Debuffs are as follows:

  • Essence Drain
  • Contagion
  • Profane Ritual
  • Decaying Hex
  • Envenom

Convalescence is available as a Panic Button to quickly regenerate our Energy Shield at the recharge rate the player has when it naturally recharges. This is a very powerful Defensive Skill if used correctly.

Withering Presence automatically applies Withered to enemies that come within our Presence for extra damage.

Bind Spectre is used to automatically spawn a Tank Minion for us once it becomes available, replacing Skeletal Warrior.

Blasphemy automatically applies Temporal Chains for us to all enemies within range.

When an enemy is within range to be Culled, cast Power Siphon to Execute them.

Early Endgame

The skill rotation of the build stays the same as above with the following changes:

Sigil of Power becomes available to us by equipping a Chiming Staff to Weapon Set 2.

Aim to place Sigil of Power somewhere central to where you want to run around so you can start charging it up and give yourself plenty of area to move around whilst benefitting from the extra damage it provides if you have to avoid incoming damage. Reset the placement if it ends before the fight is over, in most cases this won't be the case.

NOTE: Make sure to assign all damage skills to Weapon Set 1 only so that when you cast an offensive skill you will automatically swap back to your main weapon and off-hand. Sigil of Power is automatically allocated to weapon set 2 as it's a skill that is attached to the staff we equip. You can leave Blasphemy and Convalescence on both Weapon Set 1 and Weapon Set 2 so these stay active regardless of what set we have equipped at any given time.

How it Works

Starter Skills

On a fresh character you'l want to start with the basic skill gems available such as Skeletal Warrior / Unearth / Contagion / Frost Bomb / Flame Wall until you can get your hands on Essence Drain which will be your main caster spell even after your swap to be more Totem focused later on.

Skill Gems

Unearth is made available to us at the very start of the campaign so is taken to assist with the early stage of levelling until we can unlock some of our other skills. This does a decent amount of Area of Effect damage as well as Summons Minion Constructs which are useful to us for tanking enemies as well as for extra damage.

Contagion is an extremely potent skill which can be taken as early as Level 3 infecting enemies with a Chaos Debuff and when an enemy dies infected by this Debuff it spreads itself and all other Chaos Debuffs to nearby enemies with increased potency. Adding the Unleash support makes this a lot nicer to apply to larger groups of enemies whilst Magnified Effect is taken early on in the campaign to increase the radius which it will spread to enemies. Later on we gain access to Chaotic Freeze which to start with we'l add to Contagion because we aren't quite setup to place it where we will eventually want it to go. This allows us the ability to freeze enemies affected by Contagion when hitting them with Chaos Hit Damage. Much deeper into the campaign we will remove Magnified Effect and replace it with Swift Affliction for extra non-Ailment Damage over Time which should help with group clearance.

Frost Bomb was very strong early on for killing groups of enemies and bosses. Spell Cascade and Fast Forward can be added to further the damage output and useability which I found to be super helpful.

At Level 6 Essence Drain can be taken which will become our main caster skill and later on our main spreader skill alongside Contagion's natural ability to spread Chaos Debuffs. Although you can't stack more than one of the same Chaos Debuff at a time, Arcane Tempo is still useful to take here because Essence Drain has a Hit Damage element to it as well so it allows us to utilise that a bit more. We take Chain to be able to spread the Chaos Debuff to multiple enemies which should make getting through map areas a bit nicer. Although Scattershot got nerfed in Patch 0.2.0 it's still pretty useful early on for damage and spreading the Chaos Debuff this skill provides. It also means it spreads Hinder more effectively for us as well which helps slow down enemies a little in the early stages of the game before we can get our hands on Temporal Chains. Later down the line nearer the end of the campaign you will gain access to the new support Gambleshot which can be used as a replacement to Chain if you want a bit more damage out of Essence Drain at the cost of having a random spread effect instead of always Chaining, this is entirely up to you. The support Envenom can also be added here if you are lucky enough to unlock the extra support slots as the poison despite being an Ailment acts as another Chaos Debuff for Dark Effigy so this further outputs our damage later on.

Flame Wall is available to us from the very start of the campaign and is entirely optional to use here. It can be useful for some extra damage when firing your Essence Drain projectiles through it for some extra Added Fire Damage.

Profane Ritual is a bit more of a situational skill during the campaign that becomes available to us at Skill Gem Level 7. It requires a Corpse to cast and Consumes it when it is used so it isn't a skill you can cast on demand. If Profanity is socketed here it can do a pretty high amount of Chaos Damage and counts as another Chaos Debuff so if a Corpse just so happens to be in the right place, this will do you wonders. This becomes much more useful later on when you can expand it's radius a bit and there will be more enemy corpses to cast upon.

Convalescence which is essentially an Energy Shield Panic Button with a Duration and Cooldown on it. Use this when your Energy Shield has been depleted to Instantly Start Recharing Your Energy Shield.

Despair is used to prime enemies within it's area with Decaying Hex which counts as an extra Chaos Damage Over Time Debuff for our Dark Effigy projectile scaling. This also applies the Chaos Resistance Curse to enemies within it's area which reduces an enemies Chaos Resistance and amplifies all Chaos Damage you inflict on them. Once the support Chaotic Freeze has been socketed it will also allow all Chaos Damage to build up towards Freezing Enemies inflicted within the curses area which gives a very important source of Crowd Control to the build as well as boosting our damage through the use of Thin Ice.

Dark Effigy is placed down in a sensible location where it can setup and start attacking all enemies inflicted with Chaos Damage Over Time Debuffs that are within range. Earlier on in the campaign Overabundance is very useful for alllowing two Dark Effigy Totems to be placed, essentially doubling the damage output of the build so long as there is enough Increased Skill Duration active to make the Totems last a decent length of time. This should be used in conjunction with Ancestral Urgency allowing the placement of multiple Totems at a far quicker pace. Later on when entering the endgame system, the support Greatwood can be taken along with the Key Passive Ancestral Bond in order to gives us one larger, more powerful Totem. This is very useful at this stage of the game as it helps with the Totems Survivability and Area Of Effect.

Later on we take Blasphemy in conjunction with Temporal Chains which is a very powerful combo that allows us to slow down the Movement Speed of all surrounding enemies so long as they aren't Hexproof. This turns the Curse into an Automatic Aura with Less Effectiveness but Greater Area Of Effect. By taking Whispers of Doom we can Apply 2 Curses to enemies which is required to use this tech as well as Despair together.

Skill Info

Since Dark Effigy is a Totem Skill it takes all of the Offensive Stats Of The Player whilst retaining it's Own Defensive Stats. This means that if it's a Spell based Totem it will scale it's Cast Speed as the Player's Cast Speed is scaled. It also means that stats such as Spell Damage and Chaos Damage will also scale the damage of Dark Effigy.

On top of this, Dark Effigy has a second way to scale it's Cast Speed through the use of Unique Chaos Debuffs. There has to be at least 1x Chaos Debuff on an enemy for it to target and cast Vile Effusion Projectiles at them, scaling the number of Projectiles it fires at any given enemy during it's Cast Time by the number of Chaos Debuffs that are active on them. So if Dark Effigy has a Cast Time of 1sec. and there is 1x Debuff on an enemy, it will fire 1 Projectile per Second at the enemy. If that enemy was to have 2x Debuff on them Dark Effigy would fire 2 Projectiles per Second at the enemy.

Sigil of Power is added to Weapon Slot 2 later on in order to give us that extra damage we need for Harder Single Target Enemies. At Level 18 it gives 14% More Spell Damage Per Stage equating to 56% More Spell Damage at Stage 4. The sigil is charged up by spending mana inside the sigil so casting lots of high mana skills constantly will help a lot here.

Changelog

4th April 2025 / v1.0

  • Initial Planner Added

29th August 2025 / v2.0

  • Build updated for 0.3.0 - The Third Edict.

Video Guide

Table of Contents

Featured Builds

Invoker Hollow Palm - Campaign to Endgame
Updated on Dec 4, 2025
0.3 Bigdaddy Arc/Spark CoC Stormweaver
Updated on Dec 4, 2025
LICH Minions Leaguestarter (being updated for 0.4, WIP right now)
Updated on Dec 4, 2025
0.3 Fubgun's Lightning Arrow Deadeye leveling Guide
Updated on Dec 4, 2025
[0.3] Skadoosh's Poison Pathfinder Leveling 1-58
Updated on Dec 3, 2025

Become a Creator

Want to earn rewards by sharing your builds with your community?