menu
MobalyticsUse your favourite features in-game with our Desktop App
Gamebase Guide

Valheim 1.0: Meadows to Swamp Walkthrough

Guides
Valheim
By Oli
Updated on Sep 9, 2026
Sep 9, 2026

Overview

The Meadows, Black Forest, and Swamp each change what you need from your equipment and your base. Hunting and gathering support your first boss fight, mining opens up bronze tools and farming, and the Swamp introduces iron alongside much harsher terrain and enemies.

This Valheim 1.0 guide takes a closer look at those three biomes, covering the resources worth collecting, useful crafting priorities, food upgrades, local threats, and preparations for Eikthyr, the Elder, and Bonemass. The route ends after Bonemass, once you have established the supplies and equipment to prepare for the Mountains.

If you are still learning your first tools and building pieces, our guide to getting started in the Meadows walks through your opening sessions.

The Meadows: Build a Base and Prepare for Eikthyr

The Meadows gives you room to establish a home that can keep supporting you through the Black Forest and Swamp. Choose somewhere with nearby hunting grounds, wood, and space to expand. A coastline is useful for later boat trips, while reasonable access to the Black Forest makes your first mining journeys shorter.

Avoid building directly against the forest boundary just to save a little walking. Leave some distance between your home and the tougher enemies you will eventually encounter there.

Build a Home You Can Keep Using

Gather Wood and Stone, craft a Hammer, and place a Workbench. A compact wooden longhouse can hold a claimed Bed, storage, and a sheltered crafting area. Keep a nearby campfire protected from rain and give its smoke a clear route outside.

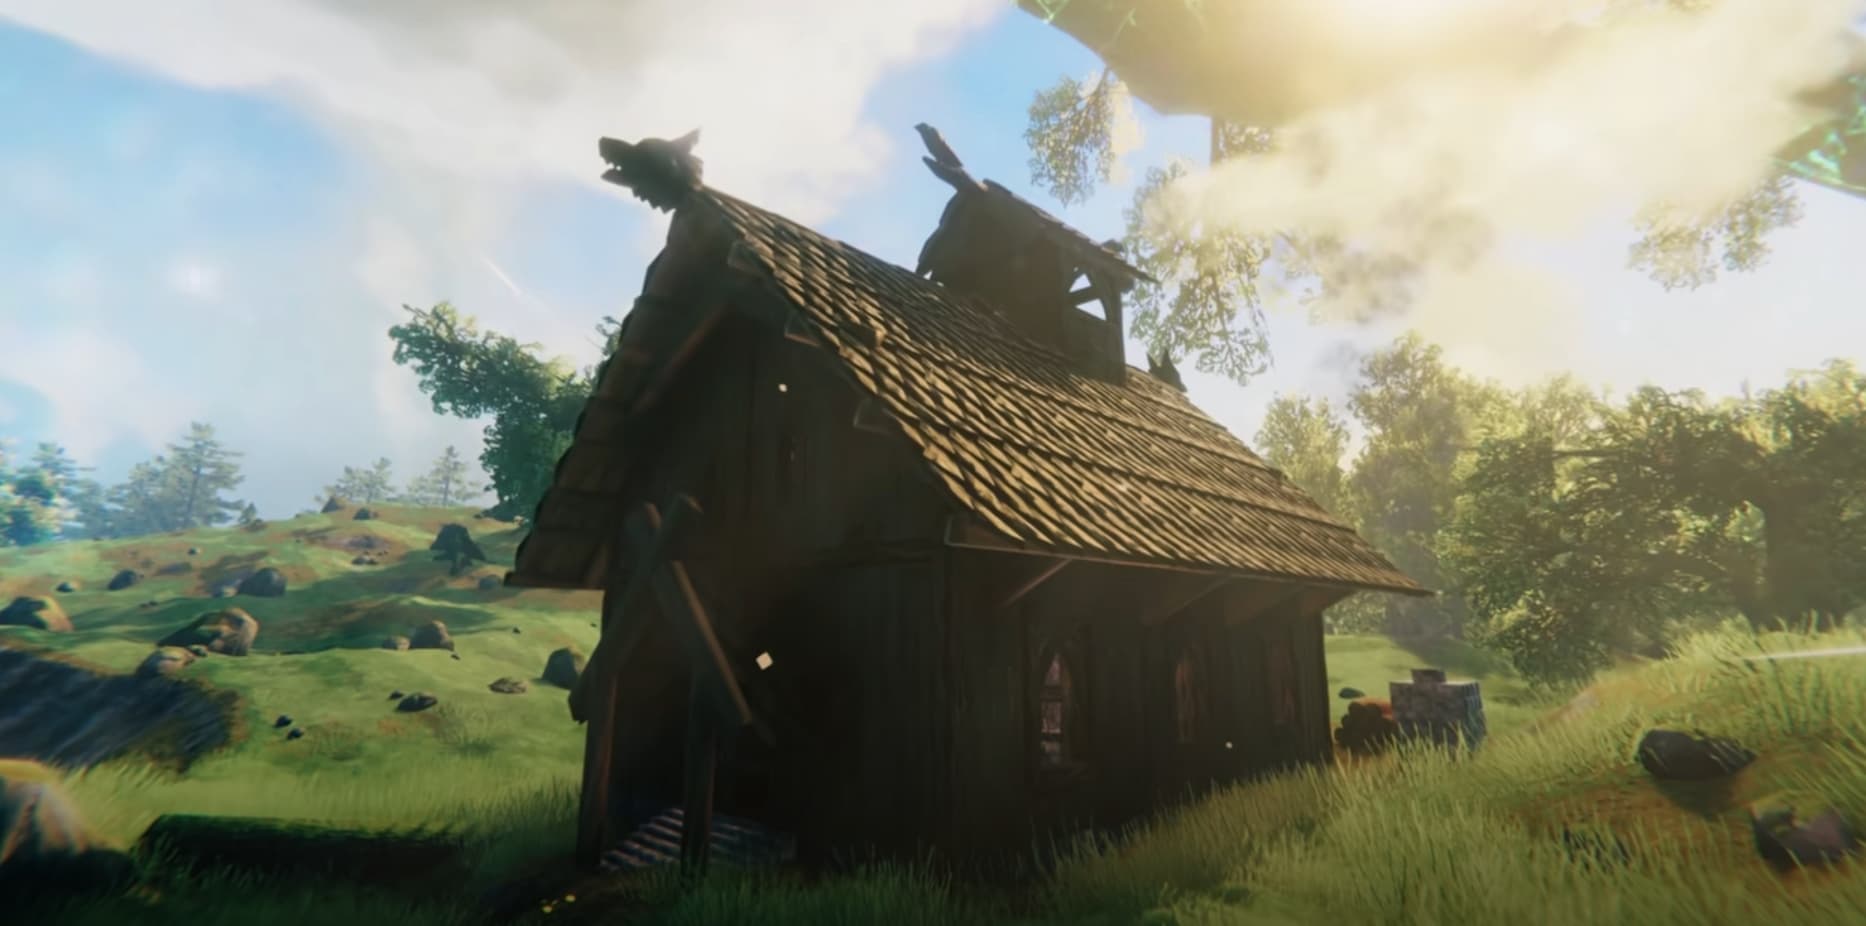
Repairing an abandoned Meadows house is another useful start. Patch the walls and roof, then adapt the building around your needs. Looking at its beams and roof pieces also helps you understand support before attempting a larger build.

Leave outdoor space for a future Smelter, Charcoal Kiln, and crop patch. Keep food and spare equipment in a separate chest so you can recover after a death without searching through your building supplies. A Hoe helps level the work area and prepare paths as the base grows.

Gather Materials with Your Next Upgrades in Mind

Use your hunting and gathering trips to collect several useful resources together:

  • Flint: Search riversides and shorelines. It supplies your Flint Axe and Flint Spear, as well as early Workbench improvements.
  • Leather Scraps and Boar Meat: Boars provide both crafting materials and food. Keep bringing scraps home even after making your first weapon.
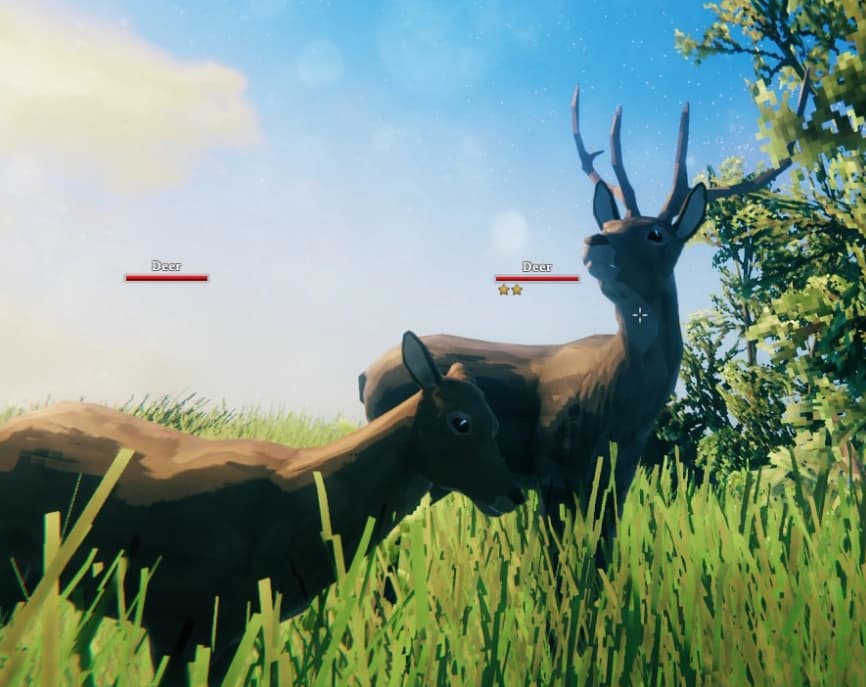
  • Deer Hide, Deer Meat, and Deer Trophies: Deer support your armour, meals, and Eikthyr summon. A bow or thrown spear makes hunting them easier.
  • Raspberries, Mushrooms, and Dandelions: Save a portion for later recipes instead of using or discarding everything immediately.
  • Queen Bees: Check abandoned buildings for wild beehives. Destroying a hive can provide a Queen Bee for a Beehive at home, giving you a renewable Honey supply for food and brewing.

Keep gathering routes marked on your map. Returning to familiar food locations is easier when you are also busy transporting ore and improving your base.

Prepare Your Equipment and Food

A Flint Spear and Wood Shield provide a straightforward melee setup. The Crude Bow gives you a ranged option and uses Wood and Leather Scraps. Keep Wood Arrows stocked if you plan to use it regularly.

Craft Leather Armour as your Deer Hide supply allows. Place a Chopping Block near the Workbench to raise its level and open up further equipment upgrades. Improve the weapon and shield you actually use before spending materials across several alternatives.

For Eikthyr, Cooked Deer Meat, Cooked Boar Meat, and Honey give you two foods favouring Health and one favouring Stamina. Raspberries are an accessible substitute while you establish your beehives. Bring replacement meals and refresh Rested before leaving home.

Find and Defeat Eikthyr

Interact with Eikthyr’s Vegvisir, the red runestone at the Sacrificial Stones, to mark an altar on your map. Take 2 Deer Trophies there when your equipment is repaired and your food is ready.

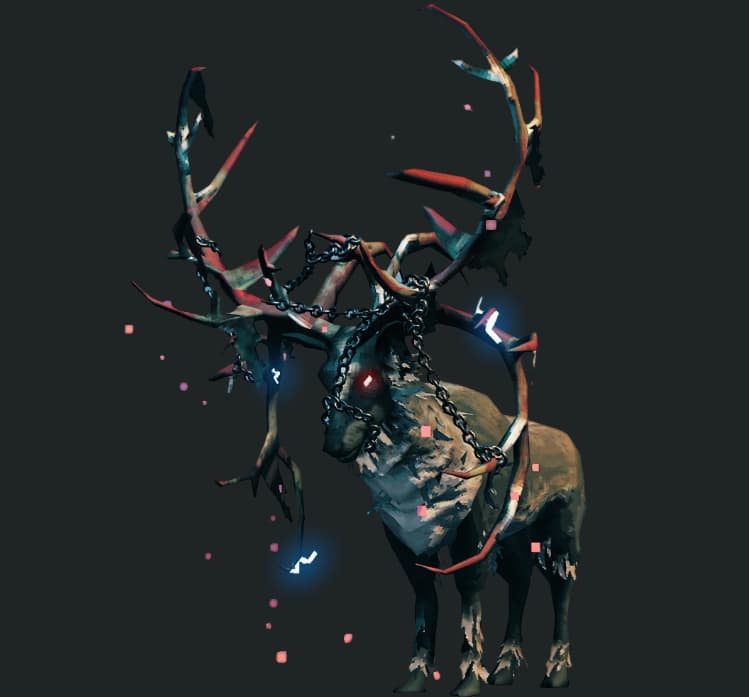
Eikthyr uses an antler attack, a forward lightning attack, and a lightning attack around his body. Watch his wind-up, defend or move clear, then attack during his recovery. With a spear, stay close enough to counter without emptying your Stamina bar. With a bow, create distance between shots and leave room to dodge.

Collect the Hard Antlers after the fight. An Antler Pickaxe requires 10 Wood and 1 Hard Antler, giving you the tool to mine Copper and Tin. Take his trophy back to the Sacrificial Stones too; his Forsaken Power reduces the Stamina used for running, jumping, and swimming.

The Black Forest: Explore Dungeons and Start Metalworking

The Black Forest introduces denser tree cover, more dangerous groups of enemies, and resources you will need to haul home. Your first expeditions should identify Burial Chambers, Copper deposits, and Tin along the coast, while gathering plants and wood along the way.

Learn the Local Threats

Greydwarfs often become dangerous through numbers. Back towards ground you have already explored if several arrive, and prioritise Greydwarf Shamans when they are healing nearby enemies. Brutes deserve more space than regular Greydwarfs, especially while you are still wearing Meadows equipment.

Skeletons are weak to Blunt damage, so a Club is useful when entering Burial Chambers. Trolls are weak to Pierce, making a bow or spear a better match. When fighting your first Trolls, find room to retreat and shoot between their attacks. Avoid leading one through your home or mining structures.

Make your first trips during daylight. It is easier to spot enemies, remember a route, and finish exploring before night adds further pressure.

Collect Surtling Cores in Burial Chambers

Burial Chambers contain the Surtling Cores needed for your first processing buildings. Work through the corridors carefully, fighting in cleared areas when possible. Opening several routes at once can leave enemies approaching from different directions.

Collect the glowing red cores, inspect chests, and keep useful loot such as Yellow Mushrooms, Coins, and valuables. Watch for a Vegvisir marking the Elder while you search. Once a chamber is cleared, mark it accordingly so you can concentrate on unexplored locations.

Aim for 10 Surtling Cores to keep a Smelter and Charcoal Kiln built together. Each structure requires 5 Cores and 20 Stone. If you only have five cores, you can make coal with a Kiln, dismantle it, and reuse the recovered materials for a Smelter while you search for more.

Mine Copper and Tin, Then Make Bronze

Copper deposits are large rock formations with metallic veins. Check the deposit’s name when aiming at it, and remember that part of the deposit can extend underground. Tin appears in smaller deposits beside water in the Black Forest.

Clear nearby enemies before starting a long mining session. Put a sheltered Workbench and storage nearby if the deposit is far from home; the Workbench can repair your Antler Pickaxe, and the chest lets you organise ore for transport.

At your base, turn Wood into Coal in the Charcoal Kiln, then feed Coal and ore into the Smelter. Copper Ore becomes Copper, and Tin Ore becomes Tin. Build a Forge, which requires 6 Copper, 4 Stone, 4 Coal, and 10 Wood.

At the Forge, 2 Copper and 1 Tin produce 1 Bronze. Keep some Copper and Tin separate for other crafting stations. Converting every bar into Bronze can delay your cooking and brewing setup.

The Black Forest: Improve Your Equipment, Food, and Travel

Bronze opens up several competing projects. Prioritise upgrades that make future gathering and exploration easier, then invest in the weapons and protection you prefer.

Choose Useful Equipment Upgrades

A Bronze Axe is an early priority because it gives you a reliable way to cut Birch and Oak for Finewood. Return to the Meadows for those trees, and collect Corewood from Pine trees in the Black Forest.

Together, these woods let you make a Finewood Bow, using 10 Finewood, 10 Corewood, and 2 Deer Hide. It is a useful upgrade for hunting, Trolls, and the Elder fight. Check the required Workbench level if the recipe is unavailable.

For melee, a Bronze Mace builds on your Club’s Blunt damage and remains useful when you first enter the Swamp. A Bronze Buckler suits players practising timed parries. Choose a shield you can use reliably and keep it upgraded as enemy attacks become stronger.

For armour, Troll Leather is a useful route if you value mobility and want to save metal for tools. Bronze Armour provides more protection at comparable upgrade levels, but its chest and leg pieces slow movement and require additional mining. Invest in the option that fits how you fight; completing every Bronze item is unnecessary.

Start Growing Carrots and Cooking Better Meals

Look for the white flowers of wild Carrots while exploring. Collect their seeds and craft a Cultivator, which uses 5 Corewood and 5 Bronze. Cultivate a patch of ground at your Meadows base, plant the seeds with room between them, and protect the crops from wandering enemies.

Replant some harvested Carrots as seed plants. These produce more seeds, allowing the farm to keep supplying food without repeated searches through the forest.

Use 10 Tin to build a Cauldron over a fire. Carrots support meals such as Deer Stew, Minced Meat Sauce, and Carrot Soup. That combination supplies two Health-focused foods and a Stamina-focused option for demanding expeditions.

Keep collecting Blueberries and Thistle in the forest. Blueberries are used in Deer Stew and other recipes, while Thistle becomes important for Poison Resistance Mead and Swamp cooking. Your Meadows hunting supplies remain useful alongside these new ingredients.

Connect Outposts and Plan Metal Transport

Each ordinary wooden Portal requires 20 Finewood, 10 Greydwarf Eyes, and 2 Surtling Cores. Build a matching pair and give both the same tag. Test the connection before depending on it during a dangerous expedition.

On default Portal settings, Copper Ore, Tin Ore, Scrap Iron, and metal bars cannot pass through ordinary wooden Portals. Finished equipment can. Use Portals for food, repairs, and returning home, while moving metal overland or by boat.

A Cart helps with overland hauling, especially along a cleared, level route. For sea journeys, work towards a Karve. Carry materials for a destination Portal and leave its matching Portal ready at home before sailing to another island.

Find Haldor and Defeat the Elder

Use Haldor to Make Gathering Easier

Watch for a bag icon on the map while exploring the Black Forest. It marks Haldor’s camp, which may be on another island. Keep developing your equipment and food while searching; finding him is an optional advantage at this stage.

Save 950 Coins for the Megingjord. Equipping this belt adds 150 carry weight, helping you transport more ore before returning to storage. Bring the valuables collected from Burial Chambers to sell when you visit him.

Place a Portal nearby, outside the camp’s protected area, for future visits. Our trader locations and shopping guide explains where to find the merchants and which purchases to prioritise.

Prepare the Elder’s Arena

Look for the Elder’s Vegvisir in Burial Chambers and Black Forest ruins. Interacting with it marks an altar, which may require a boat journey to reach. Establish your return route before starting the fight, with any Portal far enough away to avoid the battle.

Collect 3 Ancient Seeds for the summon. Greydwarf Brutes and Shamans can drop them, so keep the seeds you find while exploring.

Bring your Finewood Bow, plenty of Fire Arrows, repaired armour, and your improved Cauldron meals. Clear nearby enemies before offering the seeds. Arriving in daylight gives you time to inspect the area and identify a route between the altar’s pillars.

Fight Around the Stone Pillars

The Elder is vulnerable to Fire. Use the altar’s indestructible stone pillars to block his ranged vine attacks, then step out to shoot when you have an opening.

If he summons roots around your position, move to another clear part of the arena. Staying beside attacking roots just to finish another shot can cost far more Health than the shot is worth. Keep your distance from his close-range stomp and preserve enough Stamina to reposition.

After the fight, collect the Swamp Key, which opens Sunken Crypt entrances. Return the Elder Trophy to the Sacrificial Stones; his Forsaken Power helps with chopping and mining, making it useful during later resource trips.

The Swamp: Prepare Meads and Establish an Outpost

The Swamp combines persistent rain, uneven ground, and enemies that can punish a bad retreat. Prepare your supplies before sailing there, then establish a way home before committing to long crypt runs.

Brew Poison Resistance Before Your First Expedition

Build a Mead Ketill using 4 Tin, 6 Copper, and 2 Leather Scraps, with a fire beneath it. You also need a sheltered Fermenter, made with 30 Finewood, 5 Bronze, and 10 Resin. Both require a nearby Forge for placement.

Make a Poison Resistance Mead base at the Ketill using:

  • 10 Honey
  • 5 Thistle
  • 1 Neck Tail
  • 10 Coal

Put the base into the Fermenter. After two in-game days, one base produces six Poison Resistance Meads. Start this process while you are finishing other preparations, and keep brewing replacements as you explore.

Drink a dose before exposure to poison and monitor its remaining duration. Bring healing and stamina meads as backup. Once you collect Bloodbags in the Swamp, you can also work towards Medium Healing Mead.

Refresh Rested before each trip. Our Comfort and Rested guide explains how to extend the buff for longer expeditions.

Choose a Landing and Build a Return Point

If possible, land in neighbouring Meadows or Black Forest and approach the Swamp on foot. This gives you time to inspect the shoreline and secure your boat without immediately fighting in deep water.

Build a modest outpost with a connected Portal, storage, and room for backup food and equipment. Scout for Sunken Crypts, recognisable by their green entrance torches, before investing in a large permanent base. A small patch of Swamp may contain none.

An outpost outside the biome is a straightforward option. You can also build high in one of the Swamp’s large indestructible trees, provided you have a safe route up and down. Keep the boat and iron storage accessible from the crypts you intend to clear.

The Swamp: Handle Its Enemies and Gather Useful Resources

Make the Terrain Work for You

The Swamp’s rain keeps you Wet, reducing your recovery. Rested helps, but constant sprinting and jumping can still leave you without enough Stamina to defend yourself.

Carry a Hoe and use Level Ground where practical to improve shallow crossings between your outpost and nearby crypts. Follow solid ground, avoid unnecessary swimming, and clear threats before beginning a heavy hauling trip. A useful route matters more than a perfectly straight one.

Explore during daylight while learning the biome. Night adds Cold and the threat of Wraiths, making a difficult recovery trip even less forgiving.

Recognise the Main Threats

  • Draugr: Watch for both melee fighters and archers. Use trees and ruins to interrupt ranged attacks, and pull melee enemies towards cleared ground. Starred Draugr and Draugr Elites deserve extra caution.

  • Blobs and Oozers: Poison makes these dangerous at close range. Keep your resistance active, use Blunt damage, and avoid fighting them while surrounded.
  • Leeches: Check shallow water before crossing. Fight from the bank when possible and collect their Bloodbags for later food and mead recipes.
  • Abominations: These large creatures resist Blunt and Pierce damage. An axe’s Slash damage or Fire Arrows are better options. Give yourself room to learn their attacks; retreat if one joins a fight you are already struggling to control.

This is why carrying more than one damage type helps. Your mace is useful against several Swamp enemies, but it should not be your automatic answer to every encounter.

Collect More Than Iron

Gather Entrails from Draugr, Bloodbags from Leeches, and Thistle while exploring. Keep some Ancient Bark from the biome’s harvestable Ancient Trees for crafting. Abominations drop Roots used in Root Armour, while Surtlings around flame geysers provide another source of Coal and Surtling Cores.

Look especially carefully for yellow Turnip flowers. Bring their seeds home and grow them in your Meadows farm. Reserve part of the harvest for replanting so you can build a dependable supply.

Build a Spice Rack with 3 Dandelions, 2 Carrots, 5 Mushrooms, 3 Thistle, and 3 Turnips, then place it near the Cauldron to raise it to level 2. This opens up useful Swamp food such as Sausages and Turnip Stew once you have discovered their ingredients.

At the upgraded Cauldron, 4 Entrails, 1 Boar Meat, and 1 Thistle make 4 Sausages. 1 Boar Meat and 3 Turnips make Turnip Stew. Pair these meals with a Health food such as Deer Stew for a setup you can keep producing while gathering iron.

The Bog Witch is another useful discovery, marked by a cauldron icon as you approach her Swamp shop. Her ingredients expand cooking and brewing options. You can visit before defeating Bonemass, although some stock has its own progression requirements.

The Swamp: Clear Sunken Crypts and Put Your Iron to Work

Work Through Crypts Carefully

Bring the Swamp Key, a repaired pickaxe, your mace and shield, food, and active Poison Resistance. Your Antler Pickaxe can mine Muddy Scrap Piles; a Bronze Pickaxe also works. You can begin collecting iron with either.

Inside, mine blocked doorways gradually and check the room beyond before opening a wide passage. Fight from areas you have already cleared, and destroy Body Piles spawning Draugr when you can reach them safely. Leaving a spawner active can turn a mining stop into a continuing fight.

Mine the accessible Muddy Scrap Piles for Scrap Iron and check chests as well. Collect Withered Bones during the same trips, and interact with any Bonemass Vegvisir you find to mark his altar.

A campfire near a safe crypt entrance can help you dry off and regain Rested. Check its smoke and surroundings before stopping there. Store heavy scrap in a chest when necessary, then return through your Portal for repairs and supplies without carrying the metal.

Once a crypt is cleared, mark it on your map and arrange the hauling trip. Take the Scrap Iron back by your planned land or boat route, then process it in a Smelter to produce Iron.

Spend Iron on the Next Problem You Need to Solve

An Iron Mace is a strong first crafting priority because it helps with crypt enemies and exploits Bonemass’s weakness to Blunt damage. Its initial recipe uses 20 Iron, 4 Wood, and 3 Leather Scraps. An iron-tier shield such as the Banded Shield, made with 8 Iron and 10 Finewood, improves your defensive options.

Check your Forge’s level before crafting and upgrading. Nearby improvements such as Anvils raise its level; upgrade the station alongside the equipment you intend to use.

After the mace and shield, spend according to what is limiting your trips:

  • Protection: Iron Armour is useful if you need more room for mistakes. Root Armour offers an alternative from Abomination hunting, with different resistances on its pieces and a weakness to Fire.
  • Transport: If repeated sea journeys are slowing your iron collection, invest in the materials and Iron Nails for a Longship and its larger hold.
  • Tools: An Iron Pickaxe improves your mining equipment and is needed for Silver later. You can prioritise your Bonemass weapon first if the current pickaxe is handling crypt runs adequately.

Reserve iron to upgrade the mace and shield you are relying on for the next boss before crafting weapons you will rarely use.

Defeat Bonemass and Complete the Swamp

Prepare the Area Before Summoning

Visit the skull altar marked on your map before starting the fight. Remove nearby threats and use your Hoe to improve shallow ground around the arena. Identify a clear route for retreating and keep your return Portal away from the fighting area.

Bring your upgraded Iron Mace, shield, repaired armour, 10 Withered Bones, and enough food and mead for a prolonged encounter. Eat your prepared meals, refresh Rested, and drink Poison Resistance Mead before offering the bones.

Bonemass is weak to Blunt damage and strongly resists Pierce. The bow remains useful elsewhere in the Swamp, but a mace is the dependable choice for this fight.

Respond to His Attacks

Bonemass’s main threats require different responses:

  • Melee swipe: Watch the wind-up and dodge-roll the attack, then counter while he recovers. Take a short opening instead of committing to attacks you cannot finish safely.
  • Poison cloud: Move clear when he begins the vomiting animation. Use the space to recover Stamina or heal while avoiding the cloud.
  • Thrown summons: Watch where the thrown mass lands and deal with the resulting Blobs and Skeletons before they surround you.

Keep Poison Resistance active throughout the fight. If your Health drops, create space and recover before returning to melee. Chasing damage while exhausted makes the next swipe or group of summons much harder to handle.

Defeating Bonemass rewards you with the Wishbone. Equip it to detect hidden deposits and treasure, including Silver veins in the Mountains and buried treasure in the Meadows. Return his trophy to the Sacrificial Stones to unlock his Forsaken Power, which helps with physical defence and blocking.

After Bonemass

You now have a Meadows base supplying food, a Black Forest crafting setup, and a route for collecting and processing Swamp iron. Keep those systems working as you prepare for the Mountains.

The next biome requires protection against Freezing, with Frost Resistance Mead useful for your first expeditions. Rested supports recovery, but you still need that frost protection before beginning the next stage.

For the route through the Mountains and the biomes beyond, continue with our complete Valheim progression guide.

Table of Contents

See More

Valheim 1.0 - World Settings Guide
Updated on Sep 9, 2026
Valheim 1.0: Trader Locations and What to Buy
Updated on Sep 9, 2026
How To Win As Michael Myers - Halloween: The Game
Updated on Sep 9, 2026
Valheim 1.0: Getting Started in the Meadows
Updated on Sep 9, 2026
All Map Escape Locations - Halloween: The Game
Updated on Sep 9, 2026

Like our guides?

Add Mobalytics as a preferred source on Google!