menu
MobalyticsUse your favourite features in-game with our Desktop App
Nightreign Build

Libra Expedition Ironeye Build

presentationIroneye
Updated on Jun 27, 2025
Jun 27, 2025

Intro

In this Elden Ring build guide, we’ll walk you through the best equipment and strategies for facing Libra as the Ironeye.

Libra is easily one of the most complex and punishing bosses in the game. He can summon sigils that explode or fire projectiles, inflict Madness and Enrage, dash erratically, cause eruptions, teleport, and, if allowed to reach his second phase, completely transform the arena into chaos.

Despite the challenge, Libra has several exploitable weaknesses: Madness, Holy, and Fire all deal solid damage. He primarily inflicts Holy damage, so stacking Holy resistance and building up your Madness resistance are essential to survival.

As Ironeye, your job is to chip away at his health from range while letting your teammates hold aggro. Keep your distance, watch for his sigils, and do everything you can to prevent his phase transition; that alone can turn the tide of the fight.

Equipment Loadout

Armaments

For this fight, you'll want to equip a reliable bow that can consistently apply pressure from range.

Ideally, choose a bow that can inflict Madness or deal Holy or Fire damage, as Libra is vulnerable to all three. He’s also susceptible to most status effects, so having a way to apply Frost, Rot, Bleed, or Poison will give you even more ways to wear him down.

Greases are an excellent way to enhance your weapon for this encounter; make sure you’re stocked up before the fight begins.

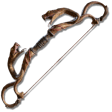
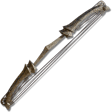
Below are some of the best bows you can bring into this battle.

Best-in-slot

Alternatively, Ironeye's Bow is a solid pick if you're using a relic that imbues it with Holy, Frost, Bleed, or Poison.

Avoid sleep-based weapons, as Libra is resistant to sleep effects.

Talismans

Best-in-slot

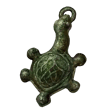
  • Green Turtle Talisman
  • Ritual Shield Talisman
  • Arrow's Reach Talisman
  • Haligdrake Talisman
  • Ritual Sword Talisman
  • Dragoncrest Shield Talisman
  • Arrow's Sting Talisman
  • Spear Talisman

Consumables

Armoatics

  • Uplifting Aromatic
  • Bloodboil Aromatic

Flask

  • Opaline Bubbletear
  • Greenburst Crystal Tear

Food

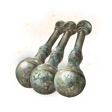
  • Clarifying Boluses
  • Exalted Flesh
  • Pickled Turtle Neck
  • Boiled Crab
  • Boiled Prawn

Greases

  • Rot Grease
  • Poison Grease
  • Blood Grease
  • Freezing Grease
  • Holy Grease

Throwing

  • Rot Pot
  • Poison Pot
  • Fetid Pot
  • Freezing Pot
  • Poisonbone Dart

Dormant Powers, Passives, and Relics

Dormant Powers

Best-in-slot

  • Wending Grace
  • Improved Stamina Recovery
  • Improved Thrusting Counterattack
  • Improved Dodging
  • All Resistances Up
  • Ice Storm Surge Sprint
  • Area of Darkness Conceals Caster While Walking
  • Violent Deluge of Star Rain While Walking
  • More Runes From Defeated Enemies
  • Rune of the Strong

Walking effects trigger when precision aiming while moving.

Relics

Be sure to complete Ironeye’s Remembrance Quests—this is how you unlock some of their strongest relics, including the Edge of Order (yellow) and Cracked Sealing Wax (yellow), which offer:

Edge of Order:

  • [Ironeye] Boosts thrusting counterattacks after executing Art
  • Starting armament deals holy damage
  • Improved Bow Attack Power

Cracked Sealing Wax:

  • [Ironeye] Extends duration of weak points
  • Critical Hits Earn Runes

Other effects you’ll want to look for are:

  • Increased rune acquisition for self and allies
  • [Ironeye] +1 additional Character Skill use
  • Character Skill Cooldwon Reduction +10%
  • Improved Initial Standard Attack
  • Stonesword Key in possession at start of expedition
  • Stamina recovers with each successful attack
  • Starting armament inflicts Frost/Poison/Blood loss
  • Holy Damage Negation Up
  • Improved Madness Resistance (+112)
  • [Ironeye] Art Charge Activations Adds Poison Effect
  • Attack power up when facing frostbite/poison-afflicted enemy
  • Improved Attack Power with 3+ Bows Equipped

Consider equipping relics like Night of the Wise (yellow) or Night of the Beast (green). These provide solid utility and can synergize well with your ranged strategy.

If you're running the Improved Initial Standard Attack relic effect, equip a bow in each hand and alternate your shots. This setup ensures that every attack benefits from the damage bonus, maximizing your output over time.

Weapon Passives

Best-in-slot

  • Improved Damage Negation at Full HP (+24%)
  • Improved Madness Resistance (+112)
  • Improved Holy Damage Negation (+12%)
  • Improved Attack Power When Two-Handing (10%)
  • Improved Ranged Weapon Attacks (10%)
  • Improved Attack Power at Full HP (+10%)
  • Attacks Inflict Rot/Poison
  • The Ironeye's Grief (+1)
  • Madness Produces A Flame of Frenzy
  • Less Likely to Be Targeted
Erdtree BowBow • Lvl Required 7
Serpent BowBow • Lvl Required 7
Black BowBow • Lvl Required 7
Pulley BowBow • Lvl Required 7
Green Turtle TalismanTalismans
Ritual Shield TalismanTalismans
Arrow's Reach TalismanTalismans
Haligdrake TalismanTalismans
Uplifting AromaticConsumables
Opaline BubbletearConsumables
Clarifying BolusesConsumables
Rot GreaseConsumables
Wending GraceDormant Powers
Improved Stamina RecoveryDormant Powers
Improved Thrusting CounterattackDormant Powers
Improved DodgingDormant Powers
Improved Damage Negation at Full HP (+24%)Weapon Passive
Improved Madness Resistance (+112)Weapon Passive
Improved Holy Damage Negation (+12%)Weapon Passive
Improved Attack Power When Two-Handing (10%)Weapon Passive

Game Plan and Pathing

Day 1

Ironeye starts with a fairly low health pool, so keep your distance and use your dash defensively; every death sets you back and eats into time you can’t afford to waste.

Stick close to your team and use your pins wisely. As a ranged character, you’re safest playing from the backline, which also gives you a great vantage point to analyze the map and help coordinate your group’s route.

Your main goals for Day 1 are to level up quickly, get a strong weapon, and hit as many churches as possible to boost your flask charges.

Use the map’s overview function to scout for guaranteed bow drops. Prioritize locations that deal Madness, Holy, Frost, Rot, Bleed, or Poison damage, in that order, as these are most effective against Libra.

If you're using relics that modify your default bow, raid a nearby cave and locate a merchant to upgrade it to Epic early on.

Make sure to visit at least one merchant during your run, since most share the same inventory, checking just one gives you access to almost everything. You might find rare and valuable items like a Wending Grace, which can be a game-changer if things go south during a Night Boss or Lord fight.

Once you’ve secured a solid bow and reached level 4 or higher, head to the central castle. Begin in the basement, which features only one boss. Beating it earns you a boss drop and a guaranteed talisman from the chest in the room beyond. If time allows, hit a nearby grace and work your way through the rest of the castle to farm additional runes.

Equip any weapon with a valuable passive as soon as you find it. To optimize your time, pick up everything and sort through your inventory while moving between objectives.

Day 2

At this stage, you should be properly geared and leveled to take on the tougher zones in Limveld.

If a Shifting Earth event is active, make it your top priority. These areas offer some of the best loot in the game and a high enough enemy density to reliably hit level 15 by day's end. If a field boss lies along the way, take a quick detour; defeating it could net you a serious upgrade that makes clearing the zone even smoother.

If no Shifting Earth is present, shift your focus to field bosses. With many now spawning, they offer the best shot at grabbing rare gear and banking large amounts of runes quickly.

If you haven’t already cleared the central castle, now is the time. The basement and rooftop bosses are much more manageable with your current gear and levels, and they offer guaranteed rewards that are worth the effort.

After downing the Night Boss, feel free to farm nearby zones if you’re still underleveled. At this point, the zone’s environmental damage is minimal, so you can safely squeeze in extra levels or grab more flasks without putting your run at major risk.

Day 3

Once you arrive, check the merchant for any rare loot and spend your remaining runes to level up.

Drop any leftover upgrade materials or keys; they’re useless in the final fight. Focus instead on stocking up with consumables you'll actually use in battle.

If there’s a Revenant on your team and you’ve got extra runes, prioritize buying Starlight Shards for them. With their limited FP pool, even a few extra casts can be a game-changer and might be the deciding factor between a win and a wipe.

Once you enter the fight and are offered a deal, consider “I wish for eventual greatness” and “I want resistance to ailments”.

The first will decrease your HP, FP, and Stamina by 30% for 2 minutes, which is a lot, but it will then be reverted and permanently increased by 20% of the original amount.

The second will give you 150 resistance to all ailments, including Madness, in exchange for 10% of your stamina.

Additional Tips

  • Keep a safe distance from Libra at all times; closing in unnecessarily will only increase your chances of getting caught in his high-damage attacks.
  • Watch for sigils on the ground; these act like landmines and will detonate the moment you step over them.
  • If Libra becomes enraged and charges at you, time your dash to take advantage of its invincibility frames. After dodging, reposition behind him and slightly to his right; this angle offers the best safety, allowing you to strafe around most attacks and completely avoid his charge.
  • Avoid phase 2 at all costs. His second phase unleashes a barrage of near-undodgeable projectiles and explosions, many of which can one-shot you outright. Preventing this transition is critical.
  • If a teammate goes down, lock on to them to make your revival shots easier to land without relying on manual aim.

Important:

Ironeye’s Ultimate is one of the most effective tools to stop Libra from entering phase 2. Its area of effect is wide enough to instantly clear all nearby sigils and disrupt the transformation. Try to hold onto it until the second or third phase transition attempt, by then, the sigil density will be high and your ult will have maximum impact.

Table of Contents

Explore Other Builds

Gnoster Expedition Ironeye Build
Updated on Nov 13, 2025
Gnoster Expedition Recluse Build
Updated on Jul 10, 2025
Recluse Best Relics for Every Nightlord
Updated on Jul 4, 2025
Libra Expedition Revenant Build
Updated on Jul 2, 2025
Libra Expedition Guardian Build
Updated on Jul 2, 2025