menu
MobalyticsUse your favourite features in-game with our Desktop App
Nightreign Build

Libra Expedition Guardian Build

presentationGuardian
Updated on Jul 2, 2025
Jul 2, 2025

Intro

In this Elden Ring build guide, we’ll cover the best equipment for taking on Libra as the Guardian.

Facing Libra as the Guardian demands a balance of raw endurance and smart play. Libra is one of the most intricate and unforgiving bosses in the game, capable of summoning explosive or projectile-firing sigils, inflicting Madness and Enrage, teleporting, dashing erratically, and, if allowed to reach phase two, turning the arena into a chaotic minefield.

While Guardian’s shield might make resistances seem less essential, that’s a dangerous assumption. Stamina depletion is one of your greatest threats in this fight. Once your guard breaks, Libra’s aggressive follow-ups can shred your health bar in seconds. Fortunately, Guardian boasts the highest base HP in the game, making resistance stacking, especially to Holy, incredibly effective at boosting your true effective health.

Libra is tough, but exploitable. He’s highly vulnerable to Madness, Holy, and Fire, and immune only to Sleep, meaning most status effects are viable. Prioritize weapons or consumables that inflict status, and consider buffing with Holy or Fire to increase your damage output.

Your job is clear: stay in Libra’s face and draw aggro away from your team. Use your superior defenses to create openings for your allies, but don’t just turtle; Libra’s relentless pressure can chew through your stamina. Drop your guard between hits, and only use block with Steel Guard active to reduce stamina loss and maximize regeneration. The key is to maintain control of the fight's tempo; if Libra controls it, you won't have a good time.

Equipment Loadout

Armaments

Your primary weapon should be one that allows you to strike while guarding and can either inflict lightning damage or apply a status effect. This lets you maintain pressure on Libra without sacrificing your defenses. Pair it with a shield that offers high Guard Boost and strong damage negation, especially against holy attacks, Libra’s primary damage type.

Primary

If you’re unable to find a suitable status or elemental weapon during your run, fall back on the best Great Spear, Halberd, or Heavy Thrusting Sword available. These weapon classes offer excellent reach, guard potential, and stamina efficiency.

Here are a few solid shield options for your off-hand.

Shield

If none of the optimal ones show up, simply use the shield with the highest Guard Boost and strong holy resistance available to you.

Finally, if your team lacks an Ironeye, be sure to bring a bow. This will allow you to help interrupt Libra’s phase transition by manually destroying his sigils that spawn high in the air.

Talismans

  • Green Turtle Talisman
  • Spear Talisman
  • Greatshield Talisman
  • Haligdrake Talisman
  • Dragoncrest Shield Talisman
  • Erdtree's Favor
  • Crimson Amber Medallion
  • Viridian Amber Medallion
  • Lord of Blood's Exultation
  • Kindred of Rot's Exultation

Consumables

Make sure to visit at least one merchant in Limveld, as their inventories are shared across the region. Occasionally, they’ll carry powerful items like Wending Grace for 10,000 runes, an essential pickup that grants you an extra life if your whole team gets wiped during a Night Boss or Lord fight.

Armoatics

  • Acid Spraymist
  • Poison Spraymist
  • Ironjar Aromatic

Flask

  • Greenburst Crystal Tear
  • Greenspill Crystal Tear
  • Crimsonburst Crystal Tear
  • Opaline Hardtear

Food

  • Clarifying Boluses
  • Pickled Turtle Neck
  • Boiled Crab
  • Boiled Prawn

Throwing

  • Rot Pot
  • Poison Pot
  • Fetid Pot
  • Freezing Pot
  • Poisonbone Dart

Grease

  • Shield Grease
  • Rot Grease
  • Poison Grease
  • Freezing Grease
  • Blood Grease
  • Holy Grease

Dormant Powers, Passives, and Relics

Dormant Powers

  • Wending Grace
  • Improved Stamina Recovery
  • Improved Thrusting Counterattack
  • Improved Holy Damage Negation (+16%)
  • Guard Counters Activate Summoning Attack
  • Improved Flask HP Restoration
  • Increased Maximum HP
  • Increased Maximum Stamina
  • Creates Holy Ground at Low HP
  • HP Recovery upon Successful Guards
  • Poison & Rot Trigger Continuous HP Recovery
  • More Runes From Defeated Enemies
  • Rune of the Strong

Relics

You’ll want to complete Guardian’s Remembrance Quest to unlock his most valuable relic: the Witch's Brooch (blue). This relic provides the following effects:

  • [Guardian] Slowly restores nearby allies' HP while Art is active
  • [Guardian] Reflect a portion of damage received when ability is activated
  • Vigor +3

Other relic effects worth seeking out include:

  • Partial HP Restoration upon Post-Damage Attacks
  • Attack power permanently increased for each evergaol prisoner defeated
  • Increase rune acquisition for self and allies
  • Stonesword Key in possession at start of expedition
  • Draw enemy attention while guarding
  • Art gauge charged from successful guarding
  • Stamina recovers with each successful attack
  • Flask Also Heals Allies
  • HP Restoration upon Thrusting Counterattack
  • Ultimate Art Gauge +
  • Starting armament Inflicts Frostbite/Poison/Bloodloss
  • Changes compatible armament's skill to Hoarfrost Stomp at start of expedition
  • Increased Maximum HP
  • Poison & Rot in Vicinity Increases Attack Power
  • Attack Power Up when Facing Frostbite-afflicted Enemy

Weapon Passives

  • Improved Guarding Ability (+15%)
  • Successful Guarding Ups Dmg Negation (+19%)
  • Improved Damage Negation at Full HP (+40%)
  • Improved Holy Damage Negation (+16%)
  • Attacks Inflict Poison (+23)
  • Improved Guard Counters (+20%)
  • HP Restoration Upon Attacks (+6)
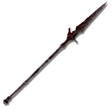
Vyke's War SpearGreat Spear • Lvl Required 7
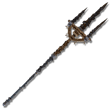
Mohgwyn's Sacred SpearGreat Spear • Lvl Required 10
Dragon HalberdHalberd • Lvl Required 7
Bloody HeliceHeavy Thrusting Sword • Lvl Required 7
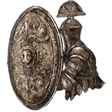
Erdtree GreatshieldGreatshield • Lvl Required 1
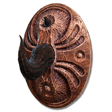
Crucible HornshieldGreatshield • Lvl Required 1
Fingerprint Stone ShieldGreatshield • Lvl Required 1
Coil ShieldSmall Shield • Lvl Required 1
Green Turtle TalismanTalismans
Spear TalismanTalismans
Greatshield TalismanTalismans
Haligdrake TalismanTalismans
Acid SpraymistConsumables
Greenburst Crystal TearConsumables
Clarifying BolusesConsumables
Rot PotConsumables
Shield GreaseConsumables
Wending GraceDormant Powers
Improved Stamina RecoveryDormant Powers
Improved Thrusting CounterattackDormant Powers
Guard Counters Activate Summoning AttackDormant Powers
Improved Guarding Ability (+15%)Weapon Passive
Successful Guarding Ups Dmg Negation (+19%)Weapon Passive
Improved Damage Negation at Full HP (+40%)Weapon Passive
Improved Holy Damage Negation (+16%)Weapon Passive

Game Plan and Pathing

Day 1

Guardian has the highest base HP in the game, so don’t hesitate to play aggressively and stay up close to absorb pressure. Still, it’s important to stick with your team early on; getting downed too soon can derail your pathing and waste precious time. A clean, optimized Day 1 sets the tone for a strong run.

Your top priority is to gain as many levels as possible and hit every church you encounter to boost your flask charges.

Open the map overview and flag locations with Madness, Holy, Fire, Frost, Rot, Bleed, or Poison elements, listed by effectiveness against Libra. These zones offer the best chances of securing high-impact damage options.

If you’ve picked the relic effect that grants permanent attack power for each Evergaol prisoner defeated, prioritize clearing cathedrals and Evergaols. Every cathedral chest contains a guaranteed Stonesword Key, giving you reliable access to more Evergaols.

Once you’ve found a solid weapon and reached level 4 or higher, head for the central castle. Begin in the basement, which only has one boss, and yields both a boss reward and a guaranteed talisman from the chest beyond. If time allows, use a nearby grace to level up and push into the upper floors for extra rune farming.

When you come across a weapon with a valuable passive, equip it right away. Scoop up everything as you go, and sort through your loot while moving between locations to avoid wasting time.

Day 2

At this stage, you should have strong enough gear and levels to start tackling Limveld’s more dangerous zones with confidence.

If you’re running the Evergaol relic, aim to clear at least two additional Evergaols today, especially if they’re along your route. The passive bonus from this relic stacks with each one completed, making it a highly efficient investment that pays off quickly.

If a Shifting Earth event is active, make it your top priority. These zones offer some of the best loot in the game and enough enemies to reliably reach level 15 by the end. If you come across a field boss while en route, don’t skip it; these fights often reward significant upgrades that can boost your damage or survivability for the rest of the run.

If there’s no Shifting Earth, shift your focus to field bosses instead. With more of them now spawning, they’re one of the most rewarding ways to earn powerful gear and large rune hauls outside of the Night Boss itself.

If you haven’t yet cleared the central castle, now’s the ideal time. The basement and rooftop bosses are manageable with your current setup, and the rewards, both in runes and gear, are well worth the effort.

After defeating the Night Boss, feel free to farm any nearby areas if you still need more levels or flask charges. Environmental damage is low at this point, and with nearby graces and resources, you can safely squeeze in a bit more progression before pushing forward.

Day 3

Once you arrive, start by checking the merchant’s inventory; you may find rare items like Wending Graces, which are invaluable for surviving a full team wipe during Night Boss or Lord encounters.

If nothing notable is available, spend any leftover runes on leveling up, then grab any critical consumables. Don’t forget to discard any unused keys or upgrade materials; you won’t be able to use them in the final fight.

Buy Warming Stones! These are especially useful for the Guardian. Since you’ll often be standing your ground and blocking rather than dodging, the passive healing will get maximum uptime and can keep you in the fight longer.

If you're running with a Revenant and have extra runes to spare, grab a few Starlight Shards for them; these will dramatically improve their total casts given their limited FP pool.

Choosing Your Deal:

When prompted at the start of the fight, strongly consider these two:

“I wish for eventual greatness”

  • This reduces your HP, FP, and Stamina by 30% for 2 minutes, but once it wears off, each stat gets a permanent +20% boost based on its original value. It's a risky opener, but a very strong long-term benefit.

“I want resistance to ailments”

  • This grants +150 resistance to every status effect, including Madness, in exchange for a 10% reduction in Stamina. It’s a worthwhile trade-off, especially against Libra’s barrage of debilitating effects.

Additional Tips

  • Stick close to the boss to keep aggro away from your team, but don’t tunnel in; always keep an eye on your endurance. If your stamina breaks while blocking, you’ll get staggered and likely take a lethal follow-up. Since blocking slows your stamina recovery, try to time your guard with actual incoming attacks, and activate Steel Guard to boost your Guard Boost when you expect a flurry.
  • Your Ultimate Art: Wings of Salvation should be treated as a revival tool first and foremost. It can fully revive downed allies, even if they’re at 3 bars, and grants brief immunity on respawn. Only use it for damage if absolutely necessary. If both teammates are down, try baiting the boss toward their bodies and positioning them close enough to land a double revive with a single cast.

Table of Contents

Explore Other Builds

Gnoster Expedition Ironeye Build
Updated on Nov 13, 2025
Gnoster Expedition Recluse Build
Updated on Jul 10, 2025
Recluse Best Relics for Every Nightlord
Updated on Jul 4, 2025
Libra Expedition Revenant Build
Updated on Jul 2, 2025
Libra Expedition Guardian Build
Updated on Jul 2, 2025