Day 1
At lower levels, Ironeye is very susceptible to getting one-shot, so be mindful of your surroundings and use your character skill defensively.
Try your best to stick with your team and use your pins effectively. As you are a ranger, you will likely be safer in the backline. This will allow you more time to analyze the map and plan your group's route effectively.
Your priorities for Day 1 are to visit as many churches as you can to increase your flask charges.
Observe the map and take note of locations with Holy, Bleed, Rot, and Frost symbols, as these will guarantee a weapon of that affinity as a drop from the area boss.
Prioritize Holy and Bleed locations as these will do the most damage to Gladius.
Now start making your way to those locations, stopping at as many churches and smaller settlements as you can manage without wasting too much time and getting caught in the storm.
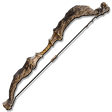
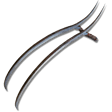
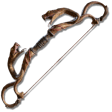
You should equip any weapon with a usable passive.
Day 2
On Day 2, many powerful field bosses with rare drops will begin spawning.
By now, you should have obtained a suitable weapon and the levels to challenge field bosses for extra runes and loot.
Now lead your team towards those field bosses, stopping at any churches and small encampments along the way.
If the field boss looks too difficult for your group to handle, you can always skip it and go to the next one.
There is a good chance you will find something more manageable at another location.
Now you’ll need to sift through your weapons for the best passives you can get.
Day 3
Take your time here.
Make sure you level up and purchase any necessary equipment from the merchant and upgrade your weapons of choice or more likely circumstance.
Make sure you get rid of any extra upgrade materials or keys in favor of consumables as you will not be able to use them anymore.
If you have a mage and some extra runes, get them some starlight shards as this will significantly increase their FP pool for the fight.