menu
MobalyticsUse your favourite features in-game with our Desktop App
Nightreign Build

Gladius Expedition Guardian Build

presentationGuardian
Updated on Jun 4, 2025
Jun 4, 2025

Intro

In this Elden Ring build guide, we will look at the best equipment you can use to tackle Gladius, Beast of Night (Tricephalos) as the Guardian Nightfarer.

Gladius is a quick boss that primarily deals physical damage but also has moves that can deal insane amounts of Fire damage, so finding equipment with good fire damage negation is very important.

While this boss can be quite tough, it does have a weakness to Holy damage you can exploit. However, due to Guardian’s poor offensive scaling, status effects remain your most effective tools for gaining the upper hand.

Guardian is the tankiest character in the game, so your role in this fight is to draw the aggro of the boss and grant your team space with good positioning.

While this boss is relentless and deals tons of damage, timing your Steel Guards well and sticking close will give your team the space it needs to defeat the boss.

Althoug this build is for beating Gladius, its general strategies can be applied to be other Nightlords.

Equipment Loadout

Armaments

You will want to have a primary weapon that can strike while guarding and apply status, as well as a shield with good damage negations and guard boost in your off-hand.

Gladius has a weakness to Holy damage, so it can be a good alternative if you are unable to find decent status weapons or the resistances of the boss have increased too much.

Best-in-slot

Alternatives

If you are unable to find these weapons in a run, choose the best Great Spear, Halberd, or Spear you can find.

Off-Hand

Due to the nature of Guardian’s skill set, it is vital to have a shield in your off-hand to make use of his abilities.

If you are unable to find these shields, just use the shield with the highest guard boost, physical damage negation, and fire damage negation.

Talismans

Best-in-slot

  • Green Turtle Talisman
  • Spear Talisman
  • Greatshield Talisman

Alternatives

  • Ritual Shield Talisman
  • Flamedrake Talisman
  • Dragoncrest Shield Talisman
  • Erdtree's Favor
  • Crimson Amber Medallion
  • Viridian Amber Medallion
  • Lord of Blood's Exultation
  • Kindred of Rot's Exultation

Consumables

Best-in-slot

  • Acid Spraymist / Poison Mist / Ironjar Aromatic
  • Pickled Turtle Neck / Boiled Crab / Boiled Prawn
  • Holy Grease /Shield Grease / Rot Grease
  • Rot Pot / Poison Pot / Fetid Pot

Dormant Powers, Passives, and Relics

Dormant Powers

Best-in-slot

  • Improved Stamina Recovery
  • Improved Thrusting Counterattack
  • HP Recovery upon Successful Guards
  • Guard Counters Activate Holy Attacks
  • Guard Counters Activate Summoning Attack

Alternatives

  • Improved Flask HP Restoration
  • Improved Physical Damage Negation
  • Increased Maximum HP
  • Increased Maximum Stamina
  • Creates Holy Ground at Low HP
  • Poison & Rot Trigger Continuous HP Recovery
  • More Runes From Defeated Enemies
  • Rune of the Strong

Relics

You will want to complete Guardian’s Remembrance Quest, as this will allow you to gain his best relic, the Witch's Brooch (BLUE), which grants:

  • [Guardian] Slowly restores nearby allies' HP while Art is active
  • [Guardian] Reflect a portion of damage received when ability is activated
  • Vigor +3

Universal Relics Best-in-slot

  • Draw enemy attention while guarding
  • Art gauge charged from successful guarding
  • Flask Also Heals Allies

Yellow Relics Best-in-Slot

  • HP Restoration upon Thrusting Counterattack
  • Physical Attack Up
  • Poison & Rot in Vicinity Increases Attack Power

Green Relics Best-in-slot

  • Attacks Inflict Scarlet Rot
  • Stamina recovers with each successful attack
  • Endurance+

Red Relics Best-in-slot

  • Increased Maximum HP
  • Attacks Inflict Frost
  • Ultimate Arts Gauge

Blue Relics Best-in-slot

  • Shield Greases in possession at the start of expedition
  • Attacks Inflict Blood Loss
  • Changes compatible armament's skill to Hoarfrost Stomp at start of expedition

Weapon Passives

Best-in-slot

  • Improved Guarding Ability (+15%)
  • Successful Guarding Ups Dmg Negation (+19%)
  • Attacks Inflict Poison (+23)
  • Add Holy to Weapon (+30)

Alternatives

  • Improved Fire Damage Negation (+20%)
  • Attack Up when Wielding Two Armaments (+10%)
  • HP Restoration Upon Attacks (+6)
  • Improved Guard Counters (+20%)
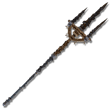
Mohgwyn's Sacred SpearGreat Spear • Lvl Required 12
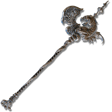
Dragon HalberdHalberd • Lvl Required 9
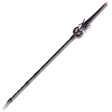
Rotten Crystal SpearSpear • Lvl Required 3
Visage ShieldGreatshield • Lvl Required 1
Fingerprint Stone ShieldGreatshield • Lvl Required 1
Coil ShieldSmall Shield • Lvl Required 1

Game Plan and Pathing

Day 1

Since Guardian has the highest health pool in the game, try your best to stick with your team and use your pins effectively. Pathing around the map is extremely important to farm more efficiently and make boss fights much easier.

Your priorities for Day 1 are to farm as many locations as possible to maximize your level and find a usable weapon and shield.

Observe the map and take note of locations with bleed, rot, frost, and holy symbols, as these will guarantee a weapon of that affinity as a drop from the area boss.

Prioritize bleed and rot locations as these will do the most damage to Gladius.

Also, use the overview feature on the map to guarantee useful weapon types from locations.

Now start making your way to those locations, stopping at as many churches and smaller settlements as you can manage without wasting too much time and getting caught in the storm.

Equip any weapon you find with a useful passive.

Day 2

On day 2, many powerful field bosses with rare drops will begin spawning.

By now, you should have obtained a suitable weapon and the levels to challenge field bosses for extra runes and loot.

Now lead your team towards those field bosses, stopping at any churches and small encampments along the way.

If the field boss looks too difficult for your group to handle, you can always skip it and go to the next one.

There is a good chance you will find something more manageable at another location, and it's a lot better than dying and losing levels.

Now you’ll need to sift through your weapons for the best passives you can get.

Day 3

Take your time here.

Make sure you level up first, and then purchase any necessary equipment from the merchant and upgrade your weapons of choice.

Get rid of any extra upgrade materials or keys in favor of consumables, as you will not be able to use them during your fight.

BUY Warming Stone!!! This will grant your team another source of reliable healing, which you will find is a scarce resource during these long fights.

If you have a mage and some extra runes, get them some Starlight Shards, as this will significantly increase their FP pool for the fight.

Additional Tips

  • Try to stay right up in the boss's face as much as possible to draw aggro away from your team.
  • Keep track of your endurance at all times because if you lose it all while blocking, you will get staggered and probably take a lot of damage or die.
  • Use your whirlwind to deal stance damage whenever you aren’t able to hit them with your weapon.
  • Once he splits, try to grab the attention of two of them and let your team fight the other. The boss AI will usually end up making one of them more passive.
  • Keep both of them in front of you at all times, as your shield cannot block attacks from behind you.

Table of Contents

Explore More Builds

Scholar General Build Guide
Updated on Dec 5, 2025
Undertaker General Build Guide
Updated on Dec 5, 2025
Gnoster Expedition Ironeye Build
Updated on Nov 13, 2025
Gnoster Expedition Recluse Build
Updated on Jul 10, 2025
Recluse Best Relics for Every Nightlord
Updated on Jul 4, 2025