Build Overview
If you would like a complete overview of how the Barbarian works use this video guide: Barbarian Deep Dive
Arsenal Selection
 Rupture will be set to your Two-handed Slashing (Any) set up.
Overpower
Overpower has changed with the launch of the Lord of Hatred. By default every player can gain 4 stacks. There are ways of increasing that through aspects like  Tidal Aspect. It is no longer a multiplier, it acts as a buff to your damage. There are ways of taking that buff and turning it into multipliers with items like
  Banished Lord's Talisman. The one thing that Overpower does is add a lot of additive damage. This is harder to come by, so it becomes a very valuable resource.
Depending on how you build your build, you will have several different ways of generating overpower. It will be important to maintain the buff. Your overpower buff will last for 4 seconds and then 1 stack will be removed. If you have something like  Blood Boiling Aspect and you pair it with
  Dominate eventually will have stacks of overpower 100% of the time. This is just one example of how you can gain Overpower stacks.
If you want to learn the basics about Multipliers watch this video: Additive vs. Multiplicative Damage video.
How this build uses Overpower
This build will give you 12 stacks of Overpower. We gain it fromBanished Lord's Talisman after you spend 275 Fury, you will also gain 4 stacks. This is the fastest way to build Overpower Stacks. You will constantly spam  Rallying Cry to generate your stacks.
Fury Management
The only Fury spender in this build is Rallying Cry. To solve this issue.
- Chance to Restore Primary Resources will help to maintain Maximum Fury
- Adding Fury Regeneration onto your Helmet, Chest piece, Pants and Boots
Defense (Non-Selig)
- Take all defense nodes inside the Paragon board first. All Maximum Life, Resistances, and Armor nodes.
- You can use glyphs like
 Ire or
  Territorial to help keep yourself alive.
 - Make sure all your gear has Maximum Life on it and you can then add Resistances, and Armor as needed if you are not using
 Melted Heart of Selig
If you want to learn how to set your defenses up, watch this video: How to avoid getting one-shot video
If you want to learn the basics about Multipliers watch this video: Additive vs. Multiplicative Damage video.
Found a Mythic and want to know if it's useable? Is this Mythic usable with my build video?
Loot Filters:
Early post 70 loot filter (All 850 items, in T1):
Cg8QAB0AAP//IgQIASAwKAEKDxAAHQAA//8iBAgDMAEoAQodEAAdAAD//yIECAEgeCIMCAUVgH4jABUF7SIAKAEKJhAAHQAA//8iGwgJFRX7IgAV5jEjABWTPCMAFYovIwAVQlkjACgBCiYQAB0AAP//IhsICRXp/CIAFUH7IgAVIFEjABXr/CIAFe78IgAoAQoPEAEdAAD//yIECAIgASgBEg9DbGlwdGlzIFN0YXJ0ZXIYASAB
Mid game loot filter (Torment 4 to 8):
ChEQAB0AAP//IgYIBCABMAEoAQodEAAdAAD//yIECAEgeCIMCAUVgH4jABUF7SIAKAEKJhAAHQAA//8iGwgJFRX7IgAV5jEjABWTPCMAFYovIwAVQlkjACgBCjsQAB0AAP//IgUIACiEByIECAMwASIbCAkV6fwiABVB+yIAFSBRIwAV6/wiABXu/CIAIgYIBCABMAEoAQoPEAMdAAD//yIECAEgDygBEg9DbGlwdGlzIE1pZGdhbWUYAiAC
Late game Loot Filter (Torment 8 to 12):
ChwQAB0AAP//IhEICBWI5xMAFb+WBAAVWJAnACgBChcQAB0AAP//IgQIASAQIgYIBCABMAEoAQoXEAId/5cA/yIMCAgVtm0nABXc0hcAKAEKGhACHQAA//8iCQgGFTheHQAgASIECAIgBCgBChEQAB0AAP//IgYIBCABMAEoAQodEAAdAAD//yIECAEgeCIMCAUVgH4jABUF7SIAKAEKJhAAHQAA//8iGwgJFRX7IgAV5jEjABWTPCMAFYovIwAVQlkjACgBCj4QAB0AAP//IggIACCEByiEByIECAMwASIbCAkV6fwiABVB+yIAFSBRIwAV6/wiABXu/CIAIgYIBCABMAEoAQoPEAMdAAD//yIECAEgHygBEg9DbGlwdGlzIEVuZGdhbWUYAyAB


 Barbarian
 Madness Kick to dash to enemies kicking them. This build is a high mobility build, with surprising output. The only downside is a lack of area of effect damage. It's incredibly fun to play if you're a fan of kicking!
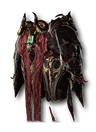 Chainscourged Mail to function, so until you have acquired a pair I would highly suggest Whirlwind as a great alternative to gear with.
















 0 (0)
0 (0)