WARNING: This guide contains spoilers for the story of Borderlands 4
Vile Lictor is the final boss of the Terminus Range and one of the Timekeeper's leuitenants.
Once a revered figure among the Augers, Vile Lictor has descended into madness, consumed by his ambition to shed his mortal form and ascend to godhood. Through ruthless experimentation and reckless manipulation of Eridium, he seeks to unravel the very threads of the Phase Dimension and seize its boundless energy. Now, the Augers - led by the irritable but ingenious Defias Calder - join forces with the Vault Hunter to end Lictor’s deranged crusade before reality itself unravels.
If you're hunting for the best legendary weapons, check out our page here for more info!
Whenever Peacebreaker Cannons fire at an enemy, gain a stack of Instigator and lose all stacks when Peacebreaker Cannons fire at a new enemy. Rafa gains +2% Gun Damage for every stack of Instigator.
Whenever Harlowe activates her Flux Generator, she decreases her remaining Action Skill Duration by 50% and gains +200% Action Skill Power.
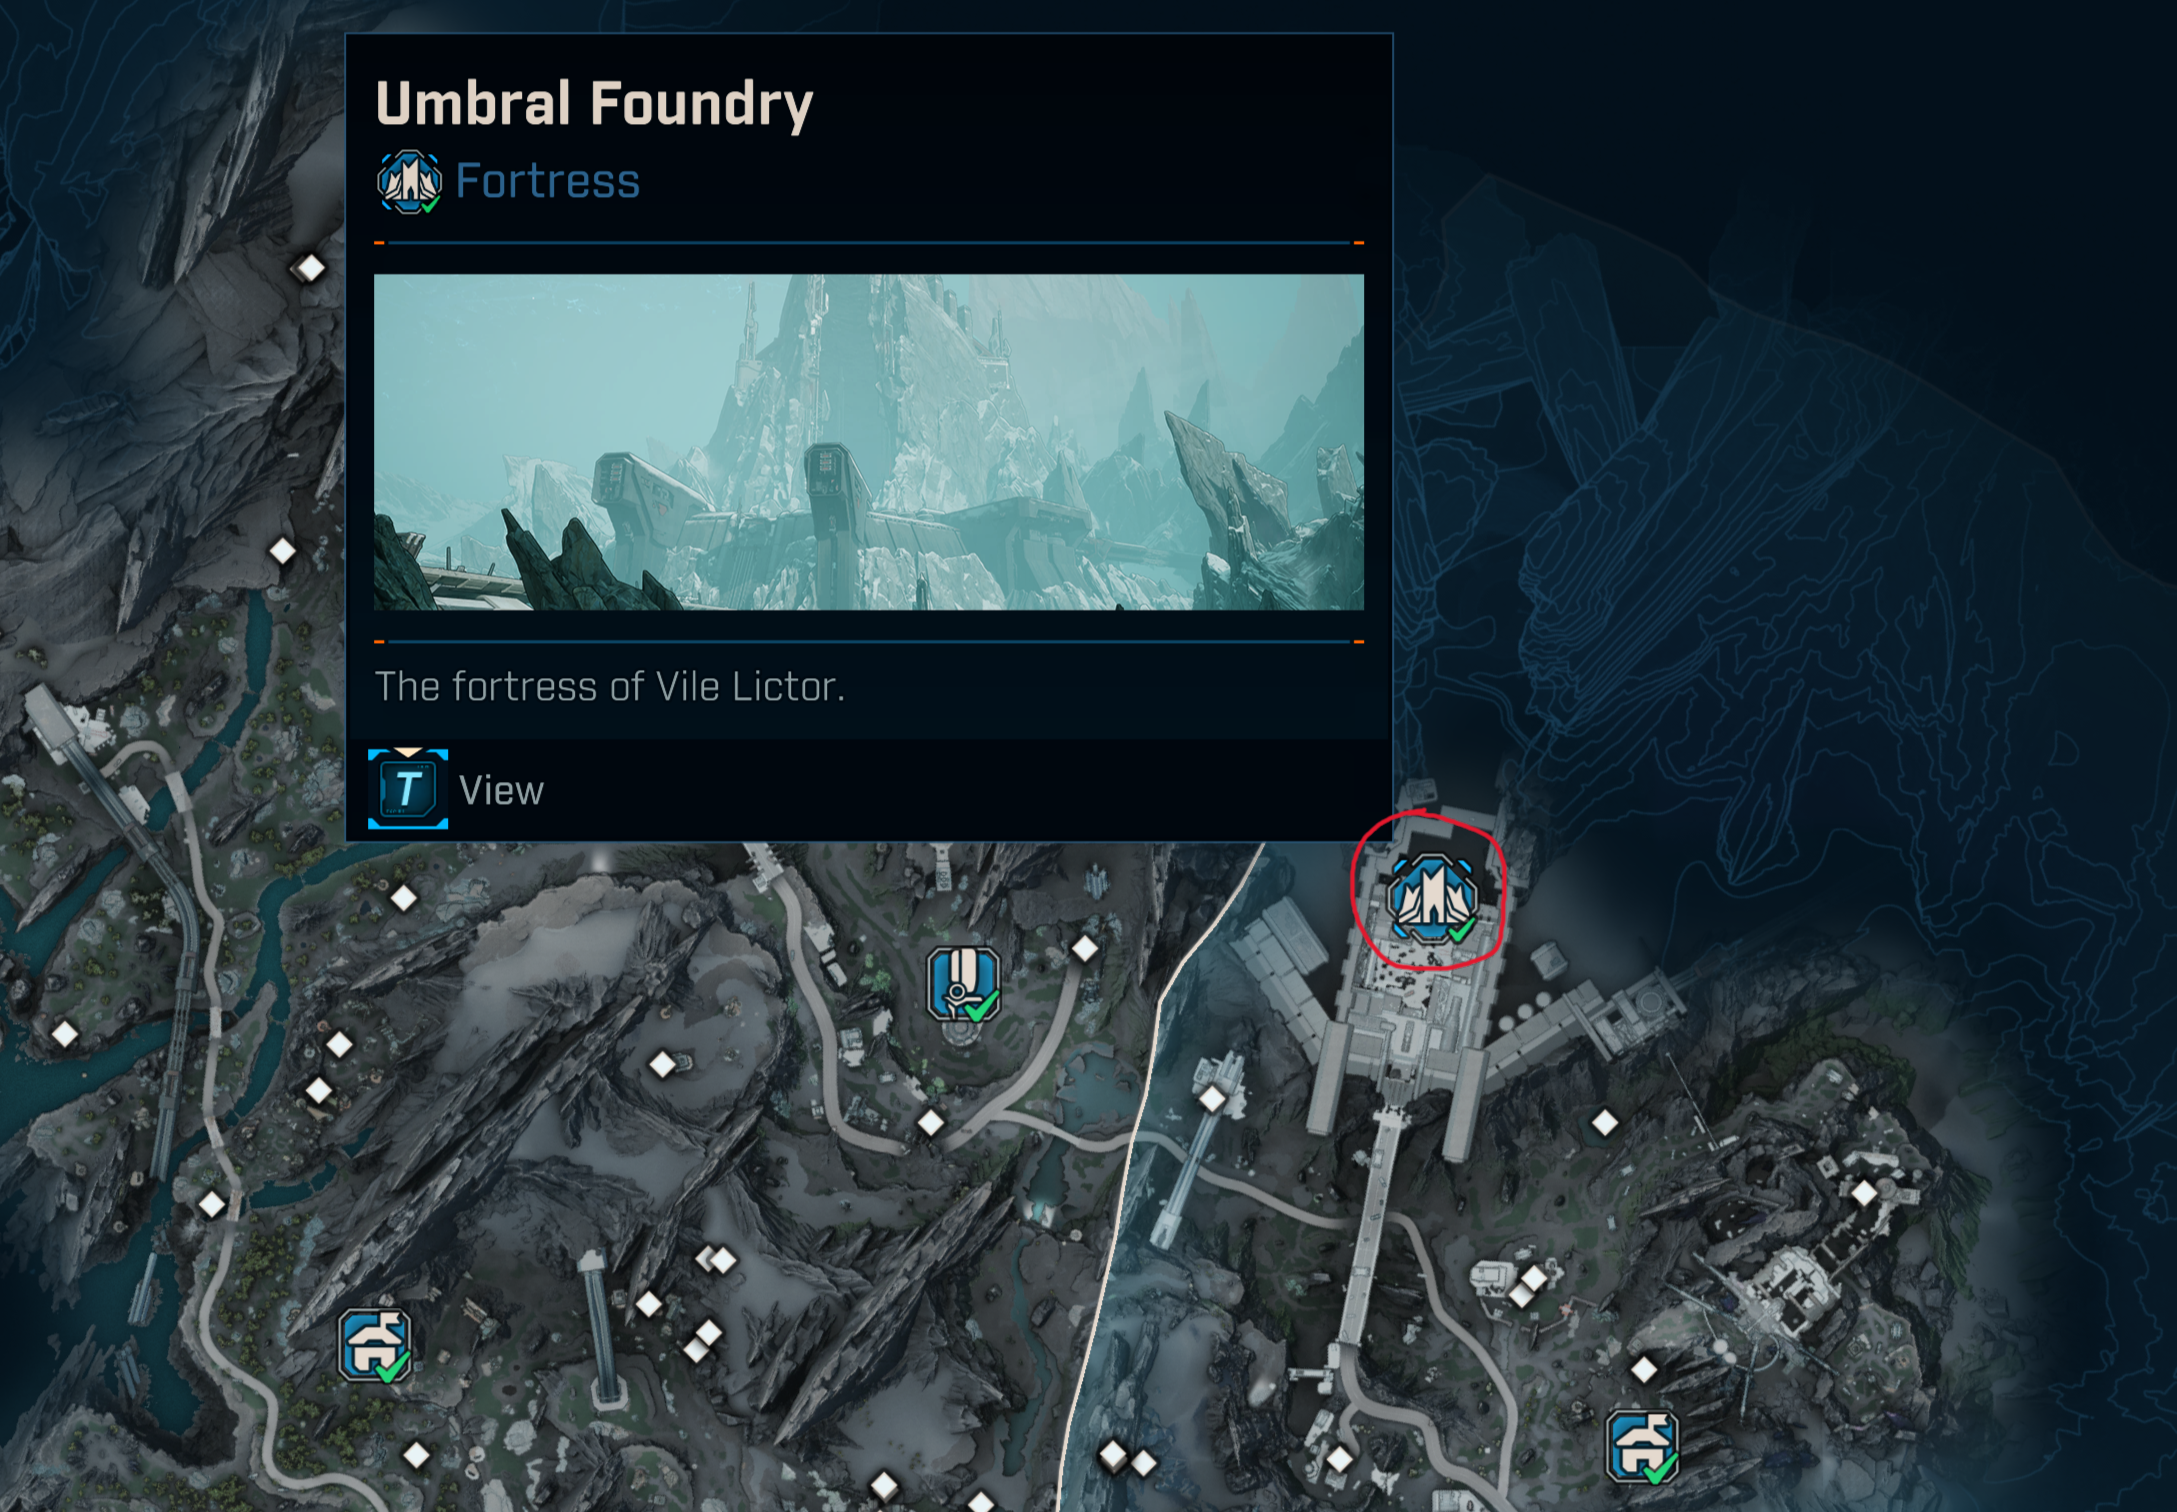
Location
Vile Lictor is located at the end of the Umbral Foundry in Terminus Range.
Progress through the story until reaching "His Vile Sanctum".
How to Beat
Vile Lictor is a 2 phase boss fight. After the first phase you will be transported to a different dimension and the boss moveset will change.
FIGHT TLDR
Phase 1: Dodge bad stuff, shoot his arms to open his heart to deal damage to him
Phase 2: Shoot him, hop on to platforms at the edge when arena wide AoE happens.
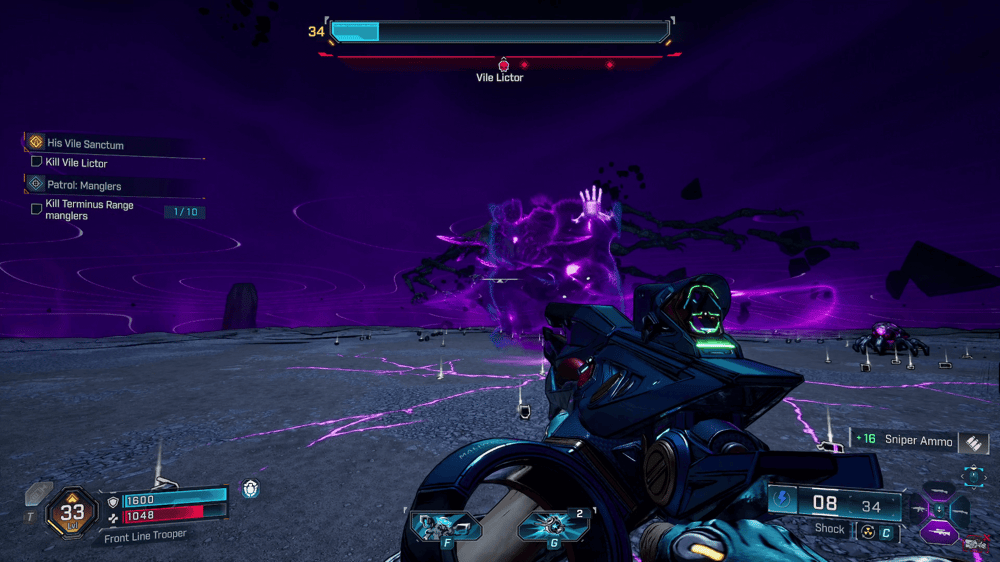
Phase 1
Lictor's Limbs
What Happens: Lictor spawns 4 Limbs that attack at range and need to be killed off before he can be damaged.
What to do: Use ⚡Shock or ☢️Radiationto quickly kill the arms as they have a Shield healthbar. Side step to avoid the slow ranged protectiles then aim at the boss's heart to deal damage to him (the heart is Armor, so swap to ❄️Cryo or 🟢Corrosive)
The hanging arms must be dealt with first
Lictor's Fists
What Happens: Adds spawn at the boss that will run towards the player and explode after a delay.
What to do: The adds are squishy and can be nuked down. Alternatively, you can let the adds get close and then run out during the delayed explosion.
These adds will be a nuisance throughout the whole fight.
Fade Walls
What Happens: Staggered waves of walls push forwards towards the player dealing damage.
What to do: Stay at the edge of the first wall, step out, then step back in after it's passed to dodge the second one.
Here we'd move right, then left.
Ground Wave
What Happens: Two short arena-wide waves spawn that deal damage if they come in contact with the player.
What to do: Simply jump over them!
Hop!
Phase 2
Limb Flurry
What Happens: A cascade of Limbs fly from Lictor's position towards the player, dealing damage.
What to do: This move looks incredibly intimidating but can be easily avoid by side strafing - no sprint or dash needed. Beware for adds.
We're strafing left so all the Limbs are missing us.
Teleport
What Happens: Vile Lictor teleports from one edge of the arena to the other.
What to do: It doesn't do any damage, just pull a 180 and continue to fight the boss.
Off he trots to the other side.
Fade Walls v2
What Happens: The boss hops laterally three times, leaving a wall behind each time that will push forwards towards the player. Each wall will also spawn adds (same as from Phase 1)
What to do: The walls are narrow and can be sidestepped - beware to not jump into the next wall!
These walls are much narrower but also much faster!
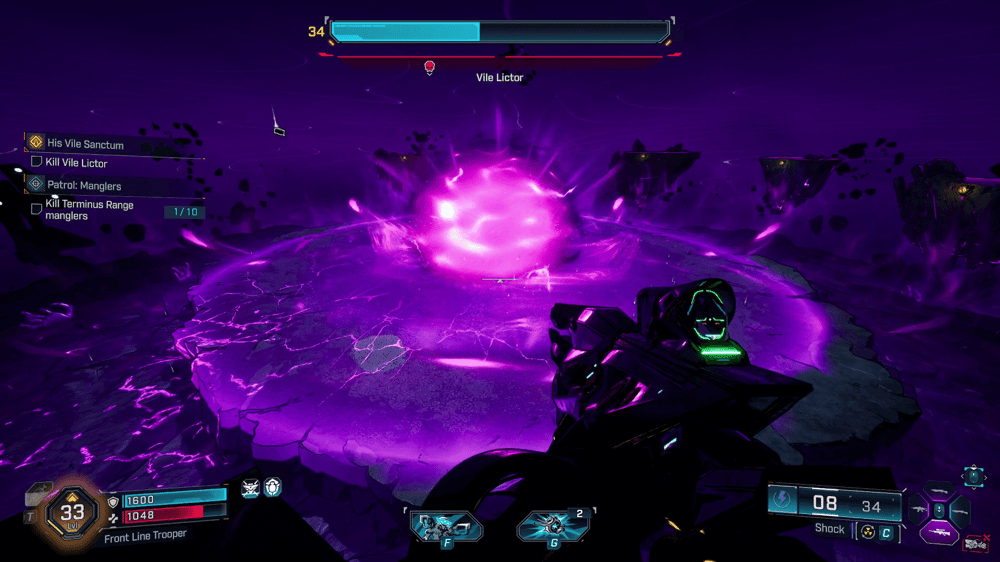
Arena Bomb
What Happens:The boss plants an energy bomb at the center of the arena that grows in size and eventually explodes, damaging everything still on the floor.
What to do: Platforms spawn outside the arena ring that can be grappled to. Jump up to avoid all damage from the bomb!
It would be pretty if it weren't trying to kill you.
Tips & Tricks
Vile Lictor starts with an Armor healthbar in Phase 1, making him vulnerable to 🟢Corrosive and ❄️Cryo, and then swaps to Shield in Phase 2, making him vulnerable to ⚡Shock and ☢️Radiation.
Due to his adds, limbs, and Phase 2 healthbars all being Shield, it is highly recommended you at least take one of the above listed elements for this fight.
Adds will kill themselves if they touch you and only hurt if you don't move out their way.
After killing him for the first time you will be teleported out of the arena and leave all your loot behind - don't worry, you can hop straight back in to get it and then jump right out again.
Adds are good for second wind/kill skills, so keeping some alive is not a terrible idea.
Keep max range from the boss and all his dodgeable damaging skills originate from his body, giving you the most time to get out the way.