- FAST Mapper with Excellent Clear
- Mostly Mod Immune
- Facetanks Most Bosses
- Engaging and Visceral Playstyle
Strengths and Weaknesses
- Relatively involved playstyle with a few separate combos and rotations.
- Dies to Recovery Disabling if not careful (Shade Walker, Bubonic)
- Not the Highest Single Target as this isn't pure glass but still does good dps
Build Variants
Endgame Setup
Act 1
Act 2
Act 3
Act 4
Early Maps
High End (No HH)
High End (HH)
Basic endgame variant of the build.
Can do:
- All +3 Pinnacles
- Uber Arbiter (skill check)
- Juiced t16 maps with Abyss
- Citadels and Anomalies
- All map mods besides reduced recovery (still be careful in super dangerous maps like -max/pen and double/triple gained as ele)
Equipment
Endgame Setup
Act 1
Act 2
Act 3
Act 4
Early Maps
High End (No HH)
High End (HH)


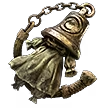

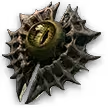
Make sure your Talisman is in your 2nd weapon slot and you right click the little II icon on your weapons to lock it to both weapons slots. It needs to be in the 2nd slot for Rigwald's Ferocity on  Shred
Shred
Crafting the Talisman:
- Obtain an ilvl 81+ Talisman with T1 Accuracy Fractured, Maji is ideal but you can do basically anything you like as long as it is one of the higher end talismans. Crit is another good option.
- You can either find one on trade or self fracture them yourself by buying rare ones with 3 or less mods including T1 Accuracy and then exalting it to 3 mods, throwing a desecration on it BUT NOT REVEALING IT, and then using a Fracturing Orb. If you can't find ANY on trade then buy an ilvl 81+ Maji Talistman preferably white and then make it into a 1 mod rare and spam chaos until T1 Accuracy.
- Bring the item to the 1 Fractured Accuracy mod and 1 other mod and then use Chaos Orbs to reroll until you land T3+ Hybrid Phys/Accuracy or Pure Phys%. Added Phys is not a keep on this weapon.
- Use an Omen of Dextral Exaltation to Exalt a Suffix onto the item.
- Use an Omen of Dextral Crystallisation and a Perfect Essence of Abrasion to apply Gained Phys on the weapon, we use Gained Phys to supplement our
 Herald of Ice Armor Break pops. Prefixes are now finished.
 - Use 2 Exalted Orbs to add 2 random suffixes, they don't matter.
- Use Perfect Essence of Haste and Perfect Essence of Battle with Omens of Dextral Crystallisation until you land both Essence mods together.
- Use an Omen of the Liege and apply a Preserved Jawbone to the weapon. Activate an Omen of Abyssal Echoes before you reveal as there is a small chance you can miss and go for Attack Speed/Companion Attack Speed.
- Divine the weapon to whatever is acceptable for you, socket it twice and add 2x Accuracy Runes.
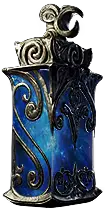
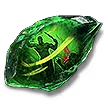
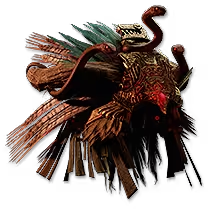 Constricting Command is very important to this build because of the Defy II support for
  Lunar Assault. This skill is EXTREMELY mana hungry and you will not be able to sustain mana without this support. It also provides a ton of really good stats on the tree.
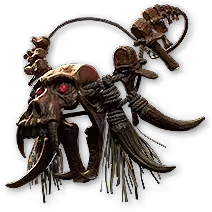
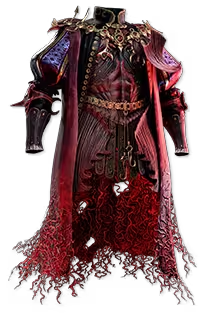 Couture of Crimson provides 50% more life due to overleech as well as a bunch of increased life. Corrupts don't matter a ton but 3 sockets is best.
For your Amulet you can drop Deadly Herald if you can't get 40 Spirit and replace it with any other damage support that is not gained preferably.
Beyond this you want the following:
- Elemental Resist to go roughly 10-15 over cap
- 75 Chaos Res
- 1 Source of Mana and Life Leech (rings or gloves)
- As much Life as possible
- As much Evasion as possible
- Any Attributes you can fit so that you can swap more on the tree to strength for more life
Skill Gems
Endgame Setup
Act 1
Act 2
Act 3
Act 4
Early Maps
High End (No HH)
High End (HH)
Support Gem Requirements:
Str 95
Dex 55
Int 50
1
Shred
2
Lunar Assault

3
Cross Slash

4
Lunar Blessing

5
Ferocious Roar

6
Pounce
7
Herald of Ice

8
Wind Dancer

9
Combat Frenzy

10
Charge Regulation
Gem Priority


+41
Lock Lunar Assault to Weapon Set 1 and ALL OTHER ACTIVE SKILLS to Weapon Set 2. Auras can stay on both.
You will want to maintain Lunar Blessing at all times, use Ferocious Roar to generate rage by using it nearby enemies. If you are using the Enraged Warcry II support you can easily chain this to spend your rage on Lunar Blessing and then refill immediately after. Be careful when using these skills in dangerous packs of enemies.
Mapping Priority List:
- Maintain Lunar Blessing and full rage through Attacking or Ferocious Roar.
- Use Lunar Assault for most general clear and to freeze very difficult enemies.
- Use Shred to jump around enemies quickly or to dps single difficult enemies such as Abyss Rares.
- If an enemy is extremely tanky, apply
 Freezing Mark with Pounce, freeze them with Lunar Assault, Shred combo 2x, execute with Cross Slash to pop the Shred Crystals.
 - Use Pounce to move around and maintain the Freezing Mark buff.
Bossing Rotation:
- If you aren't at overflow max health, use Shred a few times to get your leech started and prevent a one shot.
- Use Ferocious Roar to max rage and then spend it on Lunar Blessing
- Shred a few times to generate enough rage to Ferocious Roar again.
- Pounce to apply Freezing Mark
- Lunar Assault until the boss is frozen at around 65% freeze due to Freezing Mark
- Shred combo 2x or as many as you can in the freeze window depending on Attack Speed.
- Cross Slash to detonate Shred Ice Crystals
- If boss is still alive just hold Shred for a little bit until they die. If you are very undergeared or the boss is extremely tanky, you can do this for roughly 5-10s and then restart the combo from the beginning.
Herald of Ice Armor Break Chaining:
With the Gained as Physical modifier on our weapon we can do enough physical damage with Herald of Ice to apply Armour Break III when combined with Uruk's Smelting. If we also use the Armour Explosion support we can then cause a cascade of explosions that is much larger than normal.
Passive Tree
Endgame Setup
Act 1
Act 2
Act 3
Act 4
Early Maps
High End (No HH)
High End (HH)
main:
123
123
set 1:
20
20
set 2:
20
20
Ignore any priority lists you see here and follow my leveling trees.
Weapon Set 1 Passives are exclusively for Lunar Assault and making sure we can freeze things as easily as possible. Lock Lunar Assault to weapon set 1 and ALL OTHER SKILLS TO WEAPON SET 2.
Atlas Tree
Endgame Setup
Act 1
Act 2
Act 3
Act 4
Early Maps
High End (No HH)
High End (HH)
Quest Rewards
Check which quests you’ve completed on your character
Clearfell — Beira of the Rotten Pack
Not Specified1 choice
Hunting Grounds — The Crowbell
Not Specified1 choice
Freythorn — The King in the Mists
Not Specified1 choice
Ogham Farmlands — Una's Hut
Not Specified1 choice
Ogham Manor — Candlemass, the Living Rite
Not Specified1 choice
Keth — Kabala, Constrictor Queen
Not Specified1 choice
Valley of the Titans — Medallion
Not Specified2 choices
Deshar — Final Letter
Not Specified1 choice
The Spires of Deshar — Sisters of Garukhan
Not Specified1 choice
Jungle Ruins — Mighty Silverfist
Not Specified1 choice
The Venom Crypts — Venom Draught
Not Specified3 choices
Jiquani's Machinarium — Blackjaw, the Remnant
Not Specified1 choice
The Azak Bog — Ignagduk, the Bog Witch
Not Specified1 choice
The Molten Vault — The Molten Vault
Not Specified1 choice
Aggorat — Blood Sacrifice
Not Specified1 choice
Journey's End — Captain Hartlin
Not Specified1 choice
Eye of Hinekora — Navali's Rest
Not Specified1 choice
Halls of the Dead — Yama The White
Not Specified1 choice
Halls of the Dead — Tawhoa's Test
Not Specified2 choices
Abandoned Prison — Goddess of Justice
Not Specified2 choices
Halls of the Dead — Tasalio's Test
Not Specified2 choices
Halls of the Dead — Ngamahu's Test
Not Specified2 choices
Wolvenhold — Oswin, the Dread Warden
Not Specified1 choice
The Khari Crossing — Akthi and Anundr
Not Specified1 choice
The Khari Crossing — Molten Shrine
Not Specified1 choice
Qimah — Tabana's Pillar
Not Specified7 choices
Kriar Village — Lythara, the Wayward Spear
Not Specified1 choice
Howling Caves — The Abominable Yeti
Not Specified1 choice
Video Guide
Build Planner Export
Export this build variant directly to your game.
Table of Contents
Featured Builds


Become a Creator
Want to earn rewards by sharing your builds with your community?