PoE 2 Build
[0.5] Shin's Blood and Steel - Witchhunter
Build Overview
This build is designed to make use of the Crossbows armour breaking potential while exploiting that to deal, the all so fun, bleed damage! BLEED EXPLOSIONS! ALSO, Quite possibly, THE BEST Culling in the game! To Clarify.. INSANE Culling!
NEW in 0.5: With the addition of  Horror's Flight, we push our cull to its limit and alter the lvl84+ Gameplay to accommodate. READ ON to see what's changed.
Strengths and Weaknesses
- Great Mapping
- Great Bossing
- Blood Explosions
- INSANE Culling
- Cool Top-down Shooter Playstyle
- Reliant on HIGH Physical Damage Crossbow
- 3 amour slots taken by uniques
- Expensive chase item Rigwald's Ferocity (not required, but is a slight dps boost)


Gearing is very simple!
MAIN WEAPON:
Get a Crossbow with LOTS of Physical Damage and +to projectile gems levels. The Best you can get.
A general rule ill follow: 650pDPS for map tier 1-13, 750 pDPS for tier 14-15 and 850+ pDPS for juiced tier 15 and 16s. Try fit in Leech if you can OR fit leech on rings.
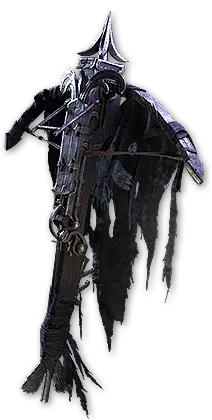
THE UNIQUES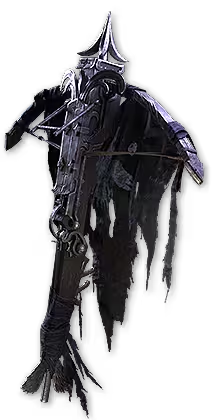 Rampart Raptor is a very cheap crossbow that allows us to use
  Fragmentation Rounds constantly and quickly for 4 seconds after a reload. This ends up being INSANE for damage when the damage source is not from the rounds themselves. We use it with
  High Velocity Rounds Riven to delete Rare and Unique Mobs.
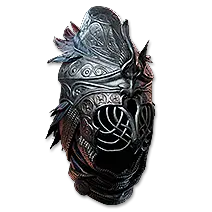
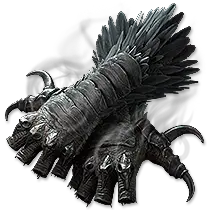
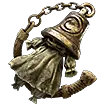
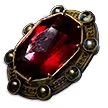
Next is the coolest part of the kit, the  Myris Uxor,
  Heart of the Well and Horror's Flight. The helm and jewel will allow us to Increase our culling threshold by a whopping 125% at max rolls. With the addition of
  Bounty Hunter along with Cull the Hordes and Culling Strike II, brings the total % up to 225% more culling threshold on Rare and Unique mobs! Once you hit lvl84 this is increased by a massive 200% with max stack of Horror's Flight's "Fear incarnate" buff.
What's all that mean? That means we INSTANTLY kill enemies at their following LIFE levels:
No Stacks of Horror's Flight: - Unique's: 16.25%, Rare's: 32.5%, Magic's: 71.25% and Normal: 99.75%
Max stacks of Horror's Flight: - Unique's: 26.25%, Rare's: 52.5%, Magic's: 100% and Normal: 100%
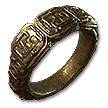
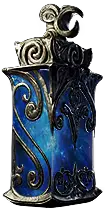
As you could see, that's some damn good life damage we don't have to do, AND it means we trigger our On-kill effects very quickly.  Ryslatha's Coil Is a bit of a double edged sword. On one hand we get 40% more max hit for our High Velocity Rounds and in turn our RIVEN damage gets better. BUT we also can get up to 40% less damage which does suck. Its a great item for non-crit physical hits. Feel free to skip this if you don't want the RNG of it.
  The Spring Hare helps us get more lucky rolls either way.
Anointment:
For the amulet Anointment you will want to get  Battle Fever as it synergises well with our setup.
THE REST:
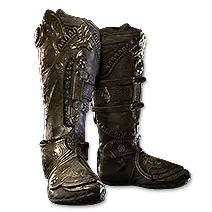
For the rest of your Armour, you just want armour evasion gear, best you can get. Prioritise elemental/chaos resists first then increased armour/evasion rolls. And life. Always life. Oh! If you didn't get leech on your weapon, get it on something else. We need LEECH!
Skill Gems
Support Gem Requirements:
Str 55
Dex 100
Int 5

1
Armour Piercing Rounds
Level 20

2
Fragmentation Rounds
Level 20

3
High Velocity Rounds
Level 20

4
Herald of Blood
Level 20

5
Wind Dancer
Level 12

6
Scavenged Plating
Level 20

7
Artillery Ballista
Level 20

8
Emergency Reload
Level 20

9
War Banner
Level 20

10
Sorcery Ward
Level 20
Gem Priority


+32
Skills and supports explained:
The main gems are  Armour Piercing Rounds, High Velocity Rounds and Fragmentation Rounds. We are the Gunner of POE2
Core Attack skills:
Armour Piercing Rounds Weapon SET 2
Leveling: Chain II > Armour Explosion > Rapid Attacks II
Level 56+: Chain III > Brutality III > Bleed III > Heft > Culling Strike II
This is our main de-buff ability and pack clear. We use it to spread bleed while also removing armour as fast as possible. We want to get Chain I asap and Armour Explosion to make its purpose that much better as we level. Once we hit level 56 and get our hands on Myris Uxor, we go all in on Physical! So drop the Armour Explosion and pop in Brutality III. Culling Strike II is also increase our cull threshold as we kill.
Use is as simple as spray and pray until everything is de-buffed with broken armour or dead. For big scary mobs use it to de-buff before switching to High Velocity Rounds.
High Velocity Rounds Weapon SET 2
Brutality III > Close Combat II > Heft > Projectile Acceleration III > Deliberation
This is the big damage ability and the main skill we want to scale! We want to make sure we use it after Armour Piercing Rounds and  Emergency Reload to maximise its damage while applying RIVEN. The reason we need to make sure it hits the hardest is because of how riven works. RIVEN is 5% of the Hit that applied it, added to every hit after while armour is broken. That mean 5% perFragmentation Rounds pellet that hit after the RIVEN is applied. LOADS OF DAMAGE! Fragmentation Rounds Weapon SET 1
Rapid Attacks III > Rigwald's Ferocity > Streamlined Rounds > Impale > Nimble Reload
This is the BOSS KILLER. It does (almost) 0 damage by itself, but with RIVEN its a killing machine. With the right passives and supports we can get this to fire every 0.1 seconds, and with 12 rounds each fire at 5% of the Damage of High Velocity Rounds, we get a very quickly escalating machine. This tech is cool NGL! Culling Strike II is there to make sure we maintain the Buff while weaving frags in to packs while mapping.
(New in 0.5: 0.5 has seen Rigwald's Ferocity become a expensive chase item. It is not needed for the build but will increase dps slightly. So have it as a end goal) Artillery Ballista:
Brutality III > Impale > Urgent Totems III> Heft > Rapid Attacks II
This things fun! Its so good at gaining aggro that i don't leave home without it. Pop it down to distract packs or prepare for a fight. Linked Brutality III to increase pin and Impale to make it a de-buff machine!Emergency Reload
Cooldown Recovery II
This is just a flat damage boost when its loaded. I like to pop it on my R key to pretend I'm reloading my shots with special rounds. Good to pop before you fire High Velocity Rounds
Persistent Skills: Herald of Blood
Bleed III > Poison III > Culling Strike II > Bursting Plague > Deadly Poison II
This thing was introduced in 0.2 and is the GAME CHANGER we needed for this build to shine. It makes all enemies explode if they have blood lose, which they always will! We are using Bursting Plague tech to make clear even more INSANE! Herald of Blood Explodes and applies Bursting Plague which then has its own explosion which can apply Bleed III which in turn Triggers Herald of Blood explosion. FUN STUFF! Also Culling Strike II will give us a consistent buff while clearing thanks to this tech.
(NEW in 0.5: We swap this out at lvl 84 for  War Banner as it will no longer be needed for clear once we get Horror's Flight)
 Wind Dancer
Blind II > Maim
This ones amazing. You can get it early and you can add supports as you expand your spirit. It gives you a % of evasion per stack up to 3 stacks and if melee gets through that evasion, the stacks will be spent and a blast of wind will launch enemies away from you, giving you time to gtfo. Must have skill for any ranged. Linked with Blind II & Maim, it can make sticky situations much more survivable!  Scavenged Plating
Prolonged Duration II > Precision I > Physical Mastery
This skill allows us to stack up to 40% more armour as we break others armour. A easy add that helps us tank allot more damage then we could otherwise. We add Precision I which maxes out our spirit and adds some accuracy to our ranged attacks which also translates to attack speed when  Falcon Dive is active on our weapon swap. Very simple, very helpful. War Banner
Prolonged Duration II > Magnified Area II
This skill replaces  Herald of Blood at LVL84 as we will be clearing trash mobs so fast the Blood explosion will no longer trigger. This will be used at boss fights to increase our dps.
 Sorcery Ward
No links
This passive skill is acquired by selecting the ascendency passive. See "how it plays section" for more details.
Passive Tree
main:
123
123
set 1:
20
20
set 2:
20
20
THE TREE!
First lets talk Jewels:
You should have 3 jewel sockets by 90 and you will want to get the below.
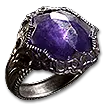
%Increased global physical damage & %Chance to bleed on your non-unique. The for the unique Heart of the Well, you will want to get 25% Culling Strike Threshold.
Next
Ascendency order:  Pitiless Killer >
  Obsessive Rituals >
  Ceremonial Ablution >
  Zealous Inquisition
For Pinnacle fights, you can swap Zealous Inquisition out for  Judge, Jury, and Executioner.
Tree Order:
Please see above. I have listed the best order to obtain the nodes but please use your own feel with it. If you feel squishy, get more defence nodes first etc.
Pay close attention to the weapon swap colors as they will show what you should aim for.
MAXIMISE DAMAGE:
We utilise  Spray and Pray and
  Full Salvo to maximise damage. So make sure you are ALWAYS moving and changing ammo types. The best way to do this is to have Armour Piercing Rounds on left click and Fragmentation Rounds on right click. Then simply fire a Fragmentation Rounds every 10 seconds.
Quest Rewards
Check which quests you’ve completed on your character
Clearfell — Beira of the Rotten Pack
+10% to Cold Resistance
Hunting Grounds — The Crowbell
Grants Two Weapon Set Passive Skill Points
Freythorn — The King in the Mists
+30 to Spirit
Ogham Farmlands — Una's Hut
Grants Two Weapon Set Passive Skill Points
Ogham Manor — Candlemass, the Living Rite
+20 to maximum Life
Keth — Kabala, Constrictor Queen
Grants Two Weapon Set Passive Skill Points
Valley of the Titans — Medallion
30% increased Charm Effect Duration
+1 Charm Slot
Deshar — Final Letter
Grants Two Weapon Set Passive Skill Points
The Spires of Deshar — Sisters of Garukhan
+10% to Lightning Resistance
Jungle Ruins — Mighty Silverfist
Grants Two Weapon Set Passive Skill Points
The Venom Crypts — Venom Draught
25% increased Stun Threshold
Jiquani's Machinarium — Blackjaw, the Remnant
+10% to Fire Resistance
The Azak Bog — Ignagduk, the Bog Witch
+30 to Spirit
The Molten Vault — The Molten Vault
Reforging Bench
Aggorat — Blood Sacrifice
Grants Two Weapon Set Passive Skill Points
Journey's End — Captain Hartlin
Two Weapon Set Passive Skill Points
Skill Gem(Lv 13)
Delirium Drop
Eye of Hinekora — Navali's Rest
5% increased Maximum Mana
Halls of the Dead — Yama The White
Grants Two Weapon Set Passive Skill Points
Halls of the Dead — Tawhoa's Test
+5 to Dexterity
Abandoned Prison — Goddess of Justice
30% increased Life Recovery from Flasks
Halls of the Dead — Tasalio's Test
+5 to Intelligence
Halls of the Dead — Ngamahu's Test
+5 to Strength
Halls of the Dead — Tribal Medicine
30% increased Armour, Evasion and Energy Shield
Wolvenhold — Oswin, the Dread Warden
Grants Two Weapon Set Passive Skill Points
The Khari Crossing — Akthi and Anundr
Two Weapon Set Passive Skill Points
The Khari Crossing — Molten Shrine
5% increased Maximum Life
Qimah — Tabana's Pillar
15% increased Armour, Evasion and Energy Shield
Kriar Village — Lythara, the Wayward Spear
+40 to Spirit
Howling Caves — The Abominable Yeti
Grants Two Weapon Set Passive Skill Points
How it Plays
The play style depends on whether you are fighting a single target or packs. But is very simple with small rotations.
Rotations:
Packs: Armour Piercing Rounds in a quick burst to apply broken armour and bleed to packs. This will cause explosions and clear with manic glee. Throw in the "EXTRAS" every now and then.
Single target:
Same as packs, we start by breaking the armour of the enemy with Armour Piercing Rounds, however this time we use High Velocity Rounds to apply RIVEN then swap to Fragmentation Rounds until Armour break debuff expires. Then if its still alive we go back to pack rotation.
If you come to a point you get to start a fight or are panicking, pop down a Artillery Ballista. These lil guys draw aggro like crazy and de-buff insanely well!
EXTRAS
Throw in a Emergency Reload before every High Velocity Rounds to maximise the damage
Pop a Artillery Ballista whenever you remember and 100% before a boss.
Defence:
Witch hunter is kind crazy when it comes to negating Elemental hits (not ground effects) with its Sorcery Ward. This thing gives you a "shield" that completely negates elemental hits until its hp is depleted. Its hp is calculated by 30% of the total of your armour and evasion. This means it can get really large. The down side is it cuts your armour evasion by 50% which hurts allot, but can be fixed by the passive tree quiet easily.
(As of 0.4 Sorcery Ward got a nice buff in the form of Ceremonial Ablution. This means our tank got a lil better!)
Overall, it is insane against anything that has elemental hits and decent against physical. So keep moving and avoid attacks best you can either way.
How it Works
BIG DMG MAKE BIG POPS! BIG CULLING MAKE BIG DEAD!
Changelog
10/02/2025: Large update.
added passive to level 90
Added new gear details
Updated passive tree guide
Updated skill gems
20/04/2025: Updated to 0.2 - BIG DAMAGE
06/09/2025: Updated passive tree with added priority order. Updated gear section. Updates ongoing
07/09/2025: Updated all sections and added updated video guide.
Published guide
16/09/25: added campaign buff choices details to gearing section.
27/09/25: Added weapon swap and spears for level 80+. updated passive tree.
22/12/25: Updated tree, gear and gems. Text outdated. Continuing to update
22/12/25: Gear and Skill text updated. Taking a break, will update Passive and other text in the morning
23/12/25: Substantially reduced the text and updated all fields.
02/06/26: Added campaign reward selection. Confirmed working with 0.5. Working on Improvements
14/06/26: Updated all sections and added new pob. Video to follow.
15/06/26: Video updated and published.
Video Guide
Build Planner Export
Export this build variant directly to your game.
Path of Building Code
Table of Contents
Featured Builds


Become a Creator
Want to earn rewards by sharing your builds with your community?