menu
MobalyticsUse your favourite features in-game with our Desktop App
PoE 2 Build

Rake Stomping Ground Alt Leveling (Witch Variant)

0.2 DotH
presentationWitch
Speed Leveling
Creator
Updated on May 7, 2025
May 7, 2025

Build Overview

Hey guys, I'm Lazy Exile, and this is my leveling guide for your Alt Character in PoE 2.

In this guide, I'm assuming you have access to gold, support gem tier 3, and currencies to purchase the required power-level items and skills.

This will give you the best player power throughout the campaign from Act 1 to Act 6. Destroy everything with ease with any class. Please find the link to all variants here:

Huntress Variant Build Guide

Sorcerer Variant Build Guide

Mercenary Variant Build Guide

Monk Variant Build Guide

Ranger Variant Build Guide

Warrior Variant Build Guide

Summary

This variant is different because it is CLASS AGNOSTIC. By using Rake + Stomping Ground, and strength stacking, this allows us to quickly stack damage, and keep the simple playstyle throughout the whole campaign from level 3 to level 60. Basically...

Pros

Extremely Strong and Tanky from level 3 to 60

No mana issues

One-button playstyle (Rake spam only)

Extremely Fast Movement Speed with Rake + Parry

Cons

Might be nerfed

Disclaimer

  • This build is not intended for endgame content and is meant to take you through the campaign from level 1 to 65 only. This build uses a specific attributes-stacking tree and will require you to respec later on to your build.
  • You'll also need some currency to get started because there are some required unique items in this build, and if you don't have it, expect the player's power to drop drastically.

How to Use the Guide?
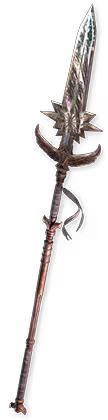
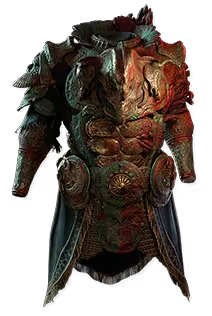
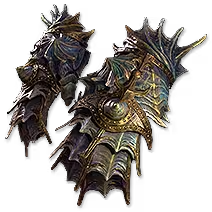
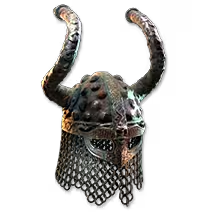
Equipment

Detail step-by-step gearing level-by-level, all you need to do is equip the right setup at the right time. Most of the items are optional, but using the setup that I'm using will give you the most damage.

Skill Gems

Detail step-by-step on what skill to use level-by-level, all you need to do is follow the setup as we only use Rake, and add a few more aura throughout the game.

Passive Trees

Detail step-by-step on what points to prioritize and take first, with checkpoint at certain level for the correct power spikes.

How it Plays?

Discussion about gameplay mechanics of this build


Equipment

item
2
item
4
item
1
item
7
item
6
item
5
item
3
item
8
item
9
item
10
Equipment Priority
0
Helmet
Black Sun Crest
1
Main Hand
Skysliver
2
Off Hand
Silverthorne
3
Left Ring
Blackheart
4
Right Ring
Ring
5
Amulet
Revered Resin
6
Body
Titanrot Cataphract
7
Gloves
Lochtonial Caress
8
Belt
Meginord's Girdle
9
Boots
Trampletoe

Note:

The only thing you need to pick up in this build is Flasks, always pick up the highest level one, and craft with Orb of Transmutation and Augmentation.

Leveling Equipment Step-by-Step

Level 1 (in town)

  • Equip Horns of Bynden
  • Equip Ghostwrithe
  • Equip Meginord's Girdle
  • Equip Painter's Servant
  • Equip Splinter of Loratta
  • Equip Glowswarm
  • Equip Blackheart
  • Equip Luminous Pace
  • Equip Dunkelhalt

Level 5

  • Equip Greymake (replace Horns of Bynden)
      • Potentially Horns of Bynden is still very good and don't need to be replaced.
  • Equip Tyranny's Grip (replace Splinter of Loratta)

Level 8

  • Equip Revered Resin
    • Alternatively Carnage Heart can be good as well

Level 11

  • Equip Wanderlust (replace Luminous Pace)

Level 16

  • Equip Skysliver (replace Tyranny's Grip)
  • Equip Lochtonial Caress (replace Painter's Servant)

Level 20

  • Equip Titanrot Cataphract (replace Ghostwrithe)

Level 26

  • Equip Silverthorne (replace Dunkelhalt)
  • Replace Glowswarm with any rare rings with +# to Strength and +# to All Attributes

Level 30

  • Equip Black Sun Crest (replace Greymake)
  • Equip Trampletoe (replace Wanderlust)

Level 41

  • Upgrade your Rings with +# to Strength and +# to All Attributes (replace both Blackheart + previous rings)
    • Optional if you lack damage
  • Upgrad eyour Amulet with +# to Strength and +# to All Attributes (replace Revered Resin)

Level 52

  • Final upgrade to your rings + amulet with +# to Strength and +# to All Attributes
    • This will be the final upgrade to supplement your damage
    • At this point your Strength should be around 700

Leveling Jewels

Emerald

Prefix

  • Companions deal #% increased Damage (at least 15+)

Suffix

  • #% Increased Attack Speed
  • #% Increased Attack Speed with Spears

From Nothing

This is completely optional and is expensive, but it saves you a few points, get a From Nothing with Iron Reflexes to get Polymathy and Authority for 2 points

Skill Gems

Support Gem Requirements:

Str 15

Dex 20

Int 25

Expand all
1

Whirling Slash

Whirling Slash
2

Disengage

Disengage
supportcooldownreductionplayer
3

Rake

Rake
supportstompinggroundplayer
supportfasterattackplayer
supportheftplayer
supportclosecombatplayer
4

Herald of Ash

Herald of Ash
supportincreasedareaofeffectplayer
5

Companion: {0}

Companion: {0}
supportelementalarmyplayer
supportlastgaspplayer
supportmeatshieldplayer
6

Thunderous Leap

Thunderous Leap
supportpinpointcriticalplayer
supportinevitablecriticalsplayer
supportshockingleapplayer
7

Overwhelming Presence

Overwhelming Presence
Gem Priority
+12

Leveling Skill Step-by-Step

Note: Highly recommend you to have a 4-link Rake to do the most damage. This skill will be KEPT AT LEVEL 3 so you can reused for your next characters.

We do not need to upgrade level on Rake, it's only meant to trigger Stomping Ground.

Act 1

Level 2 (In Town)

  • Use Disengage with Stomping Ground to do damage
    • Remember, the damage part come from where your backflip landed, so try to land on the target
  • Use Whirling Slash and Parry animation cancel to move
    • Temporary support with Martial Tempo

Level 6

  • Swap to Rake as the only damage skill from now
  • Use Rake and Parry to move fast

Level 14

  • Use Herald of Ash after King of the Mist's encounter

Act 2

Level 31

  • Swap from Herald of Ash to Companion: {0}
    • Checkout the How it Plays to know what Beast is good
  • Use Thunderous Leap to create Shock Ground
    • Optional (personally I don't use it)

Act 3

Level 36

  • Activate Herald of Ash again after Azak Bog

Act 6

  • Activate Overwhelming Presence after Azak Bog

Skill Rotation

  • Before Rake, use Disengage to do damage
    • Remember the landing part is the part that do damage because of Stomping Ground
  • After Rake, one button spam to clear the entire game


Passive Tree

main:
123
123
set 1:
20
20
set 2:
20
20

Attributes

Strength > Dexterity > Intelligence

  • In the beginning, spec everything into Strength
  • At level 31, spec into Dexterity until you have at least 72 Dexterity to use Tame Beast

Pathing

  1. Tenfold Attacks
  2. Flow Like Water & Flow State
  3. Inspiring Ally
    • You can use 3 attributes node for strength before respec back to this at level 31, because that's when we will actually have a Companion
  4. Sturdy Ally
  5. Polymathy
    • If you have From Nothing, you can spec into this way before (but it's expensive!)
  6. Brute Strength
  7. 2 Smalls Damage and Companion Damage Nodes
  8. Acceleration
  9. Dance with Death
    • Should be final point at level 61, take off your shield when fighting boss to make use of this node

Passive Skills Explanation

We want to grab as many Attributes nodes as possible while efficiently pathing to take all the damage nodes that we can get.

Because Stomping Ground scales with generic damage, we takes Companion Damage nodes, and Inspiring Ally provides extremely efficient damage % with each small nodes adding 20% to our damage.

Polymathy combines with many #% increased to Strength from our gears will help us reach high amount of Strength in the end game.

We are also try to grab as many jewels socket as possible because we can get a lot of damage from the jewel with cheap Companion damage prefix.

How it Plays

Tame Beast

Troubled Camp in Infested Barren

In here, you will be able to find this camp and this will always have 2 Beast type monsters. Keep respawn at checkpoint here to find the right type of Beast to capture. The aura that we want for our campaign would be:

  • Extra Physical Damage Aura (best)
  • Haste Aura (secondary option, but not as good)

Use Tame Beast on the Beast first, then proceed to kill the beast, and Tame Beast will change into Companion: {0}

Ascendancy

We can level this variant without any ascendancy points, so feel free to put points into whatever you want for your build.

Venom Draught

Again, there are no restrictions here, pick whatever you want.

Quests to do in the Campaign

When leveling a second character, you don't have to kill all the optional bosses. Here is a quick checklist for what quest/bosses to complete:

Act 1

  • Clearfell - Kill Beira of the Rotten Pack: +10% cold res
  • Hunting Grounds - Kill Crowbell: +2 passive points
  • Freythorn - Kill The King in The Mist: + 30 spirit
  • Ogham Farmlands - Find Una's Lute: + 2 passive points
  • Ogham Manor - Kill Candlemass, The Living Rite: +20 maximum life

Act 2

  • Keth - Kill Kabala, Constrictor Queen: +2 passive points
  • Keth + The Bone Pits - kill enemies within these 2 zones, and drop the Kabala and Sun Clan Relic.
  • Valley of the Titan - use the 2 Relics found above in the Altar to get:
    • 30% increased Charm Charges gained or
    • 15% increased Mana Recovery from Flasks
  • Deshar - Loot Final Letter from a body and give Shambrin: +2 passive points
  • The Spires of Deshar - Click on the Sisters of Garukhan Shrine: +10% lightning res

Act 3

  • Jungle Ruins - Kill Mighty Silverfist: +2 passive points
  • The Venom Crypts - Find Venom Vial and give Servi: Venom Draught bonuses (Stun Threshold/Elemental Ailment/Mana Regen Rate)
  • Azak Bog - Kill Ignagduk, The Bog Witch: +30 spirit
  • Jiquani's Machinarium - Kill Blackjaw, The Remnant: +10% fire res
  • Aggorat - Kill enemies until they drop Sacrificial Heart, sacrifice at the altar: +2 passive points

Act 1 Cruel

  • Clearfell - Kill Beira of the Rotten Pack: +10% cold res
  • Hunting Grounds - Kill Crowbell: +2 passive points
  • Ogham Farmlands - Find Una's Lute: + 2 passive points
  • Ogham Manor - Kill Candlemass, The Living Rite: 8% increased maximum life

Act 2 Cruel

  • Keth - Kill Kabala, Constrictor Queen: +2 passive points
  • Keth + The Bone Pits - kill enemies within these 2 zones, and drop the Kabala and Sun Clan Relic.
  • Valley of the Titan - use the 2 Relics found above in the Altar to get:
    • 30% increased Charm Charges gained or
    • 15% increased Life Recovery from Flasks
  • Deshar - Loot Final Letter from a body and give Shambrin: +2 passive points
  • The Spires of Deshar - Click on the Sisters of Garukhan Shrine: +10% lightning res

Act 3 Cruel

  • Jungle Ruins - Kill Mighty Silverfist: +2 passive points
  • The Venom Crypts - Find Venom Vial and give Servi: Venom Draught bonuses (Chao res/All attributes/reduced Slowing Debuff)
  • Azak Bog - Kill Ignagduk, The Bog Witch: +40 spirit
  • Jiquani's Machinarium - Kill Blackjaw, The Remnant: +10% fire res
  • Aggorat - Kill enemies until they drop Sacrificial Heart, sacrifice at the altar: +2 passive points

Video Guide

Table of Contents

Featured Builds

[0.4] Bigdaddy Arc/Spark CoC Stormweaver
Updated on Dec 5, 2025
[0.4] One-Shot Hollow Palm Monk - Uber Endgame to Starter Build Guide
Updated on Dec 5, 2025
Poison Pathfinder League Start Build (Leveling)
Updated on Dec 5, 2025
[0.4] Invoker Hollow Palm - Campaign to Endgame
Updated on Dec 5, 2025
[0.4.0 Changes] 100% Crit/Recoup Chronomancer
Updated on Dec 4, 2025

Become a Creator

Want to earn rewards by sharing your builds with your community?