An Auto bombing and screen wide clearing machine!
Utilising a  Herald of Blood and Bursting Plague loop we can spread poison and bleed damage screen wide, resulting in constant screen clearing explosions for amazing mapping! And for boss fights, we take advantage of high magnitude poisons to deal insane damage over 2 seconds.
(this build is made in endgame and is not for levelling)
PoE 2 Build
0.3 - Shin's Plague Knight - Pathfinder - Poison EXPLOSION Tank
Build Overview
Strengths and Weaknesses
- Autobomber with optional skills
- Screen-wide explosions
- Bossing capable
- Excels in large pack maps
- Unique's required can cost 10div+
- Scales with flat weapon damage
- Damage over time


Gear:
The above is example gear and are not min-max gear. Read on for priority of rolls.
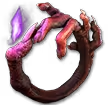
Unique's: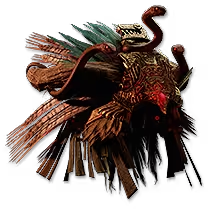 Constricting Command
This is how we get some pretty crazy states. You will want to get the version that gives 5 fewer enemy's to count as surround. This way we are always classed as surrounded. With this helm and passives we get +270% Attack Damage, +120% armour and evasion rating, +20% Attack speed, +30% block and 10% deflection just to name the important ones. It also allows us use of Defy II for our leap slam which makes it be usable even when we have no mana.
(4 roll is viable if you cannot afford and makes use of  Paranoia)
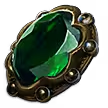
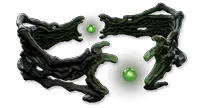 Darkness Enthroned
This allows us to get 58% increased magnitude of our poisons when socketed with 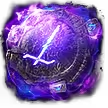 Courtesan Mannan's Rune of Cruelty. Make sure you get at least a 99% roll and gloves roll to make it work.
 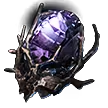 From Nothing
Get one with the  Oasis notable so we can select
  Fast Acting Toxins,
  Escape Strategy and Careful Consideration
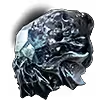 Megalomaniac
Get one with  Agonising Calamity and whatever else works. I was lucky enough to get one with
  Concussive Attack but its not required.
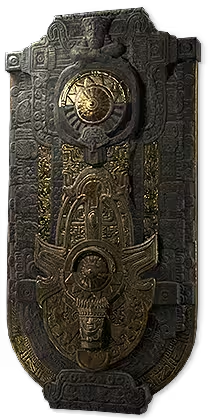
 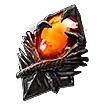 Prism of Belief
Get one with +3 for  Supercharged Slam. Oddly this is pretty cheap.
 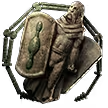 For Utopia &
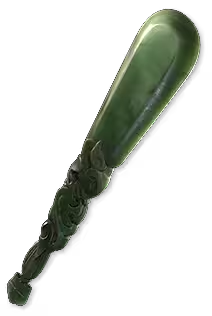
 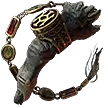 Sanguis Heroum
These will keep you alive.
Non-Unique's:
Here i will list suggested rolls for each slot in order of priority.
Amulet:
Anoint  Lasting Trauma
+2-3 to melee skills
Elemental resistances
Chaos Resistances
Life
Rarity
Life Regeneration
Rings:
Elemental resistances
Chaos Resistances
Life
Rarity
Life Regeneration
Boots:
Should be armour only (highest roll you can get)
30%+ Movement speed
% Armour applies to elemental damage
Elemental resistances
Chaos Resistances
Life
Rarity
Life Regeneration
Gloves:
Should be armour only (highest roll you can get)
+2 to melee skills
+Physical damage to attacks
Elemental resistances
Chaos Resistances
Life
Rarity
Life Regeneration
Chest:
Should be Evasion only (highest roll you can get)
% To deflection rating
Elemental resistances
Chaos Resistances
Life
Rarity
Life Regeneration
Shield:
Should be armour only (highest roll you can get)
% Armour applies to elemental damage
Elemental resistances
Chaos Resistances
Life
Life Regeneration
Twohanded:
Get as much flat physical damage as possible, so Flat damage not dps.
+to melee levels
Onehanded:
Get as much flat physical damage as possible, so Flat damage not dps.
+to melee levels
Jewels:
%increase magnitude of poison you inflict
%to evasion rating
%chance to poison
Skill Gems
Support Gem Requirements:
Str 45
Dex 60
Int 10

1
Raise Shield

2
Leap Slam
3
Supercharged Slam

4
Wind Dancer
5
Herald of Blood

6
Scavenged Plating
Gem Priority


+23
Skills:
Raise Shield
No links.
This comes with our shield but we use it fairly frequently. This will be used in boss fights to prevent hits from damaging us between rotations. It is also helpful to mitigate ranged attacks until we can get in range ourself.
Leap Slam
Bleed III > Poison III > Bursting Plague > Life Leech III > Defy II
This is our main attack when mapping and can also be used for a few hits in bossing encounters. Simple and easy to use, just jump in to the middle of a pack to spread the Bleed III, Poison III and Bursting Plague debuff and then watch everything explode! We add Life Leech III to help with life sustain and Defy II to allow us to always be able to use it. Supercharged Slam
Poison III > Deadly Poison II > Aftershock II > Heft > Efficiency II
This is the main boss skill and the reason we choose to weapon set into a two hander. The idea is to apply as many heavy hitting poisons in a short window so that it can deplete health fast. Each charge point adds a shockwave that will apply a new poison stack so we can get up to 5 stacks if lucky. The main down side is the very long attack time, each charge requiring a second of standing still, so we must make sure we wait for a opening to use this. If you can, get off a 4 charge, but otherwise just aim for 2 charges, as with Aftershock II will regularly get more hits in anyway. Wind Dancer
Bleed III > Poison III > Corrosion > Deadly Poison II > Bursting Plague
The first part of our "AutoBomber" Setup. This will apply Bleed III, Poison III and Bursting Plague debuff to enemies, which will then trigger our Herald of Blood to continue the Bursting bleed chain. We also use it to break armour so that our Scavenged Plating can stack up quickly while mapping.
(One thing to note, the damage on  Wind Blast scales of your weapons flat damage and not dps. This is why we choose high flat damage over dps when selecting a weapon, as well as why we choose maces.)Herald of Blood
Bleed III > Poison III > Bursting Plague > Escalating Poison > Deadly Poison II
The second part of our "AutoBomber" Setup. This will spread both bleed and poison through chaining explosions that are triggered by either Wind Dancer or Leap Slam. Now Herald of Blood cannot inflict bleed itself so Bleed III has no effect on it, but does effect the explosions that Bursting Plague generate, this means infinite spread of Bleed III, Poison III and Bursting Plague!
(You may swap out Escalating Poison with Life Leech III to increase survival if you wish)
Scavenged Plating
Prolonged Duration III > Physical Mastery > Clarity I
A simple but extremely effective buff that increases our defences while mapping.
Passive Tree
main:
123
123
set 1:
20
20
set 2:
20
20
The TREE!
As this is a endgame build that is level 91, I wont be going over the order as if we are going to level with it. You can follow the above Priority however to get the most out of it if you are 80+.
First lets cover the ascendency. We want to get  Contagious Contamination and
  Overwhelming Toxicity as we are a poison build. Kind of the whole reason we went pathfinder :D.
Next we want  Traveller's Wisdom to get those sweet sweet extra 6 passives.
Lastly we get  Relentless Pursuit as its a god send in maps. Temporal chains? Chilled Grounds? Grasping vines? HAHAA we laugh at them and move freely.
Now lets go over our surrounded tech. Due to the use of a 5 roll Constricting Command we will get the following passives for the below stats with 100% uptime. In the Thick of It, Paranoia, Thrill of Battle, Favourable Odds, Tactical Retreat, Frantic Fighter and all smaller passives in their circles. We will also grab Last Stand but not its surrounding passives. With these we have the following:
+270% Attack Damage
+120% Armour and Evasion rating
+20% Attack speed
+30% Block
+10% Deflection
+10% Movement speed
+40% Ailment and Stun threshold
+2.5% Life regeneration
As you can see, this can be quite powerful.
(please note that Paranoia can be dropped if you do have a 5 roll on your Constricting Command)
Now lets cover the jewels briefly as we already covered them in the gear section.
We use From Nothing with Oasis so we can get access to Fast Acting Toxins, Escape Strategy and Careful Consideration. We also use the smaller passives near Fast Acting Toxins for our twohanded weapon set passives.
Next we want to get Megalomaniac with a Agonising Calamity for the 40% more physical damage.
We also get a Prism of Belief for our Supercharged Slam
Now we have 3 more jewel slots we fill with %increase magnitude of poison you inflict, %to evasion rating and %chance to poison.
For our poison damage we get quite allot.  Vile Wounds,
  Crippling Toxins, Stacking Toxins, Lasting Toxins, Low Tolerance, Escalating Toxins, Building Toxins, Fast Acting Toxins, Leeching Toxins and Deterioration. We also grab Toxic Tolerance for poison immunity but this is just personal choice and can be skipped.
A note on Leeching Toxins, this is our main wait to sustain our life as we don't get much apart from the Life Leech III we add to our Leap Slam.
Now lets talk about raw damage. Because we use flat damage over dps these nodes go along way. Now we only have 1 node under this for now will add suggestions in the 91+ section below.
We get  Staggering Palm for its flat 20%. That's it for now.
On to defence. We are pretty damn tanky.
First our shield swap actually used a notable rather then smaller passives like the twohanded set mentioned above. We grab  Spiked Shield for this weapon set.
Now the non-set nodes we get to boost our tank are as follows. Escape Strategy, Careful Consideration,  General's Bindings and Leather Bound Gauntlets. Leather Bound Gauntlets is why its important we get armour only gloves with the highest roll possible.
Now the 91+ suggestions:
We have poison and tank covered so we want to increase our damage further. Grab the  Material Solidification notable and all its smaller passives, then grab Splinters. These are just suggestions, so feel free to do whatever.
Quest Rewards
Check which quests you’ve completed on your character
Clearfell — Beira of the Rotten Pack
Not Specified1 choice
Hunting Grounds — The Crowbell
Not Specified1 choice
Freythorn — The King in the Mists
Not Specified1 choice
Ogham Farmlands — Una's Hut
Not Specified1 choice
Ogham Manor — Candlemass, the Living Rite
Not Specified1 choice
Keth — Kabala, Constrictor Queen
Not Specified1 choice
Valley of the Titans — Medallion
Not Specified2 choices
Deshar — Final Letter
Not Specified1 choice
The Spires of Deshar — Sisters of Garukhan
Not Specified1 choice
Jungle Ruins — Mighty Silverfist
Not Specified1 choice
The Venom Crypts — Venom Draught
Not Specified3 choices
Jiquani's Machinarium — Blackjaw, the Remnant
Not Specified1 choice
The Azak Bog — Ignagduk, the Bog Witch
Not Specified1 choice
The Molten Vault — The Molten Vault
Not Specified1 choice
Aggorat — Blood Sacrifice
Not Specified1 choice
Journey's End — Captain Hartlin
Not Specified1 choice
Eye of Hinekora — Navali's Rest
Not Specified1 choice
Halls of the Dead — Yama The White
Not Specified1 choice
Halls of the Dead — Tawhoa's Test
Not Specified2 choices
Abandoned Prison — Goddess of Justice
Not Specified2 choices
Halls of the Dead — Tasalio's Test
Not Specified2 choices
Halls of the Dead — Ngamahu's Test
Not Specified2 choices
Wolvenhold — Oswin, the Dread Warden
Not Specified1 choice
The Khari Crossing — Akthi and Anundr
Not Specified1 choice
The Khari Crossing — Molten Shrine
Not Specified1 choice
Qimah — Tabana's Pillar
Not Specified7 choices
Kriar Village — Lythara, the Wayward Spear
Not Specified1 choice
Howling Caves — The Abominable Yeti
Not Specified1 choice
How it Plays
Rotations:
For groups:
We jump in with Leap Slam which applies our Poison III, Bleed III and Bursting Plague, we will then get hit trigging Wind Dancer which applies Corrosion which breacks armour while also applying more stacks of Bleed III, Poison III and Bursting Plague. Then when they die, they trigger Herald of Blood which then triggers its own Bursting Plague that applies Poison III and more Bleed III. All happening win a split second.
For single target:
If we can initiate combat or have enough time before combat we should charge Supercharged Slam up to 4 stacks then release for multiple stacks of poison. If not, charge 1-2 stacks is enough to maintain a nice poison damage over time. Positioning and timing is very important. Feel free to jump in and hit with Leap Slam when you dont have any good attack windows.
How it Works
BIG POISON GO BOOM!
Changelog
05/10/25: Published
Build Planner Export
Export this build variant directly to your game.
Video Guide
Table of Contents
Featured Builds


Become a Creator
Want to earn rewards by sharing your builds with your community?