menu
MobalyticsUse your favourite features in-game with our Desktop App
PoE 2 Build

[0.5] Ancestral Bear Titan

Updated on Jun 3, 2026
Jun 3, 2026

Build Overview

0.5 Update Changes:

  • Bhatair's Vengeance: When you Freeze a target with Supported Skills, for each 2 Rage you have, you and Allies in your Presence gain 1% of Damage as Cold Damage for 15 seconds (previously for each 1 Rage you have, for 20 seconds).
  • All crafted modifiers are now guaranteed, but items can only have 1 crafted modifier at a time. Desecrated modifiers no longer count as crafted modifiers, but items are limited to 1 Desecrated modifier.

Bhatair's Vengeance is nerfed so we'll get a bit less extra damage from the Maul Freeze tech. The crafting change will affect pretty much every build - we'll no longer be able to craft our endgame Talisman using 3 Perfect Essences. Build overall still great.


Overview:

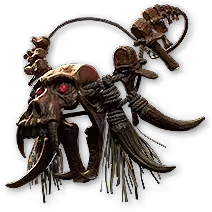
Titan setup utilising Bear Shapeshift Skills for Empowered Slams that cover a massive Area of Effect.

Early Game Levelling:

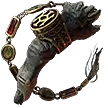
  • Use a Talisman(weapon) and Select Bear Form to gain Maul (Bear Form basic Attack).
  • Maul grants 5 Rage on Hit and can be supported with Rage III/Passive Tree/Gear etc. to grant even more Rage per Hit.
  • Furious Slam can spend 10 Rage, Enraging the Slam to deal more Damage, gain a larger base Radius and create Jagged Ground. The skill also has less Attack time if the Bear is currently standing, so the basic combo is 2x Maul into Furious Slam.
  • Shockwave Totem can be used for bonus single-target Damage, exploding the Jagged Ground created by Furious Slam.
  • Pounce is a great gap closer/movement Skill, causing an Attack Hit where it lands and Marking the highest-Rarity enemy with Predator's Mark, making them take a small amount of increased Damage(more if you have nearby allies). The Mark is activated on killing the target, summoning some allied Wolves.

Endgame Setup:

  • Use weapon swap points to make Ferocious Roar have incredibly fast activation time, generating massive amounts of Rage very quickly, but also causing the Bear to stand, allowing faster use of Furious Slam immediately after. We also make use of Amor Mandragora on weapon set 2 to gain a huge boost to Skill Speed.
  • Furious Slam has gigantic Area of Effect scaling thanks to Ancestral Empowerment, Fist of War III and the Area of Effect scaling on the Passive Tree combined with
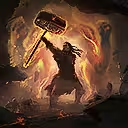
 Hulking Form.
  • Walking Calamity aids in map clear, but also provides a nice Damage boost. We can activate it whenever we need by spamming Ferocious Roar to generate Glory very quickly.
  • Drop multiple Shockwave Totems for even more single-target Damage.
  • A combination of Scavenged Plating, Charge Regulation and Armour scaling(and optionally Lightning Coil) make the setup quite tanky for endgame mapping.
  • Bonus Damage buff from Bhatair's Vengeance setup in Maul.

Weapon Set Swap (IMPORTANT):

Weapon set setup is very important, click to read below.

Why Titan over Druid?

  • Hulking Form to make the best use of the Passive Skill Tree, especially the Area of Effect nodes.
  • Even more AoE scaling from Ancestral Empowerment and Fist of War III combo.
  • Warrior start location has significantly stronger early game Damage scaling due to the amount of consistent increased Damage nodes including early access to the Singular Purpose and Crushing Verdict wheels.

Campaign Quest Bonus Choices

  • Act 2 Ancient Vows Quest: 30% increased Charm Charges gained
  • Act 3 Corpse-snake Venom: 25% increased Stun Threshold
  • Act 4 Blank Tattoos: +5 Dexterity, +5 Strength, +5 Intelligence
  • Act 4 Goddess of Justice: 30% increased Life Recovery from Flasks
  • Act 4 Shark Fin: 30% increased Armour, Evasion, and Energy Shield
  • Interlude Seven Pillars: +5% to Elemental Resistances or +5 to all Attributes (replace with 3% increased Movement Speed when Resistances/Attributes are solved in late game)

Videos:

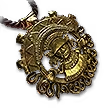
How to Craft the Endgame Talisman*

*Note the below method is outdated as of 0.5 and has been nerfed due to items now only allowing for a single crafted modifier. There may be new Runes in 0.5 that provide similar crafting steps, but we won't know until playing the patch.

  1. Obtain a Magic Maji Talisman with 150%+ increased Physical Damage(single modifier)
  2. The suffix modifier doesn't matter - If it doesn't have a suffix, make sure to add any suffix using an Orb of Augmentation before proceeding
  3. Use a Greater Essence of Abrasion to upgrade the item to Rare and add a tier 3 flat added Physical Damage modifier
  4. Activate an Omen of Dextral Crystallisation in your inventory and use a Perfect Essence of Abrasion to remove the random suffix and add the Gain as Extra Physical Damage modifier
  5. Use 3 Exalted Orbs to add 3 random suffixes
  6. Use a Perfect Essence of Haste to remove a random suffix and add the Chance to gain Onslaught modifier
  7. Use a Perfect Essence of Battle to remove a random suffix and add the +5 Attack Skill Levels modifier
  8. If the Perfect Essence of Battle removed the Onslaught modifier, you'll need to repeat step 4/5 until you have both Onslaught and Attack Skill Levels on the item
  9. Activate an Omen of the Liege and an Omen of Dextral Necromancy in your inventory and use a Preserved Jawbone to remove a random suffix and add a Desecrated suffix
  10. If the Preserved Jawbone removed either the Chance to gain Onslaught modifier or the Attack Skill Levels modifiers, you'll need to use the corresponding Essence again until you have both Essence modifiers and the unrevealed Desecrated modifier
  11. Reveal the Desecrated modifier at the Well of Souls: you're looking for the hybrid Attack Speed modifier (12—18)% increased Attack Speed, Companions have (12—18)% increased Attack Speed)
  12. You're done! Quality and socket the item, and place Greater Iron Runes for even more Damage


See the FAQ for more information.

Strengths and Weaknesses

  • Big chunky slam hits
  • Decently tanky for a Life build with good gear
  • Not the fastest
  • 2-Button playstyle isn't for everyone (use Ferocious Roar before every Furious Slam)

Build Variants

Equipment

item
10
item
4
item
5
item
6
item
8
item
3
item
10
item
2
item
7
item
1
item
item
item
item
item
Equipment Priority
+10

2nd Set Weapon: Amor Mandragora

Note: Resistance/Attributes on items are examples, they do not need to be exact. Focus on capping Elemental Resistances first, then Chaos Resistance.

Skill Gems

Support Gem Requirements:

Str 85

Dex 35

Int 30

1

Furious Slam

supportaftershockchanceplayertwo
supportrapidattacksplayertwo
supportclosecombatplayertwo
supportrageforgedplayertwo
fistofwarsupportplayerthree
2

Shockwave Totem

supportrapidattacksplayertwo
supporturgenttotemsplayerthree
supportincreaselimitplayertwo
supportefficiencyplayertwo
3

Ferocious Roar

supporttirelessplayer
supportragingcryplayer
supportefficiencyplayertwo
supportenragedwarcryplayer
4

Walking Calamity

supportelementalarmamentplayertwo
prolongeddurationsupportplayertwo
supportelementalfocusplayer
supportconcentratedareaplayer
supportexecuteplayertwo
5

Maul

supportaddedcolddamageplayer
supportembitterplayer
prolongeddurationsupportplayertwo
supportbhatairsvengeanceplayer
supportfreezeplayer
6

Pounce

supportholydescentplayer
supportrapidattacksplayerthree
supportefficiencyplayertwo
supportcooldownrecoveryplayertwo
7

Savage Fury

prolongeddurationsupportplayertwo
8

Overwhelming Presence

supportprecisionplayer
9

Scavenged Plating

prolongeddurationsupportplayertwo
10

Charge Regulation

Gem Priority
+30

WEAPON SETS (IMPORTANT)

Open your Skills Panel and click the arrow pop-out button for each skill. At the bottom of the Skill info sheet for each Skill there's two checkboxes for weapon sets:

  • Set Ferocious Roar and Savage Fury to weapon set 2 ONLY
  • Set Furious Slam, Shockwave Totem, Walking Calamity and Overwhelming Presence to weapon set 1 ONLY
  • Make sure the Maul you're using for the Bhatair's Vengeance setup is from weapon set 1
  • Scavenged Plating and Charge Regulation on both sets
  • Equip Amor Mandragora in your second weapon set. This will grant you stacks of Druidic Prowess when spending Rage via Ferocious Roar, granting up to 30% increased Skill Speed

Passive Tree

main:
123
123
set 1:
20
20
set 2:
20
20

Jewels

Ruby (place in the middle jewel socket)

Search for a Ruby with:

  • 'increased Area of Effect'
  • 'increased Damage against Enemies with Fully Broken Armour'
  • 'increased Warcry Speed'
  • 'increased Skill Speed while Shapeshifted'

Time-Lost Jewel (place it in the south-most jewel socket)

Search for a Time-Lost Ruby with:

  • 'Upgrades Radius to Medium'
  • 'Small Passives in Radius also grant increased Warcry Speed'
  • 'Small Passives in Radius also grant increased Damage against Enemies with Fully Broken Armour'

Quest Rewards

Check which quests you’ve completed on your character
Clearfell — Beira of the Rotten Pack
Not Specified1 choice
Hunting Grounds — The Crowbell
Not Specified1 choice
Freythorn — The King in the Mists
Not Specified1 choice
Ogham Farmlands — Una's Hut
Not Specified1 choice
Ogham Manor — Candlemass, the Living Rite
Not Specified1 choice
Keth — Kabala, Constrictor Queen
Not Specified1 choice
Valley of the Titans — Medallion
Not Specified2 choices
Deshar — Final Letter
Not Specified1 choice
The Spires of Deshar — Sisters of Garukhan
Not Specified1 choice
Jungle Ruins — Mighty Silverfist
Not Specified1 choice
The Venom Crypts — Venom Draught
Not Specified3 choices
Jiquani's Machinarium — Blackjaw, the Remnant
Not Specified1 choice
The Azak Bog — Ignagduk, the Bog Witch
Not Specified1 choice
The Molten Vault — The Molten Vault
Not Specified1 choice
Aggorat — Blood Sacrifice
Not Specified1 choice
Journey's End — Captain Hartlin
Not Specified1 choice
Eye of Hinekora — Navali's Rest
Not Specified1 choice
Halls of the Dead — Yama The White
Not Specified1 choice
Halls of the Dead — Tawhoa's Test
Not Specified2 choices
Abandoned Prison — Goddess of Justice
Not Specified2 choices
Halls of the Dead — Tasalio's Test
Not Specified2 choices
Halls of the Dead — Ngamahu's Test
Not Specified2 choices
Wolvenhold — Oswin, the Dread Warden
Not Specified1 choice
The Khari Crossing — Akthi and Anundr
Not Specified1 choice
The Khari Crossing — Molten Shrine
Not Specified1 choice
Qimah — Tabana's Pillar
Not Specified7 choices
Kriar Village — Lythara, the Wayward Spear
Not Specified1 choice
Howling Caves — The Abominable Yeti
Not Specified1 choice

F.A.Q

Q: I can't use Ferocious Roar again after using Furious Slam - what's going on?

A: To bypass the Cooldown of Ferocious Roar you need to have at least 20 Rage due to Enraged Warcry I. Note that Furious Slam can spend up to 20 Rage. This means that you always want to be topped off on Rage. To achieve this, make sure Walking Calamity is always up, and ensure that you're using Ferocious Roar before every use of Furious Slam.

Additionally, at the beginning of a map or after a period of inactivity, use Ferocious Roar several times to quickly reach maximum Rage. As long as your Rage is always topped off, you'll never encounter an issue where Ferocious Roar cannot be used.

Q: I'm having Mana cost issues - how can I solve Mana sustain?

A: Ensure that you have a Mana Leech modifier somewhere on your gear (Rings, Gloves etc.). You can also make use of Lavianga's Spirits for more passive Mana recovery, but if you find that you're running out of Mana out of combat, using a normal Mana Flask may be a better option.

Q: Why Gain as Extra Physical Damage on the Talisman instead of Cold or Lightning?

A: This simply makes the build more comfortable to play because it allows Walking Calamity to leech from that portion of Damage, and I've done everything I can to make this build feel good to play. Using an Extra Cold or Extra Lightning modifier is fine if you don't mind losing a bit of quality of life - you'll be able to Freeze easier with the cold modifier(for Bhatair's Vengeance), or potentially inflict Shock with the lightning one for more Damage.

Q: Which Endgame setup should I use? What's better and why?

A: This is a preference thing. Personally I prefer the Lightning Coil setup because you're able to get more out of Charge Regulation and you're a bit stronger against larger incoming Physical hits. However, with lower Armour you're also weaker against swarms of smaller hits, so both options have their upsides and downsides. The Lightning Coil setup is also notably more budget friendly due to being less reliant on Armour applying to Elemental suffix modifiers, so you can consider using it first and transition into full Armour once you have the budget.

Q: Which Jewels should I use?

A: You can find the Jewels section under the Passive Tree.

Q: I can't put Prolonged Duration into Maul, why not?

A: Place Bhatair's Vengeance in the link first so the Duration tag is added to the Skill, then you'll be able to socket Prolonged Duration II.

Changelog

  • 10/12/25 - First draft
  • 12/12/25 - Updated tree pathing to a more reliable setup for leaguestart (not relying on new STR/INT nodes) Subject to change once new info is released. Updated gems & example gear. Also added permanent campaign choice bonuses.
  • 13/12/25 - Updated tree to include Primal Rage. Updated support gems/removed placeholders.
  • 14/12/25 - Updated for current progress. Added Endgame/Levelling sections. Added Lightning Coil setup.
  • 15/12/25 - Updated ascendancy choice - see the day 3 update post. Updated overview section.
  • 16/12/25 - Updated Passive tree for Time-Lost jewel addition, added info underneath passive tree section. Added Bhatair's Vengeance setup(optional).
  • 18/12/25 - Final update for last gear upgrades etc.
  • 19/12/25 - Updated 2nd weapon set nodes from Vocal Empowerment to Admonisher instead. The extra point is invested into another glory generation node on the Everlasting Glory wheel. (this is because empowerment damage doesn't apply unless it's in your active weapon set, and we don't need the additional empowered attack)
  • 23/12/25 - Updated jewels section, restructured passive tree priority
  • 30/12/25 - Updated flasks, added FAQ section, some other adjustments to gems/gear ready for full video guide
  • 01/01/26 - Updated FAQ section
  • 26/02/26 - Guide cleanup for end of 0.4
  • 29/04/26 - Prep for 0.5

Video Guide

Build Planner Export

Export this build variant directly to your game.

Table of Contents

Featured Builds

[0.5] Caster Speedleveling Twink
Updated on Jun 23, 2026
[0.5] Comprehensive CoC Frostbolt/Spark Comet Recoup Infernalist - by Ignatius
Updated on Jun 23, 2026
[0.5] ED Contagion Lich League Starter (Level 1 to Endgame)
Updated on Jun 23, 2026
[0.5] Giga Bonk Martial Artist - Flicker / Falling Thunder Monk - League Starter to Endgame
Updated on Jun 23, 2026
Collapsing Horizon Fire Spell on Hit
Updated on Jun 23, 2026

Become a Creator

Want to earn rewards by sharing your builds with your community?