Leveling
In the campaign, your  Spark damage is going to be relatively low. That's why you want to clear mostly by casting unleashed
  Orb of Storms and folowing it up with unleashed Spark. This will do more damage early and will clear better until you get to the endgame.
Your first Ascendancy Trial is not useful. You can choose to level with another ascendancy or simply ignore the first 2 points, and only allocate them after you do your second trial around level 40.
Once you complete your second ascendancy trial, you can start scaling crit and using  Mask of the Sanguimancer.
Campaign Bonuses
Ailment Threshold and Stun Threshold are both good. Just don't take the mana regen.
Tattoos = Resistances
The Belt
As soon as you can afford it, you want to use a corrupted version of the  Soul Tether belt, which has the modifier which makes you lose energy shield removed from it. Removing this negative modifier, turns this belt into a massive upgrade to our survivability, because with enough leech, we can now easily recover Energy Shield and use it as an extension of our Life pool.
Comet Setup
This version of the build does not use  Comet. It will be worse if you replace
  Arc with it and don't modify the build correctly. If you want to play a boss killer version of Spark +
  Cast on Critical, you need to at the very least use a different weapon, different amulet and different jewels. You want a weapon and amulet with + to Level of All Spell Skills. You will also need to deal with enemy resistances, which means going back to using
  Frost Bomb and
  Elemental Weakness or using Penetration on the tree and jewels for Lightning as well as Cold, or using Rakiata's Flow. You can use
  Solus Ipse to socket multiple Rakiata's Flow in your skills.
Aspirational Upgrades
1.  Flesh Crucible - if you get this jewel with
  Blood Magic and a negligible downside, you can drop the Mask of the Sanguimancer and instead use
 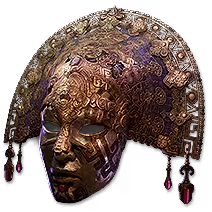 The Vertex (skill gems) with +4 to Level of All Skills.
2.  Temporalis - combined with cooldown reduction runes at the bottom of the tree, can be used to greatly reduce the cooldown of
  Blink, which can then become your main way of moving around the map faster.
3. High ES  Atziri's Splendour. Depending on your needs you can go with different variants. I like the Shield variant for double dipping
  Soul Core of Ticaba which gives 40% reduced Critical Damage Bonus to enemies per core, instead of the normal 20%.
You can check out my actual setup from the level 100 push, to see this character setup in practice: POE NINJA LINK
 Choir of the Storm ability to ignore enemy elemental resistances whenever we crit. We scale our crit chance and combine multiple lightning damage abilities to maximize this benefit.