Atlas Tree selector isn't working for some reason, Seeking/Researcher/Energetic Resonance
Most of my time on this build was spent farming pinnacle bosses, you can definitely map but it isn't as good of money as just blasting pinnacles.
While leveling you don't have to take  Ecological Shift if you just want to blast maps, it is very useful for farming strongboxes though. Most of my money while mapping comes from researchers and large strongboxes.
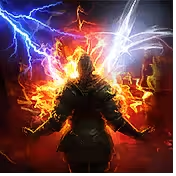
The King in the Mists
Don't facetank his big slam when he shines red, once your gear/damage is good enough you can easily interrupt these abilities with  Infernal Cry +
  Shield Charge. With better gear you can survive this most of the time, but no reason to tempt fate.
Phase 1: Blast him with damage, whenever he goes up top to the totems just shield charge them to kill them and then go back to blasting him. This phase should be super simple as long as you don't facetank a bunch of slams.
Phase 2: Follow the wisps to find the exit.
Phase 3: If you're geared just straight up facetank him and slam him with Infernal Cry empowered  Shield Walls and Shield Charges. Leech will keep you alive but still don't go out of your way to facetank either of his slams in this phase.
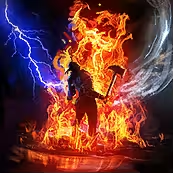
Xesht
The hardest part of this fight is actually getting to him. Clearing out a +4 breach is relatively tough if you aren't very proactive. Make sure you are tapping  Resonating Shield to proc
  Magma Barrier consistently and always moving forward, rolling past small enemies. Use Shield Charge to kill blue packs and yellow mobs, as well as to move quickly through the zone. I consistently have around 5-10s left when I reach the end depending on how kind GGG was with density per map.
This boss is VERY easy if you interrupt him when he starts summoning the hands, he will do a big charge up with a purple icon above his head, if you use all your cooldowns and light stun him during this phase he will never use the hands again. Use Infernal Cry -> Shield Wall -> Shield Charge and this will stun him MOST of the time, it doesn't always work as sometimes he just doesn't want to get stunned. Expect that GGG will fix this interaction at some point, you can still blast this guy super fast and just use flasks to survive the hands so it isn't a huge deal.
The smack down ability can kill you.
Simulacrum
This encounter is relatively difficult on +4 because of the Heavy Stun mechanic, whenever you are using Resonating Shield it counts as having your shield up and has you block everything. This also enables you to be heavy stunned, which the monsters will do very quickly. If you get heavy stunned, you are dead. You just need to keep an eye on the little bar above your health and mana flask and if that gets too high, move around and don't hold your shield up long enough for it to empty.
Also towards the later levels you are at the mercy of the RNG on waves, if you get damage + ele pen on wave 15 you are most likely dead, GGG is nerfing ele pen at some point which will make this more doable.
Focus on using the Resonating Shield quirk where if you tap it at the right speed it happens more frequently and move away from the enemies constantly in a circle. Use Shield Charge empowered by Infernal Cry to kill yellows and the bosses, as well as large packs. Shield Wall can be helpful to give you some space as well.
Olroth
Not really farmable so you will most likely only fight him a few times for the points. He was an absolute pushover for me as I just interrupted every single ability. Don't stand in the bad stuff and just blast him, it really is that simple.
Arbiter of Ash
This fight is a skill check, we do tons of damage and do interrupt him quite a bit but he has a lot of phases where he just goes immune or unable to be targeted.
During the phase where he is dropping orbs for you to stand under, save your Shield Charge for when he puts them VERY far apart.  Leap Slam is also an option but it is a little slow.
Breach
Always try to do your breach with shrines, particularly Acceleration Shrines, they make getting 50+ splinters super easy. Careful of the laser beams and the big fire orbs.
Delirium
Run through the mirror at the start, kill as much as you can, focusing on just getting to the league mechanics, don't stress the delirium mirror too much tbh, just clear efficiently like you normally would.
Strongboxes
I Alch + Exalt Researchers and Large Strongboxes until I get Rarity + Quant + Additional Mobs
I Alch Armor and Weapon Strongboxes to see if they roll Quality, if so I will exalt for quant, otherwise I don't open them.
I ignore all other strongboxes besides unique ones.
Strongboxes can be very dangerous with their damage mods, particularly lightning storm and ice spears. You can roll through the chaos projectiles to avoid them.
Essences
Essences I always corrupt unless they have one of the very expensive essences already on them. These typically die instantly but if you get a really tanky one be careful of ground effects.
Expedition
Expedition I use the big boom and just don't take phys immune and focus on logbook nodes and then flags/chests.
Ritual
Rituals I ignore completely because that mechanic is awful.
Azmeri Spirit
Ignore unless it is Orange or going in the exact direction you are going.
 Fast Metabolism you are almost unkillable besides 1 shots most of the time.
 Lightning Spear or
  Siege Cascade but it does good work with
  Herald of Ash.
 The Deepest Tower is currently one of the few that exists and it works extremely well with the placement of the Warrior on the tree. We are close to
  Stars Aligned which is one of the most powerful nodes in the game when combined with