
 Use your favourite features in-game with our Desktop App
 Warrior
 Titan
TitanBuild Overview
0.4 UPDATE


Strengths and Weaknesses
- - Capable of getting very tanky against physical and elemental damage with enough investment in armour
- Decent movement and clear speed thanks to Leap Slam +
  Boneshatter
- Quite easy to reach good single target damage
- Very chill gameplay, borderline unkillable if you decide to play with a shield
- - Armour doesn't do anything against damage over time, meaning you still need to cap your resistances, especially chaos resistance
- Requires the right equipment to truly shine
Build Variants
Campaign
Mid Endgame lvl 80+
Endgame 90+
Super Endgame 98+
This is the equipment, gem setup and passive skill tree i've had soon after i finished the campaign. For more details and what you're supposed to do during the campaign, scroll below
Of course this section will get updated with new, stronger variants as i'm gonna progress further with the character
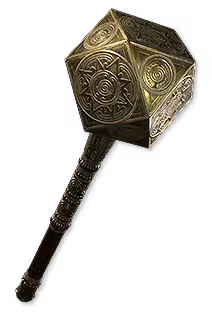


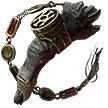
1. Weapons - I didn't bother with a shield and pretty much immediately started dual wielding in the beggining of act I. Early on you can also use a 2h weapon, depending on what you're gonna find, but overall i think that dual wielding 2 1h weapons is going to be the best since you are much faster, making your animations way less clunky. It's just gonna feel better.
As for what stats you're looking for - you basically want to get as much damage as possible on your weapons (elemental is fine too). Later on you can start looking for + level of all melee skills modifier as well
2. Body armour - Amount of armour here is important, as this will be your main source of armour early on thanks to  Sturdy Metal. This is important, because in the campaign majority of your deaths will come from physical damage, being overwhelmed by fast monsters. Getting decent amount of armour will completely negate that.
Apart from that you're looking for additional life and resistances, if you can get them.
DO NOT WORRY ABOUT ARMOUR APPLIES TO ELEMENTAL DAMAGE MODIFIER UNTIL AT LEAST LEVEL ~40-50, IT'S NOT GOING TO BE THAT USEFUL AT LOW INVESTMENT
3. Helmet, boots and gloves - I'm going to put them together since they are basically identical. You are looking for armour, life and resistances here (strength is fine), once again, do not bother with armour applies to elemental damage stat until later on
Additionally you should try to get movement speed on your boots early on, you are going to Leap Slam a lot so it's going to lose some efficiency but it's still useful during the campaign
4. Belt, rings and amulet - Ring slots are insanely good for capping your resistances, focus on that. If you can get life and/or some flat damage on top of that, that's even better.
Amulet is similar, but you can find some other useful stats here like % increased armour or + to level of melee skills
As for belts once again, life and resistances, you can also find some armour there that will help early on, especially if you use  Plate Belt
5. Charms - 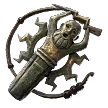 Grounding Charm and
 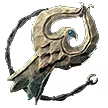 Thawing Charm are the most important ones in my opinion, after that you can get for example
 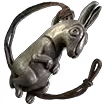 Silver Charm or
  Antidote Charm
Skill Gems
Campaign
Mid Endgame lvl 80+
Endgame 90+
Super Endgame 98+
Support Gem Requirements:
Str 85
Dex 30
Int 5

1
Mace Strike

2
Perfect Strike

3
Leap Slam
4
Boneshatter

5
Hammer of the Gods

6
Armour Breaker

7
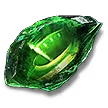
Infernal Cry

8
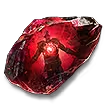
Berserk

9
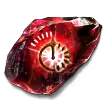
Scavenged Plating
Gem Priority
+24
The most important aspect of your gem setup is setting up the Leap Slam and Boneshatter correctly. You want to put Brink II support in your Leap Slam in order to prevent it from stunning enemies and after that explode them with Boneshatter. Impact Shockwave and Magnified Area I are great supports to use with boneshatter, since it will make the explosions bigger and give you additional aftershocks.
As for Perfect Strike and Hammer of the Gods, you just want to maximize their damage, very simple
You can also use  Herald of Ash instead of Berserk early on
Passive Tree
Campaign
Mid Endgame lvl 80+
Endgame 90+
Super Endgame 98+
main:
123
123
set 1:
20
20
set 2:
20
20
Quest Rewards
Check which quests you’ve completed on your character
Clearfell — Beira of the Rotten Pack
Not Specified1 choice
Hunting Grounds — The Crowbell
Not Specified1 choice
Freythorn — The King in the Mists
Not Specified1 choice
Ogham Farmlands — Una's Hut
Not Specified1 choice
Ogham Manor — Candlemass, the Living Rite
Not Specified1 choice
Keth — Kabala, Constrictor Queen
Not Specified1 choice
Valley of the Titans — Medallion
Not Specified2 choices
Deshar — Final Letter
Not Specified1 choice
The Spires of Deshar — Sisters of Garukhan
Not Specified1 choice
Jungle Ruins — Mighty Silverfist
Not Specified1 choice
The Venom Crypts — Venom Draught
Not Specified3 choices
Jiquani's Machinarium — Blackjaw, the Remnant
Not Specified1 choice
The Azak Bog — Ignagduk, the Bog Witch
Not Specified1 choice
The Molten Vault — The Molten Vault
Not Specified1 choice
Aggorat — Blood Sacrifice
Not Specified1 choice
Journey's End — Captain Hartlin
Not Specified1 choice
Eye of Hinekora — Navali's Rest
Not Specified1 choice
Halls of the Dead — Yama The White
Not Specified1 choice
Halls of the Dead — Tawhoa's Test
Not Specified2 choices
Abandoned Prison — Goddess of Justice
Not Specified2 choices
Halls of the Dead — Tasalio's Test
Not Specified2 choices
Halls of the Dead — Ngamahu's Test
Not Specified2 choices
Wolvenhold — Oswin, the Dread Warden
Not Specified1 choice
The Khari Crossing — Akthi and Anundr
Not Specified1 choice
The Khari Crossing — Molten Shrine
Not Specified1 choice
Qimah — Tabana's Pillar
Not Specified7 choices
Kriar Village — Lythara, the Wayward Spear
Not Specified1 choice
Howling Caves — The Abominable Yeti
Not Specified1 choice
Changelog
31.08.2025
First version
02.09.2025
Added Mid Endgame Setup
05.09.2025
Added Endgame Setup
14.09.2025
Added Super Endgame Setup
25.09.2025
Added The Final Version
12.12.2025
Updated for patch 0.4
Comments
0Build Planner Export
Export this build variant directly to your game.
Path of Building Code
Video Guide
Table of Contents
Featured Builds



Become a Creator
Want to earn rewards by sharing your builds with your community?