menu
MobalyticsUse your favourite features in-game with our Desktop App
Nightreign Build

Gnoster Expedition Executor Build

presentationExecutor
Updated on Jul 1, 2025
Jul 1, 2025

Intro

Executor unfortunately has no natural fire damage on katanas, which means we need to look either outside that category or be lucky to find a fire damage weapon that hopefully is also a katana. Gnoster is only weak to fire damage, and the poison it inflicts can only be cleansed by attacking an ally with fire damage. Gnoster is not resistant to bleed damage, meaning if you have a katana, the value of it will be even bigger. 

Because Executor can parry all attacks, this means you can also parry the missiles that the Butterfly will shoot during the fight, making it easier to deal with both enemies at the same time.

Equipment Loadout

Armaments

Best-in-slot

Alternatives

We mostly rely on going to a location with the fire modifier for a good weapon. There are no good fire weapons for Executor, so we need to go looking for one with the fire damage modifier.

Talismans

Best-in-slot

  • Winged Sword Insignia
  • Warrior Jar Shard
  • Fire Scorpion Charm

Winged Sword Insignia is still the best talisman for most Dexterity weapons, giving you a huge stat boost in damage. Warrior Jar Shard just complements the fact that we wield a fire-damaging weapon.

Alternatives

  • Lord of Blood's Exultation
  • Erdtree's Favor
  • Immunizing Horn Charm

Consumables

Best-in-slot

  • Boiled Crab / Boiled Prawn
  • Greenburst Crystal Tear / Greenspill Crystal Tear
  • Pickled Turtle Neck
  • Neutralizing Boluses

Dormant Powers, Passives, and Relics

Dormant Powers

Best-in-slot

  • Improved Physical Attack power
  • Improved Affinity Damage Negation
  • Improved Stance-Breaking

Alternatives

  • Improved Stamina Recovery
  • Improved Physical Damage Negation
  • FP Restoration upon Successive Attacks

Relics

Best-in-slot

For the best results, we will use Executor’s default chalice

Yellow Relics

Red Relics

Weapon Passives

Best-in-slot

  • Improved Stance-Breaking when Wielding Two (20%)
  • Improved Damage Negation (Physical or Holy, preferably 15%)
  • Improved Guard Breaking (+45%)
  • Improved Attack Power When Wielding Two (+13%)
  • Add Fire To Weapons(+35)

Alternatives

  • Improved Jump Attacks (9%)
  • Improved Lightning Attack Power (9%)
  • Attacks Inflict Rot(+30)
Rivers Of BloodKatana • Lvl Required 7
Lordsworn's Straight SwordStraight Sword • Lvl Required 3
Scavenger's Curved SwordCurved Sword • Lvl Required 3
Winged Sword InsigniaTalismans
Warrior Jar ShardTalismans
Fire Scorpion CharmTalismans
Boiled CrabConsumables
Greenburst Crystal TearConsumables
Pickled Turtle NeckConsumables
Improved Physical Attack powerDormant Powers
Improved Affinity Damage NegationDormant Powers
Improved Stance-BreakingDormant Powers
Polished Luminous SceneRelics
Polished Burning SceneRelics
Improved Stance-Breaking when Wielding Two (25%)Weapon Passive
Improved Guard Breaking (+45%)Weapon Passive
Improved Attack Power When Wielding Two (+13%)Weapon Passive

Game Plan and Pathing

Day 1

We want to look for any location with the fire modifier and move towards that location. While moving there, still clear any Forts, Encampments, and Cathedrals for their loot and runes.

It's important to move fast so that we can also reach as many churches as possible on day 1 to upgrade our healing. However, don’t go out of your way to go there since you will most likely waste a lot of time, which is not worth it. Look to the path there, clearing any location so that you still level up properly. We want to reach level 8 by the end of the day, and preferably higher. While moving around the map, if you move past the central castle, be sure to check if there are Trolls. If there are, we won’t want to go there on day 2 unless we are level 12-13.

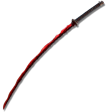
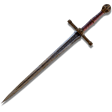
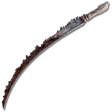
If you cannot find weapons, we have listed any weapon from the following categories that will perform well: Curved Swords, Thrusting Swords, Katanas, Twinblades, or Straight Swords.

Day 2

Day 2, what we do depends on the Shifting earth. If we have no event and Trolls didn’t spawn on the central castle, we want to go there and get as many runes as we can, aiming for level 12 before we kill the boss inside at the top and bottom.

After this, we can aim to kill some field bosses, especially the elite ones. 

If you have either Noklateo or Crater spawn, you can decide to do those instead since they will net you around the same amount of runes, with the addition of a good reward at the end.

The Mountain and Rot Forrest are not worth going to at the start of the day since they take less time. The Rot Forrest does have a ton of Elite Field Bosses to keep that in mind going into day 2.

Day 3

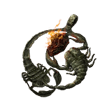
Gnoster starts as 2 different entities that share the same HP pool: The Butterfly and The Lobster. These will combine into one entity in phase 2, more about that later.

In phase 1, the Lobster and Butterfly act independently, so let's talk about what the Lobster does first.

The Lobster has 2 attacks if you are in front of it and 1 when you are beside it. All of these are delayed AOE slams that deal heavy damage. He can also armor up, making him take next to no damage, but during this, the Butterfly will fly lower so you can hit them.

The Butterfly, meanwhile, has more projectile-based attacks. She will usually shoot missiles at you from a distance, shoot poison mist, or try to grab you, which will instantly infect you with the parasite.

The parasite is a unique poison that makes a worm come out of your body, damaging you constantly and staggering you in the process. The only way to get rid of this is by being damaged by fire from a teammate or dying.

During phase 2, they will combine and get two new attacks.

They always start it off with one of them, making the Lobster charge forward while the Butterfly shoots missiles forward. It's a very annoying attack, and I recommend sprinting to the side the moment you see it coming.

The Butterfly can also randomly decide to launch a laser beam from the sky, which will linger at that location, consistently dealing high damage around it.


Additional Tips

  • The Executor works best when you can deflect attacks consistently; if you cannot, he becomes a lot worse.
  • Be sure to use consumables; there are some you might want to save, but most of them are good to just use since there are plenty to go around.
  • Your ultimate is very good at resurrecting your entire team if they are downed, so don’t be afraid to use it specifically for this.

Table of Contents

Explore Other Builds

Gnoster Expedition Ironeye Build
Updated on Nov 13, 2025
Gnoster Expedition Recluse Build
Updated on Jul 10, 2025
Recluse Best Relics for Every Nightlord
Updated on Jul 4, 2025
Libra Expedition Revenant Build
Updated on Jul 2, 2025
Libra Expedition Guardian Build
Updated on Jul 2, 2025