Day 1
Ironeye starts with very low HP, so always stay on the rear and use your Skills defensively.
On Day 1, you should immediately look for nearby small camps or settlements. There you can take on weaker foes like soldiers and knights and easily level up to Lv 3. Due to Ironeye’s passive skill, “Eagle Eye”, you’ll get increased item drops, so try to defeat enemies as you pass through them. This way, you’ll be sure to obtain some of the ideal armaments and passive effects for Ironeye.
You should equip any weapon with a suitable passive effect for your character, even if you won’t use said weapon.
Day 2
On Day 2, you should again travel around the map looking for any nearby settlements, defeating as many enemies as possible to maximize the usage of Ironeye’s passive, increasing the odds for your team to find the ideal equipment.
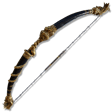
By now, you should have a suitable Greatbow (which you can and should upgrade using Smithy Stones), and a dexterity-based off-weapon with a great Ash of War that you can use in melee. Ironeye consumes a lot of stamina by continuously attacking, so look for equipment and passives that give Stamina bonuses.
Day 3
At Day 3, remember to buy any suitable equipment with the leftover runes, upgrade your Greatbow of choice, and head on to face the Night Lord.
During boss fights, you want to keep your distance unless your “Marking” skill and “SIngle Shot” ultimate are both available. Without them, you’re very squishy and easy to stagger. When both are up, you can walk up to the boss and use the Marking skill offensively. You should hold onto your Single Shot ultimate for AoE damage when multiple enemies are nearby, or to survive incoming attacks that are difficult to dodge.