menu
MobalyticsUse your favourite features in-game with our Desktop App
Nightreign Build

Fulghor Expedition Guardian Build

presentationGuardian
Updated on Jun 27, 2025
Jun 27, 2025

Intro

In this Elden Ring build guide, we’ll cover the best equipment for taking on Fulghor as the Guardian.

Fulghor is a fast, relentless boss with powerful charge attacks and wide-area swings, often followed by delayed holy explosions. Due to the sheer impact of his combos, stacking physical and holy resistance is crucial. 

While it might seem less critical to stack resistances due to your constant use of a shield, stamina depletion is a real threat in this fight. Once your stamina breaks, you’re vulnerable to follow-up hits, which can happen quickly if you’re not managing your guard properly. Moreover, because Guardian has the highest base HP, resistances scale more effectively, granting him more effective health than any other Nightfarer.

Although Fulghor is pretty tough, he’s vulnerable to lightning, so finding a weapon that can capitalize on this weakness will help to deal more meaningful damage throughout the fight.

Your job is to stay close and soak aggro to protect your team. Fulghor’s damage output can drain your stamina quickly, so practice lowering your guard between hits and only blocking with Steel Guard active to maximize stamina regen.

Equipment Loadout

Armaments

Your primary weapon should be capable of striking while guarding and inflicting either lightning damage or a status effect. This enables consistent pressure without compromising your defense. Pair it with an off-hand shield that offers high Guard Boost and strong damage negation, particularly against physical and holy damage.

Primary

If you are unable to find these weapons in a run, choose the best Great Spear, Halberd, or Heavy Thrusting Sword you can find.

Here are a few shields you can use in your off-hand.

Shield

If you can’t find an ideal match, default to the one with the highest Guard Boost and best overall physical and holy resistances.

Talismans

Best-in-slot

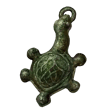
  • Green Turtle Talisman
  • Spear Talisman
  • Greatshield Talisman
  • Haligdrake Talisman
  • Dragoncrest Shield Talisman
  • Erdtree's Favor
  • Crimson Amber Medallion
  • Viridian Amber Medallion
  • Lord of Blood's Exultation
  • Kindred of Rot's Exultation

Consumables

Be sure to check every merchant you encounter for potential upgrades or rare items. Some may carry Wending Grace for 10,000 runes, a critical item that grants you an extra life if your team falls during a Night Boss or Night Lord encounter. This can be the difference between salvaging a run or losing it entirely.

Best-in-slot

  • Acid Spraymist / Poison Spraymist / Ironjar Aromatic
  • Crimsonburst Crystal Tear / Greenburst Crystal Tear /Greenspill Crystal Tear / Opaline Hardtear
  • Pickled Turtle Neck / Boiled Crab / Boiled Prawn
  • Rot Pot / Poison Pot / Fetid Pot / Freezing Pot / Poisonbone Dart
  • Shield Grease / Rot Grease / Poison Grease /Freezing Grease / Blood Grease / Lightning Grease

Dormant Powers, Passives, and Relics

Dormant Powers

Best-in-slot

  • Improved Stamina Recovery
  • Improved Thrusting Counterattack
  • HP Recovery upon Successful Guards
  • Guard Counters Activate Summoning Attack
  • Improved Flask HP Restoration
  • Improved Physical Damage Negation
  • Increased Maximum HP
  • Increased Maximum Stamina
  • Creates Holy Ground at Low HP
  • Poison & Rot Trigger Continuous HP Recovery
  • More Runes From Defeated Enemies
  • Rune of the Strong

Relics

You’ll want to complete Guardian’s Remembrance Quest to obtain his best relic: the Witch’s Brooch (blue), which grants the following effects:

  • [Guardian] Slowly restores nearby allies' HP while Art is active
  • [Guardian] Reflect a portion of damage received when ability is activated
  • Vigor +3

Best-in-slot

  • Draw enemy attention while guarding
  • Art gauge charged from successful guarding
  • Stamina recovers with each successful attack
  • Flask Also Heals Allies
  • HP Restoration upon Thrusting Counterattack
  • Ultimate Art Gauge +
  • Attacks Inflict Frost
  • Attacks Inflict Blood Loss
  • Changes compatible armament's skill to Hoarfrost Stomp at start of expedition
  • Increased Maximum HP
  • Shield Greases in possession at the start of expedition
  • Poison & Rot in Vicinity Increases Attack Power poison

Weapon Passives

Best-in-slot

  • Improved Guarding Ability (+15%)
  • Successful Guarding Ups Dmg Negation (+19%)
  • Attacks Inflict Poison (+23)
  • Improved Guard Counters (+20%)
  • Improved Holy Damage Negation (+12%)
  • HP Restoration Upon Attacks (+6)
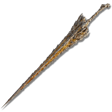
Dragon King's CragbladeHeavy Thrusting Sword • Lvl Required 10
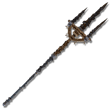
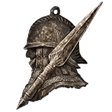
Mohgwyn's Sacred SpearGreat Spear • Lvl Required 10
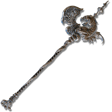
Dragon HalberdHalberd • Lvl Required 7
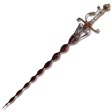
Bloody HeliceHeavy Thrusting Sword • Lvl Required 7
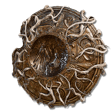
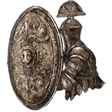
Erdtree GreatshieldGreatshield • Lvl Required 1
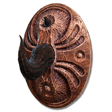
Crucible HornshieldGreatshield • Lvl Required 1
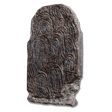
Fingerprint Stone ShieldGreatshield • Lvl Required 1
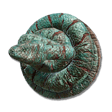
Coil ShieldSmall Shield • Lvl Required 1
Green Turtle TalismanTalismans
Spear TalismanTalismans
Greatshield TalismanTalismans
Haligdrake TalismanTalismans
Acid SpraymistConsumables
Greenburst Crystal TearConsumables
Pickled Turtle NeckConsumables
Rot PotConsumables
Shield GreaseConsumables
Improved Stamina RecoveryDormant Powers
Improved Thrusting CounterattackDormant Powers
HP Recovery upon Successful GuardsDormant Powers
Guard Counters Activate Summoning AttackDormant Powers
Improved Guarding Ability (+15%)Weapon Passive
Successful Guarding Ups Dmg Negation (+19%)Weapon Passive
Attacks Inflict Poison (+23)Weapon Passive
Improved Guard Counters (+20%)Weapon Passive

Game Plan and Pathing

Day 1

Guardian boasts the highest health pool in the game, so don’t be afraid to get in close and keep pressure on the enemy. That said, sticking with your team early on is still crucial. Going down too soon wastes valuable time and throws off your route. A clean and efficient Day 1 can make or break your run.

Your main goal at the start is to level up as much as possible and visit every church you pass to upgrade your flask charges.

Take a quick look at your map and scout for areas that drop weapons or seals with lightning, frost, rot, bleed, or poison affinities. 

Steer clear of holy camps. Fulghor shrugs off holy damage, so it won’t help here.

Once you’ve secured a decent weapon and hit at least level 4, make your way to the central castle. Start in the basement—it only has one boss, and clearing it rewards you with both a boss drop and a guaranteed talisman from the chest beyond. If you’ve got time, level at a nearby grace and continue clearing the upper levels to farm more runes.

Whenever you find a weapon with a solid passive, equip it immediately. To save time, grab everything in sight and sort through it on the move between farming spots.

Day 2

By now, you should be well-equipped and levelled enough to take on the tougher parts of Limveld.

If a Shifting Earth is active, make that your priority. These areas consistently drop high-value loot and have enough enemies to get you to around level 15 if you clear efficiently. If there’s a field boss on the way, it’s worth taking the detour; you could gain a major damage upgrade.

No Shifting Earth? Then, shift focus to field bosses. These now begin spawning regularly and offer some of the best loot and rune rewards available outside of the Night Boss.

If you haven’t already, this is also the perfect time to clear the central castle. The basement and rooftop bosses aren’t scaled too high, and with your current build, you should be able to handle them without much trouble.

Finally, once you’ve taken down the Night Boss, consider sticking around nearby locations to keep levelling if needed. Zone damage is minimal at this stage, and you should have a decent amount of flasks and graces nearby to farm a bit more and gain an extra level or more flasks.

Day 3

Once you’re here, check the merchant and see if he has any rare loot like Wending Graces. If not, prioritize using any extra runes to level and then purchase any consumables you may need. Make sure to discard any unused upgrade materials or keys. You won’t be able to use them in the final fight, so it’s better to stock up on consumables you’ll actually need.

BUY Warming Stone!!! 

These are great for the Guardian as you won’t be moving around as much while you block the boss so you will get more value out of the healing. If you have a Revenant and some extra runes, get them some starlight shards, as this will significantly increase their FP pool for the fight.

Additional Tips

  • Stay close to the boss to keep their attention off your teammates, but always watch your endurance. Getting staggered from losing all of your stamina will likely get you killed. Blocking slows stamina regen, so try to only raise your guard during actual attacks, and use Steel Guard to boost your block efficiency.
  • As for your Ultimate Art: Wings of Salvation, don’t waste it on damage unless absolutely necessary. Its true value is the full revive, even for teammates at 3 bars. If both allies are down, try to lure them near each other so you can get a double revive with one cast.

Table of Contents

Explore Other Builds

Gnoster Expedition Ironeye Build
Updated on Nov 13, 2025
Gnoster Expedition Recluse Build
Updated on Jul 10, 2025
Recluse Best Relics for Every Nightlord
Updated on Jul 4, 2025
Libra Expedition Revenant Build
Updated on Jul 2, 2025
Libra Expedition Guardian Build
Updated on Jul 2, 2025