Day 1
You need poison weapons, so look around the map for any ruins with the poison modifier, make your way there while clearing Forts, Cathedrals, and Encampments, so that you are a minimum of level 5 and preferably level 6 once you reach it. After this, we want to go to a mine to upgrade our weapon to epic and clear some Field Bosses so we reach level 8 during day one. Do not try to kill Elite Field Bosses. They are too tanky at this point, and you will waste too much time on them.
It can also be very useful to move past the central castle to check if Trolls have spawned. If they did, we only want to enter this place around level 11-12.
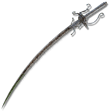
If you can’t find one of our recommended weapons, try finding one within the weapon categories: Straight Sword, Dagger, Thrusting Sword, Heavy Thrusting Sword, Spear, and Curved Sword.
Day 2
Since we checked the enemies inside the central castle on day 1, we should know by now what the enemies are. As long as they are not Trolls, we can go there straight away, kill all the enemies, and easily reach level 12-13 without killing the top and bottom bosses. Otherwise, wait until you are level 11-12 to go there.
If a shiftin-earth event occurred, go straight away if you want to clear the Crater or Noklateo, and wait till later on the day for the Mountain or Rot Forrest. The latter don’t take as long, meaning you have time for other things during the day.
If a Settlement is spawned, be sure to check it out to see if any good loot can be found there. If you still require some levels or want a better weapon, try to kill some Elite Field Bosses. By this point, they shouldn’t be too hard.
Day 3
Adel will always charge forward once he enters the arena. You can easily get through phase 1 if you have a poison weapon, since you can make him permanently vomit. Otherwise, he has two dangerous attacks: His grab attack, which tends to be an insta-kill if you are below level 13, and his skull smash, which has an AOE dealing a good amount of damage.
Once he hits 50% HP, he will transition into phase 2, which starts with a giant lightning explosion followed by a divebomb, which deals massive AOE damage. You can roll both, but I recommend just running far enough away to dodge both.
He can now do the divebomb attack when he feels like it as well. During phase 2, his skull smashes gain lightning aftershocks, which deal a lot of damage, and he can also follow up on his grab attack with another grab.
For the rest, he is very similar to phase 1, apart from the fact that he will not vomit anymore.