menu
MobalyticsUse your favourite features in-game with our Desktop App
PoE 2 Build

[0.5.5] Unstoppable Flicker Strike Build Guide [Works on Acolyte & Martial Artist]

presentationMonk
presentationInvoker
End Game
0.5.5 FR
Creator
Featured
Updated on Oct 12, 2026
Oct 12, 2026

Build Overview

Become the #1 Monk...literally (video live at 2pm UK time)

After countless hours of testing, swapping gear, experimenting with Power Charges and squeezing every last bit of damage out of Invoker, I’ve pushed this character beyond 30 MILLION DPS and into the #1 DPS Invoker position on poe.ninja.

The goal is simple: insane damage, satisfying clear speed and enough survivability to comfortably destroy endgame content.

The build combines Flicker Strike, Falling Thunder & Whirling Assault with Power Charge generation, critical strikes and elemental damage scaling to create an extremely fast and powerful endgame Monk.

Whirling Assault can also be replaced with another melee skill such as Shattering Palm or Ice Strike if you prefer.

I wanted this setup to be more than just a PoB damage number. Flicker Strike is incredibly fast, chaotic and definitely not for everyone — but once the build comes together, it’s one of the most satisfying skills in PoE 2.

My Invoker is a heavily invested endgame character, so don’t expect to instantly reach my current 30M+ DPS. The important part is that the core mechanics can be built around at lower investment and scaled progressively as you upgrade your gear.

The same core concept can also be adapted for Acolyte of Chayula or Martial Artist, although Invokeris the version I’ve pushed the furthest...so far!

I’ll keep updating this guide as I test new tech, improve the character and find even more ways to push Flicker Strike beyond its limits!

----------------------------------------------------------------------------------------------------------------------------------------------------------------------

Follow LIVE 8PM UK Time (Mon-Thurs)

  • Follow live gameplay, build testing & updates on Twitch
  • Full build guide & gameplay on YouTube

----------------------------------------------------------------------------------------------------------------------------------------------------------------------

Strengths and Weaknesses

  • Extremely fast map clear
  • High damage
  • Survivability
  • Smiles when you do a crazy long Flicker XD
  • Reliant on power charges (easily sorted)
  • Levelling a Monk can be tedious
  • Flicker can leave you in sticky situations

Build Variants

Equipment

item
2
item
5
item
1
item
3
item
6
item
5
item
2
item
7
item
8
item
4
Equipment Priority
+8

Equipment

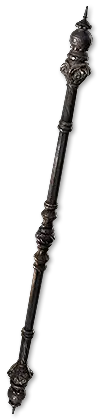
Weapon: Quarterstaff

Look for:

  • Flat Lightning or Cold Damage.
  • Increased Elemental Damage with Attacks.
  • Attack Speed.
  • +1 or +2 to Melee Skills if affordable.

Helmet: Rare Evasion/Energy Shield base with resistances.

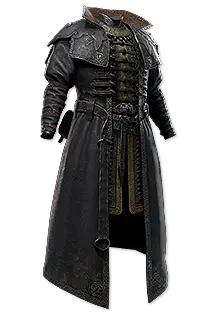
Body Armour: Evasion/Energy Shield hybrid with strong defensive rolls.

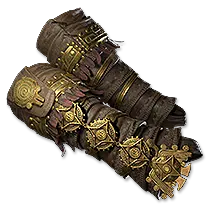
Gloves:

Look for:

  • attack speed
  • + to melee skills
  • mana leech (if you don't want to run mana remnants)
  • flat elemental damage
  • can use to fix resistances

Boots: 25–30% movement speed, resistances and Energy Shield.

Rings:

Look for:

  • flat elemental damage
  • resistances
  • mana leech

Amulet:

Look for:

  • + to melee skills
  • armour, evasion and/or energy shield
  • crit chance
  • crit damage bonus

Priority

  1. Get elemental resistances to 75%.
  2. Obtain a good cheap Quarterstaff.
  3. Get reliable Power Charge generation.
  4. Fix mana sustain.
  5. Improve Evasion and Energy Shield.

When to upgrade: Once you can clear early maps comfortably but Flicker Strike still feels inconsistent.

Skill Gems

Support Gem Requirements:

Str 45

Dex 80

Int 85

1

Flicker Strike

supportelementalarmamentplayertwo
supportperpetualchargeplayer
supporthitandrunplayer
supportconcentratedareaplayer
supportclosecombatplayertwo
2

Reaper's Invocation

profaneritualplayer
supportchargeprofusionplayertwo
supportincreaselimitplayer
supportenergyretentionplayer
supportboundlessenergyplayertwo
3

Cast on Critical

profaneritualplayer
supportincreaselimitplayer
supportchargeprofusionplayertwo
supportenergyretentionplayer
supportboundlessenergyplayertwo
4

Charge Regulation

supportclarityplayertwo
5

Whirling Assault

supportchargeprofusionplayertwo
supportefficiencyplayertwo
supportlivinglightningplayertwo
supportailithlineageplayer
supportculminationplayertwo
6

Herald of Ash

supportmagnifiedareaplayertwo
supportfiremasteryplayer
7

Herald of Thunder

supportelementalarmamentplayertwo
supportambushplayer
supportarmourbreakplayerthree
supportarmourdemolisherplayertwo
supportmagnifiedareaplayertwo
8

Falling Thunder

supportculminationplayertwo
supportelementalarmamentplayertwo
supportpinpointcriticalplayer
supportinnervateplayer
supportnovaprojectilesplayer
9

Charged Staff

supportblazingcriticalplayer
supportinnervateplayer
supportthrillofthekillplayertwo
prolongeddurationsupportplayertwo
supportcullingstrikeplayertwo
10

Wind Dancer

supportmagnifiedareaplayertwo
supportarmourbreakplayerthree
supportmaimplayer
supportblindplayertwo
supportelementalarmamentplayertwo
11

Elemental Conflux

supportlightningmasteryplayer
Gem Priority
+44

Flicker Strike you can run either Perpetual Charge if you have high crit chance or Pinpoint Critical to gain more crit chance.

Charge Regulation will give you more crit chance when you consume a power charge, so 80% crit chance on flicker will = 100% crit chance when a power charge is consumed.

Mana issues take Mana Remnants

Have a lot of spirit, take Trinity but remember to balance all three elemental types.

Passive Tree

main:
123
123
set 1:
20
20
set 2:
20
20

Quest Rewards

Check which quests you’ve completed on your character
Clearfell — Beira of the Rotten Pack
+10% to Cold Resistance
Hunting Grounds — The Crowbell
Grants Two Weapon Set Passive Skill Points
Freythorn — The King in the Mists
+30 to Spirit
Ogham Farmlands — Una's Hut
Grants Two Weapon Set Passive Skill Points
Ogham Manor — Candlemass, the Living Rite
+20 to maximum Life
Keth — Kabala, Constrictor Queen
Grants Two Weapon Set Passive Skill Points
Valley of the Titans — Medallion
30% increased Charm Effect Duration
+1 Charm Slot
Deshar — Final Letter
Grants Two Weapon Set Passive Skill Points
The Spires of Deshar — Sisters of Garukhan
+10% to Lightning Resistance
Jungle Ruins — Mighty Silverfist
Grants Two Weapon Set Passive Skill Points
The Venom Crypts — Venom Draught
30% increased Elemental Ailment Threshold
Jiquani's Machinarium — Blackjaw, the Remnant
+10% to Fire Resistance
The Azak Bog — Ignagduk, the Bog Witch
+30 to Spirit
The Molten Vault — The Molten Vault
Reforging Bench
Aggorat — Blood Sacrifice
Grants Two Weapon Set Passive Skill Points
Journey's End — Captain Hartlin
Two Weapon Set Passive Skill Points
Skill Gem(Lv 13)
Delirium Drop
Whakapanu Island — Great White One
+30% increased Global Armour, Evasion and Energy Shield
Eye of Hinekora — Navali's Rest
5% increased Maximum Mana
Halls of the Dead — Yama The White
Grants Two Weapon Set Passive Skill Points
Halls of the Dead — Tawhoa's Test
+5% to Lightning Resistance
Abandoned Prison — Goddess of Justice
30% increased Mana Recovery from Flasks
Halls of the Dead — Tasalio's Test
+5% to Cold Resistance
Halls of the Dead — Ngamahu's Test
+5% to Fire Resistance
Halls of the Dead — Tribal Medicine
+30% increased Global Armour, Evasion and Energy Shield
Wolvenhold — Oswin, the Dread Warden
Grants Two Weapon Set Passive Skill Points
The Khari Crossing — Akthi and Anundr
Two Weapon Set Passive Skill Points
The Khari Crossing — Molten Shrine
5% increased Maximum Life
Qimah — Tabana's Pillar
15% increased Armour, Evasion and Energy Shield
Kriar Village — Lythara, the Wayward Spear
+40 to Spirit
Howling Caves — The Abominable Yeti
Grants Two Weapon Set Passive Skill Points

How it Plays

Mapping Rotation (Reapers Invocation)

  1. Hit a few enemies with Whirling Assault, this will generate combo and charges using Living Lightning II and Ailith's Chimes
  2. Activate Charged Staff
  3. Repeat step 1, again this will give you power charges.
  4. Press Flicker Strike the flick around the map while holding Reaper's Invocation skill or press Reaper's Invocation after Flicker Strike has finished.
  5. Reaper's Invocation will be available again, thus allowing you to gain more power charges and use Flicker Strike.
  6. Rinse, repeat and enjoy!

----------------------------------------------------------------------------------------------------------------------------------------------------------------------

Mapping Rotation (Cast on Critical)

  1. Hit a few enemies with Whirling Assault, this will generate combo and charges using Living Lightning II and Ailith's Chimes
  2. Cast on Critical will activate Profane Ritual and also get you power charges.
  3. Activate Charged Staff
  4. Repeat step , again this will give you power charges.
  5. Press Flicker Strike the flick around the map, this will generate charges from Cast on Critical.
  6. Rinse, repeat and enjoy!

If you maintain the charges correctly, you can keep power charges all the time!

----------------------------------------------------------------------------------------------------------------------------------------------------------------------

Bossing Rotation

For bosses, preparation and Power Charge management become considerably more important. This is were Reaper's Invocation in my opinion is better than Cast on Critical.

If you find yourself on 0 power charges while on the way to the boss, but 100% on Reaper's Invocation, proc it near some old ads, this will give you some charges!

Follow these steps below and charges will not be an issue!

  1. Hit the boss with Whirling Assault to generate combo from Living Lightning II, Culmination II and Ailith's Chimes
  2. Activate Charged Staff
  3. Repeat step 1 (this will also get you past the bosses damage mitigation at the beginning of the HP bar)
  4. Flicker Strike and watch the bosses HP disappear!

If the boss is still alive, two things have happened.

  1. You are too weak (sorry), in which case, follow and repeat the steps again.
  2. You attacked too early and the bosses HP mitigation lowered your DPS!

Buy the time you invest into Flicker Strike and/or Falling Thunder you should pretty much 1 shot most/if not all map bosses, no matter the tier!

----------------------------------------------------------------------------------------------------------------------------------------------------------------------

How it Works

Main Skills Used

Whirling Assault provides a way to attack groups of enemies, build combo and maintain momentum, other skills can be used, but Whirling Assault seems to be the best due to high damage, large aoe and quicker combo generation.

Flicker Strike allows us to rapidly jump between enemies, making mapping incredibly satisfying once the build is working properly.

Falling Thunder provides additional area damage and can clear large groups of enemies when you find yourself in a "oh s**t" moments! Plus Falling Thunder slams is the best looking skill on the game!

The aim is to keep moving, maintain charge generation and avoid unnecessary downtime between attacks. If you maintain the charges, you will maintain the clear speed.

----------------------------------------------------------------------------------------------------------------------------------------------------------------------

Power Charge Generation

Power Charges are at the heart of this build.

Both Flicker Strike and Falling Thunder benefit tremendously from having charges available, meaning our goal is to generate, retain and use them as efficiently as possible.

We're using Living Lightning II and Reaper's Invocation as part of our charge-generation setup, if you have the spirit or an amulet with Cast on Critical you can use that instead of Reaper's Invocation.

Important to remember that Reaper's Invocation is a manual skill, this means you have to press a button or key when it is at 100%.

The best way(s) to do this is:

  1. Melee attack, Living Lightning II paired with Ailith's Chimes will gain power charges
  2. Activate Charged Staff
  3. Repeat step 1
  4. Flicker Strike the enemies
  5. Press Reaper's Invocation to regain charges
  6. Rinse and repeat

If you don't have Ailith's Chimes (under level 65), just repeat the steps, but remember to press Reaper's Invocation after they are dead.

Charge retention is extremely valuable because it allows us to continue attacking without constantly having to rebuild our entire charge pool.

The important part isn't just how many charges you have. It's how consistently you can use them.

----------------------------------------------------------------------------------------------------------------------------------------------------------------------

Power Charge Generation (Martial Artist)

Due to Martial Artist having the Martial Master ascendancy, running Cast on Critical or Reaper's Invocation isn't really necessary as Whirling Assault paired with Ailith's Chimes will gain charges anyway.

----------------------------------------------------------------------------------------------------------------------------------------------------------------------

Generating Power Charges - Reapers Invocation or CoC

Reaper's Invocation works off melee hits, so every time you use Flicker Strike, you will have enough energy to use Reaper's Invocation, this will activate Profane Ritual and get power charges from the dead corpses. This allows you to rinse and repeat Flicker Strike.

In Reaper's Invocation we want to shorten the duration as much as possible, this is why we take Compressed Duration II, Overabundance I and Swift Affliction III, then we socket Charge Profusion II for power charges.

Cast on Critical is the same as Reaper's Invocation but it is based on crit. Every time you crit, you generate energy, this will then get Cast on Critical to proc automatically and cast Profane Ritual to consume the corpses to gain power charges.

----------------------------------------------------------------------------------------------------------------------------------------------------------------------

200% Delirium Maps or High Cold Damage

In 200% deli maps, or if you have really high cold enemies may shatter and not leave as many charges, this is why Ailith's Chimes and Culmination II paired with Living Lightning II comes in clutch as that will generate charges.

Comments

0

Video Guide

Build Planner Export

Export all build variants directly to your game.

Path of Building Code

Table of Contents

Featured Builds

[0.5.5] Unstoppable Flicker Strike Build Guide [Works on Acolyte & Martial Artist]
Updated on Oct 12, 2026
Gemling Frost Bolt AutoBomber (0 Button Build)
Updated on Oct 12, 2026
[0.5.5] Spirit Walker Twisters
Updated on Oct 10, 2026
[0.5.5] MasterT's Blood, Ash and Thunder Atziri's Contempt Blood Mage
Updated on Oct 9, 2026
[0.5.5] Blistering Bond Self-Ignite Oil Grenade Smith of Kitava
Updated on Oct 9, 2026

Become a Creator

Want to earn rewards by sharing your builds with your community?