menu
MobalyticsUse your favourite features in-game with our Desktop App
PoE 2 Build

[0.5.5] Giga Bonk Martial Artist - Falling Thunder Monk - League Starter to Endgame

presentationMonk
presentationMartial Artist
End Game
Starter
0.5.5 FR
Beginner
Verified
Featured
Updated on Oct 1, 2026
Oct 1, 2026

Build Overview

Here's my guide for my Giga Bonk League Starter and Endgame Build for Patch 0.5.5! This is a Work in Progress so expect rapid changes early on! I've included Leveling Variants and Budget Variants, just scroll through the Variants!

---------------------------------------------------------------------------------------------------------------------

🚨Work in Progress, be sure to come by the Twitch Stream for the Newest Skill Tree and Gems as I'm changing it to test new things!🚨

---------------------------------------------------------------------------------------------------------------------

🚨I've included a League Starter Leveling Guide, Early Mapping Guide, and Endgame Guide to cover your run on Monk from Start to Finish. Click the appropriate Tab for Gear and the Passive Tree🚨

---------------------------------------------------------------------------------------------------------------------

New Power Charge Tech Here

In the Endgame, we'll use Shattering Palm + Living Lightning II + Culmination II + Ailith's Chimes to generate TONS of Power Charges on Hit! We'll hit a target with Shattering Palm, this will trigger Living Lightning II minions which will expend built Combo when h itting targets thanks to the Martial Master node. This combo is then consumed by Ailith's Chimes for Power Charges. Simply enter map, press Shattering Palm a couple times and you have Charges!

We'll use these Power Charges with Falling Thunder + Nova Projectiles II for 360° Clear! This will be our main Bossing and Mapping Skill. Bonk with Falling Thunder, then recharge your Charges with 1 press of Shattering Palm on enemies, then bonk again!

The new Way of the Stonefist Ascendancy Node will allow our Gloves to be transformed into new and stronger versions of themselves! This will provide things like Explode Corpses for Damage, Onslaught on Hit, +% to Crit Chance, and More!

We'll also use Martial Adept + Martial Master to build up Combo from ALL our hits and twice as fast. For every 1 Combo we consume, we reduce our Energy Shield Recharge Rate by 0.2 seconds, so 10 combo consumed = -2 seconds before ES Recharge starts. We spam Combo skill so CONSTANT ES recharge!

Our Defenses were Buffed in 0.5 with Deflection and Evasion getting some MASSIVE improvements. We'll be around 6K Energy Shield, 77% Evasion, and 95% Deflect on top of Chaos Immunity with Chaos Inoculation and Instant ES recovery with Shavronne's Satchel + Ultimate Life Flask with Instant Recovery. We'll also have a Companion with Spirit Vessel from the Forgotten Warden Body Armor. This Companion will eat 10% of Damage taken and 15% of Deflected Hit Damage for a massive Damage Reduction!

Filter's I use (Shoutout Mr9Lives) - Here

Act 1 Regex - "i.+mov|^ad.*ph.*da|^\d.*ph.*da|^\+.*ills$|lacquered|studded|co.+res"

Act 2 Regex - "li.+res|^\+.*ills$|i.+mov|nymph's|o-wisp's|sylph's|\d [cfl].+da"

Act 3 Regex - "i.+mov|resi|^\+.*ills$|\d [cfl].+da|nymph's|sylph's|cherub's"

Act 4 Regex - "i.+mov|resi|^\+.*ills$|\d [cfl].+da|^\d.*ph.*da|^ad.*ph.*da|nymph's|sylph's|cherub's"

Strengths and Weaknesses

  • Nuke Bosses
  • Insane Clear Speed
  • Curse and Crit Immune
  • Super Tanky (Deflection OP)
  • Very Fast
  • Tougher League Start
  • Riskier Playstyle (Skill Diff, just lock in)
  • Kinda Squishy until CI

Build Variants

Please Read, Monk is not a braindead 1 Button Build for the most part. Lack of reading will make this a painful experience.....

New Power Charge Tech Here

This will be the Giga Investment version of the build that we'll build towards. Lots of very expensive items here but not needed, just would be nice to have.

We'll take advantage of the Absent Amulet with Trinity as this will provide a ton of More Elemental Damage. We should be able to get around 200 Affinity easily which provides 36% More Elemental Damage. If you can balance your Elemental Damage and get 300 Affinity consistently, you'll get 60% More Elemental Damage.

I'll also use the Legacy of Wanderlust to make us immune to Slows like Chill / Maim / Hinder. This will make things like Grand Expedition much easier since we can avoid some of the most annoying mods for Melee.

I'll also make all the 5 Mod Sapphire with Ailment / Stun Threshold, Energy Shield, Increased Suffix Effect, and Crit Bonus to ensure we'll never get Stunned / Ignited / Frozen / Etc..... This also allows us to drop Abasement for some Extra Skill Points.

We'll use the Rite of Passage and Mageblood for a massive Mapping Power Spike once we can afford them. We'll also use Rakiata's Flow to save us some Elemental Penetration nodes and gear affixes. Raven-Touched Shard will allow us an additional Anoint, I went with Thaumaturgic Generator + Zarokh's Gift for my 2 anoints.

This variant will use Shattering Palm + Living Lightning II + Culmination II + Ailith's Chimes to generate Power Charges on Hit for FREE! We'll hit a target with Shattering Palm, this will trigger Living Lightning II minions which will expend built Combo when hitting targets thanks to the Martial Master node. This combo is then consumed by Ailith's Chimes for Power Charges. Simply enter map, press Shattering Palm a couple times and you have Charges!

Equipment

item
8
item
item
3
item
2
item
6
item
5
item
8
item
1
item
4
item
7
item
item
item
item
Tattooed Runes
Jewels
item
item
item
item
item
Equipment Priority
+8

Quarterstaff:

DO NOT BUY THE Dreaming Quarterstaff !!!!!! This is a 0% Critical Hit Chance Base and will destroy your DPS!!!!

Prioritize these Affixes:

- Adds # to # Damage to Attacks (Cold > Lightning > Fire)

- % Increased Elemental Damage with Attacks

- + to Level of Melee / Attacks

- +% to Crit Chance

- % to Critical Damage Bonus / % Increased Attack Speed

Prioritize Highest Elemental DPS, Critical Hit Chance (Sinister Quarterstaff), + Level of All Melee / Attack Skills, and Critical Damage Bonus. Socket with Farrul's Rune of the Hunt, Saqawal's Rune of the Sky, and Serle's Triumph (If you want a 4th Suffix as shown).

Don't use Duality as the Finality Buff prevents Combo generation, which breaks my build!

Body Armor:

We'll be swapping to the Forgotten Warden as this provides as much EV/ES as a really good Rare Body Armor all while costing less than 1 Divine. The Companion from the Skill on the Body will take 10-15% of Deflected hits damage so a nice 15% Damage Reduction alongside the support gems in the companion for more Defense Tech.

Our Deflection Rating will also increase when we lose ES so we should be insanely tanky with this Body Armor. I've socketed 1 Idol of Eramir for Charge Consumption Efficiency, 1 Rune of Foundations for EV/ES, and 1 Rabbit Idol for Rarity if you have 3rd Socket.

Use a Perfect Jeweler's Orb on Spirit Vessel for the 5th socket unless its corrupted (No 5th Socket then).

I prefer this Body Armor over any other Rare / Unique until you can get either a 5 Socket Morior Invictus with Global Defenses or a 2K Evasion 550+ ES Rare Body Armor. The 25% Damage Reduction from the Companion is just too good until then.

Gloves:

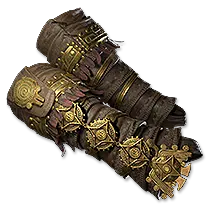
This is one of the most important pieces of our build now thanks to Way of the Stonefist.

Added Damage -> Gain Extra Damage as ____ - Increased Crit Bonus -> + to Base Crit Chance (Massive Increase) - +2 Level of Melee -> +1 Level of Melee & 10% to All Skill Quality

Prioritize these Affixes:

- + / % Increased Defense -> Stonefist Conversion -> % More EV/ES or + EV/ES per Level

- % Magnitude of Poison / Bleed -> Stonefist Conversion -> % Chance to Explode Corpses

- % Increased Critical Damage Bonus -> Stonefist Conversion -> +% to Crit Chance

- % Increased Attack Speed -> Stonefist Conversion -> % Chance for Onslaught on Hit

- + Level of Melee -> Stonefist Conversion -> + Level of Melee and % Increased Skill Quality

For High Investment , go for Single/Double Chance to Explode Corpses (From Magnitude of Bleed/Poison Mod). This is INSANE clear speed and QoL. Still get + 2 Melee and Crit Bonus, otherwise flexible options. I do recommend 1 Defensive Mod (+ / % Defenses convert to % More EV/ES or + EV/ES per Level).

Helmet:

Prioritize these Affixes:

- + / % Increased Energy Shield

- % Increased Critical Hit Chance

- +% Res / Attributes / Rarity

Get the highest ES Helmet as possible. Raven-Touched Shard is not required but provides an extra Jewel Slot with Zarokh's Gift.

Boots:

Prioritize these Affixes

- 30-35% Increased Movement Speed

- + / % Increased Evasion and Energy Shield

- % Gain Deflection Rating

- +% Res / Attributes / Rarity

- Skills have 10-15% chance to not remove Charges but still count as Consuming them (Optional QoL)

Its beneficial to get the Uhtred's Sidereus Chronomancy Mod for Chance to Not Remove Charges as this'll make uptime for all of our Charge Consuming Skills more consistent. Not required, but makes a big QoL difference.

Belt:

This slot is up to you, but I recommend the Shavronne's Satchel up until you can afford Mageblood or Headhunter. With an Instant Recovery Flask, you can heal your ES with Shavronne's Satchel which is great.

I went with Mageblood since I got one from Ritual. I went with Jade, Quicksilver, Silver, and Bismuth / Gold / Duplicate. ALWAYS have the Jade Flask on your Mageblood!!! The Evasion / Deflection it provides is OP.

Amulet:

Trinity Absent Amulet is what I've decided to go with but the Berserk + Eternal Rage is still a solid budget option.

Prioritize these Affixes:

- % Increased Evasion Rating / Energy Shield / Global Defenses

- + Level of All Melee Skills

- + to Spirit

- % Increased Crit Chance / Bonus

- +% Res / Attributes / Rarity

Anoint Thaumaturgic Generator / Zarokh's Gift if you're rich for extra passive Frenzy, Endurance, and Power Charges to fuel Charge Regulation or +1 Jewel Slot. Otherwise take a budget anoint like Critical Exploit, Serrated Edges, Vulgar Methods, etc.....

Rings:

Prioritize these Affixes:

- Adds Damage to Attacks (Any but Phys > Cold > Lightning > Fire)

- +% Res / Attributes / Rarity

Get whatever damage you can, then cover those Resistances / Attributes / Rarity. Kalandra's Touch is worth it once you have a really good Ring.

Jewels:

I use the Heart of the Well which can give Gain Extra Damage as Chaos for HUGE Damage. Expect to spend BIG for a two line Gain Extra Damage but it makes and insane boost. Increased Mana Cost Efficiency is also a GREAT line to reduce Mana Cost of Skills!

I like to use a 5 Mod Time-Lost Sapphire with Critical Hit Chance / Bonus, Energy Shield, Elemental Damage, Increased Effect of Notables, and place it next to Stupefy to allow all the Nodes around that area to grant us extra bonuses. Not required by would take this at some point since there's so many Notables we take around this Jewel Socket.

Voices Sapphire will grant us additional Rare Jewel Sockets for more 5 Mod Sapphire. This is how we'll stack a ton of ES / Ailment Threshold / Stun Threshold / Crit Chance / Crit Bonus / etc....

Megalomaniac with an Offensive and Defensive Notable, use your brain on what's good. If I recommend one it'll skyrocket.

I like Defensive Nodes such as Subterfuge Mask, Pocket Sand, The Wild Cat, Afterimage, Inner Faith, Patient Barrier, Chakra of Breathing, and Storm Driven.

I like Offensive Nodes such as Harness the Elements, Stormbreaker, Overwhelming Strike, Sundering, Deadly Flourish, Reaching Strike, and Rapid Strike.

These are just a few but I wanted to give examples as you don't have to have the same Notables as me. There are better options out there!

Skill Gems

Support Gem Requirements:

Str 55

Dex 100

Int 75

1

Falling Thunder

Level 20

supportnovaprojectilesplayer
supportminionpactplayertwo
supportculminationplayertwo
supportblindsideplayer
supportrakiatasflowplayer
2

Shattering Palm

Level 18

supportculminationplayertwo
supportailithlineageplayer
supportlivinglightningplayertwo
supportchargeprofusionplayertwo
supportrageplayerthree
3

Charged Staff

Level 20

prolongeddurationsupportplayertwo
supportcullingstrikeplayertwo
supportperpetualchargeplayer
supportblindplayertwo
supportblazingcriticalplayer
4

Pounce

Level 3

freezingmarkplayer
supportrapidattacksplayerthree
supportcooldownrecoveryplayertwo
supportcadenceplayer
supportrageplayerthree
5

Herald of Ice

Level 20

supportmagnifiedareaplayertwo
supportelementalarmamentplayertwo
supportelementalfocusplayer
supportfarcombatplayertwo
supportblindplayertwo
6

Wind Dancer

Level 20

supportvruunsinevitability
supportmaimplayer
supportblindplayertwo
supportelementalarmamentplayertwo
supportfreezeplayer
7

Charge Regulation

Level 20

supportuhtredexodusplayer
8

Mana Remnants

Level 20

supportfleetingremnantsplayertwo
supportinterludeplayer
supportkhatalsrejuvenationplayer
9

Ghost Dance

Level 20

supportcooldownrecoveryplayertwo
10

Spirit Vessel

supportloyaltyplayer
supportamanamustitheplayer
supportmeatshieldplayertwo
supporthulkingminionsplayer
supportminionmasteryplayer
11

Trinity

Level 20

supportcoldmasteryplayer
supportdiallasdesireplayer
12

Rend

Level 20

prolongeddurationsupportplayertwo
supportperpetualchargeplayer
supportrapidattacksplayerthree
supportheightenedchargesplayer
supportcadenceplayer
Gem Priority
+47

Mapping -

New Power Charge Tech Here

We'll use Shattering Palm + Living Lightning II + Culmination II + Ailith's Chimes to generate Power Charges on Hit for FREE! We'll hit a target with Shattering Palm, this will trigger Living Lightning II minions which will expend built Combo when hitting targets thanks to the Martial Master node. This combo is then consumed by Ailith's Chimes for Power Charges. Simply enter map, press Shattering Palm a couple times and you have Charges!

Once you have Charges, use Falling Thunder then refill charges with Shattering Palm. Remember, once we consume 20 total combo, our ES recharge will start INSTANTLY so spam these combo skills.

Herald of Ice will go off when we kill Frozen targets alongside our Explode mods on our Gloves for tons of clear.

The Spirit Vessel Companion will eat 15% of Deflected hit damage alongside 10% of Damage thanks to Loyalty. I'll use Amanamu's Tithe so when he dies we can get an Abyss Mod as well.

Bossing -

Simply walk into the Arena, get Power Charges from using Shattering Palm, buff yourself with Charged Staff, get some more Charges, press Mantra of Destruction or Rend (Optional) and then BONK with Falling Thunder. If whatever you hit lived, hit another Shattering Palm and go again.

Optional Skills -

Mantra of Destruction - This can be used prior to using Falling Thunder for a MASSIVE DPS boost if needed. I've decided to not use it, and am using Pounce in its place for movement. Your choice between Movement or More Damage

Herald of Thunder - If you have excess Spirit, you can squeeze in an extra Spirit Gem. This Herald is pretty popular, but feels kinda overkill since we have Herald of Ice and Explode on our Gloves. I've decided to use Mana Remnants instead

Rend - This skill is granted as the basic attack from Wyvern form on a Talisman in Weapon Set 2. It'll give 50% Damage Gained as Lightning if we have a Power Charge when used. This can provide a ton of extra damage for 10-30 seconds (Depending on Skill Effect Duration Nodes). Feel free to use this if wanted.

Passive Tree

main:
123
123
set 1:
20
20
set 2:
20
20

Passive Tree Breakdown -

This version of the Tree paths towards more Jewel Sockets for 5 Mod Jewels which are very expensive. This should only be done for 5 Mod Jewels, otherwise stick with the previous tree.

We focus on Nodes to Stack Maximum Power Charges like Overflowing Power and The Power Within. You'll need to get our Critical Hit Chance as high as possible with Nodes like Moment of Truth, True Strike, Struck Through, etc...

Stack ES, EV, and Deflection using Enhanced Reflexes, First Teachings of the Keeper, First Principle of the Hollow, Enduring Deflection and more.

Chaos Inoculation will make us Immune to Chaos Damage and allow us to go with Shavronne's Satchel with an Instant Recovery Flask for ES Sustain early on.

Dizzying Hits / Stupefy will provide a large DPS boost and a solid chance to Daze. These nodes pair really well with a Time-Lost Sapphire in the nearby Jewel Slot.

I allocate some Nodes on Weapon Set 1 so we can utilize Weapon Set 2 points for Skill Effect Duration. This will greatly increase the buff time from Rend to nearly 30 seconds.

Ascendancy Points -

Take Way of the Stonefist for GIGA OP Gloves, Martial Adept for Instant ES Recharge and x2 Combo, Martial Master to allow ALL attacks to build combo for 24/7 uptime on Culmination II / Ailith's Chimes / Chakra of Impact, and Runic Meridians for 5 extra Rune sockets.

Atlas Tree

Quest Rewards

Check which quests you’ve completed on your character
Clearfell — Beira of the Rotten Pack
+10% to Cold Resistance
Hunting Grounds — The Crowbell
Grants Two Weapon Set Passive Skill Points
Freythorn — The King in the Mists
+30 to Spirit
Ogham Farmlands — Una's Hut
Grants Two Weapon Set Passive Skill Points
Ogham Manor — Candlemass, the Living Rite
+20 to maximum Life
Keth — Kabala, Constrictor Queen
Grants Two Weapon Set Passive Skill Points
Valley of the Titans — Medallion
30% increased Charm Effect Duration
+1 Charm Slot
Deshar — Final Letter
Grants Two Weapon Set Passive Skill Points
The Spires of Deshar — Sisters of Garukhan
+10% to Lightning Resistance
Jungle Ruins — Mighty Silverfist
Grants Two Weapon Set Passive Skill Points
The Venom Crypts — Venom Draught
25% increased Stun Threshold
Jiquani's Machinarium — Blackjaw, the Remnant
+10% to Fire Resistance
The Azak Bog — Ignagduk, the Bog Witch
+30 to Spirit
The Molten Vault — The Molten Vault
Reforging Bench
Aggorat — Blood Sacrifice
Grants Two Weapon Set Passive Skill Points
Journey's End — Captain Hartlin
Two Weapon Set Passive Skill Points
Skill Gem(Lv 13)
Delirium Drop
Whakapanu Island — Great White One
+15% of Armour also applies to Elemental Damage
Gain Deflection Rating equal to 12% of Evasion Rating
+12% faster start of Energy Shield Recharge
Eye of Hinekora — Navali's Rest
5% increased Maximum Mana
Halls of the Dead — Yama The White
Grants Two Weapon Set Passive Skill Points
Halls of the Dead — Tawhoa's Test
+5% to Lightning Resistance
Abandoned Prison — Goddess of Justice
30% increased Mana Recovery from Flasks
Halls of the Dead — Tasalio's Test
+5% to Cold Resistance
Halls of the Dead — Ngamahu's Test
+5% to Fire Resistance
Halls of the Dead — Tribal Medicine
+15% of Armour also applies to Elemental Damage
Gain Deflection Rating equal to 12% of Evasion Rating
+12% faster start of Energy Shield Recharge
Wolvenhold — Oswin, the Dread Warden
Grants Two Weapon Set Passive Skill Points
The Khari Crossing — Akthi and Anundr
Two Weapon Set Passive Skill Points
The Khari Crossing — Molten Shrine
5% increased Maximum Life
Qimah — Tabana's Pillar
15% increased Armour, Evasion and Energy Shield
Kriar Village — Lythara, the Wayward Spear
+40 to Spirit
Howling Caves — The Abominable Yeti
Grants Two Weapon Set Passive Skill Points

How it Plays

See YT Videos!

How it Works

FAQ

How to Scale my Crit Chance and how much is enough?

Your Base Critical Hit Chance is the most important thing to improve. The Sinister Quarterstaff has a Base Crit Chance of 12%, which is the highest of any Quarterstaff Base. This Base + the mod " +% to Crit Chance) can provide up to a 17% Base Critical Hit Chance.

The Way of the Stonefist converts the Critical Damage Bonus mod to "+% to Crit Chance) as well, meaning we can get an additional 3% to Base Critical Hit Chance. Otherwise things like the Time-Lost Sapphire with Crit Chance, other Jewels, Passive Tree Nodes, etc.... will be your other sources of Crit. You can also utilize the Diamond Flask on Mageblood or Pinpoint Critical in place of Blindside if absoluetly necessary.

The Blindside support will provide 15% More Critical Hit Chance against blinded enemies, which is why we run Blind II in Herald of Ice and Charged Staff. This will ensure most targets we hit will be blinded and give us the bonus. However, this 15% More does not show up in our Tooltip since its Conditional. Same applies for our Daze Effects like Stupefy and Dizzying Hits. The minumum Crit Chance on tooltip in hideout with 0 buffs we should want to achieve is around 65%. Our buffs mentioned above and Charge Regulation will get us to 100% against a Blinded and Dazed Target.

Why Herald of Ice and when to swap to it?

Herald of Ice has a higher damage ceiling and better AoE than Herald of Thunder, but is harder to get to work since you have to be Freezing the targets to proc it. This is why early on, we use Herald of Thunder until you can get enough sources of Cold Damage and Freeze Buildup.

You can get these sources of Cold Damage and Freeze Buildup from your Quarterstaff with Added Cold Damage + Increased Elemental Damage with Attacks, Added Cold on Rings, Gain % Cold Damage from Heart of the Well, and Freeze Buildup on Passive Tree if needed (Thin Ice, Heavy Frost, One with the River). Breath of Aldur is also an option but it is socket bound meaning you can't change the rune once placed, only use if absolutely necessary.

Once you've gotten a large amount of Added Cold Damage, you can try swapping to Herald of Ice. If you notice you're not Freezing stuff and activating Herald of Ice, then you need some more Cold Damage or Freeze Buildup.

How to Increase Energy Shield?

The biggest sources of Energy Shield is going to come from your Body Armor (Forgotten Warden), Pure ES Helmet, and Gloves (Way of the Stonefist Mods).

Once you have a solid base Energy Shield amount, you need to get sources of Increased and More Energy Shield. These can come from the Time-Lost Sapphire and other Jewels, Amulet Mods (% Increased ES / Global Defenses), Rite of Passage (Owl Spirit), Charge Regulation (20% More ES), Passive Tree Nodes, Runes (Rune of Foundations / Perfect Iron Rune), and more.

Way of the Stonefist will convert popular Defensive mods like % Increased EV / ES / AR into % More Global Evasion and Energy Shield which is extremely potent. I would try to always have this mod on your Gloves if possible.

I can't put Ailith's Chimes / Culmination II / Charge Profusion II in Shattering Palm?

The order of the Support Gems is extremely important! You need to first equip Culmination II as it allows Shattering Palm to build combo. Now that the skill has combo associated with it, you can then slot in Ailith's Chimes since this support revolves around combo. Now that you have Ailith's Chimes which grants Power Charges, you can now equip Charge Profusion II since this support revolves around charges.

Where's Flicker Strike?

This isn't really a Flicker Strike build at this point, I've found myself barely using it and its quite finicky and expensive to feel worth using. Can still be used in place of Pounce if wanted with these supports: Concentrated Area, Perpetual Charge, Hit and Run, Blindside, Elemental Armament II

Why not run both Herald of Thunder and Herald of Ice?

Its a bit overkill in my opinion to run both Heralds, especially since I get the Explode Mods on my Gloves from the Katla's Gloom Mod Pool. I find the 30 Spirit better spent on things like Mana Remnants for Mana Sustain and Ghost Dance for ES sustain.

How do I mitigate Slows, especially in Grand Expedition?

The expensive but full proof method is the Legacy of Wanderlust which will solve all your problems, but is usually quite expensive.

The cheaper method is to stack "Reduced Potency of Slowing Debuffs". This can come from things like the Soul Core of Quipolatl, Cyclonic Alloy Body Armor Mod, and Passive Tree Nodes (Freedom of Movement, Unhindered, Lasting Boons, Unyielding, etc...).

There's also the Commiserate support which can be slotted into one of your skills like Shattering Palm to remove the Chill debuff from yourself briefly. This is a bootleg way, but better than nothing. Silver Charm can also help but will likely run out of charges fast in Grand Expeditions.

Why Forgotten Warden over a Rare Body Armor?

The Companion from the Spirit Vessel Skill granted by the Body Armor can eat up to 15% of Deflected Damage for us. Since we cap our Deflection at 95%, this means most of the time we'll take 40% Less Damage, then the Companion will eat up to 15% of Deflected Damage. This gives us an additional 15% Damage Reduction.

We also can use the Loyalty support which is an extra 10% Damage Reduction and other cool supports like Catha's Brilliance and Amanamu's Tithe.

The Base Defenses on this Body Armor are also extremely high for how easy / cheap this can be. Not to mention the tons of Deflection Rating you'll get on top of it. This Body Armor will be better than most up until you start getting into 2K+ EV 600+ ES Body Armors which will be very expensive.

Can I use Duality as a budget Quarterstaff?

No, the Finality Buff from this Quarterstaff prevents us from gaining Combo. This will brick the Power Charge generation from Ailith's Chimes!

Is Shavronne's Satchel really that good and why isn't it healing my ES on use?

YES, its absolutely insane for survivability. Spam your Flask if you trip, get swarmed, or just get low and you'll be saved. If you have a really good flask then you'll really notice how powerful this belt is.

The only requirement is to have an Instant Recovery or % of Recovery is Instant Life Flask. For some reason, when using Chaos Inoculation you have to be running one of these mods to get any recovery. Otherwise the belt is useless.

More FAQ info to be added......

Changelog

9/30/26 - Added FAQ for troubleshooting, plenty more info to be added to it

9/26/26 - Updated all other Endgame Variants to match changes I made in 0.5.5. Please let me know if theres mistakes as this was a massive overhaul

9/25/26 - Updated Mirror Tier Variant, other variants will get updates soon

9/12/26 - Fixed Socketable mistake

9/10/26- Updated Atlas Tree

9/7/26 - Fixed issue with early leveling variant, added Atlas points to mirror variant

8/31/26 - Updated Leveling variant to feel a it smoother for league start. We'll utilize Hollow Form + Whirling Assault until we can drop / buy Ailith's Chimes since its kinda required to get our Endgame build up and running.

7/9/26 - Added Mirror Tier Investment Variant. This is a high skill and investment version of the build that is centered around farming the juiciest Expedition in the game. Can swap the Berserk tech for Legacy of Wanderlust if slow is too annoying.

6/27/26 - Added Tatto's since Mobalytics added support for it

6/23/26 - Updated ALL Endgame variants providing more clarity on what mods to prioritize. Updated to match Final Update changes with a video to come within a day or two.

6/20/26 - Updated descriptions, added Shark Fin Reward. Update video coming soon!

6/7/26 - Added link to new video, added new Body Armor Forgotten Warden (Cheap and OP). Updated descriptions further and corrected some typos.

6/7/26 - Added new Power Charge Tech which replaces Whirling Assault with Shattering Palm. Check the Tech out! Updated all Endgame variants to match. Added new info for Giga Invest variant revolving around Mageblood. Lots of other minor changes.

6/2/26 - Added new video going over New Power Charge Tech and the new Breachlord's Amalgam Lineage Gem. Updated Variants

6/2/26 - Did major updates to all variants to match the changes we've made due too the testing in 0.5. PoB file removed until I give it a full update, new YT video coming in a day or two to go over newest changes.

Comments

115
E
El Tico•2h ago

Hey man how do you got enough Spirit? The reservation of Spirit goes to 156 due Kathlas Rejuvenation on Mana Remnants. Im wondering how to get the 6 points left to use all recommended skills.

0
G
GrimRobot•8h ago

Act 4: I don't understand how to use the Whirling Assault
in Hollow Form, since it requires a spear, but we simply don't have a weapon.

0
G
GrimCrown•16h ago

Hey Korbyn! First off, massive thanks for putting together such an incredible build and keeping it updated. I've been following your guide and absolutely loving it. It's easily one of the most enjoyable builds I've played!

I've recently switched to Morior Invictus for my chest armour, and I was wondering what changes you'd recommend to optimise the build around it.

Would you change any of the skill gems, support gems, Spirit setup, passive tree, or anything else compared to your current setup? I'm particularly interested in maximising damage without sacrificing too much survivability.

Really appreciate all the work you've put into the guide. Thanks again!

0
B
BoldKey•16h ago

awsome built, no issue with clearing any content, but have you put any thought on the rune interaction in grand expeditions with shattering the corpses. It is specualted that it prevents reborn and that does not allow the full juice to build up.
I cannot get more than 3div a pop even with a full rune chain stack.
Do you have any solutions to this possible issue?
Thanks in advance.


0
B
BoldKey•16h ago

the maps are t15 8 mod and 3x +2 mod and eff tablets.

0
C
CoolStorm•1d ago

lol this build is so freaking confusing... I was coooking with this build until the all of the changes for the interludes. Now not so much... And there is no way i'm finding those unique gloves and body armor.

0
B
BrightGun•7d ago

is full physical staff is better. dmg from projectiles from falling thunder convert 100% physical dmg to lightning dmg. thanks you!!!

0
J
Juls•11d ago

How to use pounce?

0
S
StaNi•9d ago

You need equip talisman in second weapon slot

0
S
SilentFlower•11d ago

from where are you getting enough of spirit ?

0
F
FGKorbyn21
Author
•11d ago

Amulet can give up to +50 Spirit. Trinity is granted by the Absent Amulet making it cost 0 Spirit

0
R
Ruthlless•11d ago

Is it a good Idea to have both Hearald of Ice and Herald of Lightning active? I would be getting that extra 20 spirit from an item.

0
F
FGKorbyn21
Author
•11d ago

I would prefer a different spirit gem like Mana Remnants and Ghost Dance. If you have both of these and extra spirit still, then I could see Herald of Thunder being a solid choice

1
View 2 replies

Video Guide

Build Planner Export

Export this build variant directly to your game.

Table of Contents

Featured Builds

0.5.5 Shield Wall + Avatar of Fire Smith of Kitava Build
Updated on Oct 12, 2026
[0.5] Gas Grenade Pathfinder
Updated on Oct 12, 2026
[0.5.5] Hollow Palm / Storm Wave League Starter (Level 1 to Endgame)
Updated on Oct 12, 2026
[0.5.5] Unstoppable Flicker Strike Build Guide [Works on Acolyte & Martial Artist]
Updated on Oct 12, 2026
Gemling Frost Bolt AutoBomber (0 Button Build)
Updated on Oct 12, 2026

Become a Creator

Want to earn rewards by sharing your builds with your community?