menu
MobalyticsUse your favourite features in-game with our Desktop App
PoE 2 Build

0.5 Shield Wall + Avatar of Fire Smith of Kitava Build

presentationWarrior
presentationSmith of Kitava
Starter
End Game
0.5 RotA
HC
SSF
Creator
By Lexd
Updated on Jun 12, 2026
Jun 12, 2026

Build Overview

Lexd's Shield Wall + Avatar of Fire Smith of Kitava for 0.5: Return of the Ancients

Hey guys! This is the Smith of Kitava version of my classic Avatar of Fire Shield Warrior build that I've now made on every Ascendancy. Compared to the Titan and Warbringer, this definitely felt the tankiest out of them all (especially on a budget), and has some really good sustain with Blood Magic since we can get so much life and life regen through this Ascendancy.

Overall, we're using Fortifying Cry and Resonating Shield with some sizeable AoE boosts from our Passive Skill Tree to clear maps and other endgame activities.
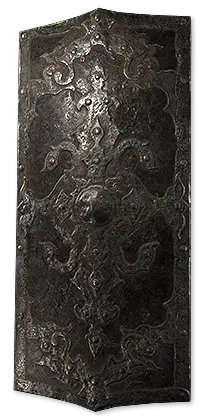
 However, you can also choose to use Shield Wall as sort of a long-range shotgun to clear as well, I would just pick up some more Attack Speed and swap in Rapid Attacks II when you are clearing with it (replace the gem that adds the least damage).

You also want to get mobs to "chase" you as Fortifying Cry is socketed with Fiery Death while clearing; there is a bit of a delay when the corpses detonate and though I wish the damage of this skill was a little higher, 60% chance for Ignited enemies to explode is quite high and you will see lots of corpses blowing up and killing chasers in your wake. I tend to prioritize ranged targets to get the melee mobs chasing after me and running into those exploding corpses.

Aside from that, on bosses we have a bunch of Weapon Set 2 points to crank up our single-target and Ignite damage, so our Shield Walls will inflict significant Fire Damage over time when they are empowered with Infernal Cry and detonated with Fortifying Cry. Yes, Fortifying Cry is still the best detonator for Shield Wall (check the note below). Just make sure that you have a full Rage Bar + the boss has been hit with Sunder recently, as the latter skill increases our Fire Damage by a whopping ~40% when inflicted before mods.

QUICK NOTE: this build was affected by the Fortifying Cry + Shield Wall shotgun nerf, but the damage of Shield Wall itself and the subsequent Ignites it inflicts are still significant. You will likely get more damage out of my Bleed build here, but this is still a solid option for taking down bosses and Fortifying Cry is still the ideal detonator for Shield Wall since it's just... well, an extra attack that scales with your shield's armour (which will be very high) which is also counted as an "Empowered Attack." It's still super strong.

As mentioned earlier, we are incredibly tanky thanks to Ascendancy nodes like Kitavan Engraving, Leather Bindings, Heatproofing, Dedication to Kitava, etc. There are a few options to go with here but those first three I think are must-haves for this build, especially early on in mapping.

That's basically it! I wish that Ignite was a bit of a stronger Ailment, but it is "serviceable" as a way to burn-down bosses, especially if they happen to leap away or become hard to hit.

There is now a Nebuloch that uses a combination of Critical Damage Bonus + Ignite Passive Skill Tree nodes and gear that inflicts some VERY strong Ignites. These used to be Chaos Damage Ignites that worked with Blackflame and stacking Wither through Withering Presence, but GGG has since nerfed this interaction and we now just want to cut through Fire Resistances some other way. I go over a few different methods in this video: https://www.youtube.com/watch?v=CVT8KU1AIkQ

Strengths and Weaknesses

  • Very tanky; one of the most durable builds I've played
  • Strong clear, can tackle all endgame activities with relative ease
  • Feels very "versatile," i.e. you can tailor the passive skill tree for different synergies considering the ascendancy (e.g. self-ignite, maximum resistances, etc.)
  • Budget-friendly; very easy to get Resist Capped and survivable with little currency spent
  • What we gain in a tankiness we sacrifice a little bit of damage for, but not a large amount
  • Fast enough, but not the most "zoomy"

Build Variants

Smith of Kitava + Avatar of Fire Shield Warrior: Act 1 Overview

Honestly, the main skills we are pretty similar between Acts 1 and 2, as well as gear priority.

For the vast majority of the run, we'll be using Boneshatter to clear groups that are primed for stun, and even as a potent single-target nuke when empowered with Infernal Cry; it can hit deceptively hard on a boss when socketed with Impact Shockwave and Fire Attunement.

I kid you not, Mace Strike (and even its single-wielded counterpart) is one of your best DPS abilities, and is usually what I'm spamming to buildup Stun or dealing DPS during heavy stun windows. We also have Rapid Attacks I and Rage I socketed for even more damage.

Resonating Shield is something we get towards the end of the Act, and it is a potent stun-primer as well as a good way to break armour on targets. You definitely want to keep up the Fully Broken Armour debuff on bosses, and tapping this every now and then is an easy way to do that.

But, since we get that skill towards the end of the Act, the most important things to keep up to date are your Maces. Check the vendors frequently for good maces as that's what's going to deal the vast majority of your damage in this Act.

A high armour Shield is just a "bonus" at this point, though it will make your Shield Charges, Resonating Shield, and even your Shield Bashes from Raise Shield hit a lot harder and buildup more stun.

QUICK NOTE: I think that, with Brink I becoming a Tier 1 support gem, Raise Shield's Shield Bash will become the best way to Prime targets for Stun early on in your playthrough, and potentially onwards. It doesn't take much to block attacks and Shield Bash, then follow up with a Boneshatter; just means you may invest into some Stun Threshold and socket Raise Shield with Steadfast I.

I genuinely think this will be the best way to clear with Boneshatter as a Shield Warrior, and potentially any Warrior.

As far as Runeshaping goes in 0.5, prioritize getting extra Support Gems to crank up your skills, Body runes for a bit of extra life, and try to grab a Storm Rune at some point so we have an assured way to deal Lightning Damage as we upgrade our Maces from tier-to-tier (this is so we can inflict the Shock ailment while DPSing with Mace Strike; I usually save it for an Act 2 Mace)

Equipment

item
1
item
2
item
3
item
Equipment Priority
+3

Smith of Kitava + Avatar of Fire Shield Warrior: Act 1 Gearing

Obviously don't go in naked with just your boots; just use whatever you can find for the blank spots, strong amour pieces, Rares you can wear, etc.

I only put the most important pieces you should keep somewhat up-to-date in this Act. Keep an eye out for strong Maces and a Shield, with a much higher priority on Maces. I also included the most important rolls on each if you mouse over each item.

Boots I placed here because you want any pair you can wear with +movespeed on them; try to get any pair with this roll on them ASAP.

Aside from that, do note that we have TWO maces set in Weapon Set II; a strong tech I have found when progressing through the campaign is using the Dual Wield form of Mace Strike, as well as setting Boneshatter to Weapon Set II to hit much harder. You essentially hit as hard as you do with a 2h, but with a much faster animation speed.

The only downside here is you'll need TWO good maces to be optimal rather than ONE good two-hander, but this can also be seen as a positive since you can roll more total +melee skill if you are lucky.

Using two one-handed maces also takes advantage of how our Passive Skill Tree is setup, but we'll get more into that later; I cannot stress enough how much of a game-changer using Dual-Wielded maces was for me when it comes to damage, and you are still able to get a ton of use out of your Shield. Try it out.

Last note; try to get a Lightning Damage roll on one, and/or keep some Storm Runes in the bank to throw into some Maces with sockets later on. This let's us apply the Shock ailment on bosses as we're hitting them with Mace Strike, which is a HUGE damage increase for all damage you inflict while it is active.

Skill Gems

Support Gem Requirements:

Str 30

Dex 15

Int 5

1

Mace Strike

Set 2

supportrageplayer
supportrapidattacksplayer
2

Raise Shield

supportsteadfastplayer
supportbrinkplayer
3

Boneshatter

Set 2

impactshockwavesupportplayer
supportmagnifiedareaplayer
4

Infernal Cry

5

Shield Charge

supportrapidattacksplayer
6

Magma Barrier

supportaddedfiredamageplayer
7

Resonating Shield

supportrageplayer
supportrapidattacksplayer
Gem Priority
+10

Smith of Kitava + Avatar of Fire Shield Warrior: Act 1 Skill Gems & Support Gems

Mace Strike is one of your best sources of DPS for awhile, so we want to socket it with Rage I and Rapid Attacks I pretty early on, though honestly I would socket Boneshatter with Impact Shockwave as a higher priority once you get that skill gem.

Turns out I was right; Raise Shield's Shield Bash is an AMAZING Stun Primer for Boneshatter now that Brink I is a level 1 support gem. I highly recommend trying this out, as the Shield Bash will Prime almost ALL non-unique targets for stun in just one bash, even with a crappy shield. Feels excellent while clearing in the early game.

Aside from that, it's pretty straightforward. Shield Charge with Rapid Attacks I isn't really good enough to be used over Sprint when traveling, but it makes it a little faster in boss fights when you need to close a gap and get some extra stun buildup.

Resonating Shield you will get late in the Act, but definitely get this up and running with Rage I (you should swap the one from Mace Strike into Resonating Shield and then socket a Fire Attunement into Mace Strike) and Rapid Attacks I as quickly as you can since it serves as a good stun primer and armour breaker on bosses. Feels good to be able to block attacks and break armour at the same time!

Also as an overall note; Brutality I and it's higher tiers will likely improve your damage better than Fire Attunement at times, but we will want a few Fire Attunement gems for later one when we take on Avatar of Fire, and we still see a pretty strong damage bonus across many skills with this on top of budgeting our Support Gems effectively.

Though it's a shadow of its former self, Magma Barrier is still a decent choice in my opinion. It does a lot of damage and can assist in either priming a group for stun or outright wiping them. You can choose to go with this over Scavenged Plating if desired since we're not technically breaking armour all that often until later, and we can actually make use of the Endurance Charges it grants us sometime in Act 3.

Passive Tree

main:
123
123
set 1:
20
20
set 2:
20
20

Smith of Kitava + Avatar of Fire Shield Warrior: Act 1 Passive Skill Tree

As far as pathing nodes go, we are Strength stacking, but please grab any Dexterity or Intelligence nodes as you need for Support Gems, and this goes for the whole build going forward.

That aside, these are the 4 notables on the passive skill tree that I think are the ones you want to hit in Act 1. Pay attention to their "priority" as that's the order you want to grab them.

Having Brutal before the The Rust King will help the fight go much more quickly, and once you get Smash you will notice your Mace Strike DPS significantly increases during boss's heavy-stunned windows.

Aside from that, progress to that bunch of one-handed damage nodes for Impair then Reaving for some useful Dexterity, Attack Speed, and significant damage increases for clears and bosses. These one-handed weapon nodes feel extra-nice on this build since we can potentially take advantage of them with both weapon sets.

If you get enough Passive Skill Tree points to also allocate Blood Rush above, go for it.

Quest Rewards

Check which quests you’ve completed on your character
Ogham Manor — Candlemass, the Living Rite
+20 to maximum Life
Valley of the Titans — Medallion
30% increased Charm Charges gained
+1 Charm Slot
The Venom Crypts — Venom Draught
25% increased Stun Threshold
Abandoned Prison — Goddess of Justice
30% increased Life Recovery from Flasks
Qimah — Tabana's Pillar
3% increased Movement Speed

Video Guide

Build Planner Export

Export this build variant directly to your game.

Path of Building Code

Loot Filter

Table of Contents

Featured Builds

[0.5] PhazePlays MINION CULL WARPER: The Fastest Minion Mapper in PoE2 — 400% Culling Threshold
Updated on Jun 18, 2026
[0.5] SPARK STORMWEAVER Leaguestarter
Updated on Jun 18, 2026
0.5 ICE STRIKE SHATTERING EXPLOSIONS
Updated on Jun 18, 2026
[0.5] 100% Crit/Recoup Chronomancer
Updated on Jun 18, 2026
[0.5] Slow Cap Support Chronomancer
Updated on Jun 18, 2026

Become a Creator

Want to earn rewards by sharing your builds with your community?