menu
MobalyticsUse your favourite features in-game with our Desktop App
PoE 2 Build

Gemling Frost Bolt AutoBomber (0 Button Build)

presentationMercenary
presentationGemling Legionnaire
End Game
0.5.5 FR
Creator
Featured
Updated on Sep 29, 2026
Sep 29, 2026

Build Overview

This is a Chinese build archetype first showcased here by 可布和常常诶, and then popularized on Witchhunter by Lazy Exile - who is an amazing build making and content creator. If you're interested in their variations please go check them out!

This build relies on Frostbolt with Breachlord's Amalgam to INFINITELY Proliferate with Mirror of Refraction. Each Frostbolt that hits the Mirror of Refraction will split into 10-12 projectiles and then return to you via Breachlord's Amalgam and if you stack enough CDR you will be spawning mirrors at like 2-3 per second which means you can ramp forever and be able to just have thousands of Frostbolts flying around your screen at any moment. There becomes so many that the game gives up and doesn't even show their animation making this one of the builds that has the MOST visual clarity in the game.

Our Defences are phenomenal, our Damage can quite literally scale to infinity, the only stopgap is mobility, which can scale infinitely as well, but at a higher investment than normal. This is because we need to balance our mobility with the speed of our Frostbolt and the CDR of our Mirror of Refraction.

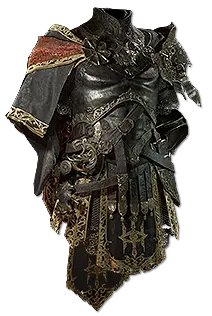
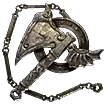
The only important pieces for this build are Atziri's Rule for Mirror of Refraction and a high quiver effect Widowhail and well rolled Drillneck (high crit and damage). Everything else is completely up to your ingenuity to balance out. Because Frostbolt snap shots Drillneck, and we pierce infinitely we essentially get max crit chance and like 100's if not thousands of increased damage from our quiver. As a result the rest of the gear and tree can focus on scaling defenses or utility.


DEFENCES: We can GIGA invest into defenses since our weapon setup gives up so much damage. Because Gemling is OP we can get insane amounts of %inc Armour from Arctic Armour alt quality and we can also invest heavily into Evasion and ES. These layers of defense all work multiplicatively with each other to create a MONSTER TANK with only 8.5K ES which Can be scaled on all vectors pretty insanely

Strengths and Weaknesses

  • Tanky AF - Can easily reach 50k Ehp on 200D Investment
  • Infinitely Scaling Damage
  • Legitimately 0 button playstyle
  • Not Super Expensive (only 3 mandatory pieces of gear)
  • Can Get 150+ Rarity on Low-Mid Investment
  • Mobility requires higher investment/isn't straight forwards scaling
  • Build can be hard to understand (uses really cool tech)

Build Variants

HOW IT PLAYS:

The way this plays is we main hand our staff to setup Mirror of Refraction then fire 1 Frostbolt into a mirror and then swap back to our Atziri's Rule to keep spawning Mirror of Refraction and then this will start an infinite chain reaction where we will just spawn a growing amount of frost bolts. Eventually there are too many Frostbolts that the game stops showing them visually but they will still be there doing damage.

You can check if the invisible chain reaction is still going by 1. if your Cast on Critical is still proccing Refutation or Frost Wall or self cast Frost Wall and see if the walls are exploding or not.

FAQ:

My Chain Keeps Breaking:

If you notice that your chain is constantly breaking this is either because you're in a reduced CDR map OR that your Proj speed is too high. In which case reduce proj speed on Jewels and remove Projectile Acceleration III from your Frostbolt

How Do I Increase Mobility?

The one downside of this build is that cranking up the mobility is a 3 part equation. Normally, that faster you run or dodgeroll the faster you are. But for us to increase mobility we need to increase 3 things simultaneously.

1. Our Movement Speed
2. Projectile Speed
3. Mirror of Refraction Spawn Interval

1. You Can increase MS From Boots + tree + Runes/Dodge Roll distance (Cast on Dodge quality)
2. You Can Increase Proj Speed With Supports Like Projectile Acceleration III, Jewels With Proj Speed, Tree Nodes
3. You Can Increase Mirror of Refraction Spawn Interval Through + All Levels NOT Spell Skill Levels and through CDR on Jewels, Tree, Gear, and Supports (Cooldown Recovery II)

Equipment

item
1
item
5
item
8
item
6
item
7
item
4
item
1
item
9
item
10
item
11
item
item
item
item
item
Jewels
item
item
item
item
item
item
item
item
item
item
Equipment Priority
+11

All gear affixes are in the their respective notes, but for jewels Specifically you can just slam on Liquid Envys on Emeralds that have any combination of %inc EV/Proj Speed/% Inc quiver bonus


Heroic Tragedy - any of these are fine as long as it has Vorona To Convert Elemental Equilibrium to Black Scythe Training For %ES This Roughly Equates to 80% Increase ES

The MOST important thing is lowering the mirror spawn interval of Mirror of Refraction. We can do this by two ways - CDR and Levels to Mirror of Refraction. CDR we get on legit every possible slot - Jewels, gear, supports wherever. This is an insane multiplier to both our damage and the consistency of our chain. We can increase the level of the Mirror of Refraction only by having a higher base level on staff (worth to perfect flux) and also by using Dialla's Desire.

Skill Gems

Support Gem Requirements:

Str 105

Dex 20

Int 105

1

Virtuous Barrier

Level 20

supportarmourdemolisherplayer
2

Mirror of Refraction

Level 20

supportcooldownrecoveryplayertwo
supportdiallasdesireplayer
supportuhtredauguryplayer
3

Charge Regulation

Level 19

supportarmourdemolisherplayer
supportuhtredomenplayer
4

Convalescence

Level 19

prolongeddurationsupportplayertwo
supportcooldownrecoveryplayertwo
supportrapidcastingplayertwo
supportuhtredsconstellation
supportefficiencyplayertwo
5

Frost Wall

Level 19

supportahnscitadelplayer
supportkaomsmadnessplayer
supportglacierplayer
supportspellcascadeplayer
supportconcentratedareaplayer
6

Arctic Armour

Level 19

supportcoldpenetrationplayer
supportcoldmasteryplayer
supportzenithplayertwo
supportelementalfocusplayer
supportembitterplayer
7

Frostbolt

Level 19

supportrakiatasflowplayer
supportverglasplayer
supportprojectileaccelerationplayerthree
supportzenithplayertwo
supportbreachlordsamalgam
8

Bloodhound's Mark

Level 9

supportarmourbreakplayer
supportexploitweaknessplayer
supportarmourexplosionplayer
supportefficiencyplayertwo
9

Sniper's Mark

Level 7

supportarmourdemolisherplayer
prolongeddurationsupportplayertwo
supportefficiencyplayertwo
10

Voltaic Mark

Level 7

supportefficiencyplayertwo
supportarmourdemolisherplayer
prolongeddurationsupportplayertwo
supportmarkfordeathplayer
11

Elemental Weakness

Level 19

supportspellcascadeplayer
supportcurseeffectplayer
supportfocusedcurseplayer
supportarmourdemolisherplayer
12

Cast on Critical

Level 19

frostwallplayer
supportglacierplayer
supportspellcascadeplayer
supportzenithplayertwo
refutationplayer
13

Mana Remnants

Level 19

supportfleetingremnantsplayertwo
supportinterludeplayer
supportkhatalsrejuvenationplayer
supportarmourdemolisherplayer
Gem Priority
+50

We can use unset rings to get 2 more skills for Virtuous Barrier and then We socket in whichever support colors we need to balance out Gem Studded for Crit Immunity (HUGE)

The Important things here are:

1. Frostbolt - Rakiatas/Cold Pen - Verglas For Frost Wall (high Gain as cold) - Projectile Acceleration III (this makes the bolts go faster but also scales our Damage)

***IMPORTANT*** If you're breaking your chain too often (Frostbolts Fizzle out and stop killing mirrors) it's often time because your proj speed is TOO HIGH. So take out Projectile Acceleration III if this happens)

- Breachlord's Amalgam THIS IS 100% REQUIRED FOR THIS ENTIRE MECHANIC TO WORK - It makes all projectiles return to you so that they can then chain off the Mirror of Refraction.

- After this you can go damage - Zenith II, Deliberation, Elemental Focus all work (Zenith is best though because it snapshots off the first cast)

2. Frost Wall - This is OP and we put it on Cast on Critical to completely automate the engine. It gives use Verglas gain and also counts as "enemies" for pierce on our Drillneck and does a good amount of damage itself

3. Mirror of Refraction Not much to say here - get as much + level and CDR here. Cooldown Recovery II is required and then Uhtred's Augury and Dialla's Desire or just Uhtred's Omen if you can't afford the previous two

4. Arctic Armour - The supports don't really matter too much, You can go damage route or utility route here and both are ok - this is primarily for the Gemling Legionnaire alt quality which gives us ~280% increased Armor.

5. Convalescence with Uhtred's Constellation is nice since we're Chaos Inoculation

6. Refutation in our Cast on Critical also gives us a little bit more defenses

7. Charge Regulation gives us MORE Arm/ES/EV since we have Thaumaturgic Generator on amulet annoint and Resonance which converts our power charges into Endurance Charges

All Other Skills + supports are solely for balancing our Gem Studded or getting more defenses from Virtuous Barrier

Passive Tree

main:
123
123
set 1:
20
20
set 2:
20
20

Quest Rewards

Check which quests you’ve completed on your character
Clearfell — Beira of the Rotten Pack
+10% to Cold Resistance
Hunting Grounds — The Crowbell
Grants Two Weapon Set Passive Skill Points
Freythorn — The King in the Mists
+30 to Spirit
Ogham Farmlands — Una's Hut
Grants Two Weapon Set Passive Skill Points
Ogham Manor — Candlemass, the Living Rite
+20 to maximum Life
Keth — Kabala, Constrictor Queen
Grants Two Weapon Set Passive Skill Points
Valley of the Titans — Medallion
30% increased Charm Charges gained
+1 Charm Slot
Deshar — Final Letter
Grants Two Weapon Set Passive Skill Points
The Spires of Deshar — Sisters of Garukhan
+10% to Lightning Resistance
Jungle Ruins — Mighty Silverfist
Grants Two Weapon Set Passive Skill Points
The Venom Crypts — Venom Draught
25% increased Stun Threshold
Jiquani's Machinarium — Blackjaw, the Remnant
+10% to Fire Resistance
The Azak Bog — Ignagduk, the Bog Witch
+30 to Spirit
The Molten Vault — The Molten Vault
Reforging Bench
Aggorat — Blood Sacrifice
Grants Two Weapon Set Passive Skill Points
Journey's End — Captain Hartlin
Two Weapon Set Passive Skill Points
Skill Gem(Lv 13)
Delirium Drop
Whakapanu Island — Great White One
+30% increased Global Armour, Evasion and Energy Shield
Eye of Hinekora — Navali's Rest
5% increased Maximum Mana
Halls of the Dead — Yama The White
Grants Two Weapon Set Passive Skill Points
Halls of the Dead — Tawhoa's Test
+5% to Lightning Resistance
Abandoned Prison — Goddess of Justice
30% increased Mana Recovery from Flasks
Halls of the Dead — Tasalio's Test
+5% to Cold Resistance
Halls of the Dead — Ngamahu's Test
+5% to Fire Resistance
Halls of the Dead — Tribal Medicine
+30% increased Global Armour, Evasion and Energy Shield
Wolvenhold — Oswin, the Dread Warden
Grants Two Weapon Set Passive Skill Points
The Khari Crossing — Akthi and Anundr
Two Weapon Set Passive Skill Points
The Khari Crossing — Molten Shrine
5% increased Maximum Life
Qimah — Tabana's Pillar
12% increased Cooldown Recovery Rate
Kriar Village — Lythara, the Wayward Spear
+40 to Spirit
Howling Caves — The Abominable Yeti
Grants Two Weapon Set Passive Skill Points

Comments

0

Build Planner Export

Export all build variants directly to your game.

Path of Building Code

Table of Contents

Featured Builds

Bleeding Ice Shot | Blood Mage | Sync Oh
Updated on Sep 29, 2026
Gemling Frost Bolt AutoBomber (0 Button Build)
Updated on Sep 29, 2026
[0.55] Hollow Form Martial Artist Monk - Hollow Palm and Whirling Assault - Early League Start Guide For Campaign and Map Progression for 0.5!
Updated on Sep 29, 2026
[0.5.5] Giga Bonk Martial Artist - Falling Thunder Monk - League Starter to Endgame
Updated on Sep 28, 2026
Overpowered Alt leveling
Updated on Sep 28, 2026

Become a Creator

Want to earn rewards by sharing your builds with your community?