menu
MobalyticsUse your favourite features in-game with our Desktop App
PoE 2 Build

[0.3] Allie's Hollow Palm Deadeye Starter!

0.3 TTE
Starter
End Game
presentationDeadeye
presentationRanger
Updated on Sep 12, 2025
Sep 12, 2025

Build Overview

- Day 1 Video Discussing Earlygame Leveling & Swapping

- Day 3 Video Discussing Shattering Palm & Falling Thunder

- Day 4 Video Discussing Thunderfist & Charge Regulation

- Midgame Video Discussing Chaos Inoculation & Mantra of Destruction

Welcome to Allie's 0.3 Starter, Hollow Palm Technique Deadeye! With the launch of Patch 0.3 we are getting a brand new Keystone that is an old classic from PoE 1 allowing us to play an Unarmed build where we will be punching our way through enemies with our fists!

----------------------------------------------------------------------------------------------------------------------
If you have any questions, I stream every day on Twitch and would be more than happy to help you out! - https://www.twitch.tv/Allliee_

I'd highly recommend checking it out and, if you can't make a Twitch stream, leave a comment on the Video Guide and I'll help as soon as I can!
----------------------------------------------------------------------------------------------------------------------

This should make for an amazing leaguestarter given Hollow Palm Technique is close to the Deadeye start allowing you to play it as early as Mid-Act 2. The massive benefit here is that you just... don't care about a weapon! Act 2 and 3 are brutal especially if you don't find a solid Weapon and can cause a lot of builds to stall and feel bad. With Hollow Palm Technique giving you Added Physical Damage based on your Skill's Gem Level it will be as if you have a solid Weapon all the way through the campaign by just upgrading your existing skill!

At the same time Hollow Palm Technique also gives you:

  • 1% more Attack Speed per 25 Item Evasion Rating on Equipped Armour Items
  • +0.1% to Critical Hit Chance per 10 Item Energy Shield on Equipped Armour Items

With this, we simply just need to stack as much Evasion Rating and Energy Shield as possible to gain quite a lot of Attack Speed and get fairly close to the Crit Cap! This means Defences are your best friend and we will scale just off of becoming tankier!

Evasion/ES was already an amazing defensive layer and when you add in Gathering Winds & Wind Ward on top of it, you will have a comfortable time! You can also then abuse Wind Dancer & Ghost Dance for for even more comfort making the whole package stronger.

Lastly, a new defensive layer is coming out for Evasion called Deflection! This works just like Spell Suppression in PoE 1 but for all damage types giving you even more comfort. We will have a large Energy Shield pool, have great recovery for it, take baseline less damage, evade the majority of attacks & scale our DPS off of it at the same time!

When you combine this with the new Ailith's Chimes & Culmination II, we can spam skills like Falling Thunder to our heart's content! This should make for a very strong speed-clear build when we swap over to Shattering Palm in Maps that might also do respectible Boss damage!

Strengths and Weaknesses

  • No Weapon required making leveling simple
  • Level with Bows up to Hollow Palm
  • Scale DPS by scaling Evaison & ES
  • No Mana problems with Walker of the Wilds
  • Should feel very tanky in Maps with Deflection, Evasion & ES
  • Have to play Bows until Act 3

Build Variants

This Build Variants section will allow you to swap the WHOLE Written Guide between a few different versions of the build. This will change any relevant information around to match it and more Variants will be added over time as we theorycraft and improve the build.

This Variant will cover leveling through Act 1 all the way up to Act 3 when you unlock Combat Frenzy at which point you swap over to Hollow Palm Technique which will be covered in the Hollow Palm Swap Build Variant.

Equipment

item
1
item
7
item
6
item
3
item
10
item
7
item
2
item
4
item
9
item
5
item
item
item
Equipment Priority
+10

This section will go over general gearing advice along with tips to make your leveling experience easier. I recommend taking a read through this while leveling. The Loot Filter is color coded, please read that section below.

Act 1 & 2 Regex - "(fi|co|li).+res|^\+.*ills$|Runn|rint|Glint|Heav"

Loot Filter & Colors

I have a Filter for this build that you can use to level or as an Endgame Filter thats tailored for this build. There are two options, first you can go to the Filterblade link and make a copy that you can go edit or you can go to my profile on the PoE website and click Follow on it. This will give you a auto-updating verison of it that will be downloaded into the game for you. Every time I make a change, this will be sent to you as well.

Filterblade Link

Profile Link

The Loot Filter will have a few different colors signifying important items in different ways.

Green w/ Yellow Text - Rare Evasion or Evasion/Es Gear for you to pick up.

Pink w/ Black Text - Normal/Blue Bows & Quivers for you to attempt to craft with Trans & Aug.

Red Background - Items to pick up and Salvage for various useful currencies.

SUPER IMPORTANT PLEASE READ

The Act 2 Boss will be the major wall you have to get through. This Boss is awful and will be a miserable fight. There is something you can do to make it better but you MUST be aware of this at all times.

You must pick up 1 Socket items and use the Salvaging Bench once unlocked to build up Artificer's Orbs. You will need two of them before the Act 2 Boss. You also must save ALL Exalted Orbs for the Weapon craft we will do right before it. These two things will make the Boss significantly easier.

The Leveling Filter will have socketed items highlighted for you to pick up. Keep them in your Stash until you can Salvage them if needed.

At the same time, try to see if you can afford Wake of Destruction if you get especially lucky with Exalted Orb drops. This will trivialise this issue and all leveling in general up to Maps.

Making Act 1 Easier

Act 1 should be very comfortable with Lightning Arrow given Bow leveling is pretty simple. Even with that said, there is quite a lot you can do to make it less painful.

First, look out for any Bows with Sockets on them, these will likely be better than any other Weapon due to you being able to put runes into them such as Lesser Desert Rune, Lesser Storm Rune, Lesser Glacial Rune or Lesser Tempered Rune. While Runes are somewhat rare, you should use them as soon as you can find them as once we unlock Hollow Palm Technique all of these Weapon Runes will never be useful to you again.

You will get quite a lot of Orbs of Transmutation & Augmentation throughout Act 1 and you should try to use them all as you get them. Your priority order will be:

  1. Weapon
  2. Boots
  3. Gloves/Rings/Amulets
  4. Everything else

Gear Stats

The Loot Filter will constantly show you Blue & White Bows for you to pick up until Hollow Palm Technique , you should grab them often and to quickly check what stats you roll on them they will be in Pink Text. If you happen to get a +1/+2 Bow Skills, your whole leveling experience will be a lot easier. Otherwise you are just looking for Added and % Increased Physical Damage or any Added Elemental Prefixes. Physical Damage rolls are always better due to them being bigger.

On top of this, if you can find a pair of Gloves with the "Gain x Life per Enemy Hit with Attacks" roll you will have significantly better sustain. Early leveling is painful with no good recovery and this roll actually makes the first 10 Levels a lot more comfier. The same can be said about trying to find 1-2 Life Regeneration rolls if possible.

On the rest of your gear, try to use Armour bases for the first few levels while you have the Strength for it until you eventually have to swap to Evasion bases due to Attributes. You can pick up some Str/Int nodes if needed on the Passive Tree.

You are just looking for Life & Resistances on all of your gear to begin with, but if you can find Added x Damage of any type on your Gloves, Rings & Amulet that would help quite a bit too.

Important - After a few zones you should have enough Gold to use the Gambling Vendor. I recommend first checking the Gear Vendor in Town every time you go back for +1/2 Bows and if there are none to consider using the Gambling Vendor for some Bows. If you do not have a Weapon with useful stats from a Transmute/Aug you should try to buy a new Bow. I also recommend saving for Rings/Amulets towards the end of Act 1 as you will likely not have any drop until Act 2.

Act 2

Make sure to save all Exalted Orbs for the Act 2 End Boss.

In Act 2, your main battle will be with your Weapon. You should look for a Recurve Bow base ASAP and you should try to find one with % Physical Damage on it. Try to pick up white Bows off the ground and Transmute & Augment them.

At this point you should start to Disenchant Rare Items you don't need into Regal Shards to make sure you have 1-3 Regal Orbs ready to go for the Act 2 Boss.

Preparing for the Act 2 Boss

The Act 2 Boss will be the major wall you have to get through. This Boss is awful and will be a miserable fight. There is something you can do to make it better but you MUST be aware of this at all times.

You need to obtain a good 
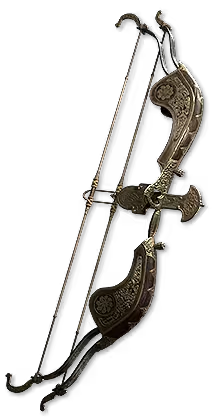
Dualstring Bow before the fight. If you do not have one this fight will be awful. To accomplish this, you must save ALL Exalted Orbs that drop, save as much Gold as possible & obtain 2 Artificer's Orbs before the fight.

Starting at Level 28 you can get Dualstring Bows to drop and you should pick up every single one of them and use a Orb of Transmutation & Orb of Augmentation on them. You are looking for one with % Physical Damage on it and ideally Attack Speed.

If you do not find one by the time you need to fight the Boss, you will have to farm the Dreadnaught area for them until you manage to craft a good one. Even if it takes you from Level 26 to 30, you must have a Dualstring Bow. (This is a direct quote from Tyty)

You can also go to Risu in the Act 2 town and Gamble your gold until you find one with % Physical Damage on it.

From there, you should Aug & Regal it and see if it ends up rolling either Attack Speed or an Added Damage stat. If it does, you should then Exalted Orb Slam it hoping for better Prefixes. Lastly, put two Lesser Iron Runes in it. With this you should be able to kill the Boss with relative ease. If you can make it past this, you are fine to make it to Hollow Palm.

Lastly, make sure you upgrade to a Colossal Life Flask & Colossal Mana Flask for the fight to make it a little bit more reasonable.

Act 3 & Beyond

For Act 3 everything will stay the same as before with the exception of us getting ready for Hollow Palm Technique. The plan is to go and kill the Bog Witch and unlock your second Spirit Gem. You will pick up Combat Frenzy and swap as soon as you unlock both Resonance & Hollow Palm.

Try to save as many Skill & Support Gems as possible to make sure you can get the majority of the gems you need.

At the start of Act 3 make sure you stop at the Orok Campfire in the Sandswept Marsh and kill the two Rare Monsters in there. There will be a Chest you can open for a Lesser Jeweller's Orb which will allow you to 4-Link your Storm Wave once you swap over. You should be fine with a 3-Link Lightning Arrow & Lightning Rod until then.

The swap to Hollow Palm is discussed in the Hollow Palm Swap Build Variant that you can swap to above which will change this section along with the Skills & Passive Tree sections to the relevant info.

Skill Gems

Support Gem Requirements:

Str 0

Dex 25

Int 20

Expand all
1

Lightning Arrow

Lightning Arrow
supportchainplayer
supportrapidattacksplayer
2

Lightning Rod

Lightning Rod
supportmagnifiedareaplayer
supportaddedlightningdamageplayer
3

Frost Bomb

Frost Bomb
4

Herald of Thunder

Herald of Thunder
supportaddedlightningdamageplayer
supportmagnifiedareaplayer
5

Freezing Salvo

Freezing Salvo
supporthourglassplayer
supportaddedcolddamageplayer
6

Barrage

Barrage
supportsecondwindplayer
Gem Priority
+9

Leveling Guide

Please read the Equipment Section for gearing recommendations while Leveling!

Level 1

In Town use your free Level 1 Skill Gem to take Lightning Rod. For all of Acts 1 & 2 and most of Act 3 up until Hollow Palm Technique you will be leveling with Lightning Arrow & Lightning Rod. Simply put down a few Lightning Rods on top of a pack then attack with Lightning Arrow which will will Chain to the Rods causing extra explosions.

Walking out of the first Town, make sure to go into the Burrow and kill the Worm Boss, this will always give you a Support Gem when turning in the Quest back in the Town. Use it to take Rapid Attacks I and link it to Lightning Arrow. Try to kill the Witch after you do this to make it significantly faster.

Grab a Frost Bomb with any extra Level 2 or 3 Skill Gems that you find. This will be used for the Exposure that it applies onto enemies and will serve as a decent DPS boost. You do need to be careful with Mana costs when using this especially as you get to Act 2 and you should try to not level it at all as it's damage is not important.

Level 3

In the Grelwood make sure you go find Areagne's Hut and kill her for a guaranteed Support Gem, use this to pick up Magnified Area I and link it to your Lightning Rod.

Upgrade Lightning Arrow to Level 2 if you happen to drop a Level 2 Skill Gem first, then Lightning Rod. The same goes for any higher level Skill Gems.

Level 6

At Level 5 you unlock the Shortbow base and should try to look for a decent one from the Vendor in town. You can also try to Gamble for one.

After killing the Druid in The Grim Tangle, you will get another Support Gem which should be used to take Lightning Infusion for Lightning Rod. With your fourth Support Gem you should get Chain for Lightning Arrow.

In the Cemetery, hug the outside and find the two big Graves with a Checkpoint by them, when you open them you will have a 50/50 chance at a Iron Ring. This will make the next two Bosses slightly easier.

Level 10

After going to the Freythorn and killing the King in the Mist, use the Spirit Skill Gem to get Herald of Thunder. With your next Support Gem, pick up Lightning Attunement for Herald of Thunder. Save the next one to get Hourglass for Freezing Salvo in a few levels and get Magnified Area I for Herald of Thunder later on when you have a spare Support Gem.

Back in the Hunting Grounds, hug the Wall and make sure you kill the Tree Rare monster that has a Checkpoint next to it and does a little Ritual when it spawns. This will always give you a Support Gem to pick up Hourglass with for Freezing Salvo in a few levels.

At Level 11 you unlock the Warden Bow base and should try to look for a decent one from the Vendor in town. You can also try to Gamble for one.

Level 13

After killing The Executioner, go back to Town and get a Level 5 Skill Gem from Leitis. With this, pick up Freezing Salvo which will act as a burst skill on Bosses & Rares. Freezing Salvo builds up Missiles every 1 second up to 10 which you can then release all at once for quite a lot of damage.

With your second Level 5 Skill Gem you should then take Barrage. This will allow you to use it before pressing Lightning Rod to place down 3 at once making setting up all of them a lot quicker. This is nice for Rares and when a Boss moves around a lot.

Due to Lightning Arrow's beams and their 6 chains, you like having quite a lot of Lightning Rods down for it to Chain through. This will stop them from instantly exhausting the 8 Chain Limit on any individual Rod quickly giving you more time to press Lightning Arrow.

Link Hourglass & Cold Attunement to Freezing Salvo and Second Wind to Barrage. With Hourglass you will only be able to use Freezing Salvo every 10 Seconds which is fine given it is it's most powerful after accumulating all of its Missiles anyways.

During the downtime, simply continue using Lightning Arrow & Lightning Rod like before.

From here simply continue on through the rest of Act 1 into Act 2. At Level 16 you unlock the Recurve Bow base and should try to look for a decent one from the Vendor in town. You can also try to Gamble for one.

In the Manor Ramparts there is a hanged man in the Gallows with a Checkpoint next to them. Click on the Rope to get a free Support Gem.

Act 2

Act 2 will be fairly tame as no Skills & Support Gem changes happen. Try to fill in any missing Supports and then save as many Skill & Support Gems as possible for Act 3 as we will need quite a few to set up Hollow Palm Technique.

Your main focus is to just keep up with your gear as mentioned in the Equipment section. Focus on getting Evasion gear everywhere with as much Fire & Lightning Resistance as you can get for Act 2.

You are going to need to upgrade your Weapons throughout this Act quite a lot otherwise you will easily fall behind in DPS. Freezing Salvo should pick up in damage with Hourglass which should start almost killing Rares on its own. You can use it on cooldown to kill most packs instantly as well.

At Level 22 you unlock the Composite Bow base and should try to find one. This will easily carry you up to the Act 2 Boss.

At Level 28 you unlock the Dualstring Bow base and you must farm for them in the Dreadnaught zone and follow the crafting advice in the Equipment section.

The hardest thing by far is killing the Act 2 Boss and once you do this you are in the clear up to Hollow Palm.

Act 3

At this point we are getting close to swapping to Hollow Palm Technique. The swap will happen once you get half way through Act 3 and kill the Bog Witch for the Spirit Gem and unlock Combat Frenzy. This along with Resonance & Charged Staff will be the point where you can make the swap.

At the start of Act 3 make sure you stop at the Orok Campfire in the Sandswept Marsh and kill the two Rare Monsters in there. There will be a Chest you can open for a Lesser Jeweller's Orb which will allow you to 3-Link your Storm Wave once you swap over. You should be fine with a 2-Link Lightning Arrow & Lightning Rod until then.

Other then that, continue as normal through the rest of Act 3. You can choose to do the Trial of Chaos before or after the swap. If it is too difficult you can also come back a few levels later and do it at the end of Act 3 or the start of Act 4.

Passive Tree

main:
123
123
set 1:
20
20
set 2:
20
20

We have a lot of travel nodes that we will pick up Dexterity with. This will be more than is needed and you can swap 2-3 of them early on to Strength to make Acts 1 and 2 a bit easier.

Our goal with this Passive Tree is to make our way over to Hollow Palm Technique which will be right above the Mana Flask nodes Altered Brain Chemistry & Warding Potions. While you could directly rush to it, there isn't much of a reason given we will wait until we kill the Witch in Act 3 and get our second Spirit Gem Combat Frenzy.

Until then, simply follow the Notable Priority and you should get to Hollow Palm Technique at or slightly before you unlock Resonance. I recommend to wait for it and to delay Hollow Palm Technique if needed or to pick Resonance slightly sooner.

Once you make it to Combat Frenzy, Resonance & Charged Staff, swap the Build Variant over to the Hollow Palm Swap one and follow the instructions in the Skills Section.

Video Guide

Table of Contents

Featured Builds

[0.4] Titan BEAR League Starter
Updated on Dec 13, 2025
0.4 Meteor Bear Shaman
Updated on Dec 13, 2025
Ben's HCSSF Bear Slam Pre League Plan
Updated on Dec 13, 2025
[0.4] Limitless Stormweaver
Updated on Dec 13, 2025
0.4 Fubgun Poisonburst Pathfinder
Updated on Dec 13, 2025

Become a Creator

Want to earn rewards by sharing your builds with your community?