menu
MobalyticsUse your favourite features in-game with our Desktop App
PoE 2 Guide

PoE 2 Boss Guide: The Trialmaster

Boss
Updated on Jan 22, 2025
Jan 22, 2025

Initiating the Encounter

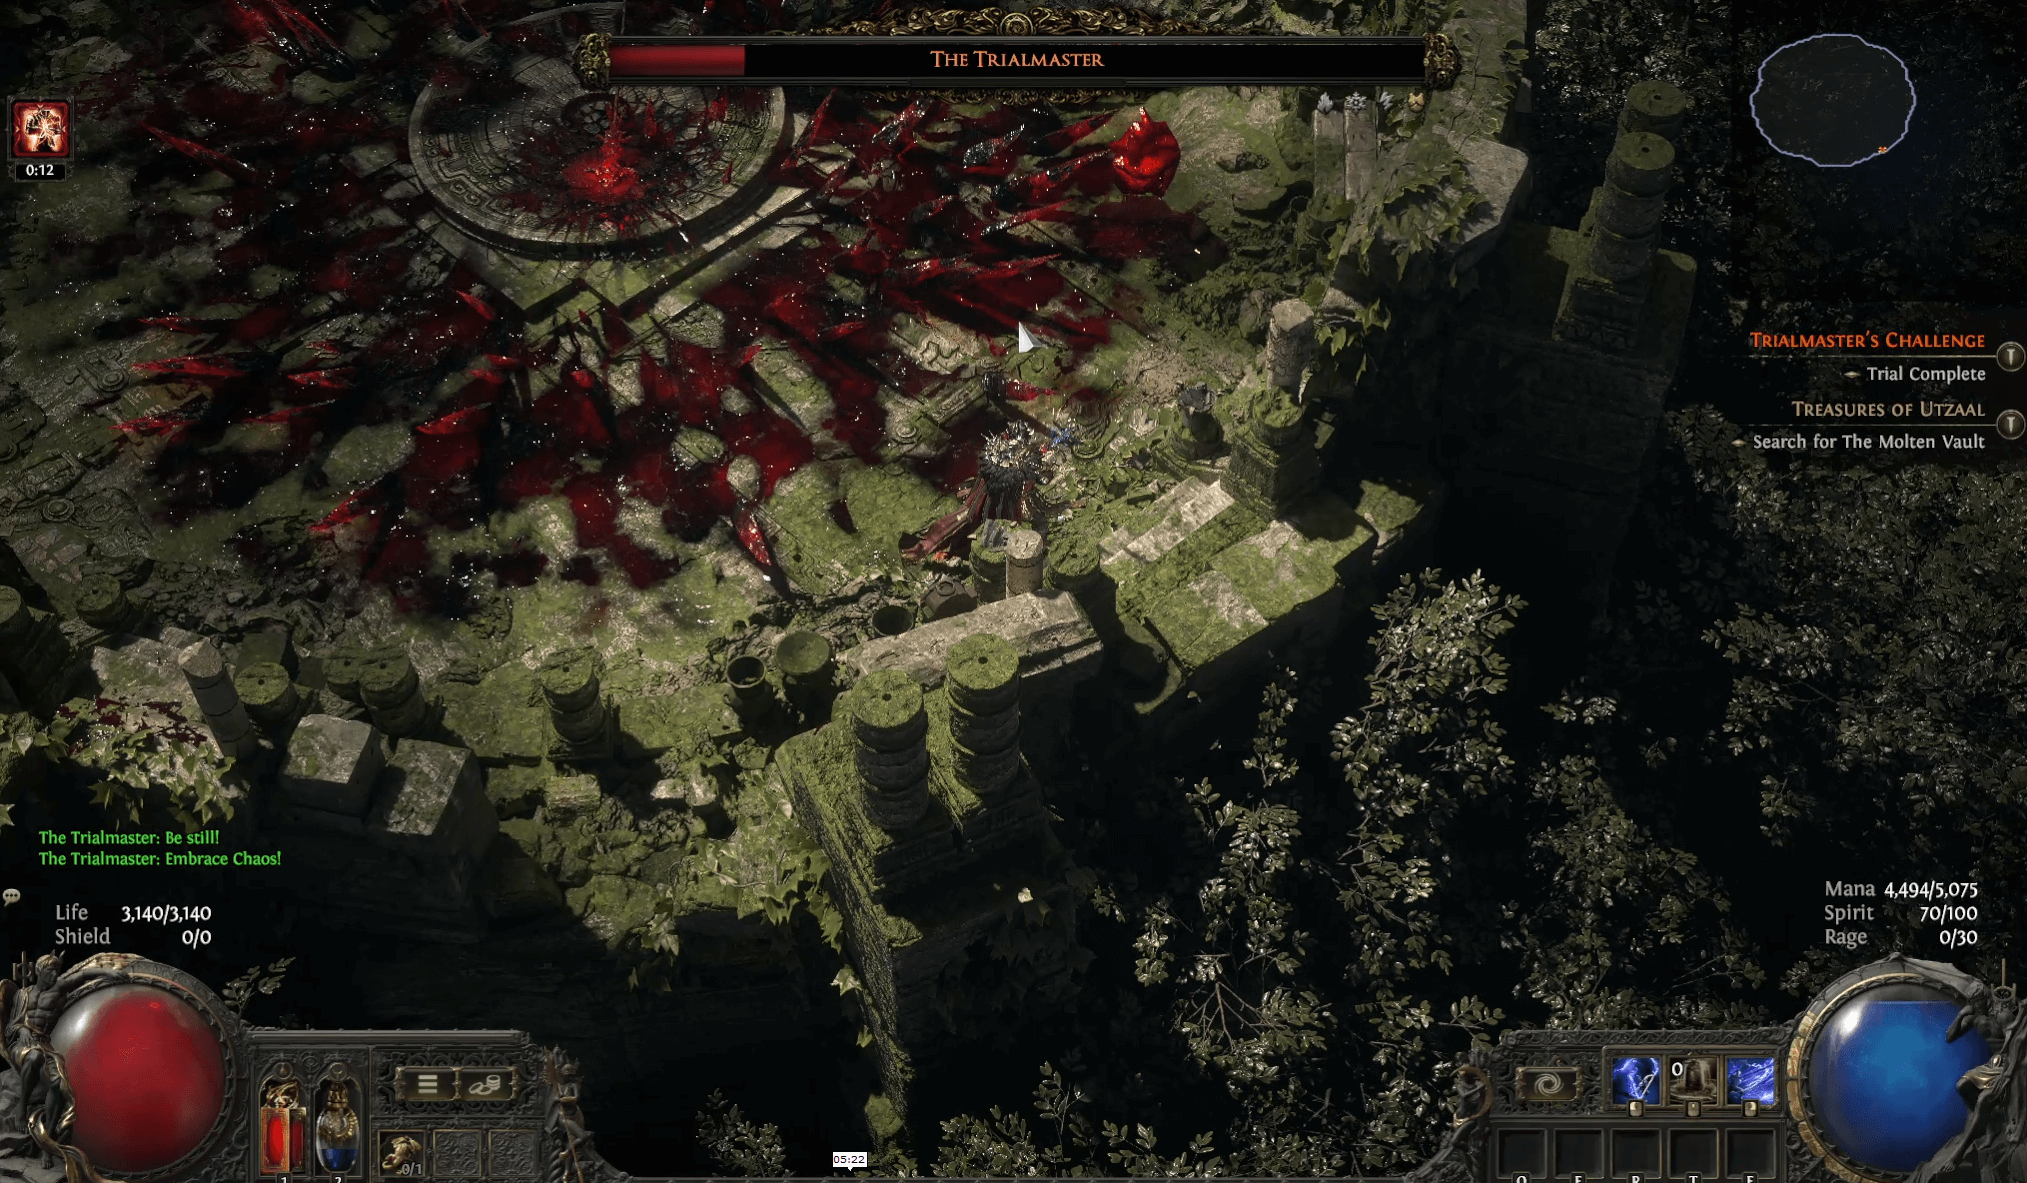
After completing the 10th Trial of the Trial of Chaos you can trade a set of the three Fates to unseal the door and proceed to fight the Trialmaster.

Acquiring the Fates

Each fate can be dropped upon defeating the boss on the 10th trial:

  • Deadly Fate; drops from Bahlak, the Sky Seer
  • Cowardly Fate; drops from Uxmal, the Beastlord
  • Victorious Fate; drops from Chetza, the Feathered Plague

Each time you enter the Trial of Chaos (10 Trials), you will fight one of these three bosses on the 4th, 7th, and 10th trials in a random order. As such, the Fate you drop from a run will be random.

You can also obtain a specific fate by utilizing the Currency Exchange or by trading with another player.

Recommendations

To complete the boss with extreme ease we recommend having max resistances (75%) and around 5k HP/ES/Mana if using Mind Over Matter

Note that the above is not a hard requirement, you can complete this boss with much lower defences. The recommendation accounts for getting hit by the hardest-hitting mechanic and still comfortably continuing the fight - it adds room for error.

Strategy

The most effective strategy to evade the Trialmaster's mechanics is by hugging the walls. This is because many of the Trialmaster's mechanics extend their range from their original point, many times following the player.

Hugging the walls ensures that mechanics don't take up a large area of the battlefield and you have more space to dodge mechanics that can potentially follow you.

In other words, you want to avoid this:

trialmaster avoid this


Drops

The Trialmaster will always drop a unique from the following list:

- Glimpse of Chaos

- Zerphi's Genesis

- Mahuxotl's Machination

- Hateforge

- The Adorned (Crimson Jewel)


Mechanics

Spear Form

Sunder

The Trialmaster swings his spear up, then slams it down releasing sunders that branch out. Hugging the wall ensures that the branches cover less of the arena.

Be careful, getting hit by the slam will inflict massive damage.

Blood Slam

The Trialmaster flashes red then faces his spear down and slams it into the ground, releasing an expanding blood area that explodes after reaching its maximum radius.

This is a very slow mechanic, don't panic!

Frenzy

The Trialmaster performs a provoking pose and then starts swinging his spear in a frenzy. The swings will also fire a blood projectile. Both swings and projectiles deal damage, however the projectiles deal more damage.

Stay behind the boss, preferably keeping enough distance to not get hit by the swings. The swings don't track as much as you might think, especially the last couple of swings, as you can see in the clip.

Time Stop

In Spear Form, the Time Stop mechanic will always cast Sunders.

The Trialmaster will stop time, then cast three sunders in different positions. When time is resumed, the sunders will be cast from those positions.

These sunders will sometimes follow the player for long distances and cover a large percentage of the battlefield, ensure you are near a wall at the start of the mechanic to prevent this as much as possible.

This is how it could look like being further away from the wall.

Sunder Spear

The Trialmaster will prepare to throw his spear, then throw it at the player. The spear will then gradually release an expanding sunder area.

This mechanic eventually has a huge radius and long duration, placing it near a wall ensures it doesn't cover too much of the arena.

Until this attack ends, the boss will be in Caster Form. After this attack ends, the boss will return to Spear Form.

This is how it could look like being further away from the wall.

Caster Form

Blood Orb

The Trialmaster fires a blood orb at the player that can duplicate upon hitting a wall.

Elemental Orbs

The Trialmaster casts a fire orb, a cold orb and a lightning orb at a player, this occurs up to three times consecutively.

This attack is very fast and does elemental damage.

Blood Tether

The Trialmaster spawns a heart with an area around it. Moving inside this area will create a blood tether, upon leaving the area you will be briefly stunned and damaged. The heart then explodes.

Time Stop

In Caster Form, the Time Stop mechanic will always cast Blood Orbs.

The Trialmaster will stop time, then cast three Blood Orbs in different positions. When time is resumed, the orbs will be cast from those positions.


Known Bugs

  • When the Trialmaster stops time, it may be the case that he doesn't cast anything and that you are stuck in the "Time Stop Phase". Do not close the game, each time I've encountered this bug it has always eventually returned back to normal, even if you are stuck for a few minutes.

Table of Contents

Latest Guides

PoE 2 Acolyte of Chayula Ascendancy Class: Tree & Passives
By Mobalytics ∙Updated on Dec 5, 2025
Classes
Classes
PoE 2 Invoker Ascendancy Class: Tree & Passives
By Mobalytics ∙Updated on Dec 5, 2025
Classes
Classes
PoE 2 Witch Hunter Ascendancy Class: Tree & Passives
By Mobalytics ∙Updated on Dec 5, 2025
Classes
Classes
PoE 2 Tactician Ascendancy Class: Passive Tree & Nodes
By Mobalytics ∙Updated on Dec 5, 2025
Classes
Classes